Publicité
Liens rapides
Please Contact Moen First
For Installation Help, Missing or
Replacement Parts
(USA)
1-800-BUY-MOEN (1-800-289-6636)
Mon - Fri 8:00 AM to 7:00 PM, Eastern
Sat. 9:00 AM to 3:00 PM Eastern
WWW.MOEN.COM
(Canada)
1-800-465-6130
Mon - Fri 7:30 AM to 7:00 PM, Eastern
WWW.MOEN.CA
Por favor, contáctese primero con Moen
Para obtener ayuda de instalación, piezas
faltantes o de recambio
01-800-718-4345
Lunes a viernes de 8:00 a 20:00 hs.
(Costa Este)
Sáb. 8:00 a 18:30 hs. (Costa Este)
WWW.MOEN.MX
Veuillez d'abord contacter Moen
en cas de problèmes avec l'installation, ou pour
obtenir toute pièce manquante ou de rechange
1-800-465-6130
Du lundi au vendredi:
de 7 h 30 à 19 h, HE
WWW.MOEN.CA
HELPFUL TOOLS For safety and ease of faucet replacement, Moen recom-
mends the use of these helpful tools.
HERRAMIENTAS ÚTILES Para que el cambio de la llave sea fácil y seguro,
Moen le recomienda usar estas útiles herramientas.
OUTILS UTILES Par mesure de sécurité et pour faciliter l'installation, Moen
suggère l'utilisation des outils suivants.
Sealant
Sellador
Mastic
Installation guide
guía de Instalación
guide d'installation
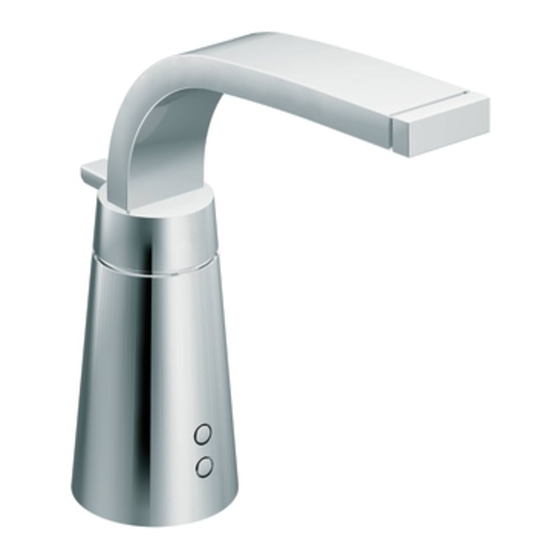
SINgLE-HOLE ELECTRONIC LAVATORY FAUCET
S899
MEZCLADORA ELE CTRÓNICA PARA LAVABO
DE UN SOLO AgUJERO
S899
ROBINET ÉLECTRONIQUE DE TOILETTES -
MONTAgE SUR UNE OUVERTURE
S899
Thread seal tape
Cinta para sellar roscas
Ruban pour joints letés
CAUTION — TIPS FOR REMOVAL OF OLD FAUCET: Always turn water supply OFF before
removing existing faucet or disassembling the valve. Open faucet handle to relieve water pressure
and ensure that complete water shut-off has been accomplished.
PRECAUCIÓN — CONSEJOS PARA CAMBIAR LA LLAVE MEZCLADORA: Siempre CIERRE la
toma de agua antes de quitar la llave existente o desmontar la válvula. Abra la llave para liberar la
presión, y asegúrese de que esté bien cerrada el agua.
ATTENTION — SUggESTIONS POUR ENLEVER L'ANCIEN ROBINET : Toujours couper
l'alimentation en eau avant d'enlever ou de démonter le robinet. Ouvrir le robinet pour libérer la
pression d'eau et pour s'assurer que l'alimentation en eau a bien été coupée.
INS1551B - 4/14
Publicité

Manuels Connexes pour Moen S899

Sommaire des Matières pour Moen S899
- Page 1 MONTAgE SUR UNE OUVERTURE WWW.MOEN.CA S899 HELPFUL TOOLS For safety and ease of faucet replacement, Moen recom- CAUTION — TIPS FOR REMOVAL OF OLD FAUCET: Always turn water supply OFF before mends the use of these helpful tools. removing existing faucet or disassembling the valve. Open faucet handle to relieve water pressure HERRAMIENTAS ÚTILES Para que el cambio de la llave sea fácil y seguro,...
-
Page 2: Parts List
option/opcion/option (AA) Parts List Liste des pièces A. Faucet Body K. Batteries (AA) (x4) V. Waste Seat A. Corps du robinet L. Boîtier de contrôle X. Joint d’ é tanchéité B. Electronic Pin Plug L. Control Box W. Pivot Rod Clip B. - Page 3 INS1551B - 4/14 Option/Option/Opcíon <3/4" Option/Option/Opcíon >3/4" 1. Loosen twist tie on Electronic Pin Plug (B) wire. For deck thickness less than 3/4", slide the Mounting Bracket (C) up to the shank of the Faucet Body (A). Secure with 2. Remove twist tie. Mounting Nut (E).
- Page 4 1. Insert Washer (Q) and Mixing Tee (R) onto Control Box (L). 1. Remove screws of Control Box (L). 2. Make final tightening with wrench. 2. Remove cover of Control Box (L). 1. Inserte la arandela (Q) y la T de mezclado (R) sobre la caja de control (L). 1.
- Page 5 INS1551B - 4/14 3/8” compression Compresión de 3/8” Compression de 3/8 po Attach Quick Connect Hose (E) to Flow Restrictor Quick Connect (J) as shown. Push in as far as possible until a “click” is 1. Ensure Electronic Pin Plug (B) cord feed is fed through slots in bottom of Control Box. heard.
- Page 6 Sealant Sellante Mastic SÍ 1. Apply a bead of sealant to underside of Waste Seat (V). Make final tightening of Drain Nut (Z) to Drain Body (AA) with wrench. Ensure Pivot Rod opening on Drain Body 2. Insert Waste Seat (W) through sink opening. Assemble Drain Body (Q) to Waste Seat (W). points towards the wall.
- Page 7 INS1551B - 4/14 Option / Opcion / Option Anti-vandal option Opcion antivandalismo Avec option anti-vandalisme Verify plastic Pivot Rod Seat (BB) is in place with beveled side facing out. The Pivot Rod (EE) can be installed in two ways. 1. Slide Pivot Rod Nut (CC) onto threading of Drain Body (AA) opening. Circle illustration shows the Pivot Rod (EE) next to hole in Waste Plug (U).
- Page 8 1995 and shall be effective from the date of purchase as shown on por el uso de otras partes que no sean piezas originales Moen. 1995 et entre en vigueur à compter de la date d’achat indiquée purchaser’s receipt.