Table des Matières
Publicité
Les langues disponibles
Les langues disponibles
Liens rapides
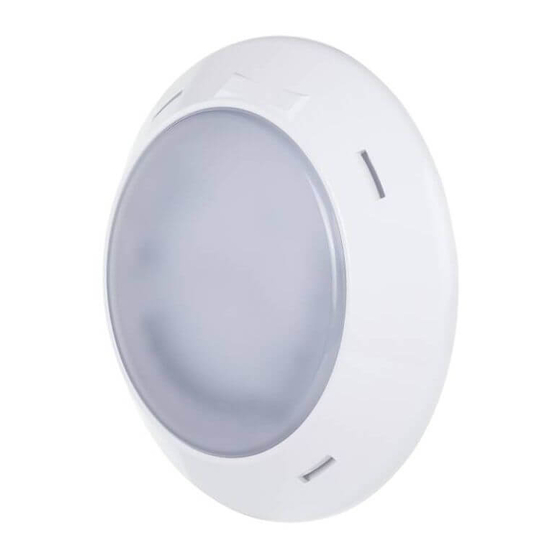
LumiPlus RAPID PROJECTOR
PROJECTEUR LumiPlus RAPID
PROYECTOR LumiPlus RAPID
PROIETTORE LumiPlus RAPID
STRAHLER LumiPlus RAPID
PROJETOR LumiPlus RAPID
INSTALLATION AND MAINTENANCE MANUAL
MANUEL D'INSTALLATION ET D'ENTRETIEN
MANUAL DE INSTALACIÓN Y MANTENIMIENTO
MANUALE DI INSTALAZIONE E MANUTENZIONE
EINBAU-UND BETRIEBSANLEITUNG
MANUAL DE INSTRUÇÕES E MANUTENÇÃO
Publicité
Table des Matières

Manuels Connexes pour Astralpool LumiPlus RAPID


Sommaire des Matières pour Astralpool LumiPlus RAPID
- Page 1 LumiPlus RAPID PROJECTOR PROJECTEUR LumiPlus RAPID PROYECTOR LumiPlus RAPID PROIETTORE LumiPlus RAPID STRAHLER LumiPlus RAPID PROJETOR LumiPlus RAPID INSTALLATION AND MAINTENANCE MANUAL MANUEL D’INSTALLATION ET D’ENTRETIEN MANUAL DE INSTALACIÓN Y MANTENIMIENTO MANUALE DI INSTALAZIONE E MANUTENZIONE EINBAU-UND BETRIEBSANLEITUNG MANUAL DE INSTRUÇÕES E MANUTENÇÃO...
-
Page 2: Important
• The spotlight should not be handled internally under any circumstances as this would lead to losing the guarantee. • If the LumiPlus Rapid is mounted on piping, bushing or wall conduits, a siphon should be used to avoid emptying the pool (see Fig. - Page 3 Procedure: 1 - An O-ring should be chosen that fits to the piping and placed on the adaptor. 2- Twist the adaptor into the piping. 3- Insert the cable in the piping, ease the projector in and turn 90º clockwise (Fig.5a). 4- Ensure that the logo is uppermost.
- Page 4 C) In mini snap-in niche (Fig. 3c) Recess required: 60229 / Accessories required: No / Siphonrequired:No Procedure: 1- Screw the adaptor into the niche. 2- Insert the cable in the niche’s stuffing box assembly, then tighten the nut on the stuffing box assembly using the special spanner included with the niche.
-
Page 5: Montage
• Le projecteur ne doit, en aucun cas, être manipulé en interne; en effet, ladite manipulation supposerait la perte de la garantie. • Si le LumiPlus Rapid est installé sur les tuyaux, les buses ou les presse-étoupes, il faudra réaliser un siphon qui permet- tra d’éviter la vidange de la piscine (voir fig. 1). - Page 6 Encastrable nécessaire : aucun / Accessoires nécessaires: 62395 / Siphon nécessaire : Oui Procédure : 1- Choisir le joint torique approprié au tuyau et le mettre sur l’adaptateur. 2-Insérer l’adaptateur à pression dans le tube 3- Insérer le câble dans le tube, entrer le projecteur et faire tourner à 90° dans le sens des aiguilles d’une montre (fig. 5a). 4- Orienter le logotype vers la partie supérieure.
-
Page 7: Avertissements De Sécurité Et Entretien
Procédure : 1- Visser l’adaptateur dans la niche. 2- Insérer le câble dans le presse-étoupe de la niche, serrer l’écrou du presse-étoupe à l’aide d’une clé spéciale dans la niche. 3- Insérer le projecteur et faire tourner à 90º dans le sens des aiguilles d’une montre (fig. 5a). 4- Orienter le logotype dans la partie supérieure (fig.4). -
Page 8: Características Generales
• El proyector no debe ser manipulado internamente bajo ningún concepto, dicha manipulación supondría la pérdida de la garantía. • Si se instala el LumiPlus Rapid en tubería, boquillas o pasamuros se precisa realizar un sifón para evitar el vaciado de la piscina (ver Fig. 1). - Page 9 4. MONTAJE: Existen varias opciones para la instalación de LumiPlus Rapid: Piscina Hormigón: A) Directamente en un tubo Ø63 PN-6/10. (Fig. 2a) Empotrable necesario: Ninguno / Accesorios necesarios: 62395 / Necesario hacer sifón: Sí Procedimiento: 1- Hay que escoger la junta torica adecuada para el tubo y ponerla en el adaptador.
- Page 10 3- Orientar el logotipo en la parte superior. (Fig. 4) C) En nicho mini de acople rapido (Fig. 3c) Empotrable necesario: 60229 / Accesorios necesarios: No / Necesario hacer sifón: No Procedimiento: 1- Roscar adaptador en nicho. 2- Insertar el cable en el prensaestopas del nicho, apretar la tuerca del prensaestopes mediante la llave especial incluida en el nicho.
-
Page 11: Verificare Il Contenuto Dell'imballaggio
Conservi questo manuale per poter consultare in futuro in merito al funzionamento di questo apparecchio. Per ottenere un ottimo rendimento dello Proiettore LumiPlus Rapid, è conveniente fare attenzione alle seguenti istruzioni: 1. VERIFICARE IL CONTENUTO DELL’IMBALLAGGIO: Nella cassa troverà... - Page 12 4. MONTAGGIO: Esistono varie opzioni per l’installazione del LumiPlus Rapid: Piscina Cemento: A) Direttamentein un tubo Ø63 PN-6/10. (Fig. 2a) Incasso necessario:nessuno / Accessori necessari: 62395 / Necessariofare un sifone:sì Procedimento: 1 –Bisogna scegliere l’anello di tenuta adeguato per il tubo emetterlo nell’adattatore.
- Page 13 2- Inserire il cavoall’interno della bocchetta, introdurreil proiettore e girare 90º in senso orario (Fig. 5a). 3- Orientare il logotipo nella parte superiore. (Fig. 4) C) In nicchia mini di accoppiamento rapido (Fig. 3c) Incasso necessario: 60229 / Accessori necessari:no / Necessario fare un sifone:no. Procedimento: 1- Avvitare l’adattatore nella nicchia.
- Page 14 Eingriffe durchgeführt werden; durch unbefugte Eingriffe erlöscht die Garantie. • Wenn der LumiPlus Rapid an einem Rohr, einer Düse oder einer Durchführung installiert wird, muss ein Siphon einge- baut werden, um ein Entleeren des Schwimmbads zu verhindern (siehe Abb. 1).
- Page 15 4. MONTAGE: Für die Installation von LumiPlus Rapid gibt es mehrere Optionen: Betonbecken: A) Direkt an einem Rohr Ø63 PN-6/10. (Abb. 2a) Erforderlicher Einbau: Keiner / Benötigtes Zubehör: 62395 / Siphon erforderlich: Ja Vorgehensweise: 1 - Es muss eine für das Rohr passende O-Ring-Dichtung gewählt und auf den Adapter gesetzt werden.
- Page 16 C) In Mini-Nische für Schnellanschluss (Abb. 3c) Erforderlicher Einbau: 60229 / Benötigtes Zubehör: Nein / Siphon erforderlich: Nein Vorgehensweise: 1- Adapter in Nische anschrauben. 2- Das Kabel in die Stopfbuchse der Nische einführen, die Mutter der Stopfbüchse mit dem für die Nische mitgelieferten Spezialschlüssel festziehen.
-
Page 17: Verifique O Conteúdo Da Embalagem
• O projector não deve ser manipulado internamente em nenhuma hipótese, uma vez que isto implica a perda da garantia. • Se se instalar o LumiPlus Rapid em tubagens, boquilhas ou bucha de passagem é necessário realizar um sifão para evitar o esvaziamento da piscina (ver Fig. - Page 18 4. MONTAGEM: Existem várias opções para a instalação de LumiPlus Rapid: Piscina de betão: A) Diretamente num tubo Ø63 PN-6/10. (Fig. 2a) Encastramento necessário: Nenhum / Acessórios necessários: 62395 / Necessário fazer sifão: Sim Procedimento: 1- É necessário escolher a junta tórica adequada para o tubo e pô-la no adaptador.
- Page 19 3- Orientar o logótipo na parte superior (Fig. 4). C) Num mini nicho de acoplagem rápida (Fig. 3c) Encastramento necessário: 60229 Acessórios necessários: Nenhum / Necessário fazer sifão: Não Procedimento: 1- Enroscar o adaptador no nicho. 2- Introduzir o cabo no bucim do nicho, apertar a porca do bucim com a chave especial incluída no nicho. 3- Introduzir o projetor e rodar 90º...
- Page 21 ENGLISH Pos. Code Description Pos. Code Description 4403010075 LP RAPID FACEPLATE 4403010060 BUSHING ADJUSTER 4403010079 LINER RAPID FACEPLATE 4403010065 LumiPlus CABLE 4403010064 WIRE NUT 4403010063 1 1/2” THREAD ADAPTOR 4403010076 PACKING GLAND ASSEMBLY FRANÇAIS Pos. Code Description Pos. Code Description 4403010075 ENJOLIVEUR LP RAPID 4403010060...
- Page 22 FIG. 1 Ø63 PN-06 Ø63 PN-10 Ø63 PN-06 Ø63 PN-10 35421 62395 35418 Ø2 (PN-10) Ø3 (PN-06) 15658 15660 53956 15659 15661 62395 62395 Ø3,5 FIG. 2...
- Page 23 27084 15664 15665 06544 Ø60 38805 60229 Ø60 FIG. 3 FIG. 4...
- Page 24 FIG.5 FIG. 6...
- Page 25 SACOPA, S.A.U. PRODUCTS: LumiPlus RAPID UNDERWATER PROJECTOR PRODUITS: PROJECTEUR IMMERGÉ LumiPlus RAPID PRODUCTOS: PROYECTOR SUBACUÁTICO LumiPlus RAPID PRODOTTI: PROIETTORE SUBACQUEO LumiPlus RAPID PRODUKTE: LumiPlus RAPID UNTERWASSERCHEINWERFER PRODUTOS: PROJETOR SUBACUÁTICO LumiPlus RAPID DÉCLARATION CE DE CONFORMITÉ DECLARATION CE OF CONFORMITY Les produits énumérés ci-dessus sont conformes à: The products listed above are in compliance with: La Directive de compatibilité...
- Page 27 KEY / SYMBOLOGIE / SIMBOLOGÍA / SIMBOLOGIA / SYMBOLE / SIMBOLOGIA Under no circumstances should the luminaire be stared into for one minute or more at distances equal to or less than 20 cm. Doing so could damage eyesight / Ne jamais regarder fixement le luminaire pendant plus d’une minute à...
- Page 28 • DIMENSIONS Concrete Pool • DIMENSIONS • DIMENSIONES • DIMENSIONI • ABMESSUNGEN • DIMENSÕES Liner Pool LumiPlus Rapid 1.11 Light Concrete pool Liner pool 62328 64340 62327 64339 Monocolour 64561 64341 RGB-Wireless 62393 65307 KIT 1 RGB-Wireless + Control Motion...