Table des Matières
Publicité
Les langues disponibles
Les langues disponibles
Liens rapides
Publicité
Table des Matières

Manuels Connexes pour Moen nebia


Sommaire des Matières pour Moen nebia
- Page 1 GUIDE D’INSTALLATION | GUÍA DE CONFIGURACIÓN...
-
Page 2: Product Features
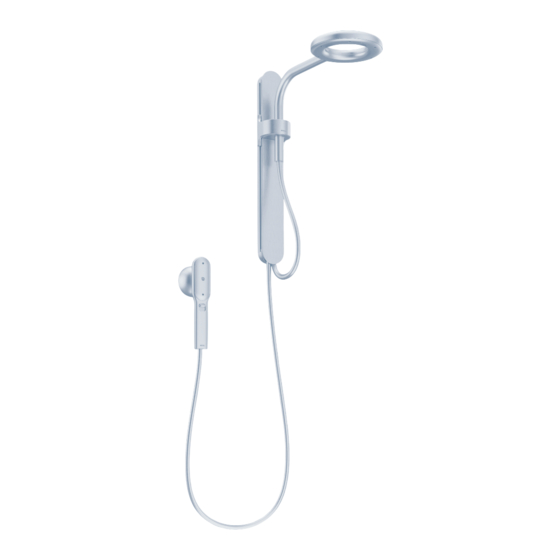
Nebia by Moen MEET YOUR NEBIA BY MOEN SPA SHOWER delivers a blissful ™ spa shower experience you’ll enjoy for years to come — and it won’t take RAINSHOWER SLIDING BRACKET HANDSHOWER & long to install. Simple and intuitive MAGNETIC DOCK “click together”... -
Page 3: Product Components
N. Magnetic Dock Adhesive Wall Bracket * Optional permanent installation hardware for commercial use. Not recommended for use in home PLEASE NOTE: There will be parts remaining after installation. Keep all parts for future use. Visit moen.com/nebia for tips and videos. - Page 4 COMPATIBILITY REQUIREMENTS PREPARING FOR INSTALL STEP 1: To install Nebia by Moen, you will need: Unscrew and remove your old shower arm and showerhead from the wall by turning Min 4" counterclockwise.* With Nebia by Moen, WATER HEATER TEMPERATURE Min 5"...
- Page 5 (See page 2 for letter references in bold.) STEP 2: STEP 3: If your Nebia by Moen base will overlap a ledge on your wall — like a decorative tub Use the installation key tool (G) (it looks Using the letter you marked in Step 2 as...
- Page 6 Take the collar you selected in Step 3, of the adapter with four or five layers and slip the rubber gasket (I) onto the correctly position your Nebia by Moen bracket. Once you've placed the gasket of thread seal tape. Then, screw the flat end of the adapter.
- Page 7 STEP 7: STEP 8: Your Nebia by Moen will stay securely in place Now it’s time to connect Nebia by Moen to the The water connection is complete. Now adjust with a waterproof adhesive. * To achieve the wall. First, double check that your filter screen the bracket until it’s straight and level.
- Page 8 “click.” Helpful Tip: For the best full-coverage experience, use the Nebia by Moen handshower like a body spray and install it at hip or torso height, 8 inches to the left or right of the bracket.
-
Page 9: Cleaning Instructions
Proof of purchase (original sales receipt) from the original consumer purchaser must accompany all warranty claims. Defects or damage caused by the use of other than genuine Moen parts is not covered by this warranty. This warranty is applicable only to faucets purchased after December, 1995 and shall be effective from the date of purchase as shown on purchaser’s receipt. - Page 10 (non comprise). fasten using the screws (D) provided. Go to Step 7. painters tape. Visit moen.com/nebia for tips and videos. Limpie las marcas de lápiz de la pared o retire la cinta Coloque la ménsula sobre la pared como se describió...
- Page 11 “click”. " deep. " diám.) y perfore hasta una a brida del ancla quede a ras de la mique « A » seulement (diam. 1/4 mur jusqu’à ce qu’ils soient de Visit moen.com/nebia for tips and videos.
-
Page 12: Maintenance/Service
Rinse loose comes out of the adapter. away from the wall. debris off of the filter with water. For mineral buildup, soak in a vinegar solution until dissolved. Button Visit moen.com/nebia for tips and videos. -
Page 13: Caractéristiques Du Produit
SUPPORT MAGNÉTIQUE des pièces assure l’étanchéité des joints, et leur installation ne nécessite pas d’outils de plomberie compliqués. Allons-y! OUTILS UTILES Par mesure de sécurité et pour faciliter l'installation, Moen recommande l’utilisation des outils ci-dessous. RUBAN POUR TAMPONS LUNETTES MARQUEUR JOINTS FILETÉS... - Page 14 * Quincaillerie servant à une installation permanente optionnelle pour utilisation commerciale. Non recommandée pour une utilisation résidentielle. REMARQUE : Il vous restera des pièces après l’installation du produit. Conservez-les pour usage ultérieur. Rendez-vous à l’adresse moen.com/nebia (en anglais seulement) pour obtenir des conseils et visionner des vidéos.
-
Page 15: Exigences En Matière De Compatibilité
• La paroi doit être munie d’une prise de raccord de tuyau NPT la bande adhésive sur le mur. Insérer la prise d’eau se trouvant collier et la paroi avant d’installer la douche Nebia by Moen de ½ po (ou BSPT de ½ po). -
Page 16: Installation De La Douche À Main
(en anglais seulement). optimale, il faut utiliser la douche à main Nebia by Moen Cette garantie est vaste, car elle couvre le remplacement de comme un vaporisateur corporel, et l’installer à la hauteur de toute pièce ou de tout fini défectueux. -
Page 17: Montage Du Support Facultatif Avec Des Vis
à suivre pour soumettre une réclamation. Il ÉTAPE B2 : suffit d’écrire à Moen incorporée à l’adresse indiquée ci- Installation sur une surface de carrelage : Au moyen d'une dessous. Expliquer le défaut et inclure une preuve d’achat, mèche de perçage de ¼... -
Page 18: Características Del Producto
PINZAS DE PRESIÓN puede colocar donde y hacia abajo. desee en la pared de su ducha. Usted puede Para ayuda con la instalación, visite moen.com /nebia incluso comprar para videos de demostración y más información. acoplamientos magnéticos adicionales y colocarlos... -
Page 19: Componentes Del Producto
* Herrajes de instalación permanente opcionales para uso comercial. No se recomienda para uso en el hogar. TENGA EN CUENTA: Habrá piezas restantes después de la instalación. Conserve todas las piezas para uso futuro. Visite moen.com/nebia para consejos y videos. -
Page 20: Preparación Para La Instalación
PASO 7: ESPACIADO Si su base Nebia de Moen se superpondrá a un saliente en su Ahora es el momento de conectar Nebia de Moen a la pared. • La salida del agua debe estar en un a pared (no en el techo). -
Page 21: Instrucciones De Limpieza
(incluyendo las esponjas mano de obra y/o daños incurridos en la instalación, reparación use la ducha de mano Nebia de Moen como rocío corporal e abrasivas o la lana de acero), amoníaco, blanqueadores o o reemplazo, ni por cualquier daño incidental, indirecto o instálela a la altura de la cadera o del torso, 8”... -
Page 22: Mantenimiento/Servicio
MANTENIMIENTO/SERVICIO Para fibra de vidrio: No se proporcionan tarugos para fibra de vidrio. Incorpore los tarugos centrados en las marcas según PASO 1: las instrucciones del fabricante. Presione hacia abajo el botón en la parte superior del soporte. PASO A4: PASO 2: Limpie las marcas de lápiz o la cinta de la pared. - Page 24 THIS BOOKLET WAS PRODUCED USING SUSTAINABLE GREEN PRINTING PRACTICES.