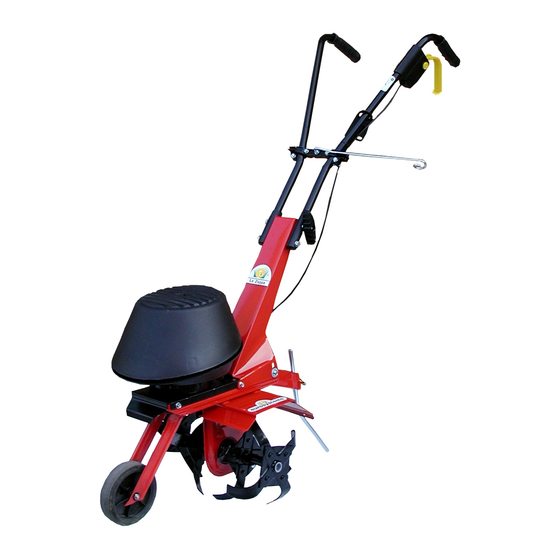
Sommaire des Matières pour Eurosystems La Zappa
- Page 1 Istruzioni d'uso Operating instructions Bedienungsanleitung Mode d'emploi MOTOZAPPA ELETTRICA ELECTRIC MOTORHOE ELEKTRISCHE MOTORHACKE MOTOBINEUSE ELECTRIQUE...
- Page 3 30.0010.900 30.0010.150 30.0010.095 86.2120.000 30.0010.094 81.7665.000 30.0010.242 84.3622.000 81.7640.000 30.0020.120 81.4548.000 30.0005.216 86.3983.000 86.1998.500 30.0010.096 86.3981.100 81.4535.050 80.8990.000 30.0010.057 30.0005.075 86.2210.000 86.3995.000 84.3605.010 30.0005.230 30.0010.056 85.1487.000 86.3085.000 30.0005.125 84.3685.000 30.0005.250 30.0010.243 86.2890.000 84.3667.000 30.0005.252 26.0010.281 81.4588.000 86.2845.000 30.0015.060 DX 30.0020.114 30.0015.061 SX 30.0020.112 30.0015.070...
- Page 5 Marcia avanti Forward drive Fahrantrieb vorwärts Marche avant - Leggere attentamente il libretto uso e istruzione prima di usare la macchina - Read the instructions manual before operating on the machine - Lesen Sie die Gebrauchsanweisung vor der Inbetriebnahme - Lire le mode d'emploi avant l'usage. - Attenzione pericolo rotazione fresa, mantenere una distanza di sicurezza dalla macchina in funzione (escluso operatore) - Danger: tiller rotation, keep at a safety distance - Achtung: frasenrotation, Sicherheitsabstand einhalten - Attention: danger rotation fraise, se tenir à...
- Page 6 INTRODUZIONE Indice Gentile cliente, lei ha acquistato una nuova attrezzatura. La ringraziamo per la fiducia accordata ai ns. prodotti e le auguriamo un piacevole utilizzo della sua macchina. Abbiamo creato queste istruzioni per I’uso allo scopo di assicurare, fin dall’inizio, un funzionamento privo Introduzione d’inconvenienti.
- Page 7 5. La sezione del cavo di alimentazione deve essere uguale o superiore a quella della classe 05RN. 6. Le operazioni di montaggio e smontaggio delle frese, la loro pulizia, nonché tutti gli interventi di manutenzione devono avvenire solo con il motore spento e spina disinserita dalla presa di corrente. 7.
- Page 8 AVVIAMENTO DELLA MOTOZAPPA - Inserire la spina nella presa di corrente (230 volt). - Fare passare il cavo nell’aggancio ferma filo (13) poi nell’asta (10) in modo da allontanarlo dalle frese in movimento. (Fig.2) - Premere il pulsante giallo (1) e tirare la leva (2). (Fig.5) - Una volta avviato il motore, rilasciare il pulsante (1), mantenendo premuta la leva (2).
- Page 9 Introduction Index Dear Customer, Thank you for your confidence in purchasing our products. We wish you to enjoy using our machines. Introduction The following working instructions have been issued to ensure you a reliable running from the beginning. If you carefully follow such information the machine will operate with complete satisfaction and have a long service Conditions of use life.
- Page 10 4. Before start to use the unit, carefully check the feeding cable . In case the feeding cable show sto be damaged do not use the tiller: verifiy first the damage , make up for it . Do not put the plug into the socket. 5.
-
Page 11: Technical Features
! ! ! ! ! TILLER : HOW TO START - Insert the plug into the socket 230 volt, - Make the wire to pass into the wire-holder (13) then into the rod (10) in order to make it away from the rotating tines (fig. 2). - Press the yellow switch (1) and pull the lever (2) (fig. - Page 12 Einleitung Inhaltsverzeichnis Verehrter Kunde, Sie haben ein neues Gerät erworben. Wir bedanken uns für Ihr Vertrauen, das Sie in unseren Qualitätsprodukten entgegebringen und wünschen Ihnen viel Freude beim Arbeiten mit Ihrem Einleitung neuen Gerät. Um eine zuverlässige Inbetriebnahme von vornherein zu gewährleisten,haben wir diese Betriebsanleitung geschaffen.
-
Page 13: Montage
6. Das Montieren und Abmontieren der Fräsen, deren Reinigung, sowie alle Wartungseingriffe dürfen nur bei abgeschaltetem Motor und ausgestecktem Stecker erfolgen. 7. Beim Anlassen der Motorhacke hinter den Sterzen bleiben. Auch beim Fräsen muß der Bediener diese Position beibehalten. 8. Nicht eigenmächtig an den Schutzverkleidungen und Sicherheitssystemen eingreifen. Beim Loslassen des Hebels müssen der Motor und die Fräse anhalten. - Page 14 ! ! ! ! ! STARTEN DER MOTORHACKE - Stecker in Steckdose (230 Volt) stecken. - Das Kabel in den Drahthalter (13) und dann in den Stab (10) einführen, um es von den sich bewegenden Fräsen fern zu halten (Abb.2). - Den gelben Knopf (1) drücken und den Hebel ziehen (2).
- Page 15 INTRODUCTION Table des matières Cher client, Vous venez d’acquérir un nouvel appareil. Nous vous remercions de la confiance que vous nous témoignez et vous souhaitons beaucoup de satisfaction dans son utilisation. Afin de garantir Introduction d’emblée un fonctionnement’sans accrocs nous avons crée cette notice d’utilisation. Si vous observez exactement les indications suivantes votre appareil fonctionnera toujours à...
-
Page 16: Montage De La Motobineuse
4. Avant l’utilisation , vérifier l’état du cable. Si celui est endommagé , ne pas employer la motobineuse , mais vérifier les dégats et rèparer les. Débrancher la fiche de la prise de courant avant d’effectuer les réparations. 5. La section du cable d’alimentation doît être égale ou supérieure à celle de la classe 05RN. 6. -
Page 17: Entretien - Entretien Huile
MONTAGE DE L’INTERRUPTEUR (FIG. 4) fixer l’interrupteur et insèrer les 2 pivots en plastique dans les trous des mancherons , comme montrè dans la figure . Serrer l’interrupteur et fixer le avec les 2 vis autotaradeuses qui se trouvent dans la pochette visserie. ! ! ! ! ! MISE EN MARCHE DE LA MOTOBINEUSE - Brancher la fiche à...


