
Manuels Connexes pour Maxspect R420R 160w


Sommaire des Matières pour Maxspect R420R 160w
- Page 1 Owner’s Manual Bedienungsanleitung Mode d’emploi Manuali dei Prodotti Manual do Proprietá rio 用户手册 使用說明書 사용자 설명서...
- Page 3 Thank you for purchasing this product. For optimum performance and safety, please read these instructions carefully. English User Memo: Date of purchase: Dealer name: Dealer address: Dealer website: Dealer email: Dealer phone no.: Please visit us on facebook or twitter! https://www.facebook.com/Maxspect http://twitter.com/maxspectled...
-
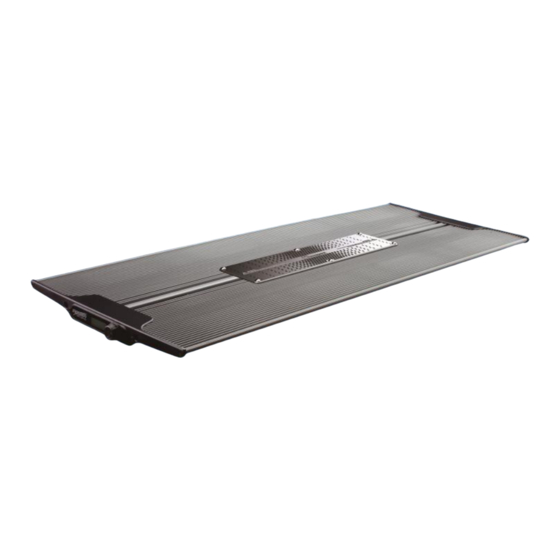
Page 4: Package Content
Package Content Please check the content in the package. English English 160w or 120w models R420R LED Module Power Supply Unit Stand Self-Adhering Velcro Thumb Screws Hanging Kit 60w model R420R LED Module Power Supply Unit Stand Thumb Screws... - Page 5 Precautions Before using this Maxspect™ R420R LED Lighting System please read English these operating instructions carefully. Take special care to follow the safety suggestions listed below. Afterwards keep this manual handy for future reference. Before using the Maxspect R420R LED Lighting System ™...
- Page 6 Installation Mounting the R420R LED Lighting System English Before connecting the LED Modules to Power Supply, first mount the system by using the provided Stand. Assemble the Stand. Assemble the stand by inserting the rails into the two holes located to the side of the R420R LED Module, as illustrated in the following diagram.
- Page 7 Installation Mounting the LED Module on your Aquarium. Using the provided self-adhering Velcro tapes, attach the stand onto the rim of the English aquarium, as illustrated in the following diagrams:...
- Page 8 You can also suspension mount the R420R unit, as illustrated in the following diagram: English Mounting the R420R using Ball-Joint System (Sold Separately) If you already own a set of Maxspect™ ball-joint frame stand, you can mount the R420R onto the frame using the same ball-joint system, as illustrated in the following diagrams:...
- Page 9 Installation English...
-
Page 10: Basic Operations
Operating Instructions Basic Operations English Follow the instructions below to operate and program the R420R LED Module. Note The LED Module turns on automatically when power is connected, and turns off when power is cut. When power is resumed, the LED Module will restore to the previous saved setting automatically, whether it was last set at Manual, Preset or Automatic Mode, and the intensity level of all the LED channels. - Page 11 Operating Instructions Manual Mode “M” English Under Manual mode, user can adjust the brightness of the two channels by using the control dial. 1. Press the control dial once to enter setup. Channel A will be selected by default. Rotate the dial to adjust its brightness. 100% 100% LED: ON...
- Page 12 Operating Instructions Preset Mode “P” English Under Preset mode, the fixture will be running the following predefined photo-period profiles. Under Preset mode, the LCD panel will display the current time and time-point. (e.g. the following diagram illustrates the current time lies between time-point 3 and 4.) 100% 100% 1.
- Page 13 Operating Instructions Automatic Mode “A” English Under the Automatic mode, users can program their own photo-period profile using 6 Time-Points. Understanding Time Points There are a total of 6 Time Points. You can program different luminous output intensity at each Time Point to control the photoperiod and brightness of the system.
- Page 14 Operating Instructions Under Automatic mode, similar to the Preset mode, the LCD panel will also display the current time and time-point. (e.g. the following diagram illustrates the current time English lies between time-point 3 and 4.) 100% 100% 1. Press the control dial once to enter setup. TIME PROGRAM 2.
- Page 15 Operating Instructions Automatic mode – Setting the clock English Once you are in the clock setting mode, the hour digit is selected by default. TIME: Rotate the dial to set the hour. (e.g. 06:30 08:30) TIME: 3. Press the control dial to change to the minute digit. Rotate the dial to set the minute.
- Page 16 Operating Instructions Automatic mode – Programming the Photo-Period English Once you are in the program setting mode, Time Point 1 is selected by default. Rotate the control dial to select the Time Point you want to modify. 8:00 100% 100% Press the control dial to change the time setting for this Time Point.
- Page 17 FROM MISUSE OR ABUSE. DISCLAIMER OF CONSEQUENTIAL AND INCIDENTAL DAMAGES: You and any other user of Maxspect Ltd. products shall not be entitled to any consequential or incidental damages, including without limitation, loss of use of the unit, inconvenience, damage to personal property, phone calls, lost income or earnings. This warranty gives you specific legal rights and you may also have other rights, which vary from state to state.
- Page 18 Weight 2 kg (4.4 lb) (160w/120w) 1.5 kg (3.3 lb) (60w) Note: For latest specifications on LED layout, types and color spectrum, please visit our website at www.maxspect.com Specifications are subject to change without notice. Weight and dimensions are approximate.
- Page 19 Sehr geehrter Kunde, vielen Dank für den Kauf dieses Produkts. Für eine optimale Leistung und Sicherheit, lesen Sie bitte diese Anleitung sorgfältig. Nutzer-Memo: Deutsch Kaufdatum Händler: Händleradresse: Händlerwebsite: Händler-E-Mail: Händlertelefon Bitte besuchen Sie uns auf Facebook oder Twitter! https://www.facebook.com/Maxspect http://twitter.com/maxspectled...
- Page 20 Packungsinhalt Bitte ü berprü fen Sie den Lieferumfang auf Vollständigkeit. 160W or 120w modell R420R LED Modul Netzteil Aufsetzsystem Deutsch Selbstklebendes Handschrauben Aufhängset Klettverschluss 60W modell R420R LED Modul Netzteil Aufsetzsystem Handschrauben...
-
Page 21: Sicherheitshinweise
Sicherheitshinweise Vor der ersten Inbetriebnahme des Maxspect™ LED-Beleuchtungssystems R420r sollten Sie diese Bedienungsanleitung sorgfältig lesen. Bitte beachten Sie die folgenden Sicherheitshinweise mit großer Sorgfalt. Bewahren Sie diese Anleitung auch zum späteren Nachschlagen auf. Deutsch Vor der Benutzung des Maxspect™ R420r LED-Beleuchtungssystems Falls vorhanden, entfernen Sie vor der Benutzung alle Schutzfolien. - Page 22 Installation Montieren des R420r LED-Beleuchtungssystems Bevor Sie die LED-Module mit dem Steuergerät verbinden, montieren Sie zunächst das System mit Hilfe des Aufsetzsystems. Montage des Aufsetzsystems Deutsch Montieren Sie das Aufsetzsystem durch Einfügen der Schienen in den beiden Löcher die sich an der Seite des LED-Moduls R420R befinden, wie in den folgenden Schaubildern dargestellt.
- Page 23 Installation Montieren des LED Moduls auf das Aquarium. Verwenden Sie hierfür das mitgelieferten Selbstklebendklettverschluss indem Sie es auf den Rand des Aquariums anbringen, wie in den folgenden Schaubildern dargestellt. Deutsch...
-
Page 24: Hängende Montage
Schaubild dargestellt, über Ihr Aquarium aufhängen: Deutsch Montage der R420R mit dem Kugelgelenk System (Separat erhältlich) Wenn Sie das Maxspect ™-Rahmenset System haben, können Sie die R420R auf den Rahmen mit dem gleichen Kugelgelenk System benutzen. Wie in den folgenden Schaubildern dargestellt:... - Page 25 Installation Deutsch...
- Page 26 Bedienungsanleitung Benutzung Befolgen Sie die nachstehenden Anweisungen um die Maxspect R420r bedienen und Programmieren. Hinweis Deutsch Sobald Die R420r an das Stromnetz angeschlossen wird schaltet sie sich automatisch ein, und schaltet sich aus, wenn sie vom Stromnetz getrennt wird Wenn die Stromversorgung wieder eingeschaltet wird, kehrt die R420r auf die früheren automatisch gespeicherten Einstellungen wieder zurück.
- Page 27 Bedienungsanleitung Manuel Modus “M” Im manuellen Modus können Sie die Helligkeit der beiden Kanäle mithilfe des Drehreglers manuell anpassen. Deutsch 1. Drücken Sie den Drehregler einmal um in das Setup-Menu zu gelangen. Kanal A wird standardmäßig ausgewählt. Drehen Sie den Drehregler um die Helligkeit anzupassen.
- Page 28 Bedienungsanleitung Preset Modus “P” In dem Preset-Modus, wird das unten aufgeführte vordefinierte Leucht-Periode- Programm Ausgeführt. Deutsch In dem Preset-Modus zeigt die LCD-Anzeige die aktuelle Intensität und den Zeitpunkt an. (z.B. das folgende Diagramm zeigt die aktuelle Lichtintensität zwischen Zeitpunkt 3 und 4 an.) 100% 100%...
- Page 29 Bedienungsanleitung Automatik Modus “A” In dem Automatik-Modus können Sie Ihr eigenes Leucht-Periode-Profil mit 6 Zeitpunkten nach Wunsch Programmieren. Was wird mit Zeitpunkt gemeint. Deutsch Es gibt insgesamt 6 Zeit-Punkten. Sie können eine unterschiedliche Lichtintensität zu jedem Zeitpunkt programmieren und damit die Tageslänge und die Helligkeit des Systems steuern. Die folgende Tabelle zeigt beispielsweise, wie Sie die Zeitpunkte Programmieren können, damit das Licht ab 8:00 hochdimmt, von 10:00 bis14:00 die maximale Ausleuchtung hat und dann langsam bis 22:00 abdimmt und sich ausschaltet.
- Page 30 Bedienungsanleitung In dem Automatik-Modus können Sie Ihr eigenes Leucht-Periode-Profil mit 6 Zeitpunkten nach Wunsch Programmieren. Ähnlich wie im Preset Modus zeigt die LCD-Anzeige die aktuelle Intensität und die Zeitpunkten an. 100% 100% Deutsch 1. Drücken Sie den Drehregler einmal um in das Setup Menu zu gelangen. TIME PROGRAM 2.
- Page 31 Bedienungsanleitung Automatik Modus – Einstellen der Uhrzeit Zeiteinstellungsmodus sind Stunden-Ziffern standardmäßig ausgewählt. TIME: Deutsch Drehen Sie den Drehregler um die Stunden einzustellen. (z.B. 06:30 auf 08:30) TIME: 3. Drücken Sie den Drehregler um zu den Minuten-Ziffern zu gelangen. Drehen Sie den Drehregler um die Minuten einzustellen.
- Page 32 Bedienungsanleitung Automatik Modus – Programmierung der Leuchtperiode Deutsch Sobald Sie in dem Einstellungsmodus Programm sind, ist standardmäßig Zeitpunkt 1 ausgewählt. Drehen Sie den Drehregler um den Zeitpunkt auszuwählen denn Sie ändern möchten. (z.B.:TP1 auf TP2) 8:00 100% 100% Drücken Sie den Drehregler und ändern Sie die Einstellung für diesen Zeitpunkt. Drehen Sie den Drehregler um die Zeit für den ersten Zeit-Punkt zu ändern.
-
Page 33: Garantie
VERMUTLICH SCHÄ DEN AUFGRUND VON FALSCHER ANWENDUNG ODER MISSBRAUCH SIND. HAFTUNGSAUSSCHLUSS FÜ R FOLGE- UND ZUFALLSSCHÄ DEN: Sie und alle anderen Nutzer der Produkte von Maxspect Ltd. haben kein Recht auf Entschädigung bei Folge – und Zufallsschäden, einschließlich und ohne Einschränkung bei Verlust des Geräts, Unannehmlichkeiten, Schäden am Privateigentum, Telefonanrufe, entgangenes Einkommen und... -
Page 34: Technische Angaben
Gewicht 2 kg (4.4 lb) (160w/120w) 1.5 kg (3.3 lb) (60w) Hinweis: Für neusten technischen Daten, LED-Layout, LED-Typen und Farbspektrum besuchen Sie bitte unsere Internetseite unter www.maxspect.com Technische Angaben können sich ohne Vorankündigung ändern. Gewicht und Abmessungen sind ungefähre Werte. -
Page 35: Mémo Utilisateur
Mémo utilisateur: Date d’achat : Nom du revendeur : Français Adresse du revendeur : Site internet du revendeur : E-mail du revendeur : N° de téléphone du revendeur : Vous pouvez nous rejoindre sur facebook ou twitter ! https://www.facebook.com/Maxspect http://twitter.com/maxspectled... -
Page 36: Contenu De L'emballage
Contenu de l’emballage Merci de vérifier le contenu de votre emballage. Modèle 160W ou 120w R420R Module LED Alimentation Support pour aquarium Français Adhésif auto-agrippant Vis manuelle Kit de suspension Modèle 60W R420R Module LED Alimentation Support pour aquarium Vis manuelle... -
Page 37: Précautions D'utilisation
Précautions d’utilisation Avant toute utilisation du système d’éclairage LED R420r Maxspect™, veuillez lire attentivement ce manuel d’utilisation. Soyez particulièrement attentifs aux consignes de sécurité qui suivent. Gardez soigneusement ce manuel pour toute future utilisation. Avant d’utiliser le système d’éclairage LED R420r Maxspect ™... -
Page 38: Fixation Du Système D'eclairage Led R420R
Installation Fixation du Système d’Eclairage LED R420r Avant de connecter le module LED à l’alimentation, assemblez tout d’abord le système en utilisant le support fourni. Assemblage du support. Montez le support en insérant les rails dans les deux trous situés sur le côté du Module LED R420R, comme illustré... - Page 39 Installation Montage du module LED R420r sur votre aquarium. En utilisant les bandes adhésives auto-agrippantes fournies, fixer le support sur le rebord de l'aquarium, comme illustré dans les schémas suivants: Français...
-
Page 40: Montage Suspendu
Français Montage de la R420R à l'aide du système Mazarra (vendu séparément) Si vous possédez déjà un ensemble de support Maxspect ™ Mazarra, vous pouvez monter la R420R en utilisant le même système d'articulation sphérique, comme illustré dans les schémas suivants :... - Page 41 Installation Français...
-
Page 42: Opérations De Base
Instructions d’utilisation Opérations de base Suivez les instructions suivantes pour utiliser et la programmer le module LED R420R. Remarque Le module LED s'allume automatiquement lorsque l'alimentation est connectée, et s'éteint lorsque l'alimentation est coupée. Lorsque l'alimentation est rétablie, le module Led revient automatiquement à la sauvegarde précédente, il garde également le niveau d'intensité... - Page 43 Instructions d’utilisation Mode manuel “M” En mode manuel, vous pouvez régler la luminosité des 2 canaux à l'aide du bouton de contrôle. 1. Appuyez 1 fois sur le bouton de contrôle pour entrer dans le menu de sélection. Le Français canal A est sélectionné...
- Page 44 Instructions d’utilisation Mode preset “P” En mode préréglage, la R420r fonctionnera selon les photopériodes prédéfinies ci-après. Français En mode préréglage, l'écran LCD affichera le temps et les points-temps. (Par exemple le dessin suivant illustre les ajustements du temps actuel et des points-temps 3 et 4.) 100% 100% 1.
-
Page 45: Compréhension Des Points-Temps
Instructions d’utilisation Mode automatique “A” En mode automatique, vous pouvez programmer votre propre photopériode en utilisant les 6 points-temps. Compréhension des points-temps Il y a un total de 6 points-temps. Vous pouvez programmer une intensité lumineuse différente à chaque point-temps pour contrôler la photopériode et la luminosité du système. Par exemple, le tableau suivant montre comment vous pouvez programmer les points-temps Français afin que le système augmente graduellement l’intensité... - Page 46 Instructions d’utilisation En mode automatique, comme pour le mode préréglage, le panneau LCD affichera le temps actuel et les points-temps. (Par exemple le diagramme suivant illustre l’intensité actuelle entre les points-temps 3 et 4). 100% 100% Français 1. Appuyez sur le bouton de contrôle pour entrer dans le menu de sélection. TIME PROGRAM 2.
-
Page 47: Mode Automatique - Réglage De L'heure
Instructions d’utilisation Mode automatique – Réglage de l’heure Quand vous êtes dans le mode réglage d'horloge, le chiffre de l'heure est sélectionné par défaut. TIME: Français Tourner le bouton de contrôle pour régler l'heure. (p. ex. 06:30 à 08:30) TIME: 3. -
Page 48: Mode Automatique - Programmation Des Photopériodes
Instructions d’utilisation Mode automatique – Programmation des Photopériodes Quand vous êtes dans le mode de réglage de programmation, le point-temps 1 est sélectionné par défaut. Tournez le bouton de contrôle pour sélectionner le point-temps que vous souhaitez modifier. (p. ex. TP1 à TP2) Français 8:00 100%... -
Page 49: Limite De Garantie
12 mois à compter de la date d’achat. Si un défaut est révélé au cours de la période de garantie, Maxspect Ltd., à sa convenance, réparera (avec des pièces neuves ou de rechanges) ou remplacera (par une unité... -
Page 50: Spécifications
Remarque: Pour les dernières spécifications sur la disposition, du type et du spectre de couleurs des LED, veuillez-vous rendre sur notre site Web à www.maxspect.com Les informations techniques peuvent être sujettes à changement sans préavis Poids et dimensions sont approximatifs. - Page 51 Per ottimizzare prestazioni e sicurezza, vi preghiamo di leggere attentamente le istruzioni Utente memo: Data di acquisto: Rivenditore: Indirizzo del rivenditore: Italiano Sito web del rivenditore: E-mail del rivenditore: Telefono del rivenditore: Puoi seguirci su facebook e twitter! https://www.facebook.com/Maxspect http://twitter.com/maxspectled...
- Page 52 Contenuto Scatola Per favore verifica il contenuto della scatola: 160W o 120w modello Modulo LED R420R Alimentatore Supporti bordo vasca Adesivo/Velcro Viti di bloccaggio Kit sospensione Italiano 60W modello Modulo LED R420R Alimentatore Supporti bordo vasca Viti di bloccaggio...
- Page 53 Precauzioni Prima di utilizzare il sistema d’illuminazione a LED Maxspect ™ R420R Vi preghiamo di leggere attentamente le istruzioni. Far particolare attenzione e seguire i suggerimenti di sicurezza elencati di seguito. Successivamente tenere questo manuale a portata di mano per riferimento futuri Prima di utilizzare il sistema d’illuminazione a LED Maxspect...
- Page 54 Installazione Montaggio del sistema d’illuminazione a LED R420R Prima di collegare i moduli LED all’alimentazione montare completamente il sistema utilizzando il supporto fornito. Assemblaggio Supporti. Montare il supporto inserendolo nei due fori situati al lato del modulo a LED R420R, come illustrato nello schema seguente: Italiano Fissaggio del supporto.
- Page 55 Installazione Montaggio del modulo sulla vasca. Fissare i supporti sul bordo vasca utilizzando l’adesivo con Velcro in dotazione come in foto: Italiano...
- Page 56 Installazione Montaggio in sospensione E’ possibile installare il modulo in sospensione con il kit (opzionale) come dimostrato in foto: Italiano Montaggio con sistema a snodo (opzionale) E’ possibile installare il modulo con gli accessori opzionali – snodo di montaggio - utilizzando i sistemi di montaggio della serie Mazarra;...
- Page 57 Installazione Italiano...
-
Page 58: Operazioni Di Base
Istruzioni Per L’Uso Operazioni di base Seguire le istruzioni riportate di seguito per accendere e programmare il modulo a LED R420R. Nota Il modulo a LED si accende automaticamente non appena alimentato. Quando l'alimentazione viene a mancare e poi ripristinata, il modulo a LED riprende le impostazioni precedenti il black-out. - Page 59 Istruzioni Per L’Uso Modalità Manuale “M” In modalità manuale, l'utente può regolare la luminosità dei due canali utilizzando la manopola di controllo. 1. Premere la manopola di controllo una volta per accedere al setup dei canali “A” e “B”. Ruotare la manopola di controllo per regolare l’intensità del canale “A”. 100% 100% LED: ON...
- Page 60 Istruzioni Per L’Uso Modalità Preset (Preselezione) “P” In modalità Preset il modulo funziona con i seguenti parametri prestabiliti di fabbrica. E’ possibile scegliere due Preset di seguito illustrati: Italiano In modalità Preset il pannello LCD visualizzerà l'ora corrente e il Punto Tempo (ad esempio, il diagramma seguente illustra l'ora corrente e la sua posizione tra il punto tempo 3 e 4.) 100%...
- Page 61 Istruzioni Per L’Uso Modalità Automatica “A” In modalità automatica gli utenti possono personalizzare il foto periodo in base alle proprie esigenze su 6 punti tempo. Cosa sono I Punti Tempo (TP) Ci sono un totale di 6 Punti Tempo (TP) ed è possibile assegnare ad ognuno di essi una diversa intensità...
- Page 62 Istruzioni Per L’Uso In modalità automatica, simile alla modalità Preset, il pannello LCD visualizza anche l'ora corrente e il TP. (ad esempio il seguente diagramma illustra il tempo corrente è compreso tra TP 3 e 4.) 100% 100% 1. Premere la manopola di controllo per accedere al setup di programmazione. TIME PROGRAM Italiano...
-
Page 63: Modalità Automatica - Settaggio Dell'orologio
Istruzioni Per L’Uso Modalità Automatica – Settaggio dell’orologio Una volta che si è sulla modalità di programmazione dell’orologio lampeggia la cifra dell’ora predefinita. TIME: Ruotare la manopola di controllo per settare l’ora. (ad es. 06:30 08:30) Italiano TIME: 3. Premere la manopola di controllo per passare a regolare i minuti. Ruotare la manopola di controllo per regolare i minuti. - Page 64 Istruzioni Per L’Uso Modalità Automatica – Programmazione del fotoperiodo Una volta tornati alla modalità di programmazione viene visualizzato in automatico il punto tempo 1 predefinito. Ruotare la manopola di controllo per selezionare 1 dei 6 punti tempo da programmare. 8:00 100% 100% Italiano...
-
Page 65: Termini Di Garanzia
Termini di garanzia Maxspect Ltd. garantisce tutti i Sistemi di Illuminazione a LED Maxspect ™ R420R per i difetti di fabbricazione, per un periodo di 12 mesi dalla data di acquisto. Se un difetto di produzione si presenta durante il periodo di garanzia, Maxspect Ltd. a sua discrezione, riparerà (usando componenti nuovi o ricostruiti) o sostituirà... - Page 66 1.5 kg (3.3 lb) (60w) Nota: Per aggiornamenti relativi alla configurazione dei LED, tipi e colori dello spettro, siete pregati di consultare il nostro sito web www.maxspect.com Le specifiche sono soggette alle modifiche senza alcun preavviso. Peso e dimensioni sono approssimativi.
- Page 67 Obrigado por adquirir este produto. Para um melhor desempenho e segurança, por favor leia cuidadosamente estas instruções. User Memo: Data da Compra: Nome Loja: Endereço Loja: Website Loja: Email Loja: Telefone Loja: Português Por favor, visite-nos no Facebook ou Twitter! https://www.facebook.com/Maxspect http://twitter.com/maxspectled...
-
Page 68: Conteúdo Da Embalagem
Conteú do da Embalagem Por favor, analise o conteú do da embalagem. Modelo de 160w ou 120w R420R modulo LED Fonte de Energia Suporte Velcro adesivo Parafuso Kit pendant Português Modelo de 60w R420R modulo LED Fonte de Energia Suporte Parafuso... - Page 69 Precauçõ es Antes de usar seu Sistema de Iluminação LED Maxspect™ R420R por favor leia este manual de instruções cuidadosamente. Tenha cuidado e siga corretamente todas as instruções descritas. Mantenha sempre ao alcance este manual para eventual consulta. Antes de usar seu Sistema de Iluminação LED Maxspect R420R ™...
-
Page 70: Instalação
Instalação Montagem do sistema R420R LED Lighting System Antes de ligar o módulo de LED com a fonte de alimentação, monte o sistema, usando o(s) suporte(s) fornecido. Montando o suporte. Monte o suporte, inserindo os trilhos nos dois orifí cios situados ao lado do módulo de LED, tal como ilustrado na figura a seguir. - Page 71 Instalação Montando o mó dulo de LED sobre o aquário. Usando o(s) velcro(s) auto-adesivos fornecido, monte o suporte na borda do aquário, como ilustrado nas figuras a seguir: Português...
- Page 72 Montando o modulo LED R420R usando o ball-joint (vendido separadamente) Se você já possui um sistema de led Maxspect (Mazarra), você pode utilizar o módulos led R420R usando o sistema ball-joint que vieram em sua luminária anterior como mostra o diagrama a seguir:...
- Page 73 Instalação Português...
-
Page 74: Instruções De Funcionamento
Instruçõ es de funcionamento Operaçõ es bá sicas Siga as instruções abaixo para operar e programar o módulo de LED R420R. ATENÇ Ã O O mó dulo de LED liga-se automaticamente quando a alimentação é conectada, e, desliga quando a energia é cortada. Quando a energia é... - Page 75 Instruçõ es de funcionamento Modo Manual “M” Sob o modo manual, o usuário pode ajustar o brilho dos dois canais usando o botão de controle. 1. Pressione o botão de controle uma vez para entrar na configuração. Canal 1 será selecionado por padrão.
- Page 76 Instruçõ es de funcionamento Modo Pré -definido “P” Sob o modo Pré-definido, o dispositivo será executado nos seguintes fotoperí odos: Sob o modo de Pré-definido, o painel LCD irá exibir a hora e ponto do tempo. (por exemplo, o diagrama a seguir ilustra que o horário atual encontra-se entre ponto de tempo 3 e 4.) 100% 100%...
- Page 77 Instruçõ es de funcionamento Modo Automatico “A” No modo Automático, o usuário pode programar o seu perfil, utilizando 6 intervalos de fotoperí odos. Entendendo os pontos de tempo Há um total de 6 pontos de tempo. Você pode programar a intensidade luminosa de saí da diferente em cada momento para controlar o fotoperí...
- Page 78 Instruçõ es de funcionamento Sob o modo Automático, semelhante ao modo Pré-definido, o painel LCD também irá exibir o tempo atual e o ponto do tempo. (por exemplo, o diagrama a seguir ilustra o horário atual encontra-se entre ponto de tempo 3 e 4.) 100% 100% 1.
- Page 79 Instruçõ es de funcionamento Modo Automático – Definindo a hora. Uma vez que você está no modo de ajuste do relógio, o dí gito da hora é selecionado por padrão. TIME: Gire o botão para selecionar a hora (ex. 06:30 08:30) TIME: Português 3.
- Page 80 Instruçõ es de funcionamento Modo Automático – Programando o fotoperíodo Uma vez no modo de configuração do programa, o ponto de tempo é selecionado por padrão. Gire o botão de controle para selecionar o ponto de tempo que você deseja modificar. 8:00 100% 100%...
- Page 81 12 meses relacionados com defeitos de fabricação, sendo contados a partir da data de compra. Se houver algum defeito no produto durante o perí odo de garantia, a Maxspect realizará o reparo no equipamento (com peças novas) sem nenhum custo.
-
Page 82: Especificações
1.5 kg (3.3 lb) (60w) ATENÇ Ã O: Para especificações mais recentes dos LEDs, tipos e espectro de cores, por favor, visite nosso website www.maxspect.com As especificações estão sujeitas a alterações sem aviso prévio. Peso e as dimensões são aproximados. - Page 83 亲爱的客户, 多谢您选购我司商品。 为确保您的安全及使用本产品时得到最佳的效果,请详细阅读此使用手册。 用户资料: 购买日期: 经销商名称: 经销商地址: 经销商网页: 经销商电邮: 经销商电话: 简中...
- Page 84 确认包装内容 请检查包装内物件是否齐全。 160w 及 120w 型号 R420R LED 灯体 电源 支架 魔术贴 支架固定手拧螺丝 吊装件 60w 型号 R420R LED 灯体 电源 支架 简中 支架固定手拧螺丝...
- Page 85 注意事项 请在操作前,仔细阅读本操作说明,并特别注意遵照下列安全建议。 请保留本说明书以便日後查阅。 安装及使用 Maxspect R420R LED 灯具前,请注意: ™ 移除灯具外包装袋及灯具上的保护膜。 2. 开启灯具时请切勿用肉眼直视灯珠,否则可能会对眼睛造成伤害。 安全提示 1. 电源 — 禁止破坏两极插头或接地型插头的安全用途。两极插头有两个接触片,其中一个 比较宽。接地型插头有两个接触片和一个接地插脚。两极插头的较宽接触片或接地型插头 的接地插脚能够确保使用者的安全。如果提供的插头与您的插座不匹配,请联系电工更换 插座。 2. 电源线保护 — 布置电源线时,确保电源线不被踩踏、挤压或阻挡。手湿时,切勿触碰插 头或电源线。插入或拔出电源插头时,应始终紧握插头。 3. 安装 — 本设备只能安装于室内,并且使用由生产厂家提供及指定的附件,安装架与悬挂 套件。 操作提示 1. 使用本设备时应始终遵照使用手册的操作说明。 2. 本设备的安装位置应远离热源,例如暖炉,也不能暴露于过度高温的环境,如阳光、火源 简中 之类。 3. 为降低火灾或雷击的危险,切勿把本设备暴露于淋雨、潮湿、滴水或溅水的环境中。 4. 本设备应安装或放置在不影响正常通风的位置上使用。...
- Page 86 安装指南 安装 R420R LED 灯具 将灯具接通电源前,请使用所提供的支架将灯具安装妥当。 支架的组装. 参照下图将支架铝条由灯具两端的孔插入灯体内。 使用手拧螺丝固定支架。 组装好支架必须使用所提供的手拧螺丝将支架固定在适当的位置。如下图所示。 简中...
- Page 87 安装指南 将灯具安装于水族箱上。 将装好支架的灯具架在水族箱上,请使用所提供的魔术贴粘贴在支架和水族箱之间,以防 止灯具滑动,如下图所示: 简中...
- Page 88 安装指南 灯具吊装 请根据下图所示将所提供的吊装件安装在灯具上: 使用云台安装灯具 (云台及对应支架需另购) 您可以选购由 Maxspect™ 提供的云台支架系统安装 R420R 灯具,请参照下图进行安装: 简中...
- Page 89 安装指南 简中...
- Page 90 使用指南 基本操作 注意 当灯具接通电源后,将自动运行对上一次灯具断电前的模式,包括所设置的时间,定 义的程序,亮度值等。 R420R 灯具有 3 种运作模式:手动模式(M) ,预设程序模式(P) ,自定义程序模式(A) 。 在运作模式间切换: 按下灯具上的旋钮不放超过 2 秒,灯具会在 3 种运作模式间进行切换。LCD 屏幕上 会显示相应的模式状态: 手动模式: 100% 100% LED: ON 简中 预设程序模式: 100% 100% 自定义程序模式: 100% 100%...
- Page 91 使用指南 手动模式 “M” 手动模式下,您可以调整 A、B 两组灯珠的亮度值和同时开启关闭两组灯珠。 1. 按一下旋钮,A 组灯珠亮度值会反白显示。此时旋转旋钮调整该组灯珠的亮度值。 100% 100% LED: ON 2. 再次按一下旋钮,B 组灯珠亮度值反白显示。转旋钮调整该组灯珠的亮度值。 100% LED: ON 简中 3. 再次按一下旋钮,ON/OFF 选项反白显示。旋转旋钮可以全换两组灯珠的开启/关闭 状态。 LED: 4. 再次按一下旋钮退出手动模式的设定状态。...
- Page 92 使用指南 预设程序模式 “P” 在预设模式下,灯具会根据预先设定的日照程序自动运行。两组预先设定的日照程序如下: 关于程序中时间点的理解和时钟的设置,请参考用户自定义模式下的操作说明。 预设程序模式下,LCD 显示屏会显示当前正在运行的时间点和两组灯珠的实时亮度值。 100% 100% 简中 1. 按一下旋钮,进入预设模式选择页面。 Preset1 Preset2 2. 您可以旋转旋钮选择想要运行的预设程序。 Preset1 Preset2...
- Page 93 使用指南 自定义程序模式 “A” 自定义程序模式下,您可以设置灯具全天自动运行的程序。 关于时间点 灯具运行程序中共有 6 个时间点,您可在每一个时间点设置两组灯珠各自的亮度值,程序将会 自动运行,由前一时间点的亮度值渐变到下一时间点的亮度值。 例如自定义程序如下设定: 08:00 09:00 10:00 14:00 18:00 22:00 Channel A 100% 100% Channel B 100% 100% 则灯具会从早上 8:00 到 9:00 的时间内, 由 0%到 50%亮度渐变; 9:00 到 10:00 的时间内, 由 50% 到 100%亮度渐变;10:00 到 14:00 的时间内维持 100%亮度不变;14:00 到 18:00 时间内由 100% 降至...
- Page 94 使用指南 预设程序模式下,LCD 显示屏会显示当前正在运行的时间点和两组灯珠的实时亮度值。 100% 100% 按一下旋钮进入自定义程序设置页面。 TIME PROGRAM 2. 旋转旋钮选择时钟设置或程序设置选项。 TIME 简中 PROGRAM 3. 按一下旋钮进入相应选项设置页面。...
- Page 95 使用指南 自定义程序模式-时钟设置 进入时钟设置页面,首先是小时数值反白显示。 TIME: 旋转旋钮设置小时数值。 TIME: 简中 3. 再按一下旋钮切换到分钟数值反白。旋转旋钮设置分钟数值。 TIME: 时钟设置完成后,按下旋钮不放超过两秒,将退出时钟设置页面。...
- Page 96 使用指南 自定义程序模式-程序设置 进入程序设置页面,首先是时间点数值反白。旋转旋钮选择要设置的时间点数值。 8:00 100% 100% 按一下旋钮切换到该时间点的时间值反白。旋转旋钮设置该时间点的时间值(每 30 分钟为一个单位,下一时间点的时间值不能早于上一时间点的时间值。 ) TP: 2 9:00 100% 100% 简中 3. 按一下旋钮切换到 A 组灯珠亮度值反白,旋转旋钮设置其亮度值。 TP: 2 10:00 A: 100% 100% 再按一下旋钮切换到 B 组灯珠的亮度值反白,旋转旋钮设置其亮度值。 5. 按以上步骤设置完 6 个时间点的时间值和亮度值后,按下旋钮不放超过 2 秒,将退 出程序设置页面。...
- Page 97 产品保修 所有迈光品牌(Maxspect)的 R420R LED 照明系统产品自购买之日起 12 个月内若有质量问题, 可享有 Maxspect 公司的保修服务。若在保修其内出现质量问题,Maxspect 公司将免费维修或 更换配件。 若产品由于误用,被改装,发生事故,处理不当,或使用不当而受到损坏,或未经授权自行维 修的,则不在保修范围之内。不在保修范围的情况包括但不限于,使用改装灯泡和修改电路等 被视为误用或滥用而损坏产品的行为。 间接及附带损害免费声明: Maxspect 对您或其他使用者的间接或附带损害不承担责任。间接或附带损害包括但不限于,使 用产品造成的损失或不便,对个人财产造成的损失,如电话,收入损失或盈利损失。本质保书 赋予您合法权利,在不同的地区您还可能享有其它权利。 除上面明确提出的内容外,MAXSPECT 公司对产品的质量,性能,适销性或特别用途的适用性均 没有作出明示或暗示的担保或陈述。因此,本产品“按现状”提供,您作为购买者承担有关此 产品的质量和性能的全部风险。 在任何情况下,MAXSPECT 公司均不对因本产品或其文件的缺陷而引起的直接的、间接的、特别 的、附带的或结果性的损害承担责任。 上述质保书,声明和故障排除方法是唯一版本,没有其它口头的或书面的,明示的或暗示的内 容。在任何时候,Maxspect 公司的经销商,代理商或雇员都无权对此质保书进行更改、扩展或 补充。 简中 由于某些地区不允许此类附带性或结果性损害的免责或有限责任,上述限制可能不适用于您。...
- Page 98 Meanwell NES-150-24(120w) Meanwell NES-75-15(60w) 输入电压 / 电流 4.5A/115VAC - 2.5A/230VAC 1.5A/115VAC - 0.9A/230VAC (60w) 36V 5.9A(160w) 输出电压 / 电流 24V 6.3A(120w) 15V 5A(60w) 2 kg (4.4 lb) (160w/120w) 重量 1.5 kg (3.3 lb) (60w) 提示: 简中 更多详细信息,请浏览我们的官方网站: www.maxspect.com 规格如有变更,恕不另行通知。 重量和尺寸均为约数。...
- Page 99 親愛的客戶, 多謝您選購我司商品。 為確保您的安全及使用本產品時得到最佳的效果,請詳細閱讀此使用說明書。 用戶資料: 購買日期: 經銷商名稱: 經銷商地址: 經銷商網頁: 經銷商電郵: 經銷商電話: 繁中...
- Page 100 確認包裝內容 請檢查包裝內物件是否齊全。 160w 及 120w 型號 R420R LED 燈體 電源 支架 魔術貼 支架固定手擰螺絲 吊裝件 60w 型號 R420R LED 燈體 電源 支架 繁中 支架固定手擰螺絲...
- Page 101 注意事項 請在操作前,仔細閱讀本操作說明,並特別注意遵照下列安全建議。 請保留本說明書以便日後查閱。 安裝及使用 Maxspect™ R420R LED 燈具前,請注意: 移除燈具外包裝袋及燈具上的保護膜。 2. 開啟燈具時請切勿用肉眼直視燈珠,否則可能會對眼睛造成傷害。 安全提示 1. 電源 — 禁止破壞兩極插頭或接地型插頭的安全用途。兩極插頭有兩個接觸片,其中一個 比較寬。接地型插頭有兩個接觸片和一個接地插腳。兩極插頭的較寬接觸片或接地型插頭 的接地插腳能夠確保使用者的安全。如果提供的插頭與您的插座不匹配,請聯系電工更換 插座。 2. 電源線保護 — 布置電源線時,確保電源線不被踩踏、擠壓或阻擋。手濕時,切勿觸碰插 頭或電源線。插入或拔出電源插頭時,應始終緊握插頭。 3. 安裝 — 本設備只能安裝於室內,並且使用由生產廠家提供及指定的附件,安裝架與懸掛 套件。 操作提示 1. 使用本設備時應始終遵照使用手冊的操作說明。 2. 本設備的安裝位置應遠離熱源,例如暖爐,也不能暴露於過度高溫的環境,如陽光、火源 之類。 3. 為降低火災或雷擊的危險,切勿把本設備暴露於淋雨、潮濕、滴水或濺水的環境中。 4. 本設備應安裝或放置在不影響正常通風的位置上使用。 5. 本設備應遠離產生強磁場的設備或裝置。...
- Page 102 安裝指南 安裝 R420R LED 燈具 將燈具接通電源前,請使用所提供的支架將燈具安裝妥當。 支架的組裝. 參照下圖將支架鋁條由燈具兩端的孔插入燈體內。 使用手擰螺絲固定支架。 組裝好支架必須使用所提供的手擰螺絲將支架固定在適當的位置。如下圖所示。 繁中...
- Page 103 安裝指南 將燈具安裝於水族箱上。 將裝好支架的燈具架在水族箱上,請使用所提供的魔術貼粘貼在支架和水族箱之間,以防 止燈具滑動,如下圖所示: 繁中...
- Page 104 安裝指南 燈具吊裝 請根據下圖所示將所提供的吊裝件安裝在燈具上: 使用雲台安裝燈具 (雲台及對應支架需另購) 您可以選購由 Maxspect™ 提供的雲台支架系統安裝 R420R 燈具,請參照下圖進行安裝: 繁中...
- Page 105 安裝指南 繁中...
- Page 106 使用指南 基本操作 注意 當燈具接通電源後,將自動運行對上一次燈具斷電前的模式,包括所設置的時間,定 義的程序,亮度值等。 R420R 燈具有 3 種運作模式:手動模式(M) ,預設程序模式(P) ,自定義程序模式(A) 。 在運作模式間切換: 按下燈具上的旋鈕不放超過 2 秒,燈具會在 3 種運作模式間進行切換。LCD 屏幕上 會顯示相應的模式狀態: 手動模式: 100% 100% LED: ON 預設程序模式: 100% 100% 繁中 自定義程序模式: 100% 100%...
- Page 107 使用指南 手動模式 “M” 手動模式下,您可以調整 A、B 兩組燈珠的亮度值和同時開啟關閉兩組燈珠。 1. 按一下旋鈕,A 組燈珠亮度值會反白顯示。此時旋轉旋鈕調整該組燈珠的亮度值。 100% 100% LED: ON 2. 再次按一下旋鈕,B 組燈珠亮度值反白顯示。轉旋鈕調整該組燈珠的亮度值。 100% LED: ON 繁中 3. 再次按一下旋鈕,ON/OFF 選項反白顯示。旋轉旋鈕可以全換兩組燈珠的開啟/關閉 狀態。 LED: 4. 再次按一下旋鈕退出手動模式的設定狀態。...
- Page 108 使用指南 預設程序模式 “P” 在預設模式下,燈具會根據預先設定的日照程序自動運行。兩組預先設定的日照程序如下: 關於程序中時間點的理解和時鐘的設置,請參考用戶自定義模式下的操作說明。 預設程序模式下,LCD 顯示屏會顯示當前正在運行的時間點和兩組燈珠的實時亮度值。 100% 100% 1. 按一下旋鈕,進入預設模式選擇頁面。 Preset1 繁中 Preset2 2. 您可以旋轉旋鈕選擇想要運行的預設程序。 Preset1 Preset2...
- Page 109 使用指南 自定義程序模式 “A” 自定義程序模式下,您可以設置燈具全天自動運行的程序。 關於時間點 燈具運行程序中共有 6 個時間點,您可在每一個時間點設置兩組燈珠各自的亮度值,程序將會 自動運行,由前一時間點的亮度值漸變到下一時間點的亮度值。 例如自定義程序如下設定: 08:00 09:00 10:00 14:00 18:00 22:00 Channel A 100% 100% Channel B 100% 100% 則燈具會從早上 8:00 到 9:00 的時間內, 由 0%到 50%亮度漸變; 9:00 到 10:00 的時間內, 由 50% 到 100%亮度漸變;10:00 到 14:00 的時間內維持 100%亮度不變;14:00 到 18:00 時間內由 100% 降至...
- Page 110 使用指南 預設程序模式下,LCD 顯示屏會顯示當前正在運行的時間點和兩組燈珠的實時亮度值。 100% 100% 按一下旋鈕進入自定義程序設置頁面。 TIME PROGRAM 2. 旋轉旋鈕選擇時鐘設置或程序設置選項。 TIME PROGRAM 繁中 3. 按一下旋鈕進入相應選項設置頁面。...
- Page 111 使用指南 自定義程序模式-時鐘設置 進入時鐘設置頁面,首先是小時數值反白顯示。 TIME: 旋轉旋鈕設置小時數值。 TIME: 3. 再按一下旋鈕切換到分鐘數值反白。旋轉旋鈕設置分鐘數值。 TIME: 繁中 時鐘設置完成後,按下旋鈕不放超過兩秒,將退出時鐘設置頁面。...
- Page 112 使用指南 自定義程序模式-程序設置 進入程序設置頁面,首先是時間點數值反白。旋轉旋鈕選擇要設置的時間點數值。 8:00 100% 100% 按一下旋鈕切換到該時間點的時間值反白。旋轉旋鈕設置該時間點的時間值(每 30 分鐘為一個單位,下一時間點的時間值不能早於上一時間點的時間值。 ) TP: 2 9:00 100% 100% 3. 按一下旋鈕切換到 A 組燈珠亮度值反白,旋轉旋鈕設置其亮度值。 繁中 TP: 2 10:00 A: 100% 100% 再按一下旋鈕切換到 B 組燈珠的亮度值反白,旋轉旋鈕設置其亮度值。 5. 按以上步驟設置完 6 個時間點的時間值和亮度值後,按下旋鈕不放超過 2 秒,將退 出程序設置頁面。...
- Page 113 產品保修 所有邁光品牌 (Maxspect) 的 R420R LED 照明系統產品自購買之日起 12 個月內若有質量問題, 可享有 Maxspect 公司的保修服務。若在保修其內出現質量問題,Maxspect 公司將免費維修或 更換配件。 若產品由於誤用,被改裝,發生事故,處理不當,或使用不當而受到損壞,或未經授權自行維 修的,則不在保修範圍之內。不在保修範圍的情況包括但不限於,使用改裝燈泡和修改電路等 被視為誤用或濫用而損壞產品的行為。 間接及附帶損害免費聲明: Maxspect 對您或其他使用者的間接或附帶損害不承擔責任。間接或附帶損害包括但不限於,使 用產品造成的損失或不便,對個人財產造成的損失,如電話,收入損失或盈利損失。本質保書 賦予您合法權利,在不同的地區您還可能享有其它權利。 除上面明確提出的內容外,MAXSPECT 公司對產品的質量,性能,適銷性或特別用途的適用性均 沒有作出明示或暗示的擔保或陳述。因此,本產品“按現狀”提供,您作為購買者承擔有關此 產品的質量和性能的全部風險。 在任何情況下,MAXSPECT 公司均不對因本產品或其文件的缺陷而引起的直接的、間接的、特別 的、附帶的或結果性的損害承擔責任。 上述質保書,聲明和故障排除方法是唯一版本,沒有其它口頭的或書面的,明示的或暗示的內 容。在任何時候,Maxspect 公司的經銷商,代理商或雇員都無權對此質保書進行更改、擴展或 補充。 由於某些地區不允許此類附帶性或結果性損害的免責或有限責任,上述限制可能不適用於您。 繁中...
- Page 114 Meanwell NES-150-24(120w) Meanwell NES-75-15(60w) 輸入電壓 / 電流 4.5A/115VAC - 2.5A/230VAC 1.5A/115VAC - 0.9A/230VAC (60w) 36V 5.9A(160w) 輸出電壓 / 電流 24V 6.3A(120w) 15V 5A(60w) 2 kg (4.4 lb) (160w/120w) 重量 1.5 kg (3.3 lb) (60w) 提示: 更多詳細信息,請瀏覽我們的官方網站: www.maxspect.com 規格如有變更,恕不另行通知。 重量和尺寸均為約數。 繁中...
- Page 115 제품을 구입해 주셔서 감사합니다. 최적의 성능과 안전을 위해 다음 지침을 주의 깊게 읽어 주시기 바랍니다. 구매 정보 : 구입 일자: 구입처: 구입처 주소: 구입처 webpage: 구입처 e-mail: 구입처 전화 번호: Facebook 과 twitter 를 통해 보다 다양한 정보를 확인하세요! https://www.facebook.com/Maxspect http://twitter.com/maxspectled 한국의...
- Page 116 포장 안내 제품을 받으신 후 다음 부품이 모두 포함되어 있는지 확인하세요. 60W 모델 R420R LED 모듈 파워 서플라이 스탠드 벨크로 테이프 고정 나사 행잉 킷 60W 모델 R420R LED 모듈 파워 서플라이 스탠드 고정 나사 한국의...
- Page 117 사용 전 주의 사항 Maxspect™ R420R LED 조명 시스템을 사용하기 전에 본 설명서를 주의 깊게 읽어 주세요. 또한 다음의 안전에 관한 사항에 따라 제품을 설치/사용하시기 바랍니다. Maxspect R420R LED 조명 시스템을 사용하기 전에 ™ Afterwards keep this manual handy for future reference.
- Page 118 설치 수조 위에 설치하기 LED 모듈에 전원을 공급하기 전에 함께 동봉 된 스탠드를 이용하여 등기구를 수조에 거치하여 주십시오. 스탠드 조립하기 등기구의 측면에 위치한 2 개의 구멍에 스탠드를 넣어 주십시오. 아래 그림을 참조하세요. 스탠드를 나사로 고정하기 동봉된 나사로 스탠드를 고정 하십시오 한국의...
- Page 119 설치 LED 등기구를 수조에 고정하기 동봉 된 벨크로 테이프를 사용하여 등기구와 주조를 더욱 확실하게 고정 할 수 있습니다. 수조 보강대가 있는 경우 아래 그림과 같이 거치 방향을 변경할 수 있습니다. 한국의...
- Page 120 별매로 공급되는 Hanging KIT 를 사용하면 등기구를 펜던트 처럼 거치할 수 있습니다. 볼 조인트 시스템으로 설치하기 (별매품) 만약 각도를 변경하여 등기구를 설치하고 싶다면 Maxspect™ 볼 조인트 시스템을 이용할 수 있습니다. 볼 조인트 시스템 설치를 원하실 때는 판매처에 문의하시기 바랍니다. 세부 사항은 아래의 그림을 참고하여 주십시오...
- Page 121 설치 한국의...
- Page 122 사용 설명 기본 사용법 주의 등기구는 전원이 공급되면 자동으로 ON 되고 전원 공급이 중단되면 OFF 됩니다 전원이 다시 공급되면 Razor 는 최근에 저장 된 설정에 따라 다시 동작합니다. 수동모드, 프리셋모드,자동 모드 간의 선택 콘트롤 다이얼을 2 초간 누르면 3 가지 모드 간의 이동이 가능합니다. 각 모드는 “M-수동”, “P-프리셋”, “A-자동”...
- Page 123 사용 설명 수동 모드 - M 수동 모드에서는 컨트롤 다이얼을 통해 2 개 채널의 조명 밝기를 각각 조절할 수 있습니다 컨트롤 다이얼을 한 번 누르면 설정으로 이동합니다. 디폴트로 채널 A 가 선택됩니다. 컨트롤 다이얼을 돌려 밝기를 조절합니다. (e.g. 100% 60%) 100% 100% LED: ON...
- Page 124 사용 설명 프리셋 모드 “P” 프리셋 모드에서는 다음의 사전 설정 된 조명 주기 프로파일을 확인할 수 있습니다. LCD 에는 현재 시간과 타임포인트를 표시합니다. (다음 그림은 현재 시간은 타임포인트 3 과 4 사이에 위치함을 표시합니다) 100% 100% 세부 설정을 위해 컨트롤 다이얼을 한 번 눌러 주십시오. 프리셋#1 이 디폴트로 선택됩니다.
- Page 125 사용 설명 자동 모드 “A” 자동 모드에서는 사용자가 설정한 5 개의 타임포인트의 조명 조건에 따라 자동으로 LED 시스템을 제어합니다. 타임 포인트란? R420R 에서는 총 6 개의 타임포인트를 사용합니다. 각각의 타임포인트에서 사용자는 각기 다른 조명의 강도와 시간을 설정 할 수 있습니다. 08:00 09:00 10:00...
- Page 126 사용 설명 자동 모드에서는 프리셋 모드와 마찬가지로 현재 사용되는 타임포인트를 LCD 에 표시합니다. (다음은 현재 시간이 타임포인트 3 과 4 사이에 위치함을 보여줍니다) 100% 100% 컨트롤 다이얼을 한 번 누르면 설정으로 이동합니다. TIME PROGRAM 2. 다이얼을 돌려 변경하고자 하는 설정을 선택합니다 (시간 프로그램) TIME PROGRAM 한국의...
- Page 127 사용 설명 자동 모드 – 시간 설정 시간 설정 모드로 이동하면, 다음의 디폴트 화면을 확인 할 수 있습니다. TIME: 다이얼을 돌려 “시”를 변경합니다. (e.g. 06:30 08:30) TIME: 다이얼을 다시 누르면 “분”을 변경할 수 있습니다. 다이얼을 돌려 “분”을 설정합니다. (e.g. 08:30 08:45) TIME: 설정이...
- Page 128 사용 설명 자동 모드 – 조명 주기 설정하기 프로그램 설정화면으로 이동하면 디폴트로 다음 화면을 확인할 수 있습니다. 다이얼을 돌려 변경하고자 하는 타임포인트를 선택합니다. (e.g. TP1 TP2) 8:00 100% 100% 다이얼을 눌러 타임포인트의 시간을 변경합니다. 다이얼을 돌려 타임포인트의 시작 시간을 변경합니다. (e.g. 9:00 10:00) TP: 2 9:00 100%...
- Page 129 R420R LED 조명 시스템의 품질 문제가 있을 경우 구일일로 부터 12 개월 이내에 Maxspect 의 품질 보증 서비스를 받으실 수 있습니다. Maxspect 에서는 보증 범위 내의 품질 문제에 대해 수리나 교환 서비스를 제공하며 보증 범위가 아닌 경우 별도의 비용이 발생 될 수 있습니다.
- Page 130 2 kg (4.4 lb) (160w/120w) 중량 1.5 kg (3.3 lb) (60w) 참고 : LED 레이아웃, 종류 및 색상 스펙트럼에 대한 최신 사양을 보려면 www.maxspect.com 의 웹 사이트를 방문하시기 바랍니다 사양은 예고없이 변경 될 수 있습니다. 무게와 크기가 대략적인 것입니다. 한국의...
- Page 132 NOTE: Products, packaging, features and specifications are subject to change. All screen images are simulated. © 2009-2012 Maxspect Limited. Reproduction in whole or in part without written permission is prohibited. All rights reserved. Maxspect and R420R are trademarks of Maxspect Limited. Cree and XLamp are trademarks of Cree, Inc.