
Manuels Connexes pour Teka TB95C31X


Sommaire des Matières pour Teka TB95C31X
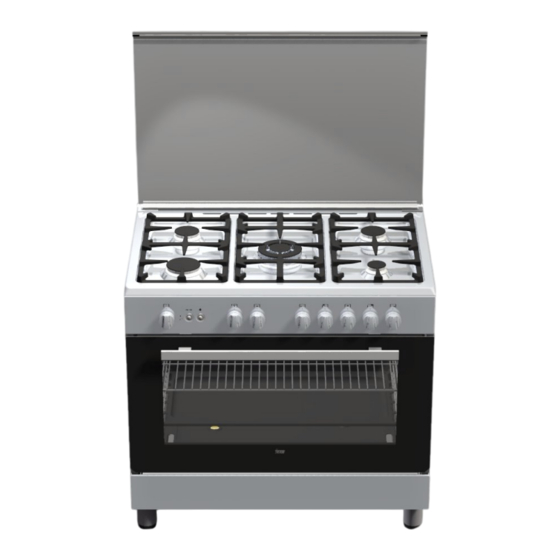
- Page 1 INSTRUCTION MANUAL (pag. 2) NOTICE D’ UTILISATION (pag. 8) TB95C31X 40297200 TB95C31W 40297201 COD . 310 47 4...
- Page 2 INSTALLATION, MAINTENANCE AND USE INSTRUCTIONS FOR FREE-STANDING COOKERS 90x60 cm GIANT OVEN READ THE INSTRUCTION BOOKLET BEFORE INSTALLING AND USING THE APPLIANCE. The manufacturer will not be responsible for any damage to property or to persons caused by incorrect installation or improper use of the appliance.
- Page 3 Oven Natural G20 3182 Butane G30 3182 Propane G31 3182 Grill Natural G20 1720 Butane G30 1720 Propane G31 1720 BURNER ADJUSTMENT 1) Burner "MINIMUM" adjustment: Work surface burner adjustment: follow the instructions below to adjust the work surface burner minimum: 1) Light the burner and set the knob to the MINIMUM position (small flame).
- Page 4 APPLIANCE MAINTENANCE REPLACING PARTS Before performing any maintenance operation, disconnect the appliance from the gas supply and electricity network. To replace parts such as knobs and burners, just remove them from the seats without disassembling any part of the cooker. To replace parts such as nozzle supports, valves and electric components follow the procedure described in the burner adjustment paragraph.
- Page 5 USING BURNERS A diagram is etched on the control panel above each knob which indicates which burner corresponds to that knob. The burners can be ignited in different ways depending on the type of appliance and its specific characteristics: - Manual lighting (it is always possible even when the power is cut off): Turn the knob counterclockwise that corresponds to the burner selected, setting it to the MAXIMUM position at the etched star (large flame Fig.14-15-16) and place a lit match up to the burner.
- Page 6 makes the gas start to flow) and keep it pressed, after the burner has been completely lit, for 10 seconds. Release the knob and make sure that the burner remains on, otherwise repeat the operation. - Electric ignition (only for the models equipped with this device): In this case, first open the oven door, then press and turn the knob to the maximum temperature setting (number 8).
- Page 7 CLEANING THE APPLIANCE Before cleaning the appliance, it should be disconnected from the power supply and turn off the main gas feeder valve. Cleaning the work surface: Periodically clean the burner heads, the enamelled steel grids, the enamelled covers and the flame caps using warm soapy water.
- Page 8 NOTICE D’INSTALLATION, D’ENTRETIEN ET MODE D’EMPLOI DE LA CUISINIERE A GAZ 90x60cm (MODELE M9) LIRE ATTENTIVEMENT LE CONTENU DE CETTE NOTICE AVANT D’INSTALLER OU D’UTILISER LA CUISINIERE. Le fabricant décline toute responsabilité en cas de dommages à des personnes ou à des biens provoqués par une mauvaise installation ou un usage impropre de la cuisinière.
- Page 9 Naturel G20 3182 Four Buthane G30 3182 Propane G31 3182 Naturel G20 1720 1720 Grill Buthane G30 Propane G31 1720 REGLAGE DES BRULEURS 1) Réglage de la flamme minimum des brûleurs : Réglage des brûleurs de la table de cuisson: pour régler la flamme minimum des brûleurs de la table de cuisson, procéder de la façon suivante : 1) Allumer le brûleur et tourner la manette sur la position de MINIMUM (petite flamme).
- Page 10 ENTRETIEN DE L'APPAREIL CHANGEMENT DES COMPOSANTS Avant toute opération d’entretien et / ou de réparation, couper l’arrivée de courant et de gaz vers l’appareil. Pour changer les composants comme les manettes ou les brûleurs, il suffit de les extraire de leur logement sans besoin de démonter aucune pièce de la cuisinière.
- Page 11 UTILISATION DES BRULEURS Sur le tableau de bord, au-dessus de chaque manette, un schéma a été gravé qui indique à quel brûleur se réfère la manette. L'allumage des brûleurs peut s’effectuer de différentes façons en fonction du type d’appareil et de ses caractéristiques particulières : - Allumage manuel (il est toujours possible même en cas de coupure de courant) : Tourner la manette correspondant au brûleur sélectionné...
- Page 12 TABLEAU n° 4 POSITION THERMOSTAT BRULEUR FOUR BRULEUR FOUR+BRULEUR GRILL 1=MINIMUM 120°C 200°C 8=MAXIMUM 220°C 270°C L'allumage du brûleur du four peut s’effectuer de différentes façons : - Allumage manuel (toujours possible mais en cas de coupure de courant) : Ouvrir la porte du four et tourner la manette jusqu’à...
- Page 13 NETTOYAGE DE L’APPAREIL Débrancher l’appareil du réseau d’alimentation et fermer le robinet général d’adduction de gaz à l’appareil avant de procéder à toute opération de nettoyage. Nettoyage du plan de cuisson : Les brûleurs, les grilles en acier émaillé, les couvercles émaillés, et les répartiteurs de flamme doivent être lavés périodiquement avec de l’eau savonneuse tiède, rincés et essuyés avec soin.
- Page 14 (fig.1) (fig.2) (fig.3) (fig.4) (fig.5) (fig.6) (fig.7) (fig.8) (fig.9)
- Page 15 (fig.10) (fig.11) (Fig. 12) (Fig. 13) (Fig. 14) (Fig. 15) (Fig. 16) (Fig. 17) Fig. 18 (fig.18A –18B) (Fig. 19) (Fig. 20) (Fig. 21) (Fig. 22) (Fig. 23)
- Page 16 (Fig. 24) (Fig. 25) (F ig. 26) (Fig. 27) (Fig. 27) (Fig. 27) (Fig.35)
- Page 18 درﺧﺸﺶ اﻳﻦ آﻨﻴﺪ اﻳﻦ ﻗﺴﻤﺘﻬﺎ را ﺑﺎ ﺁب و ﺻﺎﺑﻮن ﺷﺴﺘﺸﻮ دهﻴﺪ و ﺁﻧﻬﺎ را ﺑﺎ ﻳﻚ آﻬﻨﻪ ﻧﺮم ﺧﺸﻚ ﻗﺴﻤﺘﻬﺎی اﺟﺎق هﻤﺮاﻩ ﺑﺎ اﺳﺘﻔﺎدﻩ ﮔﺎﻩ ﺑﻪ ﮔﺎﻩ از ﻣﺤﺼﻮﻻﺗﯽ آﻪ ﻣﻌﻤﻮ ﻻ ً در ﺑﺎزار ﻳﺎﻓﺖ ﻣﯽ ﺷﻮﻧﺪ ﺳﺎب اﺳﺘﻔﺎدﻩ ﻧﻜﻨﻴﺪ ی...
- Page 19 در اﻳﻨﺼﻮرت ﮔﺮﻳﻞ را در ﺟﺎی ﻣﺨﺼﻮص ﺁن ﮔﺬاﺷﺘﻪ و ﺑﺮ روی دن ﺑﺮ روی ﮔﺮﻳﻞ آﺒﺎﺑﯽ آﺮ ﺁن ﻣﻮاد ﻏﺬاﻳﯽ را ﻗﺮار دهﻴﺪ ، در ﺣﺎﻟﯽ آﻪ در روی ﺳﻄﻮح زﻳﺮﻳﻦ ﺳﻴﻨﯽ را ﻗﺮار ﺳﭙﺲ ﺷﻌﻠﻪ ﮔﺮﻳﻞ را روﺷﻦ آﻨﻴﺪ و را...
- Page 20 ﺛﺎﻧﻴﻪ ﭘﺲ از روﺷﻦ ﺷﺪن آﺎﻣﻞ ﺷﻌﻠﻪ ﺻﺒﺮ آﻨﻴﺪ و ﺳﭙﺲ ﺁﻧﺮا رهﺎ ﺑﺮای ﻣﺪت را ﻓﺸﺎر دهﻴﺪ روﺷﻦ ﻣﺎﻧﺪﻩ ﺑﺎﺷﺪ ، وﮔﺮ ﻧﻪ ﻋﻤﻠﻴﺎت را ﺗﻜﺮار آﻨﻴﺪ ﺳﺎزﻳﺪ ، آﻨﺘﺮل آﻨﻴﺪ آﻪ ﺷﻌﻠﻪ ﺛﺎﻧﻴﻪ ﻓﻌﺎل ﺑﻤﺎﻧﺪ ﺳﻴﺴﺘﻢ روﺷﻦ آﺮدن ﻧﺒﺎﻳﺪ ﺑﺮای ﻣﺪت ﺑﻴﺶ از ﺛﺎﻧﻴﻪ...
- Page 21 ﺟﺪول ﺷﻤﺎرﻩ ﺷﻌﻠﻪ ﮔﺮﻳﻞ ﺷﻌﻠﻪ ﻓﺮ ﻓﻘﻂ ﺷﻌﻠﻪ ﻓﺮ وﺿﻌﻴﺖ ﭘﻴﭻ ﻓﺮ ﺣﺪاﻗﻞ ﺣﺪاآﺜﺮ روﺷﻦ آﺮدن ﺷﻌﻠﻪ ﻓﺮ ﻣﯽ ﺗﻮاﻧﺪ ﺑﻪ ﻃﺮق ﮔﻮﻧﺎﮔﻮن اﻧﺠﺎم ﺷﻮد ﺑﺮای هﻤﻮارﻩ ﻣﻴﺴﺮ ﻣﯽ ﺑﺎﺷﺪ ﺣﺘﯽ در زﻣﺎن ﻓﻘﺪان ﺟﺮﻳﺎن ﺑﺮق روﺷﻦ آﺮدن دﺳﺘﯽ ﺗﺼﻮﻳﺮ ﺑﺮﺳﺪ...
- Page 22 ﺷﻌﻠﻪ آﻮﭼﻚ ﺗﺼﻮﻳﺮ ﺑﺒﺮﻳﺪ وﻗﺘﯽ ﺑﻪ ﻣﺮﺣﻠﻪ ﺟﻮش رﺳﻴﺪﻳﺪ ، ﭘﻴﭻ ﮔﺎز را ﺑﻪ وﺿﻌﻴﺖ ﺣﺪاﻗﻞ ﺎ ﻗﺎﺑﻠﻤﻪ ه ﺑﺮای ﻗﻄﺮ ﺗﻮﺻﻴﻪ ﺷﺪﻩ ﺟﺪول ﺷﻤﺎرﻩ ﺷﻌﻠﻪ هﺎ ﻗﻄﺮ ﺗﻮﺻﻴﻪ ﺷﺪﻩ ﻗﺎﺑﻠﻤﻪ هﺎ ﯽ آﻤﻜ 12 – 14 14 – 26 ﻧﻴﻤﻪ...
- Page 23 دﻗﻴﻘﻪ ﺷﻤﺎر را ﻧﺸﺎن ﻣﯽ دهﺪ ﻋﻼﻣﺖ ﺮداﻧﺪن آﺒﺎب را ﻧﺸﺎن ﻣﯽ دهﺪ آﻠﻴﺪ ﻓﻌﺎل آﻨﻨﺪﻩ ﻣﻮﺗﻮر ﮔ ﻋﻼﻣﺖ روﺷﻦ آﺮدن ﭼﺮاغ ﻓﺮ را ﻧﺸﺎن ﻣﯽ دهﺪ ﺳﻮﺋﻴﭻ آﻠﻴﺪ ﻋﻼﻣﺖ هﺴﺘﻨﺪ ﻳﺎ ﺧﺎﻣﻮش ﻧﺸﺎن ﻣﯽ دهﺪ آﻠﻴﺪ ﻣﺎدر وﺿﻌﻴﺖ روﺷﻦ ﻋﻼﻣﺖ...
- Page 24 رﻧﮓ ﯽ ﺳﻴﻢ آﻮﭼﻚ ﺁﺑ ﻧﻮﺗﺮ ﺣﺮف زرد ﺳﺒﺰ ﺳﻴﻢ آﻮﭼﻚ اﺗﺼﺎل زﻣﻴﻦ ﻧﺮﺳﺪ ﺑﻪ درﺟﻪ ﺣﺮارت ی ﻗﺮار ﮔﻴﺮد آﻪ در هﻴﭻ ﻧﻘﻄﻪ ا ﯽ ﺑﺎﻳﺪ ﺑﻪ ﻃﺮﻳﻘ ﯽ ﺑﺮق ﻣ ﺳﻴﻢ ﺳﺘﻔﺎدﻩ ﻧﻜﻨﻴﺪ ، ﭼﻮن اﻣﻜﺎن دارد ﺑﺎﻋﺚ ﺑﺮای...
- Page 25 ﺗﻨﻈﻴﻢ ﻣﻴﺰان ﺣﺪاﻗﻞ ﺷﻌﻠﻪ هﺎ ﺗﻨﻈﻴﻢ ﺷﻌﻠﻪ هﺎ ﺻﻔﺤﻪ ﮔﺎز ﺻﻔﺤﻪ ﮔﺎز ﺑﻄﺮﻳﻖ زﻳﺮ ﻋﻤﻞ آﻨﻴﺪ ی ﻈﻴﻢ ﻣﻴﺰان ﺣﺪاﻗﻞ ﺷﻌﻠﻪ هﺎ ﺗﻨ ی ﺑﺮا ﺣﺪاﻗﻞ ﺑﮕﺬارﻳﺪ ﺷﻌﻠﻪ آﻮﭼﻚ ی ﺷﻌﻠﻪ را روﺷﻦ آﺮدﻩ و ﭘﻴﭻ ﺷﻴﺮ ﮔﺎز را رو ﭘﺎﻳﻪ...
- Page 26 ﻣﻨﺪرﺟﺎت ﺟﺪول ﺷﻤﺎرﻩ ﻋﻤﻞ آﻨﻴﺪ ﺷﻌﻠﻪ ﻓﺮ ﺑﻪ ﻧﺤﻮ زﻳﺮ ﻧﺎزل ﺑﺮای ﺗﻌﻮﻳﺾ ﻣﻨﻔﺬ ﺻﻔﺤﻪ ﻓﺮ را ﺧﺎرج آﻨﻴﺪ را ﺑﺎز آﺮدﻩ و ﺷﻌﻠﻪ را از ﻧﮕﻬﺪارﻧﺪﻩ ﺁن ﺧﺎرج آﻨﻴﺪ و دﻗﺖ آﻨﻴﺪ ﭘﻴﻠﻮت ﭘﻴﭻ ﺗﺼﻮﻳﺮ ﺻﺪﻣﻪ وارد ﻧﺸﻮد ﻞ ﺗﺮﻣﻮآﻮﭘ...
- Page 27 ﻗﺒﻞ از ﻧﺼﺐ و اﺳﺘﻔﺎدﻩ از اﺟﺎق دﻓﺘﺮﭼﻪ ﺁﻣﻮزش را ﻣﻄﺎﻟﻌﻪ آﻨﻴﺪ در ﺻﻮرت ﻧﺼﺐ ﻧﺎدرﺳﺖ و ﻳﺎ اﺳﺘﻔﺎدﻩ ﻏﻠﻂ از دﺳﺘﮕﺎﻩ ﻣﺴﺌﻮل ﺧﺴﺎرات ﺳﺎزﻧﺪﻩ ﺷﺮآﺖ ﻧﻴﺴﺖ اﺷﻴﺎء و اﻓﺮاد ﺑﻪ ﯽ اﺣﺘﻤﺎﻟ در اﻳﻦ ی و ﻧﻮﺷﺘﺎر ﯽ از اﺷﺘﺒﺎهﺎت ﭼﺎﭘ ﺷﯽ...
- Page 28 TB95C31X 40297200 TB95C31W 40297201...