
Manuels Connexes pour ROSIERES RDVE342MPN


Sommaire des Matières pour ROSIERES RDVE342MPN
- Page 1 VITROCERAMIC COOKING HOB INSTRUCTION BOOKLET PIANO COTTURA IN VETROCERAMICA MANUALE D'USO E MANUTENZIONE PLAQUE DE CUISSON EN VITROCÉRAMIQUE MANUEL D‘UTILISATION...
-
Page 2: Declaration Of Conformity
Important warnings and tips for use IMPORTANT! This manual constitutes an integral part of the appliance. It must be kept intact and within easy reach during the entire life of the cooktop. Please carefully read this manual and all the instructions contained herein before using the appliance. -
Page 3: Control Settings
COOKING ANY ADJUSTMENT, MAINTENANCE, ETC. MUST BE CARRIED OUT WITH THE HOB UNPLUGGED AT THE MAINS. The glass-ceramic cooktop permits rapid vertical transmission of heat from the heating element below the cooktop to the pots or pans placed on top of it. Heat does not spread horizontally, thus at a distance of just a few centimetres from the cooking zone, the glass remains relatively ”cool”... -
Page 4: Touch Control
KNOBS CONTROL In these hobs the cooking zones are controlled by knobs connected to power selectors Numbers are used to indicate cooking settings where "1" is the minimum setting and the highest number is the maximum setting. Number 0 is the off position. Extensible zones, where available, are activated over max position. To switch on the extended zone, turn the knob beyond the max setting until a click is heard, then return it to any setting from min to max. - Page 5 Turning Touch Control on/off After start-up, the touch control requires about one second before it is ready for use. After reset, all displays and LED’s will flash for about 1 second. After this time, all displays and LED’s go off and the touch control is in stand-by status.
- Page 6 Use of the multiple circuits (where supplied) Depending on the model, your appliance can have a DUAL or a TRIPLE heating element. When a multiple plate is activated, the internal circuits are turned on. If you also want to turn on the outermost circuit, you need only select the extended zone key.
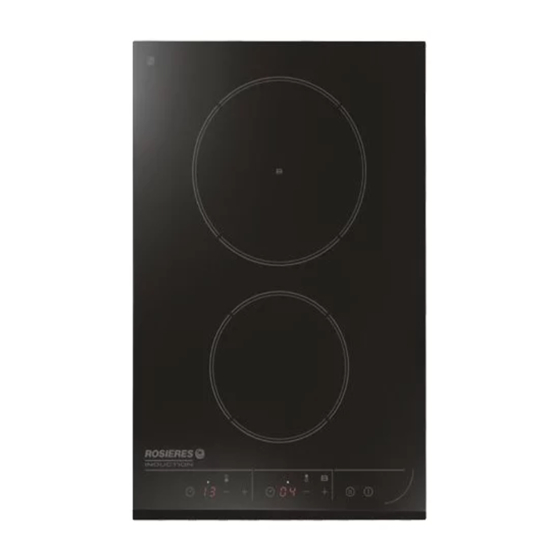
- Page 7 INDUCTION Warnings: The Induction complies with the valid EMC standards. Therefore no disturbances with other electronic devices should occur. User with pace maker or other electronic implant are recommended to check with the manufacturer of the electronic device or their medicine if their electronic device is adequate safe respecting to EMC The cooking surface may get hot even in case of inductive heating without direct heating of the cooking surface.
-
Page 8: Pause Function
Pause Function When at least one cooking zone is in operation, the heating elements may be switched off by actuating the special key “pause” for >= 1s. Already programmed times (also egg timer) are stopped and do not continue during the pause. Automatic heat-up and booster are also switched off on all cooking zones during activation, the residual heat calculation and operating time limitation continue and are not stopped. - Page 9 FIT INSTRUCTION Important! These instructions are intended for qualified technicians. The appliance must be installed correctly, in compliance with current laws. Before carrying out any operation on the appliance, it must be disconnected from the electric supply. Position (fig.1) The hob is designed to be fitted into a work surface which is larger than the hob. The dimension of the hole to be made in the worktop and the minimum distances between rear and side walls and those above are showed on figure n°...
- Page 10 Error code Description Possible error cause Error clearing Overheating of the induction coils Cooling down necessary ER03 & Permanent use of keys; Water or cooking utensils on the Cleaning of the Control unit cuts off after 10 sec glass above the control unit operational surface permanent tone Error on filter board...
- Page 11 CUSTOMER ASSISTANCE SERVICE If you cannot identify the cause of the operating anomaly: switch off the appliance (do not subject it to rought treatment) and contact the Assistance Service. PRODUCT SERIAL NUMBER. Where can I find it? It is important you to inform the Assistance Service of your product code and its serial number (a 16 character code which begins with the number 3);...
-
Page 12: Avvertenze E Consigli Per L'uso
Avvertenze e consigli per l'uso IMPORTANTE! Questo manuale costituisce parte integrante dell’apparecchio. Occorre conservarlo integro e a portata di mano per tutto il ciclo di vita del piano di cottura. Consigliamo una attenta lettura di questo manuale e di tutte le indicazioni in esso contenute prima dell’utilizzo dell’apparecchio. Conservare gli eventuali ricambi in dotazione. -
Page 13: Consigli Per La Cottura
COTTURA OGNI MODIFICA, MANUTENZIONE, ECC. DEV'ESSERE EFFETTUATA CON L'APPARECCHIO SCOLLEGATO DALLA RETE ELETTRICA I piani in Vetroceramica permettono una rapida trasmissione del calore in verticale dagli elementi riscaldanti posti sotto al vetro alle pentole o padelle appoggiate sopra. Il calore non si propaga orizzontalmente, alla distanza di qualche centimetro dalla zona cottura, il vetro rimane relativamente freddo al tatto. - Page 14 CONTROLLO MEDIANTE MANOPOLE In questi apparecchi le zone di cottura sono controllate da delle manopole connesse ai regolatori di potenza. I numeri indicano la scala di potenza, partendo dal minimo "1" e crescendo fino al numero maggiore. Il numero "0" indica la posizione di spento. Le zone estensibili, dove presenti, si attivano portando la manopola alla posizione di massima potenza, e girandola ancora fino a sentire uno scatto, a quel punto la zona sarà...
- Page 15 Accensione/spegnimento del Touch Control Dopo l'accensione, il Touch richiede circa un secondo prima di essere pronto al funzionamento. Dopo il reset tutti i led lampeggiano per circa 1 secondo. Passata questa fase, tutti i display ed i led si spengono ed il Touch control va in modalità...
- Page 16 Uso delle zone a circuito multiplo (dove presenti) Dipendentemente dal modello, l'apparecchio può avere una "DUAL" o "TRIPLA" zona riscaldante. Quando una piastra multipla viene attivata, si accendono tutti i curcuiti contemporaneamente. Se si vuole accendere solamente il circuito interno, i circuiti esterni possono essere disattivati con i tasti appositi in qualsiasi momento. I circuiti esterni attivi sono indicati da uno specifico LED che ne indica il funzionamento.
- Page 17 INDUZIONE Attenzione: Il dispositivo "Basic Induction " è conforme agli standard EMC in vigore. Per questo non si dovrebbero verificare interferenze con altri apparecchi elettronici. Si consiglia agli utenti con pace-maker o altri innesti elettronici di controllare con il produttore dell'apparecchio elettronico o con il proprio medico se esso è abbastanza sicuro rispetto alla compatibilità...
-
Page 18: Funzione Pausa
Funzione pausa Quando almeno una zona di cottura è in funzione, gli elementi di riscaldamento possono essere spenti premendo il pulsante speciale assegnato per >= 1sec.. I tempi già programmati (anche per l'egg timer) vengono bloccati e non continuano durante la pausa. Anche il riscaldamento automatico e l'amplificatore vengono spenti su tutte le zone di cotture durante l'attivazione, il calcolo del calore residuo e il limite del tempo di funzionamento continuano e non vengono interrotti. -
Page 19: Istruzioni Per L'installazione
ISTRUZIONI PER L'INSTALLAZIONE Importante! le presenti istruzioni sono rivolte ad un installatore qualificato; l'apparecchiatura deve essere installata correttamente, in conformità alle norme in vigore; qualsiasi intervento deve essere eseguito con l'apparecchio elettricamente disinserito; Installazione nel top (piano del mobile) Il piano di cottura può essere installato in tutti i mobili, purchè resistenti al calore (almeno 90° C); Le dimensioni del foro da praticare per l'incasso nel piano del mobile e le distanze minime da rispettare con le pareti posteriori, laterali e sovrastanti l'apparecchio, sono indicate nelle figura 1. - Page 20 Codice Descrizione Possibile causa risoluzione errore Surriscaldamento delle parti elettriche Lasciare raffreddare ER03 & Attivazione continua dei Acqua o stoviglie sul vetro nella Pulizia della sensori per più di 10 secondi zona del Touch Control superficie segnale acustico Errore nella scheda madre Scheda di controllo difettosa Sostituire la scheda 5V - corto circuito nella scheda di potenza.
- Page 21 SERVIZIO ASSITENZA CLIENTI Prima di chiamare il servizio Assistenza Tecnica In caso di mancato funzionamento del piano Vi consigliamo di: - verificare il buon inserimento della spina nella presa di corrente; - verificare che l'afflusso di gas sia regolare. Nel caso non s'individui la causa di malfunzionamento: spegnere l'apparecchio, non manometterlo e chiamare il Servizio di Assistenza Tecnica.
-
Page 22: Avertissements Et Conseils Importants Pour L'utilisation
Avertissements et conseils importants pour l'utilisation IMPORTANT ! Ce manuel fait partie intégrante de l'appareil. Il faut le conserver en bon état et à portée de la main pour tout le cycle de vie de la table de cuisson. Lire attentivement ce manuel et toutes les indications qu'il contient avant l'utilisation de l'appareil. -
Page 23: Opération De Cuisson
CUISSON TOUT RÉGLAGE, TRAVAIL DE MAINTENANCE, ETC. DOIT ÊTRE EFFECTUÉ SUR UNE TABLE DE CUISSON DEBRANCHÉE DU SECTEUR. La caractéristique de la table en vitrocéramique est de permettre une transmission rapide de la chaleur dans le sens vertical, par les éléments chauffants placés sous la table de cuisson, aux casseroles posées sur celle-ci. La chaleur ne se propage pas en mode horizontal et donc le verre reste "froid"... - Page 24 USAGE MANETTES Dans cettes appareils les plates de cuisson sont allumèe par les manettes. Les numéros indiquent les positions de fonctionnement à température croissante, où n° 1 est le minimum. Numéro "0" est la position de eteint. Les plates extensibles , où prevu, sont allumèe après la position max. Pour activer la zone extensible, tourner la manette au-delà...
- Page 25 Marche/arrêt du Touch Control Après la mise sous tension, il faut 1 seconde à l'unité de commande pour être prête à fonctionner. L'unité de commande peut ensuite être allumée en appuyant sur la touche de MARCHE/ARRÊT. Le système électronique reste activé pendant 20 secondes. Si entre temps aucune fonction ou aucun temps de cuisson ne sont sélectionnés, le système électronique se remet automatiquement en mode STAND-BY, en émettant un signal sonore.
-
Page 26: Usage Des Circuits Multiples - Doubles Ou Triples (Option)
Usage des circuits multiples - doubles ou triples (option) Selon le modèle, l'unité peut contrôler des circuits doubles ou triples. En appuyant sur la touche circuit multiple d'un foyer activé (c'est-à-dire à la puissance de chauffe "0“), le circuit externe correspondant peut être coupé à tout moment. Les circuits externes activés sont indiqués par une LED supplémentaire. -
Page 27: Important
INDUCTION Important: La “Induction ” est conforme aux normes EMC applicables. De plus, aucun autre appareil électronique ne doit provoquer d'interférences. Les utilisateurs portant un stimulateur cardiaque ou tout autre implant électronique doivent contrôler avec le fabricant de l'appareil électronique ou leur médecin si leur appareil est conforme aux normes EMC. -
Page 28: Fonction Pause
Fonction pause Lorsqu'un ou plusieurs foyers sont en marche, le processus de chauffe peut être interrompu en appuyant sur la touche pause. Le voyant voisinde la touche pause s'allume. Si un décomptage est en cours, il sera également interrompu. Si le préchauffage automatique est en cours, il sera interrompu. Important, le décomptage du temps de préchauffage se poursuit lorsque la table est en mode pause. -
Page 29: Branchement Électrique (Fig.6)
INSTALLATION Attention: Toutes les opérations devraient être effectuées par du personnel qualifié L'installation doit etre effectuée conformément aux normes en vigueur Avant toute opération débrancher la plaque de cuisson du secteur Positionnement (fig.1) L'appareil est conçu pour être intégré sur un plan de travail. Les dimensions de la découpe dans le meuble et les distances minimums entre les parois arrière, latérales et celles situées au-dessus de l’appareil sont indiquées sur la figure n°... -
Page 30: Cause Possible
Erreur Description Cause possible Error clearing Surchauffage des spirales Refroidissement nécessaire ER03 & Pression continue sur les touches Présence d'eau ou d'ustensils de cuisine Nettoyage de la permanent tone Coupure de l'unité au bout de 10 sec sur le verre de l'unité de commande surface de travail Erreur sur le filtre de signaux Remplacer le filtre de signaux... -
Page 31: Service D Assistance À La Clientèle
SERVICE D ASSISTANCE À LA CLIENTÈLE Si vous ne pouvez pas identifier la cause d une anomalie : éteindre l appareil (ne pas le manipuler) et contacter le Service d Assistance. NUMÉRO DE SÉRIE DU PRODUIT. Où le trouver ? Il est important que vous communiquiez au Service d Assistance le code de votre produit et le numéro de série (un code de 16 caractères qui commence avec le numéro 3) ;... - Page 32 RDVE342MPN - 33801060 RDVI342B - 33801059 RDVE342 - 33801058 RDVE342MRB - 33801061 Fig.-Abb.-Rys.: Ábra-Obr. mono-circuit vitroceramic plate Ø140mm - 1.2kW mono-circuit vitroceramic plate Ø180mm - 1.8kW double-circuit vitroceramic plate Ø120/180mm - 0.7/1.7kW mono-circuit induction plate Ø160mm - 1.4kW mono-circuit induction plate Ø200mm - 2.3/3.0kW...
- Page 33 Fig-Abb-Rys-Ábra-Obr. 1 A (mm) = (340*N)-70 Numero di piani da affiancare Number of hobs to combined Nombre de appareils à mettre côte à côte...
- Page 34 Fig-Abb-Rys-Ábra-Obr.2 Fig-Abb-Rys-Ábra-Obr.3 Fig-Abb-Rys-Ábra-Obr.4 Fig-Abb-Rys-Ábra-Obr.6 Connection to the power mains Branchement au resau Podlaczenie elektryczne Conecci n a la red el éctrica Fig-Abb-Rys-Ábra-Obr.5...
- Page 35 The symbol on the product or on its packaging indicates that this product may not be treated as household waste. Instead it shall be handed over to the applicable collection point for the recycling of electrical and electronic equipment. By ensuring this product is disposed of correctly, you will help prevent potential negative consequences for the environment and human health, which could otherwise be caused by inappropriate waste handling of this product.
- Page 36 H01A7040...