Publicité
Certificación del Sistema de Gestión de la Calidad
Environmental Management System Certification
UNE-EN ISO 14001:2015
ES20/208675
Sistema de Gestión de la Calidad
Quality Management System
UNE-EN ISO 9001:2015
ES19/86566
(*) Certificación de Producto SGS
UNE-EN 60335
www.pando.es
1
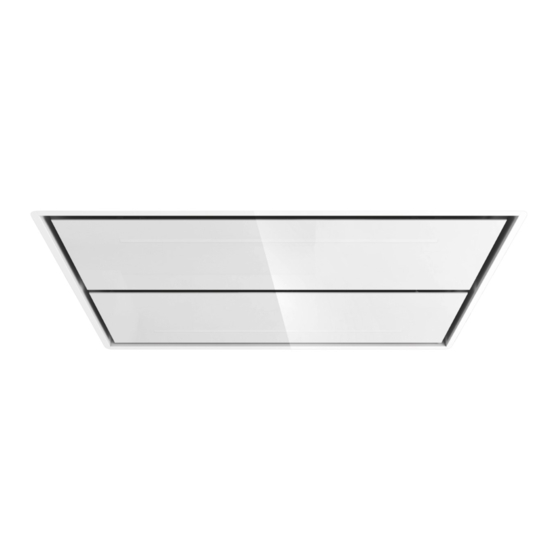
E-231
MOTOR INT.
Manual de instalación
Manual de instalação
Manuel d'installation
Installation manual
660066400159 - V21.1
Publicité
Table des Matières

Manuels Connexes pour Pando E-231


Sommaire des Matières pour Pando E-231
- Page 1 E-231 MOTOR INT. Certificación del Sistema de Gestión de la Calidad Environmental Management System Certification UNE-EN ISO 14001:2015 ES20/208675 Manual de instalación Sistema de Gestión de la Calidad Quality Management System UNE-EN ISO 9001:2015 Manual de instalação ES19/86566 Manuel d’installation (*) Certificación de Producto SGS...
- Page 2 2 2 2 2 2 2...
- Page 3 ES- El fabricante no responde por las posibles inexactitudes, imputables a errores de imprenta o de transcripción, contenidas en este manual. Se reserva el derecho de poder aportar a los propios productos aquellas modificaciones que considere necesarias o útiles, sin perjudicar las características esenciales de funcionalidad y de seguridad.
-
Page 4: Es - Instrucciones De Seguridad
(WEEE). ES - INTRODUCCIÓN Ante todo, queremos agradecerle la confianza depositada a nuestra firma, al elegir una campana extractora Pando. ES - INSTRUCCIONES DE SEGURIDAD Leer detenidamente las instrucciones de seguridad indicadas en el manual de uso e instalación adjunto en la bolsa de accesorios y documentación del producto. - Page 5 INSTALACION DE TUBO CONDUCTOR DE HUMO: Es muy recomendable la utilización de tubos de extracción de humos S.E.C. System® de Pando, que mejoran considerablemente el confort de uso y la insonorización del equipo.
- Page 6 2002/96/CE relativa aos resíduos de equipamento elétrico e eletrónico (REEE). PT - INTRODUÇÃO Antes de mais, queremos agradecer-lhe a confiança depositada na nossa empresa, ao escolher um exaustor Pando. PT - INSTRUÇÕES DE SEGURANÇA Leia atentamente as instruções de segurança indicadas no manual de uso e instalação incluído na bolsa de acessórios e documentação do produto.
- Page 7 Do exaustor e os periféricos devem ter acesso fácil e seguro para a possível manutenção ou reparo do serviço técnico oficial da Pando. A garantia não cobre os custos e recursos necessários para acessar um produto que não atende a essas condições. Se o produto não for facilmente acessível ou seguro, de acordo com os critérios SAT transmitidos na sua inspeção inicial, será...
-
Page 8: Fr - Instructions De Sécurité
électroniques (DEEE). FR - INTRODUCTION Nous souhaitons avant tout vous remercier pour la confiance que vous nous avez accordée en choisissant une hotte aspirante Pando. FR - INSTRUCTIONS DE SÉCURITÉ Lisez attentivement les consignes de sécurité indiquées dans le manuel d'utilisation et d'installation joint dans le sac d'accessoires et documentation du produit. - Page 9 Il doit être pris en compte et prévoir que la hotte et les périphériques doivent avoir un accès facile et sûr aux tâches de maintenance ou de réparation du service technique officiel de Pando (SAT). La garantie NE couvrira pas les coûts et moyens nécessaires pour accéder à un produit qui ne remplit pas ces conditions.
-
Page 10: Very Important
(WEEE). EN - INTRODUCTION Firstly, we would like to thank you for your confidence in our firm when you chose a Pando extractor hood. EN - SAFETY INSTRUCTIONS Read carefully the safety instructions indicated in the use and installation manual enclosed in the accessories and product documentation bag. - Page 11 CEILING HEIGHT: For optimum operation of the hood, the distance between the hob or cooking area and the base of the hood should be between 140 and 170cm. For other distances outside this range consult our Pando Technical Division. POSITION OF THE HOOD: The hood must be centred over the cooking area.
- Page 12 CONTENIDO / CONTEÚDO / CONTENU / CONTENT (x1) Plantilla A(x2) E (x1) B (x4) (x1) D (x4) C (x4) M6X250 G (x1) 100x180 (x4) (x1) 2000mm Ø150 F (x1) 100x180X280...
- Page 13 HERRAMIENTAS NECESARIAS / FERRAMENTAS NECESSÁRIAS / LES OUTILS NÉCESSAIRES / TOOLS REQUIRES Ø10 Ø8 COTAS / DIMENSÕES / COTES / DIMENSIONS...
- Page 14 ¡PELIGRO! PERIGO! DANGER! INSTALACIÓN A FALSO TECHO CON GRAPAS No instale la campana directo a paneles de cartón yeso u otra superficie no resistente. Utilice los accesorios (Dx2) subministrados con la campana e instale un refuerzo al falso techo. PT- INSTALAÇÃO AO TETO FALSO COM GRAMPOS Não instale o exaustor diretamente à...
- Page 15 INSTALACIÓN / INSTALAÇÃO / INSTALLATION / INSTALLATION p.16 OPCIÓNA A / OPÇÃO A / OPTION A / OPTION A ES- Anclaje a falso techo con grapas PT- Ancoragem ao teto falso com grampos FR- Ancrage au faux plafond avec des agrafes EN- Fixing to false ceiling with clamps INSTALACIÓN / INSTALAÇÃO / INSTALLATION / INSTALLATION p.35...
- Page 16 INSTALACIÓN / INSTALAÇÃO / INSTALLATION / INSTALLATION OPCIÓN OPÇÃO OPTION OPTION ES- ANCLAJE A FALSO TECHO CON GRAPAS PT- ANCORAGEM AO TETO FALSO COM GRAMPOS FR- ANCRAGE AU FAUX PLAFOND AVEC DES AGRAFES ANCHORAGE TO FALSE CEILING WITH STAPLES Instalar a falso techo reforzado, preparado para soportar mínimo 75 Kg de peso. No instale la campana directo a paneles de cartón yeso u otra superficie no resistente.
- Page 17 INSTALACIÓN / INSTALAÇÃO / INSTALLATION / INSTALLATION OPCIÓNA A / OPÇÃO A / OPTION A / OPTION A ENCASTRE / INSIRA / ENCASTREMENT / INSERT 1068 min. 200mm Regulación grapas, máximo 30mm. Espessura da placa do teto falso. Réglementation des agrafes, maximum 30mm. Clamps regulation, maximum 30mm.
- Page 18 INSTALACIÓN / INSTALAÇÃO / INSTALLATION / INSTALLATION OPCIÓNA A / OPÇÃO A / OPTION A / OPTION A...
- Page 19 INSTALACIÓN / INSTALAÇÃO / INSTALLATION / INSTALLATION OPCIÓNA A / OPÇÃO A / OPTION A / OPTION A A(x2) A(x2) ES- Instalar un soporte adecuado, preparado para soportar mínimo 75 Kg de peso. No instale la campana directo a paneles de cartón yeso u otra superficie no resistente. PT- Instale um suporte adequado, preparado para suportar um peso mínimo 75 Kg .
- Page 20 INSTALACIÓN / INSTALAÇÃO / INSTALLATION / INSTALLATION OPCIÓNA A / OPÇÃO A / OPTION A / OPTION A (x2) (x2)
- Page 21 INSTALACIÓN / INSTALAÇÃO / INSTALLATION / INSTALLATION OPCIÓNA A / OPÇÃO A / OPTION A / OPTION A (x4)
- Page 22 INSTALACIÓN / INSTALAÇÃO / INSTALLATION / INSTALLATION OPCIÓNA A / OPÇÃO A / OPTION A / OPTION A (x6) G (x1)
- Page 23 INSTALACIÓN / INSTALAÇÃO / INSTALLATION / INSTALLATION OPCIÓNA A / OPÇÃO A / OPTION A / OPTION A OPCIONAL/ OPCIONAL/ EN OPTION/ OPTIONAL CAMBIO CAJA ELECTRÓNICA / MUDANÇA DE CAIXA ELETRÔNICA / CHANGER LA POSITION DE LA BOÎTE ÉLECTRONIQUE / CHANGE ELECTRONIC BOX POSITION 1º...
- Page 24 INSTALACIÓN / INSTALAÇÃO / INSTALLATION / INSTALLATION OPCIÓNA A / OPÇÃO A / OPTION A / OPTION A OPCIONAL/ OPCIONAL/ EN OPTION/ OPTIONAL ESCOJER SALIDA / ESCOLHA A SAÍDA / CHOISISSEZ LA SORTIE / CHOOSE OUTPUT (x4) 3º 1º 2º...
- Page 25 INSTALACIÓN / INSTALAÇÃO / INSTALLATION / INSTALLATION OPCIÓNA A / OPÇÃO A / OPTION A / OPTION A B (X4) (X4)
- Page 26 INSTALACIÓN / INSTALAÇÃO / INSTALLATION / INSTALLATION OPCIÓNA A / OPÇÃO A / OPTION A / OPTION A E(x1)
- Page 27 INSTALACIÓN / INSTALAÇÃO / INSTALLATION / INSTALLATION OPCIÓNA A / OPÇÃO A / OPTION A / OPTION A OPCIONAL/ OPCIONAL/ EN OPTION/ OPTIONAL SALIDA LATERAL LARGO / SAÍDA LATERAL LONGO/ SORTIE LONG LATÉRALE / LONG SIDE OUTPUT...
- Page 28 INSTALACIÓN / INSTALAÇÃO / INSTALLATION / INSTALLATION OPCIÓNA A / OPÇÃO A / OPTION A / OPTION A...
- Page 29 INSTALACIÓN / INSTALAÇÃO / INSTALLATION / INSTALLATION OPCIÓNA A / OPÇÃO A / OPTION A / OPTION A Ajustar hasta falso techo Ajustar ao teto falso Ajuster au faux plafond Fix to false ceiling max. 0.5 Newtons /m² (X4) (X4)
- Page 30 INSTALACIÓN / INSTALAÇÃO / INSTALLATION / INSTALLATION OPCIÓNA A / OPÇÃO A / OPTION A / OPTION A...
- Page 31 INSTALACIÓN / INSTALAÇÃO / INSTALLATION / INSTALLATION OPCIÓNA A / OPÇÃO A / OPTION A / OPTION A...
- Page 32 INSTALACIÓN / INSTALAÇÃO / INSTALLATION / INSTALLATION OPCIÓNA A / OPÇÃO A / OPTION A / OPTION A (X4)
- Page 33 INSTALACIÓN / INSTALAÇÃO / INSTALLATION / INSTALLATION OPCIÓNA A / OPÇÃO A / OPTION A / OPTION A - PRIMER ENCENDIDO Y PUESTA EN MARCHA / SINCRONIZACIÓN CONTROL REMOTO p.55 PRIMEIRA LIGAÇÃO E COLOCAÇÃO EM FUNCIONAMENTO/SINCRONIZAÇÃO DO CONTROLO REMOTO p.56 - LE PREMIER ALLUMAGE ET LA MISE EN PLACE / SYNCHRONISATION COMMANDE À...
- Page 34 INSTALACIÓN / INSTALAÇÃO / INSTALLATION / INSTALLATION OPCIÓNA A / OPÇÃO A / OPTION A / OPTION A...
- Page 35 INSTALACIÓN / INSTALAÇÃO / INSTALLATION / INSTALLATION OPCIÓN OPÇÃO OPTION OPTION ES- ANCLAJE A FORJADO CON VARILLAS ROSCADAS PT- ANCORA DE TETO FORJADA COM HASTES ROSCADAS FR- ANCRAGE AU PLANCHER AVEC TIGES FILETEES EN-FIXING TO THE FORGE USING THREADED RODS...
- Page 36 INSTALACIÓN / INSTALAÇÃO / INSTALLATION / INSTALLATION OPCIÓNA B / OPÇÃO B / OPTION B / OPTION B ENCASTRE / INSIRA / ENCASTREMENT / INSERT 1 268 (200-270) C (x4)
- Page 37 INSTALACIÓN / INSTALAÇÃO / INSTALLATION / INSTALLATION OPCIÓNA B / OPÇÃO B / OPTION B / OPTION B...
- Page 38 INSTALACIÓN / INSTALAÇÃO / INSTALLATION / INSTALLATION OPCIÓNA B / OPÇÃO B / OPTION B / OPTION B A(x2) A(x2)
- Page 39 INSTALACIÓN / INSTALAÇÃO / INSTALLATION / INSTALLATION OPCIÓNA B / OPÇÃO B / OPTION B / OPTION B...
- Page 40 INSTALACIÓN / INSTALAÇÃO / INSTALLATION / INSTALLATION OPCIÓNA B / OPÇÃO B / OPTION B / OPTION B C (x4)
- Page 41 INSTALACIÓN / INSTALAÇÃO / INSTALLATION / INSTALLATION OPCIÓNA B / OPÇÃO B / OPTION B / OPTION B (x2) (x2)
- Page 42 INSTALACIÓN / INSTALAÇÃO / INSTALLATION / INSTALLATION OPCIÓNA B / OPÇÃO B / OPTION B / OPTION B (x4)
- Page 43 INSTALACIÓN / INSTALAÇÃO / INSTALLATION / INSTALLATION OPCIÓNA B / OPÇÃO B / OPTION B / OPTION B...
- Page 44 INSTALACIÓN / INSTALAÇÃO / INSTALLATION / INSTALLATION OPCIÓNA B / OPÇÃO B / OPTION B / OPTION B (x14)
- Page 45 INSTALACIÓN / INSTALAÇÃO / INSTALLATION / INSTALLATION OPCIÓNA B / OPÇÃO B / OPTION B / OPTION B (X4) (X4) CLICK...
- Page 46 INSTALACIÓN / INSTALAÇÃO / INSTALLATION / INSTALLATION OPCIÓNA B / OPÇÃO B / OPTION B / OPTION B D (x4) (X4) (X4)
- Page 47 INSTALACIÓN / INSTALAÇÃO / INSTALLATION / INSTALLATION OPCIÓNA B / OPÇÃO B / OPTION B / OPTION B F (x1) G (x1) E (x1)
- Page 48 INSTALACIÓN / INSTALAÇÃO / INSTALLATION / INSTALLATION OPCIÓNA B / OPÇÃO B / OPTION B / OPTION B (x5)
- Page 49 INSTALACIÓN / INSTALAÇÃO / INSTALLATION / INSTALLATION OPCIÓNA B / OPÇÃO B / OPTION B / OPTION B Ajustar hasta falso techo Ajustar ao teto falso Ajuster au faux plafond Fix to false ceiling max. 0.5 Newtons /m² (X4) (X4)
- Page 50 INSTALACIÓN / INSTALAÇÃO / INSTALLATION / INSTALLATION OPCIÓNA B / OPÇÃO B / OPTION B / OPTION B (x14)
- Page 51 INSTALACIÓN / INSTALAÇÃO / INSTALLATION / INSTALLATION OPCIÓNA B / OPÇÃO B / OPTION B / OPTION B...
- Page 52 INSTALACIÓN / INSTALAÇÃO / INSTALLATION / INSTALLATION OPCIÓNA B / OPÇÃO B / OPTION B / OPTION B (x6) (x6)
- Page 53 INSTALACIÓN / INSTALAÇÃO / INSTALLATION / INSTALLATION OPCIÓNA B / OPÇÃO B / OPTION B / OPTION B (X4) (X2)
- Page 54 INSTALACIÓN / INSTALAÇÃO / INSTALLATION / INSTALLATION OPCIÓNA B / OPÇÃO B / OPTION B / OPTION B - PRIMER ENCENDIDO Y PUESTA EN MARCHA / SINCRONIZACIÓN CONTROL REMOTO p.55 PRIMEIRA LIGAÇÃO E COLOCAÇÃO EM FUNCIONAMENTO/SINCRONIZAÇÃO DO CONTROLO REMOTO p.56 - LE PREMIER ALLUMAGE ET LA MISE EN PLACE / SYNCHRONISATION COMMANDE À...
- Page 55 - PRIMER ENCENDIDO Y PUESTA EN MARCHA / SINCRONIZACIÓN CONTROL REMOTO ON/OFF, Pulsando este símbolo encendemos el motor, si volvemos a pulsar lo apagamos. Pulsando este símbolo bajamos la velocidad el motor. Pulsando este símbolo aumentamos la velocidad del motor. Nota: Si dispone de una versión de motor que supere los 650m³/h la 3ª...
- Page 56 PRIMEIRA LIGAÇÃO E COLOCAÇÃO EM FUNCIONAMENTO/SINCRONIZAÇÃO DO CONTROLO REMOTO ON/OFF, Pressione este símbolo para ligar o motor e pressione novamente para desligá Pressione este símbolo para reduzir a velocidade do motor. Pressione este símbolo para aumentar a velocidade do motor Nota: se tiver uma versão motor que exceda 650mm ³/h, a 3ª...
-
Page 57: Ne Toucher Pas Aucune Touche De La Télécommande Jusqu'à Après 5 Secondes
- LE PREMIER ALLUMAGE ET LA MISE EN PLACE / SYNCHRONISATION COMMANDE À DISTANCE ON/OFF, Permet de mettre en marche le moteur, si on appuie de nouveau il s’éteint. Permet de diminuer la vitesse du moteur. Permet d’augmenter la vitesse du moteur. Note: Si vous avez une version de moteur qui dépasse 650mm ³/h, la 3ème ou 4ème vitesse sera chronométrée. - Page 58 - THE FIRST IGNITION AND PUTTING IN MARCH / SYNCHRONIZATION REMOTE CONTROL ON/OFF, Press this symbol to turn on the motor, press again to turn off. Press this symbol to reduce the motor speed. Press this symbol to increase motor speed, Note: If you have a motor version that exceeds 650m³/h, 3rd or 4th speed will be be time limited.(*see Ecodesign Timer section).
- Page 59 MANTENIMIENTO / MANUTENÇÃO / MAINTENANCE / MAINTENANCE FILTRO ALUMINIO / FILTRO ALUMÍNIO / FILTRE D´ALUMINIUM / ALUMINIUM FILTER...
- Page 60 MANTENIMIENTO / MANUTENÇÃO / MAINTENANCE / MAINTENANCE FILTRO DE CARBON ACTIVADO (FCLR-AE), LAVABLE Y REACTIBABLE DE ALTA EFICIENCIA ( OPCIONAL) FILTRO DE CARVAO ATIVADO (FCLR-AE), LAVÁVEL E REACTIBABLE ALTA EFICIÊNCIA. (OPCIONAL) FILTRE AU CHARBON ACTIVÉ (FCLR), LAVABLE ET RETRIGGERABLE HAUTE EFFICACITÉ. (EN OPTION) ACTIVATED CARBON FILTER (FCLR), WASHABLE AND REACTIVATABLE HIGH EFFICIENCY.
- Page 61 LED type lights involve a complex manipulation in addition to an air connection involving an internal connector risk of electric shock, therefore this type of handling must be done by the Pando official technical service or a qualified and authorized professional. The manufacturer will not be liable for any damage caused by mishandling of the LED lights by unauthorized personnel.
- Page 62 INOXPAN S.L. NOTAS/NOTAS/REMARQUES/NOTES:...
- Page 63 INOXPAN S.L.
- Page 64 Av. El Molí de les Mateves,11 Apdo. Correos nº 21 08310 ARGENTONA (Barcelona - Spain) Tel. +34 93 757 94 11 Fax +34 93 757 96 53 www.pando.es com.pando@pando.es Export: export@pando.es Tel. 902 41 55 11 Certificación del Sistema de Gestión de la Calidad...
-
Page 65: Manual De Instalação
E-231 MOTOR EXT. Certificación del Sistema de Gestión de la Calidad Environmental Management System Certification UNE-EN ISO 14001:2015 ES20/208675 Manual de instalación Sistema de Gestión de la Calidad Quality Management System UNE-EN ISO 9001:2015 Manual de instalação ES19/86566 Manuel d’installation (*) Certificación de Producto SGS... - Page 66 2 2 2...
- Page 67 ES- El fabricante no responde por las posibles inexactitudes, imputables a errores de imprenta o de transcripción, contenidas en este manual. Se reserva el derecho de poder aportar a los propios productos aquellas modificaciones que considere necesarias o útiles, sin perjudicar las características esenciales de funcionalidad y de seguridad.
- Page 68 (WEEE). ES - INTRODUCCIÓN Ante todo, queremos agradecerle la confianza depositada a nuestra firma, al elegir una campana extractora Pando. ES - INSTRUCCIONES DE SEGURIDAD Leer detenidamente las instrucciones de seguridad indicadas en el manual de uso e instalación adjunto en la bolsa de accesorios y documentación del producto.
- Page 69 INSTALACION DE TUBO CONDUCTOR DE HUMO: Es muy recomendable la utilización de tubos de extracción de humos S.E.C. System® de Pando, que mejoran considerablemente el confort de uso y la insonorización del equipo.
- Page 70 2002/96/CE relativa aos resíduos de equipamento elétrico e eletrónico (REEE). PT - INTRODUÇÃO Antes de mais, queremos agradecer-lhe a confiança depositada na nossa empresa, ao escolher um exaustor Pando. PT - INSTRUÇÕES DE SEGURANÇA Leia atentamente as instruções de segurança indicadas no manual de uso e instalação incluído na bolsa de acessórios e documentação do produto.
- Page 71 Do exaustor e os periféricos devem ter acesso fácil e seguro para a possível manutenção ou reparo do serviço técnico oficial da Pando. A garantia não cobre os custos e recursos necessários para acessar um produto que não atende a essas condições. Se o produto não for facilmente acessível ou seguro, de acordo com os critérios SAT transmitidos na sua inspeção inicial, será...
- Page 72 électroniques (DEEE). FR - INTRODUCTION Nous souhaitons avant tout vous remercier pour la confiance que vous nous avez accordée en choisissant une hotte aspirante Pando. FR - INSTRUCTIONS DE SÉCURITÉ Lisez attentivement les consignes de sécurité indiquées dans le manuel d'utilisation et d'installation joint dans le sac d'accessoires et documentation du produit.
- Page 73 Il doit être pris en compte et prévoir que la hotte et les périphériques doivent avoir un accès facile et sûr aux tâches de maintenance ou de réparation du service technique officiel de Pando (SAT). La garantie NE couvrira pas les coûts et moyens nécessaires pour accéder à un produit qui ne remplit pas ces conditions.
- Page 74 (WEEE). EN - INTRODUCTION Firstly, we would like to thank you for your confidence in our firm when you chose a Pando extractor hood. EN - SAFETY INSTRUCTIONS Read carefully the safety instructions indicated in the use and installation manual enclosed in the accessories and product documentation bag.
- Page 75 CEILING HEIGHT: For optimum operation of the hood, the distance between the hob or cooking area and the base of the hood should be between 140 and 170cm. For other distances outside this range consult our Pando Technical Division. POSITION OF THE HOOD: The hood must be centred over the cooking area.
- Page 76 CONTENIDO / CONTEÚDO / CONTENU / CONTENT (x1) Plantilla E (x1) B (x4) A(x2) (x1) D (x4) C (x4) M6X250 MOTOR V.1550 100x180 Ø150 MOTOR V.2450 / V.2350 100x260 Ø200 Ø200 INT.Ø203 INT.Ø203 EXT.Ø253 EXT.Ø253...
- Page 77 HERRAMIENTAS NECESARIAS / FERRAMENTAS NECESSÁRIAS / LES OUTILS NÉCESSAIRES / TOOLS REQUIRED Ø10 Ø8 COTAS / DIMENSÕES / COTES / DIMENSIONS...
- Page 78 ¡PELIGRO! PERIGO! DANGER! INSTALACIÓN A FALSO TECHO CON GRAPAS No instale la campana directo a paneles de cartón yeso u otra superficie no resistente. Utilice los accesorios (Dx2) subministrados con la campana e instale un refuerzo al falso techo. PT- INSTALAÇÃO AO TETO FALSO COM GRAMPOS Não instale o exaustor diretamente à...
- Page 79 OPCIONAL/ OPCIONAL/ EN OPTION/ OPTIONAL ESCOGER SALIDA / ESCOLHA A SAÍDA / CHOISISSEZ LA SORTIE / CHOOSE OUTPUT...
- Page 80 INSTALACIÓN / INSTALAÇÃO / INSTALLATION / INSTALLATION p.17 OPCIÓNA A / OPÇÃO A / OPTION A / OPTION A ES- Anclaje a falso techo con grapas PT- Ancoragem ao teto falso com grampos FR- Ancrage au faux plafond avec des agrafes EN- Fixing to false ceiling with clamps INSTALACIÓN / INSTALAÇÃO / INSTALLATION / INSTALLATION p.34...
- Page 81 INSTALACIÓN / INSTALAÇÃO / INSTALLATION / INSTALLATION OPCIÓN OPÇÃO OPTION OPTION ES- ANCLAJE A FALSO TECHO CON GRAPAS PT- ANCORAGEM AO TETO FALSO COM GRAMPOS FR- ANCRAGE AU FAUX PLAFOND AVEC DES AGRAFES ANCHORAGE TO FALSE CEILING WITH STAPLES Instalar a falso techo reforzado, preparado para soportar mínimo 45 Kg de peso. No instale la campana directo a paneles de cartón yeso u otra superficie no resistente.
- Page 82 INSTALACIÓN / INSTALAÇÃO / INSTALLATION / INSTALLATION OPCIÓNA A / OPÇÃO A / OPTION A / OPTION A ENCASTRE / INSIRA / ENCASTREMENT / INSERT 1268 Regulación grapas, máximo 30mm. Espessura da placa do teto falso 30mm. Réglementation des agrafes, maximum 30 mm. Clamps regulation, maximum 30mm.
- Page 83 INSTALACIÓN / INSTALAÇÃO / INSTALLATION / INSTALLATION OPCIÓNA A / OPÇÃO A / OPTION A / OPTION A...
- Page 84 INSTALACIÓN / INSTALAÇÃO / INSTALLATION / INSTALLATION OPCIÓNA A / OPÇÃO A / OPTION A / OPTION A A(x2) A(x2) ES- Instalar un soporte adecuado, preparado para soportar mínimo 45 Kg de peso. No instale la campana directo a paneles de cartón yeso u otra superficie no resistente. PT- Instale um suporte adequado, preparado para suportar um peso mínimo 45 Kg .
- Page 85 INSTALACIÓN / INSTALAÇÃO / INSTALLATION / INSTALLATION OPCIÓNA A / OPÇÃO A / OPTION A / OPTION A (x2) (x2)
- Page 86 INSTALACIÓN / INSTALAÇÃO / INSTALLATION / INSTALLATION OPCIÓNA A / OPÇÃO A / OPTION A / OPTION A (x4)
- Page 87 INSTALACIÓN / INSTALAÇÃO / INSTALLATION / INSTALLATION OPCIÓNA A / OPÇÃO A / OPTION A / OPTION A (x6) G (x1)
- Page 88 INSTALACIÓN / INSTALAÇÃO / INSTALLATION / INSTALLATION OPCIÓNA A / OPÇÃO A / OPTION A / OPTION A B (X4) (X4)
- Page 89 INSTALACIÓN / INSTALAÇÃO / INSTALLATION / INSTALLATION OPCIÓNA A / OPÇÃO A / OPTION A / OPTION A E(x1)
- Page 90 INSTALACIÓN / INSTALAÇÃO / INSTALLATION / INSTALLATION OPCIÓNA A / OPÇÃO A / OPTION A / OPTION A OPCIONAL/ OPCIONAL/ EN OPTION/ OPTIONAL SALIDA LATERAL LARGO / SAÍDA LATERAL LONGO/ SORTIE LONG LATÉRALE / LONG SIDE OUTPUT...
- Page 91 INSTALACIÓN / INSTALAÇÃO / INSTALLATION / INSTALLATION OPCIÓNA A / OPÇÃO A / OPTION A / OPTION A...
- Page 92 INSTALACIÓN / INSTALAÇÃO / INSTALLATION / INSTALLATION OPCIÓNA A / OPÇÃO A / OPTION A / OPTION A Ajustar hasta falso techo Ajustar ao teto falso Ajuster au faux plafond Fix to false ceiling max. 0.5 Newtons /m² (X4) (X4)
- Page 93 INSTALACIÓN / INSTALAÇÃO / INSTALLATION / INSTALLATION OPCIÓNA A / OPÇÃO A / OPTION A / OPTION A...
- Page 94 INSTALACIÓN / INSTALAÇÃO / INSTALLATION / INSTALLATION OPCIÓNA A / OPÇÃO A / OPTION A / OPTION A...
- Page 95 INSTALACIÓN / INSTALAÇÃO / INSTALLATION / INSTALLATION OPCIÓNA A / OPÇÃO A / OPTION A / OPTION A (X4) (X2)
- Page 96 INSTALACIÓN / INSTALAÇÃO / INSTALLATION / INSTALLATION OPCIÓNA A / OPÇÃO A / OPTION A / OPTION A - PRIMER ENCENDIDO Y PUESTA EN MARCHA / SINCRONIZACIÓN CONTROL REMOTO p.54 PRIMEIRA LIGAÇÃO E COLOCAÇÃO EM FUNCIONAMENTO/SINCRONIZAÇÃO DO CONTROLO REMOTO p.55 - LE PREMIER ALLUMAGE ET LA MISE EN PLACE / SYNCHRONISATION COMMANDE À...
- Page 97 INSTALACIÓN / INSTALAÇÃO / INSTALLATION / INSTALLATION OPCIÓNA A / OPÇÃO A / OPTION A / OPTION A...
- Page 98 INSTALACIÓN / INSTALAÇÃO / INSTALLATION / INSTALLATION OPCIÓN OPÇÃO OPTION OPTION ES- ANCLAJE A FORJADO CON VARILLAS ROSCADAS PT- ANCORA DE TETO FORJADA COM HASTES ROSCADAS FR- ANCRAGE AU PLANCHER AVEC TIGES FILETEES FIXING TO THE FORGE USING THREADED RODS...
- Page 99 INSTALACIÓN / INSTALAÇÃO / INSTALLATION / INSTALLATION OPCIÓNA B / OPÇÃO B / OPTION B / OPTION B ENCASTRE / INSIRA / ENCASTREMENT / INSERT 1 268 (200-375) 100x180/260 X: min. 200mm max. 375mm Ø200 X: min. 300mm max. 375mm C (x4)
- Page 100 INSTALACIÓN / INSTALAÇÃO / INSTALLATION / INSTALLATION OPCIÓNA B / OPÇÃO B / OPTION B / OPTION B...
- Page 101 INSTALACIÓN / INSTALAÇÃO / INSTALLATION / INSTALLATION OPCIÓNA B / OPÇÃO B / OPTION B / OPTION B A(x2) A(x2)
- Page 102 INSTALACIÓN / INSTALAÇÃO / INSTALLATION / INSTALLATION OPCIÓNA B / OPÇÃO B / OPTION B / OPTION B...
- Page 103 INSTALACIÓN / INSTALAÇÃO / INSTALLATION / INSTALLATION OPCIÓNA B / OPÇÃO B / OPTION B / OPTION B C (x4)
- Page 104 INSTALACIÓN / INSTALAÇÃO / INSTALLATION / INSTALLATION OPCIÓNA B / OPÇÃO B / OPTION B / OPTION B (x2) (x2)
- Page 105 INSTALACIÓN / INSTALAÇÃO / INSTALLATION / INSTALLATION OPCIÓNA B / OPÇÃO B / OPTION B / OPTION B (x4)
- Page 106 INSTALACIÓN / INSTALAÇÃO / INSTALLATION / INSTALLATION OPCIÓNA B / OPÇÃO B / OPTION B / OPTION B...
- Page 107 INSTALACIÓN / INSTALAÇÃO / INSTALLATION / INSTALLATION OPCIÓNA B / OPÇÃO B / OPTION B / OPTION B (x14)
- Page 108 INSTALACIÓN / INSTALAÇÃO / INSTALLATION / INSTALLATION OPCIÓNA B / OPÇÃO B / OPTION B / OPTION B (X4) (X4) CLICK...
- Page 109 INSTALACIÓN / INSTALAÇÃO / INSTALLATION / INSTALLATION OPCIÓNA B / OPÇÃO B / OPTION B / OPTION B D (x4) (X4) (X4)
- Page 110 INSTALACIÓN / INSTALAÇÃO / INSTALLATION / INSTALLATION OPCIÓNA B / OPÇÃO B / OPTION B / OPTION B...
- Page 111 INSTALACIÓN / INSTALAÇÃO / INSTALLATION / INSTALLATION OPCIÓNA B / OPÇÃO B / OPTION B / OPTION B E (x1)
- Page 112 INSTALACIÓN / INSTALAÇÃO / INSTALLATION / INSTALLATION OPCIÓNA B / OPÇÃO B / OPTION B / OPTION B Ajustar hasta falso techo Ajustar ao teto falso Ajuster au faux plafond Fix to false ceiling max. 0.5 Newtons /m² (X4) (X4)
- Page 113 INSTALACIÓN / INSTALAÇÃO / INSTALLATION / INSTALLATION OPCIÓNA B / OPÇÃO B / OPTION B / OPTION B (x14)
- Page 114 INSTALACIÓN / INSTALAÇÃO / INSTALLATION / INSTALLATION OPCIÓNA B / OPÇÃO B / OPTION B / OPTION B (x6)
- Page 115 INSTALACIÓN / INSTALAÇÃO / INSTALLATION / INSTALLATION OPCIÓNA B / OPÇÃO B / OPTION B / OPTION B (X4) (X2)
- Page 116 INSTALACIÓN / INSTALAÇÃO / INSTALLATION / INSTALLATION OPCIÓNA B / OPÇÃO B / OPTION B / OPTION B - PRIMER ENCENDIDO Y PUESTA EN MARCHA / SINCRONIZACIÓN CONTROL REMOTO p.54 PRIMEIRA LIGAÇÃO E COLOCAÇÃO EM FUNCIONAMENTO/SINCRONIZAÇÃO DO CONTROLO REMOTO p.55 - LE PREMIER ALLUMAGE ET LA MISE EN PLACE / SYNCHRONISATION COMMANDE À...
- Page 117 INSTALACIÓN / INSTALAÇÃO / INSTALLATION / INSTALLATION OPCIÓNA B / OPÇÃO B / OPTION B / OPTION B...
- Page 118 - PRIMER ENCENDIDO Y PUESTA EN MARCHA / SINCRONIZACIÓN CONTROL REMOTO ON/OFF, Pulsando este símbolo encendemos el motor, si volvemos a pulsar lo apagamos. Pulsando este símbolo bajamos la velocidad el motor. Pulsando este símbolo aumentamos la velocidad del motor. Nota: Si dispone de una versión de motor que supere los 650m³/h la 3ª...
- Page 119 PRIMEIRA LIGAÇÃO E COLOCAÇÃO EM FUNCIONAMENTO/SINCRONIZAÇÃO DO CONTROLO REMOTO ON/OFF, Pressione este símbolo para ligar o motor e pressione novamente para desligá Pressione este símbolo para reduzir a velocidade do motor. Pressione este símbolo para aumentar a velocidade do motor Nota: se tiver uma versão motor que exceda 650mm ³/h, a 3ª...
- Page 120 - LE PREMIER ALLUMAGE ET LA MISE EN PLACE / SYNCHRONISATION COMMANDE À DISTANCE ON/OFF, Permet de mettre en marche le moteur, si on appuie de nouveau il s’éteint. Permet de diminuer la vitesse du moteur. Permet d’augmenter la vitesse du moteur. Note: Si vous avez une version de moteur qui dépasse 650mm ³/h, la 3ème ou 4ème vitesse sera chronométrée.
- Page 121 - THE FIRST IGNITION AND PUTTING IN MARCH / SYNCHRONIZATION REMOTE CONTROL ON/OFF, Press this symbol to turn on the motor, press again to turn off. Press this symbol to reduce the motor speed. Press this symbol to increase motor speed, Note: If you have a motor version that exceeds 650m³/h, 3rd or 4th speed will be be time limited.(*see Ecodesign Timer section).
- Page 122 MANTENIMIENTO / MANUTENÇÃO / MAINTENANCE / MAINTENANCE FILTRO ALUMINIO / FILTRO ALUMÍNIO / FILTRE D´ALUMINIUM / ALUMINIUM FILTER...
- Page 123 MANTENIMIENTO / MANUTENÇÃO / MAINTENANCE / MAINTENANCE FILTRO DE CARBON ACTIVADO (FCLR-AE), LAVABLE Y REACTIBABLE DE ALTA EFICIENCIA ( OPCIONAL) FILTRO DE CARVAO ATIVADO (FCLR-AE), LAVÁVEL E REACTIBABLE ALTA EFICIÊNCIA. (OPCIONAL) FILTRE AU CHARBON ACTIVÉ (FCLR), LAVABLE ET RETRIGGERABLE HAUTE EFFICACITÉ. (EN OPTION) ACTIVATED CARBON FILTER (FCLR), WASHABLE AND REACTIVATABLE HIGH EFFICIENCY.
- Page 124 LED type lights involve a complex manipulation in addition to an air connection involving an internal connector risk of electric shock, therefore this type of handling must be done by the Pando official technical service or a qualified and authorized professional. The manufacturer will not be liable for any damage caused by mishandling of the LED lights by unauthorized personnel.
- Page 125 INOXPAN S.L. NOTAS/NOTAS/REMARQUES/NOTES:...
- Page 126 INOXPAN S.L. NOTAS/NOTAS/REMARQUES/NOTES:...
- Page 127 INOXPAN S.L.
- Page 128 Av. El Molí de les Mateves,11 Apdo. Correos nº 21 08310 ARGENTONA (Barcelona - Spain) Tel. +34 93 757 94 11 Fax +34 93 757 96 53 www.pando.es com.pando@pando.es Export: export@pando.es Tel. 902 41 55 11 Certificación del Sistema de Gestión de la Calidad...