Publicité
Les langues disponibles
Les langues disponibles
Liens rapides
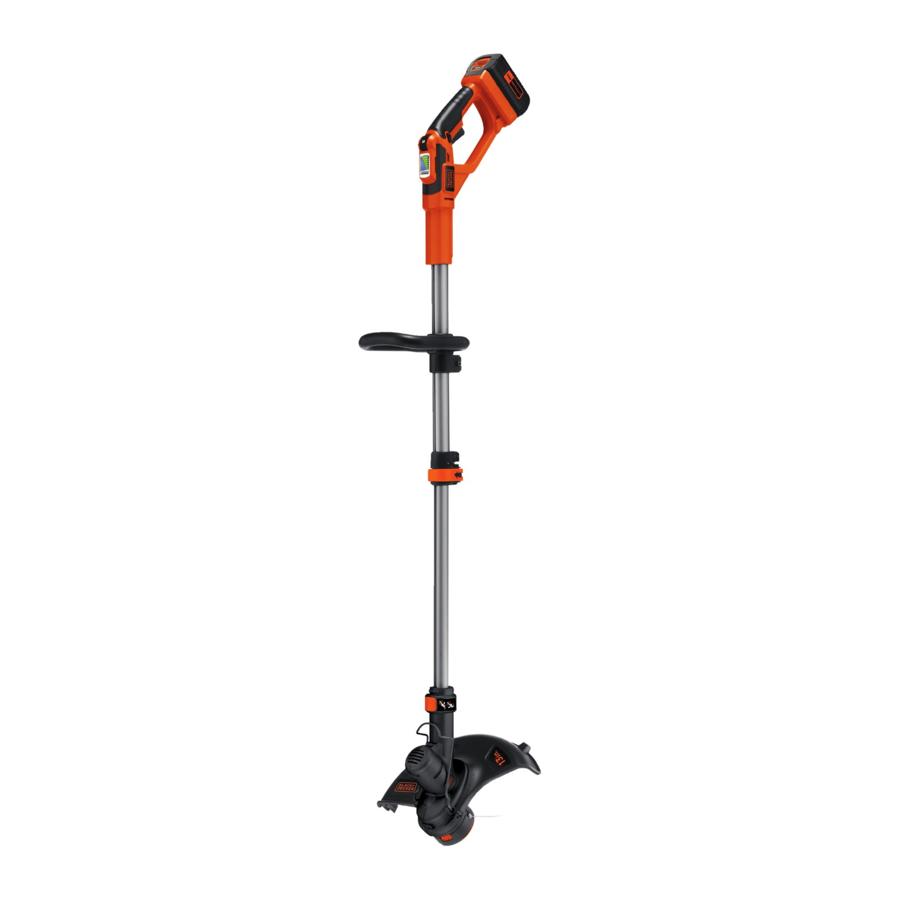
36V LITHIUM TRIMMER / EDGER
INSTRUCTION MANUAL
Model Number LST136
Thank you for choosing Black & Decker! Go
to www.BlackandDecker.com/NewOwner
to register your new product.
PLEASE READ BEFORE RETURNING
If you have a question or experience a problem with your
THIS PRODUCT FOR ANY REASON:
Black & Decker purchase, go to
for instant answers 24 hours a day.
WWW.BLACKANDDECKER.COM/INSTANTANSWERS
If you canʼt find the answer or do not have access to the internet,
call 1-800-544-6986 from 8 a.m. to 5 p.m. EST Mon. - Fri
to speak with an agent.
Please have the catalog number available when you call.
SAVE THIS MANUAL FOR FUTURE REFERENCE.
VEA EL ESPAÑOL EN LA CONTRAPORTADA.
POUR LE FRANÇAIS, VOIR LA COUVERTURE ARRIÈRE.
INSTRUCTIVO DE OPERACIÓN, CENTROS DE SERVICIO Y
PÓLIZA DE GARANTÍA. ADVERTENCIA: LÉASE ESTE
INSTRUCTIVO ANTES DE USAR EL PRODUCTO.
All manuals and user guides at all-guides.com
1
Model # LST136
• The guard must be installed before trimming or edging - if
KEY INFORMATION YOU SHOULD KNOW:
not, the motor will overheat (page 8).
• When replacing the line, use only .065 inch diameter
ROUND line (B&D Model #AF-100 is recommended) -
otherwise the tool will not function properly (page 11).
• Do not bump the feed head against the ground - it will
disrupt the feed mechanism.
Publicité

Manuels Connexes pour Black & Decker LST136


Sommaire des Matières pour Black & Decker LST136
- Page 1 All manuals and user guides at all-guides.com Model # LST136 36V LITHIUM TRIMMER / EDGER INSTRUCTION MANUAL Model Number LST136 Thank you for choosing Black & Decker! Go to www.BlackandDecker.com/NewOwner to register your new product. PLEASE READ BEFORE RETURNING If you have a question or experience a problem with your THIS PRODUCT FOR ANY REASON: Black &...
- Page 2 All manuals and user guides at all-guides.com TABLE OF CONTENTS IMPORTANT SAFETY WARNINGS Safety Guidelines - Definitions..........2 AND INSTRUCTIONS Important Safety Warnings and Instructions ......2 When using electric gardening appliances, basic Components................4 safety precautions should always be followed to reduce risk of fire, WARNING: Important Safety Instructions for Battery Chargers....4 electric shock, and personal injury, including the following.
- Page 3 All manuals and user guides at all-guides.com which it is able to cut effectively. Do not use tool if the switch trigger does not turn • USE THE RIGHT TOOL – Do not use this tool for any job except the tool on or off.
- Page 4 All manuals and user guides at all-guides.com IMPORTANT SAFETY INSTRUCTIONS COMPONENTS FOR BATTERY CHARGERS SAVE THESE INSTRUCTIONS: This manual contains important safety instructions for battery chargers. 1. On/Off Switch • Before using charger, read all instructions and cautionary markings on charger, battery pack, and product using battery pack. 2.
- Page 5 All manuals and user guides at all-guides.com necessary. Use of improper extension cord could result in risk of center when service or repair is required. Incorrect reassembly • An extension cord must have adequate wire size (AWG or • Disconnect the charger from the outlet before attempting any fire, electric shock, or electrocution.
- Page 6 All manuals and user guides at all-guides.com • Contents of opened battery cells may cause respiratory irritation. The standard charger provided will charge a fully depleted battery in CHARGING PROCEDURE about 2 hours. Provide fresh air.If symptoms persist, seek medical attention. 1.
- Page 7 All manuals and user guides at all-guides.com Shock hazard. Do not allow any liquid to get The charger and battery pack can be left connected with the green inside charger. Never attempt to open the battery pack for any LEAVING THE BATTERY IN THE CHARGER WARNING: LED glowing indefinitely.
- Page 8 All manuals and user guides at all-guides.com • Push the auxiliary handle ATTACHING THE AUXILIARY HANDLE (FIGURES F AND G) (F1) onto the tube (F2). ASSEMBLY & ADJUSTMENT • Slide the bolt (G1) through Before assembly, make sure that the tool is the holes in the auxiliary switched off and the battery has been removed.
- Page 9 All manuals and user guides at all-guides.com • This tool has a telescopic ADJUSTING THE HEIGHT OF THE TOOL (FIGURE H) SETTING THE TOOL TO TRIMMING OR EDGING MODE mechanism, allowing you to • The tool can be used in trimming mode as shown in figure I or in set it to a comfortable (FIGURE I, J AND K) edging mode to trim overhanging grass along lawn edges and flower...
- Page 10 All manuals and user guides at all-guides.com the open position. Ensure that the edging guide is all the way down, an audible click will be heard. • With the unit on, angle unit and slowly swing the OPERATING THE TRIMMER Note: The head will only rotate in one direction.
- Page 11 All manuals and user guides at all-guides.com through Black & Decker service centers. To find your local service location call: 1-800-544-6986 • Use the tip of the string to do the cutting; do not force string HELPFUL CUTTING TIPS head into uncut grass. Use edge guide along such things as fences, houses and flower beds for best practices.
- Page 12 All manuals and user guides at all-guides.com • Align the tabs on the spool • Insert the 3/4 inch (19mm) cap with the slots (R1) in the end of the bulk line into the housing (figure R). hole (T1) in the spool •...
- Page 13 All manuals and user guides at all-guides.com MAINTENANCE PROBLEM SOLUTION Automatic line feed does not • Keep the tabs depressed and To avoid serious injury, remove the battery from feed more line. remove the spool from the spool the tool before performing any maintenance. housing in the trimmer head.
- Page 14 All manuals and user guides at all-guides.com IMPORTANT: To assure product SAFETY and RELIABILITY, repairs, maintenance and adjustment should be performed by TROUBLE SHOOTING CONTINUED authorized service centers or other qualified service organizations, always using identical replacement parts. PROBLEM SOLUTION This device complies with part 15 of the FCC rules.
- Page 15 All manuals and user guides at all-guides.com factory replacement parts, contact the Black & Decker location nearest you. To find your local service location, refer to the yellow page directory under "Tools—Electric" or call: 1-800-544-6986 or visit www.blackanddecker.com FULL THREE-YEAR HOME USE WARRANTY Black &...
- Page 16 All manuals and user guides at all-guides.com Numéro de modèle LST136 TAILLE-BORDURE / COUPE-BORDURE AVEC PILE AU LITHIUM DE 36 V MODE DʼEMPLOI Merci dʼavoir choisi Black & Decker! Consulter le site Web www.BlackandDecker.com/NewOwner pour enregistrer votre nouveau produit. A LIRE AVANT DE RETOURNER CE PRODUIT POUR QUELQUE RAISON QUE CE SOIT : Si des questions ou des problèmes surgissent après lʼachat dʼun produit...
- Page 17 All manuals and user guides at all-guides.com LIGNES DIRECTRICES EN MATIERE DE • SʼHABILLER DE MANIÈRE APPROPRIÉE - Ne pas porter de vêtements amples ni de bijoux. Ils peuvent sʼenchevêtrer dans les SECURITE - DEFINITIONS pièces mobiles. Des gants en caoutchouc et des chaussures adéquates à...
- Page 18 All manuals and user guides at all-guides.com CONSERVER CES MESURES. • DÉBRANCHER LʼOUTIL – Lorsque inactif, lors de remplacement de fil ou avant un nettoyage. • ÉVITER LES CONDITIONS ENVIRONNEMENTALES Lʼétiquette apposée sur votre outil pourrait comprendre les symboles DANGEREUSES - Ne pas utiliser dʼoutils électriques dans des suivants.
- Page 19 All manuals and user guides at all-guides.com DIRECTIVES DE SÉCURITÉ IMPORTANTES COMPOSANTS POUR LES CHARGEURS DE PILES MISE EN GARDE : 1. Interrupteur dans certaines circonstances, lorsque le chargeur est branché au bloc dʼalimentation, le chargeur peut être marche/arrêt court-circuité par des corps étrangers conducteurs tels que, mais sans sʼy limiter, la laine dʼacier, le papier dʼaluminium ou toute 2.
- Page 20 All manuals and user guides at all-guides.com Calibre de fil minimum recommandé pour les rallonges domestique standard (120 V). Ne pas utiliser une tension supérieure pour le chargeur. Calibre minimal des cordons de rallonge CONSERVER CES DIRECTIVES 120V 0-25 26-50 51-100 101-150 Tension...
- Page 21 All manuals and user guides at all-guides.com symptômes persistent, obtenir des soins médicaux. MOINS quʼelles ne soient bien protégées contre les courts-circuits. Pour le transport de piles individuelles, on doit donc sʼassurer que les AVERTISSEMENT : Risque de brûlure. Le liquide de la pile bornes sont protégées et bien isolées contre toute matière pouvant peut sʼenflammer sʼil est exposé...
- Page 22 All manuals and user guides at all-guides.com appareil électrique. PILE EN MAUVAIS ETAT b. Vérifier si la prise est reliée à un interrupteur dʼéclairage qui Le chargeur est en mesure de détecter une pile faible ou coupe le courant au moment dʼéteindre la lumière. endommagée.
- Page 23 All manuals and user guides at all-guides.com INDICATEUR DE LʼETAT DE CHARGE (FIGURE B) MONTAGE ET REGLAGE Le bloc-piles est pourvu dʼun indicateur dʼétat de charge. Cet indicateur peut servir à afficher le niveau actuel de charge dʼun bloc- piles durant lʼutilisation et durant la charge. Il ne donne aucune AVERTISSEMENT : Avant le montage, sʼassurer que lʼoutil est indication quant au fonctionnement de lʼoutil.
- Page 24 All manuals and user guides at all-guides.com REGLAGE DE LA HAUTEUR DE LʼOUTIL (FIGURE H) FIXATION DE LA POIGNEE AUXILIAIRE (FIGURES F ET G) • Cet outil dispose dʼun • Pousser la poignée auxiliaire (F1) sur le tube (F2). mécanisme télescopique •...
- Page 25 All manuals and user guides at all-guides.com REGLAGE DE LʼOUTIL POUR LA TAILLE OU LA COUPE EN • Tout en tenant la poignée auxiliaire, tourner la tête dans le sens BORDURE antihoraire. • Relâcher le bouton de (FIGURE I, J ET K) dégagement de la tête.
- Page 26 All manuals and user guides at all-guides.com COUPE EN BORDURE • Régler le cadran à la position 1 pour choisir la durée Les meilleurs résultats de dʼexécution max. et ainsi coupe sont obtenus sur des augmenter la durée de vie du bords de plus de 50 mm (2 bloc-piles.
- Page 27 All manuals and user guides at all-guides.com avance automatique de fil fournira et coupera automatiquement du taille-bordures (figure P). une nouvelle longueur de fil. Ne pas frapper lʼappareil sur le sol • Pour obtenir des résultats pour alimenter lʼappareil ou pour toute autre raison. optimaux, remplacer la Le fil tranchant sʼusera et sera avancé...
- Page 28 All manuals and user guides at all-guides.com REMBOBINER LA BOBINE (UTILISER UNIQUEMENT UN FIL ROND • Enrouler le fil de coupe sur la bobine dans DE 1,65 MM (0,065 PO) DE DIAMETRE) (FIGURES S, T ET U) le sens indiqué par la flèche inscrite sur la REMARQUE : Le fil en vrac des bobines enroulées à...
- Page 29 All manuals and user guides at all-guides.com 1. Maintenir les orifices de ventilation dégagés pour éviter la surchauffe. 2. Votre fil rotatif peut sécher avec le temps. Pour tenir votre fil en PROBLÈME SOLUTION excellente condition, entreposer les bobines de rechange de fil La alimentación automática de cuerda no •...
- Page 30 All manuals and user guides at all-guides.com GARANTIE COMPLETE DE TROIS ANS PROBLÈME SOLUTION • Sʼassurer de couper avec le bout du fil Alimentation excédentaire POUR UNE UTILSATION DOMESTIQUE (177,8 mm [7 po] de la bobine). Utilise le guide de coupe si nécessaire Black &...
- Page 31 All manuals and user guides at all-guides.com Model # LST136 DE PODADORA/ BORDEADORA DE LITIO DE 36 V MANUAL DE INSTRUCCIONES Gracias por elegir Black & Decker! Visite www.BlackandDecker.com/NewOwner para registrar su nuevo producto. LEA EL MANUAL ANTES DE DEVOLVER ESTE PRODUCTO POR CUALQUIER MOTIVO: Si tiene una consulta o algún inconveniente con su producto...
- Page 32 All manuals and user guides at all-guides.com protegerse las piernas. Recójase y cubra el cabello largo. • CUERDA DE NYLON: mantenga la cara, las manos y los pies PAUTAS DE SEGURIDAD/DEFINICIONES Es importante que lea y comprenda este manual. La información lejos de la cuerda de nylon giratoria en todo momento.
- Page 33 All manuals and user guides at all-guides.com COMPONENTES Siga todas las instrucciones incluidas en este Manual de instrucciones para una operación adecuada de la herramienta. No utilice la herramienta bajo la lluvia. • NO OPERE herramientas eléctricas portátiles en atmósferas 1.
- Page 34 All manuals and user guides at all-guides.com CONSERVE ESTAS INSTRUCCIONES prevenciones en el cargador, en el paquete de baterías y en el producto que utiliza el paquete de baterías. La etiqueta de su herramienta puede incluir los siguientes símbolos. Los símbolos y sus definiciones son los siguientes: ADVERTENCIA: Riesgo de descarga eléctrica.
- Page 35 All manuals and user guides at all-guides.com centro de mantenimiento autorizado. • Para garantizar la seguridad, un cable prolongador debe tener • No desarme el cargador; llévelo a un centro de mantenimiento Estados Unidos). Cuanto más pequeño sea el número de calibre un tamaño de cable adecuado (AWG o Calibre de conductor de reparación.
- Page 36 All manuals and user guides at all-guides.com como llaves, monedas, herramientas manuales y similares. Las lave el área de inmediato con agua y jabón suave. Si el líquido Normas para Materiales Peligrosos del Departamento de de la batería entra en contacto con los ojos, enjuague con agua Transporte de los EE.UU.
- Page 37 All manuals and user guides at all-guides.com DIAGNOSTICO DEL CARGADOR tacto durante la carga. Esto es una condición normal y no indica un problema. Para facilitar el enfriado del paquete de baterías después Este cargador está diseñado para detectar ciertos problemas que de su uso, evite colocar el cargador o el paquete de baterías en un pueden surgir con los paquetes de baterías o el cargador.
- Page 38 All manuals and user guides at all-guides.com INDICADOR DEL ESTADO DE LA CARGA (FIGURA B) MONTAJE Y AJUSTE herramienta. La batería está equipada con un indicador de estado de la carga. Esto se puede utilizar para visualizar el nivel actual de carga de la batería durante el uso y durante la carga.
- Page 39 All manuals and user guides at all-guides.com • Fije el protector con el tornillo (E1) (Figura E). AJUSTE DE LA POSICIÓN DEL MANGO AUXILIAR El mango auxiliar se puede (FIG. G) ajustar para proporcionar óptimo equilibrio y comodidad. • Afloje la perilla del perno girándola en sentido contrario a las agujas del reloj.
- Page 40 All manuals and user guides at all-guides.com LIBERACIÓN DE LA CUERDA DE CORTE • Suelte el botón de liberación del cabezal. Al despacharse de la fábrica, la cuerda de corte está sujeta con cinta • Levante la guía de borde a la cubierta del carrete.
- Page 41 All manuals and user guides at all-guides.com ENCENDIDO Y APAGADO • Para encender la • Sostenga la herramienta como se muestra en la Figura N. FUNCIONAMIENTO DE LA PODADORA herramienta, mantenga • Mantenga un ángulo de corte de 5 a 10 grados como se oprimido el botón de bloqueo muestra en la Figura N1.
- Page 42 All manuals and user guides at all-guides.com • Otras piezas de repuesto (protectores, tapas de carrete, etc.) están disponibles en los centros de mantenimiento de Black & Decker. Para encontrar su • Utilice la punta de la cuerda para realizar el corte; no empuje el cabezal de la CONSEJOS ÚTILES PARA CORTAR centro de mantenimiento local llame al: 1-800-544-6986 o visite cuerda contra el césped sin cortar.
- Page 43 All manuals and user guides at all-guides.com obtener mejores resultados, se recomiendan los carretes enrollados • Afloje el extremo de la cuerda de corte e introduzca la de fábrica. cuerda en el orificio (R2) Para rebobinar la cuerda, Figura R. •...
- Page 44 All manuals and user guides at all-guides.com EL SELLO RBRC™ y el ajuste deben realizarse en los centros de mantenimiento El sello RBRC™ (Corporación de reciclado de baterías autorizados o en otras organizaciones de mantenimiento recargables) que se encuentra en la batería de iones de calificadas, utilizando siempre piezas de repuesto idénticas.
- Page 45 All manuals and user guides at all-guides.com PROBLEMA SOLUCIÓN PROBLEMA SOLUCIÓN • Antes de quitar la cuerda, La alimentación automática de La cuerda se desenrolla al enrolle la cuerda prolijamente en el cuerda no alimenta más cuerda. asegúrese de sujetarla en las carrete de manera que las cuerdas quitar la tapa o el carrete ranuras de retención (S2) (Figura S).
- Page 46 All manuals and user guides at all-guides.com · GARANTÍA BLACK & DECKER · La segunda opción es llevar o enviar el producto (con flete pago) a un Centro de mantenimiento propio o autorizado de Black & Decker . SOLAMENTE PARA PROPOSITOS DE MEXICO para su reparación o reemplazo según nuestro criterio.
- Page 47 All manuals and user guides at all-guides.com SOLAMENTE PARA PROPOSITOS DE MEXICO Grupo Realsa en herramientas, Representaciones Industriales Robles, Fernando González Armenta S.A. de C.V. S.A. de C.V. Bolivia No. 605 Súper Manzana 69 MZ.01 Lote 30 Tezozomoc No. 89 Col.
- Page 48 05120 MEXICO, D.F – Páginas amarillas – TEL. (01 55) 5326 7100 para Servicio y ventas 01 800 847 2309/01 800 847 2312 Cat. No. LST136 Form No. 90578591 rev02 March 2012 Copyright © 2012 Black & Decker Printed in China...