
Manuels Connexes pour AEG Voxtel S110 Combo


Sommaire des Matières pour AEG Voxtel S110 Combo
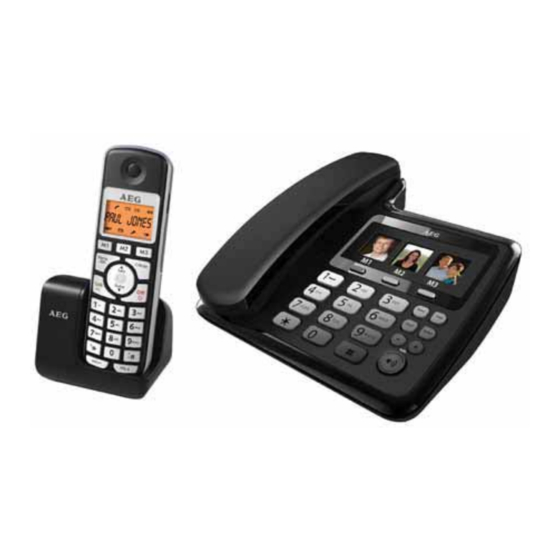
- Page 1 All manuals and user guides at all-guides.com QUICK START GUIDE CORDLESS TELEPHONE Voxtel S110 Combo...
- Page 2 All manuals and user guides at all-guides.com...
- Page 3 All manuals and user guides at all-guides.com BECAUSE WE CARE Thank you for purchasing this product. This product has been designed and assembled with utmost care for you and the environment. This is why we supply this product with a quick installation guide to reduce the number of paper (pages) and therefor save trees to be cut for making this paper.
- Page 4 All manuals and user guides at all-guides.com UNPACKING YOUR PHONE In the box you will find: Keep the packing materials in a safe place in case you later need to transport the device. GETTING TO KNOW YOUR PHONE Handset overview (see P1) Meaning Up/Down During a call: Press to increase or decrease the handset volume.
- Page 5 All manuals and user guides at all-guides.com Off hook/Handsfree In idle / predialing mode : Press to make a call. Press again to turn on the speakerphone. In Redial list / Call List / Contacts entry: Press to make a call to the selected entry in the list.
- Page 6 All manuals and user guides at all-guides.com Right soft key function. Press to start an intercom call. Right soft key function. Press to go back to the previous menu (back) level or cancel the current action. Right soft key function. Press the alarm, or mute/unmute the microphone during a call.
- Page 7 All manuals and user guides at all-guides.com Installing the cordless handset and charging the batteries (see P3) Slide open and remove the battery compartment cover from the back of the handset. Place the 2 supplied batteries into the battery compartment with the polarity markings as indicated. Slide the battery compartment cover back until it clicks into place.
- Page 8 All manuals and user guides at all-guides.com Answer a call If the handset is not on the charging cradle: When the phone rings, press to answer a call. Note: If “AUTO ANS” is set to “ON”, then lifting the handset off the base or charger will answer the call automatically and no keys need to be pressed.
- Page 9 All manuals and user guides at all-guides.com Note: If there are no numbers in the redial list, the display shows “EMPTY ”. Using the corded base: 7.10 Making a call Pick up the corded handset or press on the corded base. Enter the phone number.
- Page 10 All manuals and user guides at all-guides.com PRIVATE PHONEBOOK Your phone can store up to 20 private phonebook entries with names and numbers in each cordless handset. Each phonebook entry can have a maximum of 20 digits for the phone number and 12 characters for the name.
- Page 11 All manuals and user guides at all-guides.com PHONE SETTINGS Your phone comes with a selection of settings that you can change to personalise your phone the way you like it to work. 10.2.1 Set the handset language Press and / to select “HS SET”. Press and / to select “LANGUAGE”.
- Page 12 All manuals and user guides at all-guides.com On the base: At the same time, press and hold the key for about 5 seconds or until it beeps, to indicate the base is in registration mode. A confirmation beep is played to indicate successful registration, and the handset returns to idle mode with its handset number displayed and the antenna icon steady.
- Page 13 All manuals and user guides at all-guides.com CE DECLARATION This product is in compliance with the essential requirements and other relevant provisions of the R&TTE directive 1999/5/EC. The Declaration of conformity can be found on: www.aegtelephones.eu DISPOSAL OF THE DEVICE (ENVIRONMENT) At the end of the product lifecycle, you should not throw this product into the normal household garbage but bring the product to a collection point for the recycling of electrical and electronic equipments.
- Page 14 All manuals and user guides at all-guides.com UNSER EINSATZ FÜR DIE UMWELT Vielen Dank, dass Sie sich für dieses Produkt entschieden haben. Dieses Gerät wurde mit größter Sorgfalt entwickelt und zusammengebaut, um Ihnen ein exzellentes Produkt zu bieten und gleichzeitig die Umwelt zu schonen.
- Page 15 All manuals and user guides at all-guides.com LIEFERUMFANG Bewahren Sie das Verpackungsmaterial für spätere Transporte Ihres Telefons an einem sicheren Ort auf. EINFÜHRUNG Überblick Mobilteil (siehe P1) Symbol- und Zeichenerklärung Verstärken Während eines Anrufs: Drücken, um die Lautstärke des Mobilteils zu erhöhen oder zu verringern.
- Page 16 All manuals and user guides at all-guides.com Alphanumerisches Tastenfeld * Taste im Ruhezustand: Gedrückt halten, um die Tastensperre ein- oder auszuschalten. # -Taste während eines Anrufs: Gedrückt halten, um eine interne Rückfrage zu starten. # -Taste im Ruhezustand: Drücken und Halten, um den Klingelton des Mobilteils ein- oder auszuschalten.
- Page 17 All manuals and user guides at all-guides.com Linke Softtaste. Drücken, um zum Hauptmenü zu gelangen. Linke Softtaste. Drücken, um die aktuelle Auswahl zu bestätigen. Zeigt einen neuen Anruf in der Anrufliste an. Zeigt weitere Optionen in Listen an, abwärts bzw. aufwärts. Rechte Softtaste.
- Page 18 All manuals and user guides at all-guides.com AUFSTELLEN Wichtig: Die Basisstation muss immer an eine Steckdose angeschlossen sein, um vollständig zu funktionieren. Auch das Mobilteil funktioniert nur, wenn die Basisstation an eine Steckdose angeschlossen ist. Verwenden Sie nur die Netzteile und Telefonanschlusskabel, die dem Gerät beiliegen. Andere könnten nicht kompatibel sein und Funktionsstörungen verursachen.
- Page 19 All manuals and user guides at all-guides.com 7.1.6 Gesprächsdaueranzeige Ihr Mobilteil erfasst automatisch die Dauer von jedem Anruf. Die Gesprächsdaueranzeige erscheint sofort, wenn Sie einen Anruf entgegen nehmen oder 15 Sekunden nach einem Wählvorgang und bleibt für 5 Sekunden nach Beendigung eines Telefonats sichtbar. Die Dauer wird in Stunden, Minuten und Sekunden in diesem Format angezeigt: HH:MM:SS.
- Page 20 All manuals and user guides at all-guides.com Wahlwiederholung der zuletzt gewählten Nummern Sie können jede der letzten fünf gewählten Nummern erneut wählen. Wenn Sie zu einer Nummer einen Namen im Telefonbuch eingetragen haben, wird dieser Name statt der Nummer angezeigt. Die zuletzt gewählte Nummer wird in der Wahlwiederholungsliste an erster Stelle angezeigt.
- Page 21 All manuals and user guides at all-guides.com 7.15.1 Eine Nummer als Direktwahl speichern Drücken Sie im Ruhezustand Geben Sie die Telefonnummer ein. Drücken Sie die Tasten M1, M2 oder M3, um die Nummer im gewählten Speicherort zu hinterlegen. Wenn für die ausgewählte Direktwahltaste schon eine Nummer gespeichert wurde, wird diese durch die neue Nummer ersetzt.
- Page 22 All manuals and user guides at all-guides.com Verwendung des Mobilteils: Anrufliste einsehen Alle eingegangenen Anrufe sind in der Anrufliste gespeichert, wobei der letzte Anruf an oberster Stelle der Liste steht. Ist die Anrufliste voll, wird der älteste Anruf durch einen neuen ersetzt. Alle unbeantworteten Anrufe, die noch nicht angesehen wurden, sind mit einem -Symbol in der unteren Mitte des Displays markiert.
- Page 23 All manuals and user guides at all-guides.com REGISTRIERUNG Wichtig: Beim Kauf des Telefons sind alle Mobilteile schon bei der Basisstation registriert, Sie müssen also nichts mehr tun. Die Anmeldung von Mobilteilen ist nur dann notwendig, wenn Sie zusätzliche Mobilteile benötigen oder ein Original-Mobilteil fehlerhaft ist. Sie können bis zu 5 zusätzliche Mobilteile pro Basisstation registrieren, wobei die Nummer jedes einzelnen Mobilteils (1-5) auf dem Display angezeigt wird.
- Page 24 All manuals and user guides at all-guides.com TECHNISCHE DATEN Standard Digital Enhanced Cordless Telecommunication (DECT) 1,88 - 1,9 GHz (Bandbreite = 20 MHz) Kanalbandbreite 1,728 MHz Betriebsbereich Bis zu 300 m im Freien; Bis zu 50 m in Gebäuden Betriebsdauer Standby: 100 Stunden, Gespräch: 10 Stunden Akkuladezeit: 15 Stunden Temperaturbereich...
- Page 25 All manuals and user guides at all-guides.com NOTRE ENGAGEMENT Merci d‘avoir fait l‘acquisition de ce produit. Lors de la conception et de l‘assemblage de ce produit, nous avons tout mis en œuvre afin de vous protéger vous, ainsi que l‘environnement. C‘est la raison pour laquelle nous accompagnons ce produit d‘un guide d‘installation rapide visant à...
- Page 26 All manuals and user guides at all-guides.com DÉBALLAGE DE VOTRE TÉLÉPHONE Le carton d‘emballage contient : Conservez l‘emballage en lieu sûr au cas où vous seriez amené à transporter l‘appareil ultérieurement. DESCRIPTION DE VOTRE TÉLÉPHONE Présentation du combiné (voir P1) Légende Haut/Bas Pendant un appel : appuyez pour augmenter ou réduire le volume du combiné.
- Page 27 All manuals and user guides at all-guides.com Clavier alphanumérique Touche * en mode inactif : appuyez et maintenez enfoncé pour activer ou désactiver le verrouillage du clavier. Touche # pendant un appel : appuyez et maintenez enfoncé pour insérer un signal clignotant.
- Page 28 All manuals and user guides at all-guides.com Indique lorsqu‘il y a d‘autres caractères ou chiffres devant ceux affichés. Indique lorsqu‘il y a d‘autres caractères ou chiffres après ceux affichés. Fonction de la touche de fonction gauche. Appuyez pour accéder au menu principal.
- Page 29 All manuals and user guides at all-guides.com Numéros de mémoire directs (M1, M2 et M3) M1/M2/M3 Appuyez pour composer le numéro mémorisé au préalable dans la touche correspondante en mode haut-parleur. INSTALLATION Important : La base doit toujours être branchée sur une prise électrique pour fonctionner pleinement. Sinon, le combiné...
- Page 30 All manuals and user guides at all-guides.com Appuyez sur pour composer le numéro de l‘entrée de journal sélectionnée. 7.1.5 Appel à partir de la liste bis Appuyez sur pour accéder à la liste bis et appuyez sur / pour sélectionner le numéro voulu. Appuyez sur pour composer le numéro bis sélectionné.
- Page 31 All manuals and user guides at all-guides.com Remarque : Vous pouvez toujours répondre à un appel lorsque le verrouillage du combiné est activé. En mode de verrouillage du clavier, appuyez sur * et maintenez-la enfoncée pour désactiver le verrouillage. L‘icône disparaît.
- Page 32 All manuals and user guides at all-guides.com 7.15 Numéros de mémoire directs La base filaire comporte 3 numéros de mémoire directs (M1 à M3) qui vous permettent de stocker les numéros que vous composez le plus fréquemment (jusqu‘à 24 chiffres chacun). Si vous saisissez plus de 24 chiffres, seuls les 24 premiers sont enregistrés. 7.15.1 Enregistrement d‘un numéro dans un numéro de mémoire direct En mode inactif, appuyez sur...
- Page 33 All manuals and user guides at all-guides.com À l‘aide du combiné sans fil : Affichage du journal Tous les appels reçus sont enregistrés dans le journal. Le dernier en date apparaît en haut de la liste. Lorsque le nombre maximal d‘appels du journal est atteint, l‘appel le plus ancien est remplacé par le nouveau. Tout appel manqué...
- Page 34 All manuals and user guides at all-guides.com ENREGISTREMENT Important : Lorsque vous achetez votre système téléphonique, tous les combinés sont déjà enregistrés sur votre base. Par conséquent, vous n‘avez pas besoin de les enregistrer. L‘enregistrement du combiné n‘est nécessaire que si vous achetez des combinés supplémentaires ou si un combiné tombe en panne. Vous pouvez enregistrer des combinés supplémentaires jusqu‘à...
- Page 35 All manuals and user guides at all-guides.com CARACTÉRISTIQUES TECHNIQUES Standard Digital Enhanced Cordless Telecommunication (DECT) 1,88 à 1,9 GHz (largeur de bande = 20 MHz) Largeur de bande du canal 1,728 MHz Plage de fonctionnement Jusqu‘à 300 m en extérieur ; jusqu‘à 50 m en intérieur Temps de fonctionnement En veille : 100 heures, en conversation : 10 heures Délai de chargement des piles : 15 heures...
- Page 36 All manuals and user guides at all-guides.com ONZE ZORG Wij willen u bedanken voor de aankoop van dit product. Bij de ontwikkeling en montage van dit product stonden u en het milieu centraal. Daarom krijgt u bij dit product een verkorte installatiehandleiding, zodat er minder papier wordt gebruikt en er dus minder bomen moeten worden gekapt.
- Page 37 All manuals and user guides at all-guides.com DE VERPAKKING VAN UW TELEFOON VERWIJDEREN In de doos zit het volgende: Bewaar het verpakkingsmateriaal op een veilige plek zodat u het later kunt gebruiken als u het toestel moet vervoeren. UW TELEFOON Overzicht handset (zie P1) Betekenis Omhoog/Omlaag...
- Page 38 All manuals and user guides at all-guides.com Alfanumeriek toetsenbord Toets * in standby-modus: ingedrukt houden om de toetsenbordvergrendeling in of uit te schakelen. Toets # tijdens een oproep: ingedrukt houden om een flashsignaal in te voegen. Toets # in standby-modus: ingedrukt houden om de beltoon van de handset in of uit te schakelen.
- Page 39 All manuals and user guides at all-guides.com Geeft aan dat er meer tekens of cijfers staan na de tekens/cijfers die worden weergegeven. Softtoets links: indrukken om het hoofdmenu te openen. Softtoets links: indrukken om de selectie te bevestigen. Geeft een nieuwe oproep in de oproeplijst aan. Geeft aan dat er hoger of lager in de lijst nog meer opties zijn.
- Page 40 All manuals and user guides at all-guides.com INSTALLATIE Belangrijk: De stekker van het basisstation moet altijd in een stopcontact zijn gestoken om goed te werken en dat geldt ook voor de draadloze handset. Gebruik alleen voedingsadapters en telefoonsnoeren die bij het product worden geleverd.
- Page 41 All manuals and user guides at all-guides.com De timer wordt weergegeven zodra u een oproep beantwoordt of 15 seconden na het bellen en blijft op het display tot 5 seconden na het einde van het gesprek. De tijd wordt weergegeven in uren, minuten en seconden (UU:MM:SS). Een oproep beantwoorden Als de handset niet op de lader staat: Wanneer de telefoon rinkelt, drukt u op...
- Page 42 All manuals and user guides at all-guides.com 7.9.1 Een nummer uit de herhaallijst bellen Druk in de standby-modus op om de herhaallijst te openen. Opmerking: Als de herhaallijst een naam bevat, drukt u op # om het nummer te zien dat bij de naam hoort. Druk op / om door de herhaallijst te bladeren.
- Page 43 All manuals and user guides at all-guides.com Opmerking: De directe geheugentoets kan niet volledig worden gewist. Als u een nummer wilt verwijderen, kan dat alleen door het nummer te vervangen door een nieuw nummer. TELEFOONBOEK Uw telefoon bevat een telefoonboek waarin men tot 20 contactpersonen met naam en nummer in elke draadloze handset kan opslaan.
- Page 44 All manuals and user guides at all-guides.com Druk op om de oproeplijst te openen. OF druk op en / tot “CALL LOG” verschijnt en druk op Druk op / om het gewenste nummer te selecteren. Druk indien van toepassing op # om het nummer van de beller te bekijken. Druk op tot “DETAILS”...
- Page 45 All manuals and user guides at all-guides.com Als u wilt controleren of een handset is geregistreerd, moet u eerst controleren of de voeding naar de basiseenheid is ingeschakeld en of de handset binnen bereik is. Op het display van de handset moet het nummer worden weergegeven en het pictogram moet branden.
- Page 46 All manuals and user guides at all-guides.com Elektrische aansluiting Basisstation: input 100-240 V AC 50/60 Hz 150 mA, output 6VDC 450 mA Lader: input 100-240 V AC 50/60 Hz 150 mA, output 6VDC 300 mA CE-VERKLARING Dit product voldoet aan de essentiële vereisten en andere relevante voorschriften van de R&TTE-richtlijn 1999/5/EG.
- Page 47 All manuals and user guides at all-guides.com PERCHÉ CI TENIAMO Grazie per aver acquistato questo prodotto. Il presente prodotto è stato progettato e assemblato con la massima cura per l‘utente e l‘ambiente. Per questo motivo, forniamo in dotazione una guida rapida di installazione allo scopo di ridurre il numero di pagine e di conseguenza l‘abbattimento di alberi per la produzione di questa carta.
- Page 48 All manuals and user guides at all-guides.com DISIMBALLAGGIO DEL TELEFONO La confezione contiene: Conservare i materiali di imballaggio in un luogo sicuro nel caso in cui sia necessario il trasporto del dispositivo. IMPARARE A CONOSCERE IL TELEFONO Panoramica del portatile (vedi P1) Significato Su/Giù...
- Page 49 All manuals and user guides at all-guides.com Tastierino alfanumerico Tasto * in modalità in attesa: Tenere premuto per attivare o disattivare il blocco del tastierino. Tasto # durante una chiamata: Tenere premuto per inserire un segnale flash. Tasto # nella modalità in attesa: Tenere premuto per attivare / disattivare la suoneria del portatile.
- Page 50 All manuals and user guides at all-guides.com Funzione del tasto programmabile sinistro. Premere per accedere al menu principale. Funzione del tasto programmabile sinistro. Premere per confermare l‘opzione selezionata. Indica una nuova chiamata nell‘elenco. Indica ulteriori opzioni disponibili negli elenchi, sopra o sotto. Funzione tasto programmabile...
- Page 51 All manuals and user guides at all-guides.com INSTALLAZIONE Importante: Per funzionare correttamente, la base deve essere sempre collegata ad una presa elettrica poiché il portatile non è in grado di funzionare senza base. Utilizzare solo gli adattatori di alimentazione e i cavi di linea telefonica forniti con il prodotto.
- Page 52 All manuals and user guides at all-guides.com La durata viene visualizzata nel formato ore, minuti e secondi (HH:MM:SS). Risposta a una chiamata Se il portatile non si trova sul supporto di carica: Quando il telefono suona, premere per rispondere a una chiamata. Nota: Se “RISP AUT”...
- Page 53 All manuals and user guides at all-guides.com Nota: Se nell‘elenco di ripetizione è visualizzato un nome, premere # per visualizzare il numero corrispondente a questa voce. Premere / per scorrere l‘elenco di ripetizione. Premere per comporre il numero selezionato da ripetere. Nota: Se nell‘elenco di ripetizione non sono presenti numeri, sul display viene visualizzato “VUOTO“.
- Page 54 All manuals and user guides at all-guides.com RUBRICA PERSONALE Il telefono è in grado di memorizzare fino a 20 voci contenenti nomi e numeri nella rubrica personale in ogni portatile. Ogni voce della rubrica può essere composta da un massimo di 20 cifre per il numero di telefono e 12 caratteri per il nome.
- Page 55 All manuals and user guides at all-guides.com Premere e / selezionare “ELIMINA”. Premere per confermare. IMPOSTAZIONI DEL TELEFONO Il telefono presenta una serie di impostazioni che è possibile modificare per personalizzare l‘apparecchio in base alle proprie esigenze. 10.2.1 Impostazione della lingua del portatile Premere e / per selezionare “IMP PORT”.
- Page 56 All manuals and user guides at all-guides.com Sulla base: Contemporaneamente, tenere premuto il tasto per circa 5 secondi fino a che non viene emesso un segnale acustico che indica che la base è in modalità registrazione. Viene emesso un segnale acustico di conferma per indicare che la registrazione è avvenuta con successo, quindi il portatile torna in modalità...
- Page 57 All manuals and user guides at all-guides.com DICHIARAZIONE CE Questo prodotto è conforme ai requisiti essenziali e alle altre disposizioni pertinenti stabilite dalla Direttiva R&TTE 1999/5/CE. La Dichiarazione di conformità è riportata nel sito Web: www.aegtelephones.eu SMALTIMENTO DELL‘APPARECCHIO (AMBIENTE) Alla conclusione del suo ciclo di vita, il prodotto non deve essere gettato nel contenitore dei rifiuti domestici, ma deve essere depositato presso un apposito punto di raccolta per il riciclaggio di apparecchi elettrici ed elettronici.
- Page 58 All manuals and user guides at all-guides.com VI BRYR OSS Tack för att du valt att köpa den här produkten. Produkten har utformats och monterats utifrån största möjliga omsorg om dig och miljön. Därför levereras produkten med en snabbinstallationsguide för att minimera antalet sidor och därmed minska den totala pappersförbrukningen och förhindra att träd skövlas i onödan.
- Page 59 All manuals and user guides at all-guides.com PACKA UPP DIN TELEFON I förpackningen hittar du följande: Spara förpackningsmaterialet på en säker plats om du skulle behöva transportera enheten vid ett senare tillfälle. BEKANTA DIG MED DIN TELEFON Översikt över handenheten (se P1) Förklaring Upp/ner Under ett samtal: tryck för att höja eller sänka volymen i handenheten.
- Page 60 All manuals and user guides at all-guides.com Alfanumerisk knappsats knappen * i inaktivt läge: håll knappen intryckt för att aktivera eller inaktivera knapplåset. knappen # under ett samtal: håll knappen intryckt för att infoga en flashsignal. knappen # i inaktivt läge: inaktivera/aktivera handenhetens ringsignal genom att hålla knappen intryckt i inaktivt läge.
- Page 61 All manuals and user guides at all-guides.com Funktion för vänster programknapp. Tryck för att öppna huvudmenyn. Funktion för vänster programknapp. Tryck för att bekräfta det aktuella valet. Indikerar nytt samtal i listan över inkomna nummer. Indikerar fler tillgängliga alternativ i listor, ovanför eller nedanför. Funktion för höger programknapp.
- Page 62 All manuals and user guides at all-guides.com Koppla in den sladdanslutna basstationen (se P5) Anslut handenheten till basstationen med hjälp av spiralsladden. Kontrollera att kontakterna sitter ordentligt i uttagen på handenheten och på sidan av basstationen – du hör ett litet klick när de sitter på plats. Anslut nätadaptern och telefonkabeln i uttagen på...
- Page 63 All manuals and user guides at all-guides.com ELLER Placera handenheten i basstationen eller laddaren för att avsluta samtalet. Högtalarläge för handenhet Under ett samtal kan du trycka på för att växla mellan handsfree-läge med högtalartelefon och normal användning av handenheten. Justera volymen i hörluren och handsfree-läget Det finns 5 nivåer (VOLUME 1 till VOLUME 5) att välja mellan för såväl luren som högtalaren.
- Page 64 All manuals and user guides at all-guides.com Varning: Det uppstår en fördröjning på 3 sekunder efter att du lyft den sladdanslutna handenheten eller tryckt på högtalarknappen innan några siffror syns, men det är möjligt att trycka på önskade sifferknappar under denna tid.
- Page 65 All manuals and user guides at all-guides.com Tryck på och mata sedan in namnet. Tryck på och mata sedan in numret. Tryck på och / för att välja önskad ringsignal för posten i telefonboken. Tryck på för att lagra posten i telefonboken. Söka efter en post i telefonboken I inaktivt läge: Tryck på...
- Page 66 All manuals and user guides at all-guides.com Tryck på och / för att välja ”HS SET”. Tryck på och / för att välja ”AUTO ANS”. Tryck på och / för att sätta på eller stänga av autosvarsfunktionen. Tryck på för att bekräfta. 10.2.3 Återställa den trådlösa handenheten Du kan återställa telefonen till dess grundinställningar.
- Page 67 All manuals and user guides at all-guides.com Återlämna enheten till den butik där du köpte den och se till att ta med inköpskvittot. Kom ihåg att inkludera nätadaptern. 12.2 Efter garantiperiodens slut Om enheten inte längre omfattas av garantin, kontaktar du oss via www.aegtelephones.eu Den här produkten fungerar endast med laddningsbara batterier.
- Page 68 All manuals and user guides at all-guides.com BO NIE JEST NAM WSZYSTKO JEDNO www.aegtelephones.eu...
- Page 69 All manuals and user guides at all-guides.com...
- Page 70 All manuals and user guides at all-guides.com...
- Page 71 All manuals and user guides at all-guides.com...
- Page 72 All manuals and user guides at all-guides.com...
- Page 73 All manuals and user guides at all-guides.com 7.1.1 > 7.1.2 7.1.4 7.1.5 7.1.6...
- Page 74 All manuals and user guides at all-guides.com > 7.9.1 7.10...
- Page 75 All manuals and user guides at all-guides.com 7.11 7.12 7.14 7.15 7.15.1...
- Page 76 All manuals and user guides at all-guides.com...
- Page 77 All manuals and user guides at all-guides.com 10.2.1 10.2.2...
- Page 78 All manuals and user guides at all-guides.com 12.1 12.2 www.aegtelephones.eu...
- Page 79 All manuals and user guides at all-guides.com www.aegtelephones.eu...
- Page 80 All manuals and user guides at all-guides.com www.aegtelephones.eu...
- Page 81 All manuals and user guides at all-guides.com...
- Page 82 All manuals and user guides at all-guides.com...
- Page 83 All manuals and user guides at all-guides.com...
- Page 84 All manuals and user guides at all-guides.com Flash...
- Page 85 All manuals and user guides at all-guides.com 7.1.1 > 7.1.2 7.1.4...
- Page 86 All manuals and user guides at all-guides.com 7.1.5 7.1.6 >...
- Page 87 All manuals and user guides at all-guides.com 7.9.1 7.10 7.11...
- Page 88 All manuals and user guides at all-guides.com 7.12 7.14 7.15 7.15.1...
- Page 89 All manuals and user guides at all-guides.com...
- Page 90 All manuals and user guides at all-guides.com 10.2.1 10.2.2...
- Page 91 All manuals and user guides at all-guides.com 12.1 12.2 www.aegtelephones.eu...
- Page 92 All manuals and user guides at all-guides.com www.aegtelephones.eu...
- Page 93 All manuals and user guides at all-guides.com OMTANKE FOR MILJØET Tak, fordi du købte dette produkt. Dette produkt er udviklet og samlet med den størst mulige omtanke for dig og miljøet. Det er årsagen til, at vi leverer dette produkt med en vejledning til hurtig installation, hvorved vi reducerer mængden af papir (sider) og minimerer fældningen af træer til fremstilling af vejledningen.
- Page 94 All manuals and user guides at all-guides.com Gem emballagen på et sikkert sted i tilfælde af, at du senere får brug for at transportere telefonen. LÆR TELEFONEN AT KENDE Oversigt over telefonrør (se P1) Forklaring Op/ned Under et opkald: Tryk for at øge eller sænke lydstyrken på telefonrøret. M1/M2/M3 - Hurtigopkaldsknapper I inaktiv tilstand: Tryk på...
- Page 95 All manuals and user guides at all-guides.com Besvar/håndfri I tilstanden inaktiv/forudindtastning: Tryk for at foretage et opkald. Tryk igen for at slå højttaleren til. I genopkaldslisten/opkaldsfortegnelsen/listen over kontaktpersoner: Tryk for at foretage et opkald til den valgte post på listen. Tryk igen for at slå højttaleren til. Under ringning: Tryk for at besvare et opkald.
- Page 96 All manuals and user guides at all-guides.com Angiver flere valg på lister ovenfor eller nedenfor. Funktion for højre brugerdefineret tast. Tryk på denne tast for at starte et opkald på samtaleanlægget. Funktion for højre brugerdefineret tast. Tryk for at gå tilbage til det forrige niveau i menuen eller annullere den aktuelle handling.
- Page 97 All manuals and user guides at all-guides.com Installation af det trådløse telefonrør og opladning af batterierne (se P3) Skub dækslet på bagsiden af telefonrøret op og fjern det for at åbne batterirummet. Sæt de to medfølgende batterier i batterirummet i henhold til polaritetsmarkeringerne. Klik batteridækslet på...
- Page 98 All manuals and user guides at all-guides.com Højttaler på telefonrøret Under et opkald kan du trykke på for at skifte imellem håndfri højttaler og normal brug af telefonrøret. Sådan justeres lydstyrken for øretelefon og håndfri Der findes 5 lydstyrkeniveauer (“VOLUME 1” til “VOLUME 5”) at vælge imellem for både telefonrør og højttaler.
- Page 99 All manuals and user guides at all-guides.com Advarsel: Der vil være en forsinkelse på tre sekunder, efter du har løftet telefonrøret eller har trykket på knappen SPEAKER (højttaler), før der bliver ringet ud. Hvis der trykkes på et eller flere tal i det interval, bliver de registreret, og alle tallene bruges til opkaldet efter forsinkelsesintervallet.
- Page 100 All manuals and user guides at all-guides.com Tryk på og / for at vælge “CONTACTS”, og tryk derefter på for at få adgang til telefonbogen. Tryk på for at vise “ADD”. Tryk på , og indtast derefter navnet. Tryk på , og indtast derefter nummeret.
- Page 101 All manuals and user guides at all-guides.com 10.2.2 Sådan indstilles autosvar Hvis du aktiverer Autosvar, kan du besvare et opkald automatisk blot ved at løfte telefonrøret fra basisenheden eller opladeren, uden at trykke på nogen knapper. Tryk på og / for at vælge “HS SET”. Tryk på...
- Page 102 All manuals and user guides at all-guides.com 12.1 Hvis enheden er dækket af garantien Afbryd basisenheden fra telefonledningen og strømforsyningen. Pak alle telefonsystemets dele i den originale emballage. Returnér enheden til den butik, hvor du købte den, og husk at medbringe købskvitteringen. Husk at medbringe strømforsyningsadapteren.
- Page 103 All manuals and user guides at all-guides.com RENGØRING OG VEDLIGEHOLDELSE Rengør ikke telefonens dele med benzen, fortynder eller andre opløsningsmidler, da dette kan forårsage permanente skader, som ikke dækkes af garantien. Rengør om nødvendigt apparatet med en fugtig klud. Telefonsystemet må ikke stå i varme, fugtige omgivelser eller direkte sollys, og det må ikke blive vådt.
- Page 104 All manuals and user guides at all-guides.com www.aegtelephones.eu...
- Page 105 All manuals and user guides at all-guides.com...
- Page 106 All manuals and user guides at all-guides.com...
- Page 107 All manuals and user guides at all-guides.com...
- Page 108 All manuals and user guides at all-guides.com...
- Page 109 All manuals and user guides at all-guides.com 7.1.1 > 7.1.2 7.1.4 7.1.5 7.1.6...
- Page 110 All manuals and user guides at all-guides.com > 7.9.1 7.10...
- Page 111 All manuals and user guides at all-guides.com 7.11 7.12 7.14 7.15 7.15.1...
- Page 112 All manuals and user guides at all-guides.com...
- Page 113 All manuals and user guides at all-guides.com 10.2.1 10.2.2...
- Page 114 All manuals and user guides at all-guides.com 12.1 12.2 www.aegtelephones.eu...
- Page 115 All manuals and user guides at all-guides.com www.aegtelephones.eu...
- Page 116 All manuals and user guides at all-guides.com www.aegtelephones.eu...
- Page 117 All manuals and user guides at all-guides.com...
- Page 118 All manuals and user guides at all-guides.com...
- Page 119 All manuals and user guides at all-guides.com Flash...
- Page 120 All manuals and user guides at all-guides.com 7.1.1 > 7.1.2 7.1.4 7.1.5...
- Page 121 All manuals and user guides at all-guides.com 7.1.6 >...
- Page 122 All manuals and user guides at all-guides.com 7.9.1 7.10 7.11 7.12 NEBO 7.14 7.15 7.15.1...
- Page 123 All manuals and user guides at all-guides.com...
- Page 124 All manuals and user guides at all-guides.com 10.2.1 10.2.2...
- Page 125 All manuals and user guides at all-guides.com 12.1 12.2 www.aegtelephones.eu...
- Page 126 All manuals and user guides at all-guides.com www.aegtelephones.eu...
- Page 127 All manuals and user guides at all-guides.com...
- Page 128 All manuals and user guides at all-guides.com © 2012 Binatone Electronics International Limited All rights reserved Subject to avaibility. Rights of modification reserved. AEG is a registered trademark used under license from AB Electrolux (publ) www.aegtelephones.eu...