Publicité
Les langues disponibles
Les langues disponibles
Liens rapides
Fitting
Instructions
MATERIALS
A
1
Cross Bar
B
1
Side Bracket
C
1
Side Bracket
D
4
M10 x 35 x 1.25 pitch Bolts, Lock Washers and Flat Washers (OD 25mm)
E
2
M10 x 35 x 1.25 pitch Bolts, Lock Washers and Flat Washers (OD 25mm)
F
4
M12 x 35 x 1.75 pitch Bolts, Nuts and Lock Washers
ZB
1
Electrical Plate Bracket
ZE
1
Flip-Up Electrical Plate
ZQ
1
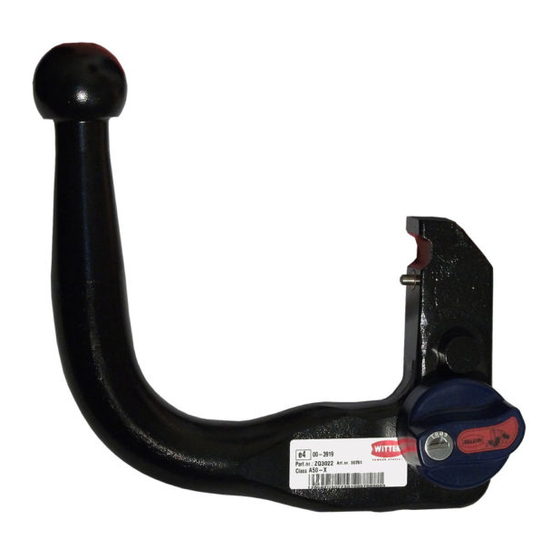
Tow Ball Neck ZF3007 or ZQ3007
For use with either
KA25 Flange neck option – ZF3007. Note: This towbar must be used with either a Witter Towball (part number Z11) or Class
A50-1 or A50-X towball, which dimensionally conforms to A50-1 with a 'D' and 'S' value greater than or equal to that of the towbar.
KA25Q Detachable neck option – ZQ3007. Please refer to ZQ fitting instructions for installation
FITTING
Note:
This Towbar may be fitted by either inserting the Cross Bar (A) into the bumper void by pulling the bottom edge of the bumper
downwards, or by completely removing the bumper prior to fitting the towbar to give easier access.
To remove the bumper:
•
Remove all fasteners from bottom edge, wheel arch and wheel arch bumper tip.
•
Remove the rear light clusters (4 nuts inside rear quarter panels).
•
Remove Clips and screws from light cluster area and boot opening face.
•
Pull back the boot side trim to gain access to two bolts on the inside of the rear quarter panel, remove bolts and push out
the adjacent square plastic clip.
•
Remove the four bolts securing the internal bumper beam (located on boot floor).
•
Pull each bumper tip outwards and slide bumper, complete with its internal beam, rearwards to remove from vehicle.
Disconnect the bumper beam from the bumper by removing the two rubber securing straps and loosely re-assemble the
beam back to the vehicle using original fasteners through the boot floor.
Remove rearmost exhaust rubber from its bracket and un-bolt the Bracket from the vehicle. (hand to customer)
1.
Locate mounting points (D & E) on chassis rails and remove cover seals/tape.
2.
Cut the Towbar aperture in the bumper as shown below.
3.
Remove all fasteners securing the bottom edge of the bumper
4.
Remove all the bumper brackets from the internal bumper beam or alternatively rotate upwards until horizontal.
5.
6.
Partially assemble fasteners (E) into the captive nuts located in the side of each chassis rail. (Note: It may be necessary
to loosen the internal bumper beam supports (4 bolts on inside of boot floor) to correctly align the captive nut with the
hole in the skin of the chassis)
Loosely assemble Side Brackets (B) and (C) using fasteners (D) and (E) into the captive nuts of the chassis, and so that
7.
the pre-assembled fasteners (E) clamp the outside vertical face of each Side Bracket.
Pull down the bottom edge of the bumper and insert Cross Bar (A) into void then secure to Side Brackets (B and C)
8.
using fasteners (F)
Assemble the chosen Neck (ZQ or ZF) and Electrical Plate parts (ZF and ZE) to Cross Bar (A) using fasteners from
9.
Neck Kit.
10.
Fully tighten all fasteners, starting with fasteners (D).
Re-tighten the bumper beam bolts on the boot floor.
11.
Raise the exhaust silencer and refit rearmost exhaust rubber to rod provided on Side Brackets (C and D).
12.
Refit bumper if originally removed.
13.
14.
Re-secure bottom edge of bumper using existing fasteners to the two tags provided on Cross Bar (A). (The outer two
fasteners are no longer used.)
Recommended torque settings:
Grade 8.8 bolts: M8 - 24Nm, M10 - 52 Nm, M12 - 80 Nm, M14 - 130 Nm, M16 - 200 Nm
Grade 10.9: M12 – 120Nm, M10 – 70Nm M8- 35Nm
W0001KA25-FIT$010909110000%Ä
W0001KA25-FIT$010909110000
KA25
TOWBAR
&
For Kia Magentis
KA25Q
Publicité

Sommaire des Matières pour Witter KA25
- Page 1 For use with either KA25 Flange neck option – ZF3007. Note: This towbar must be used with either a Witter Towball (part number Z11) or Class A50-1 or A50-X towball, which dimensionally conforms to A50-1 with a ‘D’ and 'S' value greater than or equal to that of the towbar.
- Page 3 BUMPER CUT...
-
Page 4: Montage
Plaque électrique escamotable Pour utiliser avec KA25 Ferrure pour rotule standard– ZF3007. Remarque : Cet attelage doit être utilisé avec une boule d’attelage Witter (référence produit Z11) ou une boule de remorquage Classe A50-1 ou A50-X se conformant dimensionnellement à A50-1 avec une valeur ‘D’... - Page 5 Couple de serrage recommandé: Boulons de Grade 8.8: M8 - 24Nm, M10 - 52 Nm, M12 - 80 Nm, M14 - 130 Nm, M16 - 200 Nm Grade 10.9: M12 – 120Nm, M10 – 70Nm M8- 35Nm Découper autour du point de fixation du pare-chocs...


