Table des Matières
Publicité
Les langues disponibles
Les langues disponibles
Liens rapides
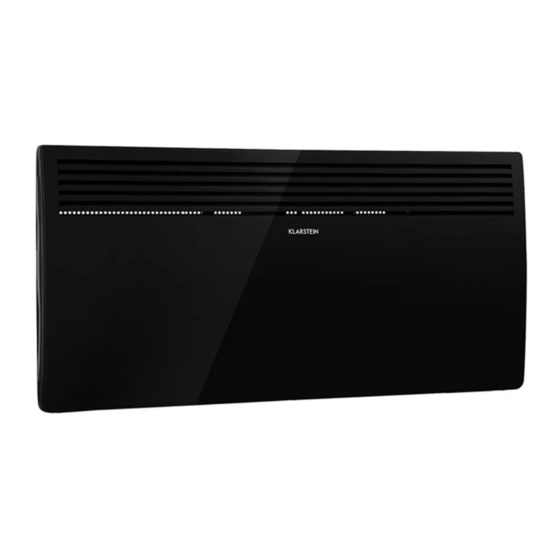
HOT SPOT SLIM-
CURVE
Infrarot-Heizung
Infrared Heater
Radiador infrarrojo
Radiateur Infrarouge
Radiatore a infrarossi
10033016 10033017 10033018 10033019
www.klarstein.com
Hinweis: Dieses Produkt ist nur für gut isolierte Räume
oder für den gelegentlichen Gebrauch geeignet.
Note: This product is only suitable for well insulated
spaces or occasional use.
Nota: Este producto está indicado únicamente en
lugares abrigados o para una utilización punctual.
Remarque : Ce produit ne peut être utilisé que dans
des locaux bien isolés ou de manière occasionnelle.
Advertencia: Questo prodotto è adatto solo per spazi
ben isolati o uso occasionale.
Publicité
Chapitres
Table des Matières

Manuels Connexes pour Klarstein HOT SPOT SLIM-CURVE


Sommaire des Matières pour Klarstein HOT SPOT SLIM-CURVE
- Page 1 Radiador infrarrojo Radiateur Infrarouge Radiatore a infrarossi 10033016 10033017 10033018 10033019 www.klarstein.com Hinweis: Dieses Produkt ist nur für gut isolierte Räume oder für den gelegentlichen Gebrauch geeignet. Note: This product is only suitable for well insulated spaces or occasional use.
-
Page 3: Table Des Matières
Sehr geehrter Kunde, wir gratulieren Ihnen zum Erwerb Ihres Gerätes. Lesen Sie die folgenden Hinweise sorgfältig durch und befolgen Sie diese, um möglichen Schäden vorzubeugen. Für Schäden, die durch Missachtung der Hinweise und unsachgemäßen Gebrauch entstehen, übernehmen wir keine Haftung. Scannen Sie den folgenden QR-Code, um Zugriff auf die aktuellste Bedienungsanleitung und weitere Informationen rund um das Produkt zu erhalten:... -
Page 4: Produktdatenblatt
PRODUKTDATENBLATT Artikelnummer(n) 10033016 10033017 Angabe Symbol Wert Einheit Angabe Einheit Wärmeleistung Nur bei elektrischen Speicher-Einzelraumheizgeräten: Art der Regelung der Wärmezufuhr Nennwärmeleistung Manuelle Regelung der Wärmezufuhr mit nein integriertem Thermostat Mindestwärmeleistung Manuelle Regelung der Wärmezufuhr nein (Richtwert) mit Rückmeldung der Raum- und/oder Außentemperatur Maximale kontinuierliche Elektronische Regelung der Wärmezufuhr... -
Page 5: Sicherheitshinweise
SICHERHEITSHINWEISE • Lesen Sie alle Anweisungen, bevor Sie dieses Gerät benutzen. • Lassen Sie das Gerät nicht unbeaufsichtigt, wenn es in Betrieb ist. • Diese Heizung wird während der Benutzung heiß. Berühren Sie nicht die heißen Oberfl ächen. VORSICHT: Verbrennungsgefahr! Einige Teile dieses Produktes können sehr heiß... - Page 6 • Fassen Sie das Heizelement nicht mit bloßen Händen an. Wenn es versehentlich berührt wird, entfernen Sie Fingerabdrücke mit einem weichen Tuch, da sich diese sonst in das Element einbrennen und einen vorzeitigen Ausfall der Heizung verursachen. • Ersetzen Sie das Heizelement nicht oder versuchen Sie nicht, es zu entfernen. •...
- Page 7 MONTAGE Artikelnummer Produkt 10033016 Bad-Heizkörper aus Metall weiß 10033017 Badheizkörper aus Metall schwarz 10033018 weiße Rollen 10033019 schwarze Rollen Abmessungen L (mm) H (mm) L1 (mm) H1 (mm) Heizgerät an der Wand montieren und demontieren Wandmontage Heizgerät von der Wand abnehmen...
-
Page 8: Geräteübersicht
Rollen installieren und entfernen Knopf drücken Wenn die Montage abgeschlossen ist, Drücken Sie den Knopf nach oben, um hören Sie einen Klick. die Rollen abzunehmen. GERÄTEÜBERSICHT Luftaustritt Steuereinheit Schalter Lenkrollenhalter... -
Page 9: Bedienfeld
BEDIENFELD Betriebsanzeige Heizleistung Heizungsanzeige Anzeige halbe Heizleistung (LO) Anzeige volle Heizleistung (HI) Anzeige Fenster offen (WO) Anzeige Manueller Modus (M) Anzeige Auto-Modus (A) Timer-Anzeige Einstelltaste Aufwärts (+) Einstelltaste Abwärts (-) Programm bestätigen (OK) Programm-Einstellungen (Set) Grad Celsius-Symbol (°C) Temperaturanzeige Minutenanzeige Stundenanzeige Wochentaganzeige Taste Auto-/Manueller Modus... -
Page 10: Bedienung
BEDIENUNG Inbetriebnahme • Nehmen Sie die Heizung vorsichtig aus dem Karton. Bitte bewahren Sie den Karton für die Lagerung außerhalb der Saison auf. • Stellen Sie sicher, dass der Ein/Aus-Schalter (21) ausgeschaltet ist, bevor Sie das Gerät anschließen. • Achten Sie darauf, dass die Heizung gemäß der Montageanleitung vollständig montiert ist. - Page 11 • Erfolgt nach Beendigung der Einstellung 10 Sekunden lang keine Aktion, speichert das System automatisch die Einstellung und verlässt das Menü. Timer einstellen Den Timer im Manuellen Modus einstellen (24-Stunden-Timer) Drücken Sie die Taste Auto-/Manueller Modus (19), um den manuellen Modus auszuwählen.
- Page 12 Teilleistung und volle Leistung einstellen • Drücken Sie die Heizleistungs-Taste (2), um die Leistung in Teil- oder Volllast zu ändern. • Bei Vollast wird in der Anzeige volle Heizleistung (5) das „HI” eingeblendet und in der Anzeige halbe Heizleistung (4) das „LO” ausgeblendet. •...
- Page 13 Signalton • Jedes Mal, wenn Sie eine Taste drücken, ertönt ein Signalton, bei längerem Drücken ertönt er nur einmal. Kindersicherung • Wenn das Gerät in Betrieb ist, drücken Sie gleichzeitig die Aufwärts- (10) und Abwärts (1 1)-Taste für 3 Sekunden. Das System wird gesperrt. Die Temperaturanzeige (15) zeigt zunächst „[ ]”...
-
Page 14: Hinweise Zur Entsorgung
HINWEISE ZUR ENTSORGUNG Wenn es in Ihrem Land eine gesetzliche Regelung zur Entsorgung von elektrischen und elektronischen Geräten gibt, weist dieses Symbol auf dem Produkt oder auf der Verpackung darauf hin, dass dieses Produkt nicht im Hausmüll entsorgt werden darf. Stattdessen muss es zu einer Sammelstelle für das Recycling von elektrischen und elektronischen Geräten gebracht werden. - Page 15 Dear Customer, Congratulations on purchasing this device. Please read the following instructions carefully and follow them to prevent possible damages. We assume no liability for damage caused by disregard of the instructions and improper use. Scan the QR code to get access to the latest user manual and more product information.
-
Page 16: Product Data Sheet
PRODUCT DATA SHEET Item number(s): 10033016 10033017 Item Symbol Value Unit Item Unit Heat output Type of heat input, for electric storage local space heaters only Nominal heat output manual heat charge control, with integrated thermostat Minimum heat output manual heat charge control with room and/or (indicative) outdoor temperature feedback Maximum continuous heat... -
Page 17: Safety Instructions
SAFETY INSTRUCTIONS • Read all instructions before using this unit. • Do not leave this unit unattended when in use. • This heater will get hot when in use. Do not touch hot surfaces. CAUTION: Risk of burns! Some parts of this product can become very hot and cause burns. Particular attention has to be given when children and vulnerable people are present. - Page 18 • Do not handle the element with bare hands. If it is inadvertently touched, remove finger marks with a soft cloth and methylated spirits or alcohol, otherwise the marks will burn into the element causing premature heater failure. • Do not replace or attempt to replace the element in this product. •...
- Page 19 ASSEMBLY Item number Product 10033016 Bathroom metal panel heater white 10033017 Bathroom metal panel heater black 10033018 Castors white 10033019 Castors black Dimensions L (mm) H (mm) L1 (mm) H1 (mm) Mounting and dismounting the heater on the wall Wall mounted mode Take down the heater from wall...
-
Page 20: Device Overview
Rollen installieren und entfernen Push button If the installation is complete, an Press the button up, take down the acoustic click sounds. caster. DEVICE OVERVIEW Air Outlet Control Unit Switch Castor Wheel Stand... -
Page 21: Control Panel
CONTROL PANEL Power indicator Heater element power Heating indicator Half Heating indicator (LO) Full Heating indicator (HI) Window Open Indicator (WO) Manual mode indicator (M) Auto mode indicator (A) Timer indicator Upwards adjustment (+) button Downwards adjustment (-) button Program Confirm (OK) Program Set (Set) Degrees Celsius symbol (°C) Temperature indicator... -
Page 22: Operation
OPERATION Initial operation • Carefully remove the heater from the box. Please keep the carton for off-season storage. • Make sure the power switch (21) is turned off before pluggin it in. • Make sure that the heater is completely installed according to the installation instructions. - Page 23 Setting the timer Setting the Timer in Manual Mode (24-hour timer) Press the Auto/Manual mode button (19) to select the manual mode. The display shows “M” in manual mode (7). Press the “Set” button (13) to set the hour of the timer to stop the heating. Press the up (10) and down (1 1) buttons to select the hour (if the selected hour is less than the current hour, the system is automatically activated the next day).
- Page 24 Manual Mode and Auto Mode • Press the Auto/Manual mode button (19) to change the mode to Manual or Auto. • In manual mode, the display in manual mode (7) shows an “M” while the “A” is hidden. • In auto mode, the display in auto mode (8) shows the “A” and the “M” is hidden. Shutdown memory function •...
- Page 25 Unlock child lock Switch off the device with the start/stop button (20). The unit switches to the resting stage. Press the up (10) and down (1 1) buttons for 3 seconds and the child lock is unlocked.
-
Page 26: Disposal Considerations
DISPOSAL CONSIDERATIONS If there is a legal regulation for the disposal of electrical and electronic devices in your country, this symbol on the product or on the packaging indicates that this product must not be disposed of with household waste. Instead, it must be taken to a collection point for the recycling of electrical and electronic equipment. - Page 27 Chère cliente, cher client, Toutes nos félicitations pour l’acquisition de ce nouvel appareil. Veuillez lire attentivement et respecter les instructions de ce mode d’emploi afin d’éviter d’éventuels dommages. Nous ne saurions être tenus pour responsables des dommages dus au non-respect des consignes et à...
-
Page 28: Fiche De Données Produit
FICHE DE DONNÉES PRODUIT Référence (s) du produit 10033016 10033017 Donnée Symbole Valeur Unité Donnée Unité Puissance calorifique Uniquement pour les radiateurs électriques à accumulation : Type de régulation de l'apport de chaleur Puissance calorifique Pnom Régulation manuelle de l'apport de chaleur nominale avec thermostat intégré... -
Page 29: Consignes De Sécurité
CONSIGNES DE SÉCURITÉ • Lisez toutes les instructions avant d’utiliser cet appareil. • Ne laissez pas l‘appareil sans surveillance lorsqu‘il est en marche. • Ce radiateur devient chaud pendant l‘utilisation. Ne touchez pas les surfaces chaudes. ATTENTION : risque de brûlure ! Certaines parties de cet appareil peuvent devenir très chaudes pendant le fonctionnement et causer des brûlures. - Page 30 • Ce produit est adapté à une utilisation intérieure et extérieure. N‘utilisez pas ce radiateur à proximité immédiate d‘une baignoire, d‘une douche ou d‘une piscine. • Ce produit ne doit pas être exposé aux intempéries pendant une longue période. • Ne touchez pas la fiche avec des mains mouillées ou humides. •...
- Page 31 MONTAGE Numéro d‘article Produit 10033016 Corps du radiateur de salle de bains en métal blanc 10033017 Corps du radiateur de salle de bains en métal noir 10033018 Roulettes blanches 10033019 Roulettes noires Dimensions L (mm) H (mm) L1 (mm) H1 (mm) Montage et démontage du radiateur sur un mur Montage mural Démonter le radiateur du mur...
-
Page 32: Aperçu De L'appareil
Installation et démontage des roulettes Appuyez sur le bouton Lorsque vous avez terminé le montage, Appuyez sur le bouton vers le haut pour vous pouvez entendre un clic. démonter les roulettes. APERÇU DE L‘APPAREIL Unité de Sortie d‘air commande Interrupteur Support de roulettes directrices... -
Page 33: Panneau De Commande
PANNEAU DE COMMANDE Témoin de marche Puissance de chauffage Témoin de chauffage Témoin de puissance de chauffage moyenne (LO) Témoin de puissance maximale de chauffage (HI) Témoin de fenêtre ouverte (WO) Témoin de mode manuel (M) Témoin de mode auto (A) Affichage de la minuterie Touche de réglage avant (+) Touche de réglage arrière (-) -
Page 34: Utilisation
UTILISATION Mise en marche • Retirez soigneusement le radiateur de l‘emballage. Veuillez conserver le carton pour ranger l‘appareil hors saison. • Assurez-vous que l‘interrupteur marche/arrêt (21) est éteint avant de connecter l‘appareil. • Assurez-vous que le chauffage est complètement installé conformément aux instructions d‘installation. - Page 35 avant (10) et arrière (1 1), lorsque l‘affichage de la température (15) clignote. • Si vous n‘effectuez aucune action dans les 10 secondes après la fin du réglage, le système enregistre automatiquement le réglage et quitte le menu. Réglage de la minuterie Réglage de la minuterie en mode manuel (minuterie 24 heures) Appuyez sur la touche Auto / Manual Mode (19) pour sélectionner le mode manuel.
- Page 36 fonctionnement prédéfinie, il s‘éteint en 1 seconde sans aucune action lorsque vous appuyez sur la touche marche / arrêt (20). Réglage de la puissance intermédiaire et de la puissance maximale • Appuyez sur la touche de réglage de la puissance de chauffage (2) pour passer à la puissance intermédiaire ou totale.
- Page 37 l‘appareil. Sur le témoin de fenêtre ouverte (6), le témoin de contrôle „WO“ est désactivé. Le chauffage se trouve en mode de fonctionnement normal. Signal sonore • Chaque fois que vous appuyez sur une touche, un bip retentit. Un sseul son est émis lors d‘un appui long Verrouillage parental •...
-
Page 38: Informations Sur Le Recyclage
INFORMATIONS SUR LE RECYCLAGE Vous trouverez sur le produit l’image ci-contre (une poubelle sur roues, barrée d‘une croix), ce qui indique que le produit se trouve soumis à la directive européenne 2012/19/ UE. Renseignez-vous sur les dispositions en vigueur dans votre région concernant la collecte séparée des appareils électriques et électroniques. - Page 39 Estimado cliente, Le felicitamos por la adquisición de este producto. Lea atentamente el siguiente manual y siga cuidadosamente las instrucciones de uso con el fin de evitar posibles daños. La empresa no se responsabiliza de los daños ocasionados por un uso indebido del producto o por haber desatendido las indicaciones de seguridad.
- Page 40 HOJA DE DATOS DEL PRODUCTO Denominación del modelo 10033016 10033017 Dato Símbolo Valor Unidad Dato Unidad Potencia térmica Solo con disposítivos de acumulación de calor eléctricos para abastecimiento local: Tipo de regulación del abastecimiento de calor Potencia térmica nominal Pnom Regulación manual del abastecimiento de calor con termostato integrado: Potencia térmica mínima...
- Page 41 INDICACIONES DE SEGURIDAD • Lea atentamente estas indicaciones antes de utilizar este aparato. • No deje el aparato en marcha si no se encuentra bajo supervisión. • Este radiador alcanza temperaturas muy elevadas durante su uso. No toque las superfi cies calientes. ATENCIÓN: Existe riesgo de quemaduras ! Algunas piezas de este producto pueden alcanzar temperaturas muy elevadas y provocar quemaduras.
- Page 42 • No toque la resistencia con las manos mojadas. Si se ha tocado por accidente, retire las manchas de dedos con un paño suave; de lo contrario, estas se quedarán marcadas en la resistencia y provocarán una merma anticipada del radiador. •...
- Page 43 MONTAJE Número de artículo Producto 10033016 Calefactor de baño de metal en color blanco 10033017 Calefactor de baño de metal en color negro 10033018 Ruedas blancas 10033019 Ruedas negras Dimensiones L (mm) H (mm) L1 (mm) H1 (mm) Montar y desmontar el calefactor de la pared Montaje en pared Desmontar el calefactor de la pared...
- Page 44 Instalar y desmontar las ruedas Pulsar botón Cuando haya finalizado el montaje Presione el botón hacia arriba para escuchará un clic desmontar las ruedas VISIÓN GENERAL DEL APARATO Salida de Unidad de aire control Interruptor Soporte de las ruedas giratorias...
- Page 45 PANEL DE CONTROL Indicador de funcionamiento Potencia de calefacción Indicador de calefacción Indicador de potencia de calefacción media (LO) Indicador de potencia de calefacción completa (HI) Indicador de ventana abierta (WO) Indicador de modo manual (M) Indicador de modo automático (A) Indicador del temporizador Botón de configuración hacia adelante Botón de configuración hacia atrás (-)
- Page 46 UTILIZACIÓN Puesta en marcha • Desembale la calefacción con cuidado de su caja. Guarde la caja para almacenar el aparato cuando no lo utilice. • Asegúrese de que el interruptor on/off (21) esté desactivado antes de conectar el aparato. • Asegúrese de que la calefacción se monte conforme a las instrucciones de montaje. •...
- Page 47 guarda automáticamente la configuración y abandona el menúsystème enregistre automatiquement le réglage et quitte le menu. Ajustar el temporizador Configurar el temporizador en modo manual (temporizador de 24 horas) Pulse el botón de modo auto/manual (19) para seleccionar el modo manual. En el indicador de modo manual (7), aparece „M“.
- Page 48 tiempo de funcionamiento predeterminado, el aparato se apaga al pulsar el botón start/stop (20) sin realizar ninguna acción en 1 segundo Ajustar potencia parcial y potencia total • Pulse el botón de potencia de calefacción (2) para modificar la potencia a carga parcial o total.
- Page 49 Eliminar detección automática de ventana abierta • Pulse dos veces el botón start/stop (20) para encender y apagar. En el indicador de ventana abierta (6), se desactiva el indicador luminoso „WO“. La calefacción se encuentra en modo normal. Señal acústica •...
- Page 50 INDICACIONES PARA LA RETIRADA DEL APARATO Si en su país existe una disposición legal relativa a la eliminación de aparatos eléctricos y electrónicos, este símbolo estampado en el producto o en el embalaje advierte que no debe eliminarse como residuo doméstico. En lugar de ello, debe depositarse en un punto de recogida de reciclaje de aparatos eléctricos y electrónicos.
- Page 51 Gentile Cliente, La ringraziamo per aver acquistato il dispositivo. La preghiamo di leggere attentamente le seguenti istruzioni per l’uso e di seguirle per evitare possibili danni tecnici. Non ci assumiamo alcuna responsabilità per danni scaturiti da una mancata osservazione delle avvertenze di sicurezza e da un uso improprio del dispositivo.
- Page 52 SCHEDA INFORMATIVA DEL PRODOTTO AVVERTE Identifi cazione del modello (i) 10033016, 10033017 • Leggere tu Indicazione Simbolo Valore Unità Indicazione Unità • Non lascia • Questa stu Potenza termica Solo per gli apparecchi per il riscaldamento d'ambiente bollenti. locale elettrici ad accumulo: Tipo di controllo dell´apporto termico Potenza termica nominale Pnom...
- Page 53 ENZE DI SICUREZZA utte le indicazioni prima di utilizzare il dispositivo. are il dispositivo privo di controllo quando è in funzione. ufa diventa molto calda durante l’utilizzo. Non toccare le superfici ATTENZIONE: pericolo di ustione! Alcuni componenti di questo prodotto possono diventare estremamente caldi e causare ustioni.
- Page 54 • Non toccare l’elemento riscaldante a mani nude. Se viene toccato MONTAG involontariamente, rimuovere immediatamente con un panno umido le impronte digitali lasciate, altrimenti si imprimono sull’elemento riscaldante, causando un prematuro malfunzionamento del dispositivo. • Non sostituire l’elemento riscaldante e non cercare di toglierlo. •...
- Page 55 GGIO Numero articolo Prodotto 10033016 Stufa da bagno in metallo bianco 10033017 Stufa da bianco in metallo nero 10033018 Rotelle bianche 10033019 Rotelle nere Dimensioni L (mm) H (mm) L1 (mm) H1 (mm) Montare la stufa alla parete e smontarla ontaggio a parete Rimuovere la stufa dalla parete...
- Page 56 PANNEL Montare e smontare le rotelle Premere il tasto A montaggio terminato si sente un clic Premere il tasto verso l’alto per togliere le rotelle DESCRIZIONE DEL DISPOSITIVO Uscita Unità di dell’aria controllo Interruttore Supporto rotelle orientabili Inte...
- Page 57 LLO DI CONTROLLO pia di funzionamento tenza riscaldante pia riscaldamento pia riscaldamento livello basso (LO) pia riscaldamento livello elevato (HI) pia finestra aperta (WO) pia modalità manuale (M) pia modalità automatica (A) pia timer sto di regolazione avanti (+) sto di regolazione indietro (-) onfermare programma (OK) postazioni programma (set) mbolo gradi Celsius (°C)
- Page 58 UTILIZZO Impostare il ti Impostare il ti Messa in funzione Premere il • Togliere la stufa dal cartone con cura. Conservare il cartone per riporre il manuale. N dispositivo in caso di tempi prolungati di non utilizzo. Premere “S • Prima di collegare la spina, assicurarsi che l’interruttore On/Off sia spento. l’ora con A •...
- Page 59 imer imer in modalità manuale (timer 24 ore) tasto modalità automatica/manuale (19) per selezionare la modalità Nell’indicazione della modalità manuale (7) compare “M”. Set” (13), per impostare l’ora di spegnimento della stufa. Selezionare Avanti (10) e Indietro (1 1) (se l’ora impostata è precedente all’ora attuale, viene arrestato automaticamente il giorno successivo).
- Page 60 • In caso di potenza parziale, nell’indicazione della potenza parziale (5) comparirà Protezione pe “LO” nell’indicazione della potenza totale (4) scomparirà “HI”. • A dispositi Modalità manuale e automatica Indietro (1 1 (15) mostra • Premere il tasto modalità automatica/manuale (19) per passare da una modalità •...
- Page 61 er i bambini ivo in funzione, tenere premuti contemporaneamente Avanti (10) e 1 1) per 3 secondi. Il sistema è bloccato. L’indicazione della temperatura ra “[ ]” e dopo 5 secondi mostra la temperatura ambiente. ette qualche impostazione, viene mostrato “[ ]” per 5 secondi, viene segnale acustico e poi viene mostrata di nuovo la temperatura ambiente protezione per i bambini il dispositivo con Start/Stop (20).
- Page 62 SMALTIMENTO Se nel proprio paese si applicano le regolamentazioni inerenti lo smaltimento di dispositivi elettrici ed elettronici, questo simbolo sul prodotto o sulla confezione segnala che questi prodotti non possono essere smaltiti con i rifiuti normali e devono essere portati a un punto di raccolta di dispositivi elettrici ed elettronici.