
Manuels Connexes pour DELTACALOR DROP 500


Sommaire des Matières pour DELTACALOR DROP 500
- Page 1 MANUALE D’USO E INSTALLAZIONE OPERATION AND INSTALLATION MANUAL NOTICE D’UTILISATION ET D’INSTALLATION MANUAL DE USUARIO Y DE INSTALACIÓN DOC.IS.003436 03.07.2020...
- Page 2 [IT] Queste istruzioni devono essere lette attentamente per garantire il funzionamento in sicurezza del prodotto. Pertanto si raccomanda fortemente di leggerle prima di procedere con l’installazione e di conservarle per poterle consultare in futuro. In caso di dubbi circa le modalità di installazione del prodotto, chiedere assistenza a un tecnico qualificato. [EN] These instructions must be read carefully to ensure the product operates safely.
-
Page 3: Prescrizioni Di Sicurezza
PRESCRIZIONI DI SICUREZZA • Qualunque danno derivante dalla mancata osservanza di queste prescrizioni determinerà l’annullamento della garanzia del fab- bricante. • Non utilizzare l’apparecchio all’esterno. • Questo apparecchio è destinato ad un uso domestico e non deve essere impiegato per altri scopi. • Se l’apparecchio cade, è... -
Page 4: Avvertenze Per Le Persone Disabili E I Bambini
AVVERTENZE PER LE PERSONE DISABILI E I BAMBINI • Questo apparecchio può essere utilizzato da persone con ri- dotte capacità fisiche, sensoriali, mentali o senza alcuna cono- scenza del prodotto oppure da bambini di età non inferiore a 8 anni purché sorvegliati e istruiti sull’uso sicuro dell’apparecchio e consapevoli di tutti i rischi. -
Page 5: Sicurezza Bambini
SICUREZZA BAMBINI Blocco tastiera Premendo simultaneamente per più di 5 secondi i tasti SCAL- DASALVIETTE e DEUMIDIFICATORE, si attiva il blocco tastie- ra, indicato da un LED verde lampeggiante sul tasto ON/OFF. Per sbloccare la tastiera, premere simultaneamente i due tasti per più... -
Page 6: Preparazione All'installazione
PREPARAZIONE ALL’INSTALLAZIONE Prima di collegare l’apparecchio di riscaldamento, disin- serire l’alimentazione generale. Essendo un apparecchio di classe II, può essere installato in tutte le stanze della casa, compresi i volumi di protezione 2/3 di un bagno (IP24). L’apparecchio di riscaldamento deve essere installato in maniera tale che gli interruttori e gli altri dispositivi di comando non possa- no essere toccati da una persona presente nella vasca da bagno o sotto la doccia (rif. - Page 7 ALIMENTAZIONE E COLLEGAMENTI ELETTRICI • Conformemente alle norme in vigore, l’alimentazione dell’appa- • Conformemente alle norme in vigore, l’alimentazione dell’appa- recchio di riscaldamento deve essere protetta mediante un in- recchio di riscaldamento deve essere protetta mediante un in- terruttore differenziale di 30 mA e un dispositivo di protezione terruttore differenziale di 30 mA e un dispositivo di protezione contro le sovracorrenti, adeguato alle caratteristiche della linea contro le sovracorrenti, adeguato alle caratteristiche della linea...
- Page 8 FISSAGGIO DEGLI AGGANCI ALLA PARETE 4 × 4 × 4 × 4 × 4 × Ø 10 CH 14 CH 3 [ 8 - IT ]...
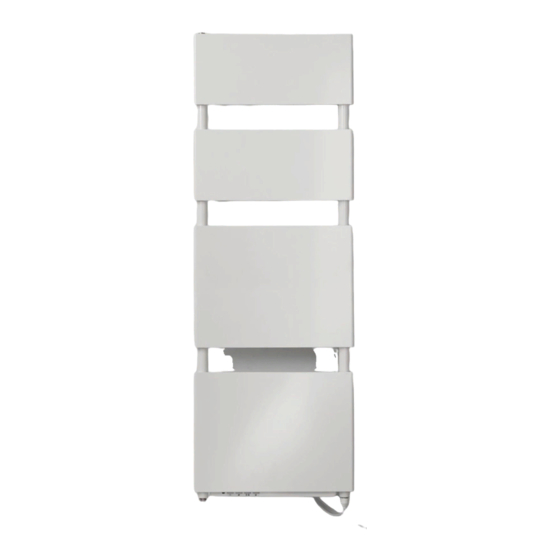
- Page 9 INSTALLAZIONE WHITE Potenza 500 + 750 + 60 W 750 + 750 + 60 W Potenza con termo- 1310 W 1560 W ventilatore 450 mm 450 mm 450 mm 906 mm 435 mm 435 mm [ 9 - IT ]...
-
Page 10: Utilizzo Corretto
UTILIZZO CORRETTO Utilizzare il prodotto come mostra la figura 1. Non ricoprire mai l’intero apparecchio con salviette o indumenti (figura 2). I collet- tori (tubi verticali) non devono essere mai coperti. Un uso errato può causare pericolosi surriscaldamenti e compromettere il fun- zionamento dell’apparecchio. - Page 11 FUNZIONAMENTO TELECOMANDO Sinottica tasto ON/STANDBY Display retroilluminato tasto CRONO tasto MODE tasto tasto tasto / ricevimento tasto BOOST 2 ore apertura finestra Livello batteria basso Trasmissione IR Consumo energetico Temperatura impostata 1. Filo pilota; 2. Comfort; 3. Notte; 4. Antigelo; 5.
-
Page 12: Modalità Di Funzionamento
Icona Modalità o funzione Descrizione Attiva la funzione ECO Rilevamento finestra aperta Attiva la funzione Rilevamento finestra aperta Attiva la funzione ASC Standby Il dispositivo entra in modalità di standby Fil pilote Funzione non attiva Accensione/Standby 1°C in meno rispetto alla temperatura im- postata. -
Page 13: Modalità Antigelo
Impostazione dell’ora e della data: Modalità Antigelo La cifra lampeggiante indica il giorno della set- Se la temperatura ambiente scende sotto timana: premere i tasti per imposta- 7°C, la modalità Antigelo attiva l’elemento re il giorno desiderato e premere il tasto riscaldante del controllo elettronico. -
Page 14: Modalità Eco
COMFORT: la temperatura COMFORT 1°C in meno rispetto alla temperatura im- impostata dall’utente viene mantenuta postata. costante nell’ambiente, accendendo e • Tasto e tasto con luce blu lampeg- spegnendo in modo intelligente l’ele- giante: modalità in attesa di funzionamento mento riscaldante. per entrambi. - Page 15 Avvertenza batterie scariche Indicatore di consumo Questa utile funzione mostra il livello attuale Quando il livello di carica della batteria è bas- di consumo di elettricità in base alla tempera- so, l’icona corrispondente apparirà sul display. tura impostata. L’icona nell’angolo in alto a si- In questo caso, le batterie devono essere so- nistra del display utilizza 3 colori, rosso, giallo stituite il prima possibile.
- Page 16 Funzione TERMO-VENTILATORE La funzione Termo-ventilatore si attiva premendo il tasto TERMO-VENTILATORE (v. im- magine in alto). Premendo una volta il tasto TERMO-VENTILATORE, il termo-ventilatore si attiva per 2 ore, quindi si spegne. Se la temperatura ambiente supera i 27°C, lo scaldasalviette entra in standby e rimane in questo stato finché...
- Page 17 Funzione mista TERMO-VENTILATORE + SCALDASALVIETTE Se si preme il tasto SOUFFLANT TERMO-VENTILATORE quando la funzione scaldasalviet- te è attiva, è possibile attivare la funzione mista termo-ventilatore + scaldasalviette, che consente di attivare sia il termo-ventilatore che lo scaldasalviette finché la temperatura ambiente non raggiunge i 28°C.
-
Page 18: Messaggi Di Errore
Blocco tastiera Premendo simultaneamente per più di 5 secondi i tasti SCALDASALVIETTE e DEUMIDI- FICATORE, si attiva il blocco tastiera, indicato da un LED verde lampeggiante sul tasto OFF. Per sbloccare la tastiera, premere simultaneamente i due tasti per più di 3 secondi. Messaggi di errore Descrizione Stato LED... -
Page 19: Caratteristiche Tecniche
100 x 42 x 27 mm (Alt. x Lar. x Pro.) Montaggio A parete, con supporto apposito Garanzia 2 anni Fabbricante: DELTACALOR s.r.l. Manuale di istruzioni disponibile sul sito: http://www.lfantoni.com/d/DOC.IS.003641.pdf Il simbolo apposto sul prodotto, segnala l’obbligo di consegnare l’apparecchio da smaltire presso un punto di raccolta specializzato, conformemente alla Direttiva 2012/19/UE. - Page 20 Puissance thermique maximale continue 1,56 max,c Consommation d'électricité auxiliaire À la puissance thermique nominale 1,56 À la puissance thermique minimale 0,06 En mode veille <0,0005 Contatti: Deltacalor S.r.L - Via mazzini, 23801 Calolziocorte (LC) - ITALIA [ 20 - IT ]...
- Page 21 Con opzione di controllo a distanza sì Con controllo di avviamento adattabile sì Con limitazione del tempo di funzionamento sì Con termometro a globo nero Contatti: Deltacalor S.r.L - Via mazzini, 23801 Calolziocorte (LC) - ITALIA [ 21 - IT ]...
-
Page 22: Safety Instructions
SAFETY INSTRUCTIONS • Should damages be caused from breach of these regulations, the manufacturer’s guarantee shall be invalidated. • Do not use the appliance outdoors. • Your appliance is intended for domestic use. It may not be used for other purposes. • If the appliance has been dropped, has been damaged or does not function correctly, do not use it and ensure that the appli- ance power supply has been disconnected (fuse or switch). - Page 23 WARNINGS FOR DISABLED PEOPLE AND CHILDREN • This equipment may not be used by people with reduced phys- ical, sensory, or mental capacity, those without any knowledge of the equipment, or children over 8 years of age, unless super- vised and instructed on safe use of the equipment, and aware of all the risks.
-
Page 24: Children Safety
CHILDREN SAFETY Lock Keyboard Hold down the TOWEL WARMER and DEHUMIDIFIER but- tons for more than 5 seconds, to activate lock keyboard, indicat- ed by a green light flashing on the ON/OFF button. To unlock the keyboard, hold the buttons down together for more than 3 seconds. -
Page 25: Preparation For Installation
PREPARATION FOR INSTALLATION Before connecting the heating appliance, disconnect the power supply using the general switch. This heating appliance is a class II appliance. As such, it may be in- stalled in all rooms of the house, including in protection volumes 2 and 3 of a bathroom (IP24). -
Page 26: Power Supply And Electrical Connections
POWER SUPPLY AND ELECTRICAL CONNECTIONS • In accordance with the rules in force, the power of the heating • In accordance with the rules in force, the power of the heating appliance must be protected by an RCD of 30 mA and an over- appliance must be protected by an RCD of 30 mA and an over- current protection device, suitable to the characteristics of the current protection device, suitable to the characteristics of the... - Page 27 WALL MOUNTING THE FIXING KIT 4 × 4 × 4 × 4 × 4 × Ø 10 CH 14 CH 3 [ 27 - EN ]...
- Page 28 INSTALLAZIONE WHITE Power 500 + 750 + 60 W 750 + 750 + 60 W Power with hot air blower 1310 W 1560 W 450 mm 450 mm 450 mm 906 mm 435 mm 435 mm [ 28 - EN ]...
-
Page 29: Correct Use
CORRECT USE Use the product as shown in figure 1. Never cover the entire unit with towels or clothing (figure 2). The manifolds (vertical pipes) cannot be covered. Incorrect use can cause dangerous overheat- ing, and compromise how the equipment works. To clean the equipment, do not use chemical products, but only a non abrasive damp cloth. -
Page 30: Remote Control Operation
REMOTE CONTROL OPERATION Synoptic ON/STAND-BY key Backlit display CRONO key MODE key / open window detection key BOOST 2 hours key Battery charge low IR Transmission Energy consumption Temperature set 1. Pilot Wire; 2. Comfort; 3. Night; 4. Anti-Freeze; 5. Boost 2 Hours; 6. -
Page 31: Power On / Stand-By
Icon Mode or function Description It enables the ECO function It enables the Open Window Detection Open Window Detection function It enables the ASC function Stand-by The device enters the Stand-by mode Fil pilote Function not active Power ON / Stand-by • Key with blue light flashing and key with blue light on: mode that indicates 1°C... -
Page 32: Antifrost Mode
Setting time and date: Boost 2h mode The flashing digit indicates the day of the The Boost 2h mode can be used to heat week: press the keys to set the de- quickly the room. sired day, press MODE to confirm. • To enable the function, press the relative Use the keys to set the hour and... -
Page 33: Functions
COMFORT-2: the ambient temperature ASC function is kept 2°C lower than the COMFORT The ASC function works in CHRONO mode. temperature. It brings the switch on time planned forward slightly, to increase comfort, while at the same How is PILOT WIRE mode activated? time reducing overall energy consumption. -
Page 34: Low Battery Warning
Low battery warning Consumption indicator This useful function shows the current elec- When the charge in the battery is low, the tricity consumption, based on the tempera- corresponding icon appears on the display. ture set. The icon in the top left corner of the The batteries must be replaced as soon as display uses 3 colours, red, yellow, and greed, possible. -
Page 35: Blower Function
BLOWER function The blower function is switched on by pushing the BLOWER button (see image above). If BLOWER button is pushed once, the blower runs for 2 hours and then switches off. If the ambient temperature goes above 27°C, the towel warmer goes into stand-by mode, and stays there until the ambient temperature drops below 27°C or until 2 hours have passed. - Page 36 BLOWER + TOWEL WARMER mixed function If the BLOWER button is pushed when the towel warmer function is on, you can start the blower + towel warmer mixed function, which allows both the blower and the towel warm- er to run until the ambient temperature reaches 28°C. Description LED status Blue, steady...
-
Page 37: Error Messages
Lock Keyboard Hold down the TOWEL WARMER and DEHUMIDIFIER buttons for more than 5 seconds, to activate lock keyboard, indicated by a green light flashing on the ON/OFF button. To unlock the keyboard, hold the buttons down together for more than 3 seconds. Error messages Description LED status... -
Page 38: Technical Specifications
Mounting Wall mounting through the specific support Warranty 2 years Manufacturer: DELTACALOR s.r.l. Instruction manual available from: http://www.lfantoni.com/d/DOC.IS.003641.pdf symbol applied to the product means that it is compulsory to consign the appliance to a special waste collection centre in case of disposal, in conformity to the 2012/19/UE Directive. - Page 39 Maximum continuous heat output 1,56 max,c Auxiliary electricity consumption At nominal heat output 1,56 At minimum heat output 0,06 In standby mode <0,0005 Contact details: Deltacalor S.r.L - Via mazzini, 23801 Calolziocorte (LC) - ITALIA [ 39 - EN ]...
- Page 40 Room temperature control, with open window detection With distance control option With adaptive start control With working time limitation With black bulb sensor Contact details: Deltacalor S.r.L - Via mazzini, 23801 Calolziocorte (LC) - ITALIA [ 40 - EN ]...
-
Page 41: Consignes De Sécurité
CONSIGNES DE SÉCURITÉ • Tout dommage résultant du non-respect de ces consignes en- traîne la non application de la garantie constructeur. • Ne pas utiliser l’appareil à l’extérieur. • Votre appareil est destiné à un usage domestique et ne doit pas être utilisé... -
Page 42: Avertissement Pour Les Personnes Handicapées Et Les Enfants
AVERTISSEMENT POUR LES PERSONNES HANDICAPÉES ET LES ENFANTS • Cet appareil peut être utilisé par des enfants âgés de plus de 8 ans et par des personnes ayant des capacités physiques, sen- sorielles ou mentales réduites ou dénuées d’expérience ou de connaissance, s’ils (si elles) sont correctement surveillé(e)s ou si des instructions relatives à... -
Page 43: Sécurité Enfants
SÉCURITÉ ENFANTS Verrouillage clavier Si vous appuyez en même temps pendant plus de 5 secondes sur les touches SÈCHE-SERVIETTES et DESHUMIDIFICATEUR vous entrez en mode verrouillage clavier, signalé par la Led verte clignotante lente de la touche ON/OFF. Pour débloquer appuyez en même temps sur les deux touches pendant plus de 3 secondes. -
Page 44: Préparation D'installation
PRÉPARATION D’INSTALLATION Avant de raccorder l’appareil de chauffage, couper l’élec- tricité au disjoncteur général. L’appareil de chauffage est un appareil de classe II, il peut donc être installé dans toutes les pièces de la maison y compris dans les vo- lumes de protection 2 et 3 d’une salle de bain (IP24). -
Page 45: Alimentation Et Raccordement Électriques
ALIMENTATION ET RACCORDEMENT ÉLECTRIQUES • L’alimentation de l’appareil de chauffage doit être protégée, • L’alimentation de l’appareil de chauffage doit être protégée, conformément aux normes en vigueur, par un interrupteur dif- conformément aux normes en vigueur, par un interrupteur dif- férentiel de 30 mA et un dispositif de protection contre les férentiel de 30 mA et un dispositif de protection contre les surintensités adapté... -
Page 46: Fixations Des Consoles Murales
FIXATIONS DES CONSOLES MURALES 4 × 4 × 4 × 4 × 4 × Ø 10 CH 14 CH 3 [ 46 - FR ]... - Page 47 INSTALLATION WHITE Puissances 500 + 750 + 60 W 750 + 750 + 60 W Puissance avec soufflerie 1310 W 1560 W 450 mm 450 mm 450 mm 906 mm 435 mm 435 mm [ 47 - FR ]...
-
Page 48: Utilisation Correcte
UTILISATION CORRECTE Utilisez le produit de la façon indiquée sur la figure 1. Ne posez en aucun cas des serviettes ni des vêtements sur le cadre exté- rieur (figure 2). Les collecteurs (tubes verticales) ne doivent jamais être couverts.Une utilisation incorrecte risque de causer de dan- gereuses surchauffes et de compromettre le fonctionnement de l’appareil. -
Page 49: Fonctionnement Télécommande
FONCTIONNEMENT TÉLÉCOMMANDE Synoptique Touche ON/ATTENTE Afficheur rétroéclairé Touche CHRONO Touche MODE Touche Touche Touche / détection ouverture fenêtre Touche BOOST 2 heures Niveau batterie bas Transmission IR Consommation énergie Température configurée 1. Fil Pilote; 2. Confort; 3. Nuit; 4. Antigel; 5. -
Page 50: Modes De Fonctionnement
Icône Mode ou fonction Description Active la fonction ECO Open Window Detection Active la fonction Détection fenêtre ouverte Active la fonction ASC Stand-by Le dispositif se met en mode Attente Fil pilote Fonction non active Allumage/Attente • Touche avec lumière bleue clignotante et touche avec lumière bleue fixe ;... -
Page 51: Mode Antigel
Réglage horaire et date: Mode Antigel Le chiffre clignotant indique le jour de la se- Le mode Antigel active l’élément chauffant maine: appuyez sur les touches pour du contrôle électronique si la température configurer le jour voulu et appuyez sur la ambiante descend au-dessous de 7°C. -
Page 52: Mode Eco
CONFORT: la température CONFORT modalité qui indique 1°C en moins que la configurée par l’utilisateur est maintenue température configurée. constante dans la pièce, en allumant et • Touche et touche avec lumière éteignant de façon intelligente l’élément bleue clignotante: modalité en attente de chauffant. -
Page 53: Avertissement Batterie Faible
Avertissement batterie faible Indicateur de consommation Cette fonction utile montre le niveau actuel de Quand le niveau de charge de la batterie est la consommation d’électricité en fonction de bas, l’icône correspondante apparaîtra sur l’af- la température configurée. L’icône en haut et à ficheur. -
Page 54: Fonction Sèche-Serviettes
Fonction SOUFFLANT La fonction soufflant se met en marche en appuyant sur la touche SOUFFLANT (cf. image ci-dessus). Si vous appuyez une fois sur la touche SOUFFLANT le soufflant se met en marche pendant 2 heures, puis il s’éteint. Si la température ambiante dépasse 27°C, le sèche-serviettes se met en attente et y reste jusqu’à... - Page 55 Fonction mixte SOUFFLANT + SÈCHE-SERVIETTES SI vous appuyez sur la touche SOUFFLANT alors que la fonction sèche-serviettes est ac- tive, vous pouvez activer la fonction mixte soufflant + sèche-serviettes, qui permet d’avoir le soufflant et le sèche-serviettes actifs jusqu’à la température ambiante de 28°C. Description Etat Led Bleu fixe...
-
Page 56: Messages Erreurs
Verrouillage clavier Si vous appuyez en même temps pendant plus de 5 secondes sur les touches SÈCHE-SER- DESHUMIDIFICATEUR vous entrez en mode verrouillage clavier, signalé par la VIETTES et Led verte clignotante lente de la touche ON/OFF. Pour débloquer appuyez en même temps sur les deux touches pendant plus de 3 secondes. -
Page 57: Caractéristiques Techniques
100 x 42 x 27mm ( H x L x l) Montage Mural, avec le support dédié Garantie 2 ans Fabricant: DELTACALOR s.r.l. Manual d’instruction disponible sur le site: http://www.lfantoni.com/d/DOC.IS.003641.pdf Le symbole , posé sur l’appareil, signale l’obligation de se débarrasser de l’appareil en le confiant à... -
Page 58: Référence(S) Du Modèle: Drop
Puissance thermique maximale continue 1,56 max,c Consommation d'électricité auxiliaire À la puissance thermique nominale 1,56 À la puissance thermique minimale 0,06 En mode veille <0,0005 Coordonnées de contact: Deltacalor S.r.L - Via mazzini, 23801 Calolziocorte (LC) - ITALIA [ 58 - FR ]... - Page 59 Contrôle de la température de la pièce, avec détecteur de fenêtre ouverte Option contrôle à distance Contrôle adaptatif de l'activation Limitation de la durée d'activation Capteur à globe noir Coordonnées de contact: Deltacalor S.r.L - Via mazzini, 23801 Calolziocorte (LC) - ITALIA [ 59 - FR ]...
-
Page 60: Reglas De Seguridad
REGLAS DE SEGURIDAD • En caso de daños que deriven del no respeto de estas reglas no se podrá aplicar la garantía del fabricante. • No utilizen el aparato en el exterior. • Su aparato está destinado para uso doméstico y no debe em- plearse para otras finalidades. - Page 61 ADVERTENCIAS PARA LAS PERSONAS DISCAPACITADAS Y LOS NIÑOS • Este aparato puede ser utilizado por personas con capacida- des físicas, sensoriales y mentales reducidas o sin conocimiento acerca del producto, o bien por niños a partir de 8 años de edad, siempre que esten vigilados e instruidos sobre el uso se- guro del aparato y conscientes de todos los riesgos.
-
Page 62: Seguridad Para Niños
SEGURIDAD PARA NIÑOS Bloqueo del teclado Si se presionan simultáneamente durante más de 5 segundos las teclas SECATOALLAS y DESHUMIDIFICADOR, se activa el bloqueo del teclado, indicado por un LED verde parpadeante sobre la tecla ON/OFF. Para desbloquear el teclado, presionar simultáneamente las dos teclas durante más de 3 segundos. -
Page 63: Preparación De La Instalación
PREPARACIÓN DE LA INSTALACIÓN Antes de conectar el aparato de calefacción desconectar el interruptor general. El aparato de calefacción es un aparato de clase II, por eso puede instalarse en todos los espacios de la casa, también en los volúme- nes de protección 2 y 3 de un cuarto de baño (IP24). - Page 64 ALIMENTACIÓN Y CONEXIONES ELÉCTRICAS • La alimentación del aparato de calefacción tiene que estar pro- • La alimentación del aparato de calefacción tiene que estar pro- tegida, conforme a las normas vigentes, por un interruptor di- tegida, conforme a las normas vigentes, por un interruptor di- ferencial de 30 mA y por un dispositivo de protección contra ferencial de 30 mA y por un dispositivo de protección contra la sobrecorriente adaptado a las características de la línea de...
- Page 65 FIJACIÓN DEL KIT DE FIJACIÓN A LA PARED 4 × 4 × 4 × 4 × 4 × Ø 10 CH 14 CH 3 [ 65 - ES ]...
- Page 66 INSTALACIÓN WHITE Potencia 500 + 750 + 60 W 750 + 750 + 60 W Potencia con soplador 1310 W 1560 W 450 mm 450 mm 450 mm 906 mm 435 mm 435 mm [ 66 - ES ]...
-
Page 67: Uso Correcto
USO CORRECTO Utilizar el producto como se muestra en la figura 1. Nunca cubrir completamente el aparato con toallas o prendas de vestir (figu- ra 2). Nunca cubrir los colectores (tubos verticales). El uso inco- rrecto puede provocar peligrosos sobrecalentamientos y compro- meter el funcionamiento del aparato. - Page 68 FUNCIONAMIENTO MANDO A DISTANCIA Sinopsis Tecla ON/STANDBY Pantalla retroiluminada Tecla CRONO Tecla MODO Tecla Tecla Tecla / detección de apertura de ventana Tecla BOOST 2 horas Nivel bajo de batería Transmisión IR Consumo de energía Temperatura seleccionada 1. Cable Piloto; 2. Confort; 3.
-
Page 69: Modalidad De Funcionamiento
Icono Modalidad o función Descripción Activa la función ECO Detección de ventana Activa la función Detección de ventana abierta abierta Activa la función ASC Standby El dispositivo entra en modalidad de Standby Fil pilote Función no activa Encendido/Standby menos con respecto a la temperatura con- figurada. - Page 70 Configuración de la hora y de la fecha Se recomienda utilizar esta modalidad cuando el lugar permanezca libre durante varios días. El número intermitente indica el día de la se- • Presionar la tecla MODALIDAD hasta mana: presionar las teclas para confi- que esta modalidad sea seleccionada.
-
Page 71: Funciones
ECO: mantiene siempre una tempera- • Tecla y tecla con luz azul parpa- tura 3,5°C más baja que la temperatura deante: modo en espera de funcionamiento CONFORT. para ambas. ANTIHIELO: mantiene siempre la tem- peratura ambiente por encima de los Función ASC 7°C para evitar la congelación. - Page 72 Advertencia de baterías Indicador de consumo descargadas Esta útil función muestra el nivel actual de consumo de electricidad en función de la Cuando el nivel de carga de la batería es bajo, temperatura seleccionada. El icono en la es- el icono correspondiente aparecerá en la quina superior izquierda de la pantalla utiliza pantalla.
- Page 73 Función SOPLADOR La función soplador se activa al presionar la tecla SOPLADOR (ver imagen de arriba). Si se presiona una vez la tecla SOPLADOR, el soplador se activa durante 2 horas, luego se apaga. Si la temperatura ambiente supera los 27 ºC, el secatoallas entra en stand-by y permanece en ese estado hasta que la temperatura ambiente descienda por debajo de los 27 ºC o bien hasta que transcurran 2 horas.
- Page 74 Función mixta SOPLADOR + SECATOALLAS Si se presiona la tecla SOPLADOR cuando la función secatoallas está activa, es posible ac- tivar la función mixta soplador + secatoallas, que permite activar tanto el soplador como el secatoallas hasta que la temperatura ambiente alcance los 28 ºC. Descripción Estado del LED Azul fijo...
- Page 75 Bloqueo del teclado Si se presionan simultáneamente durante más de 5 segundos las teclas SECATOALLAS y DESHUMIDIFICADOR, se activa el bloqueo del teclado, indicado por un LED verde parpa- deante sobre la tecla ON/OFF. Para desbloquear el teclado, presionar simultáneamente las dos teclas durante más de 3 segundos.
-
Page 76: Caracteristicas Tecnicas
100 x 42 x 27 mm (Alt. x Lar. x Pro.) Montaje En pared, con soporte a tal fin Garantía 2 años Fabricante: DELTACALOR s.r.l. Manual del usuario disponible en el sitio: http://www.lfantoni.com/d/DOC.IS.003641.pdf El símbolo , colocado sobre el producto, indica la obligación de entregar el aparato a eliminar en un punto de recogida especializado, conforme a la Directiva 2012/19/UE. - Page 77 Potencia calorífica máxima continuada 1,56 max,c Consumo auxiliar de electricidad A potencia calorífica nominal 1,56 A potencia calorífica mínima 0,06 En modo de espera <0,0005 Información de contacto: Deltacalor S.r.L - Via mazzini, 23801 Calolziocorte (LC) - ITALIA [ 77 - ES ]...
- Page 78 Con opción de control a distancia sí Con control de puesta en marcha adaptable sí Con limitación de tiempo de funcionamiento sí Con sensor de lámpara negra Información de contacto: Deltacalor S.r.L - Via mazzini, 23801 Calolziocorte (LC) - ITALIA [ 78 - ES ]...