Table des Matières
Publicité
Les langues disponibles
Les langues disponibles
Liens rapides
Publicité
Table des Matières

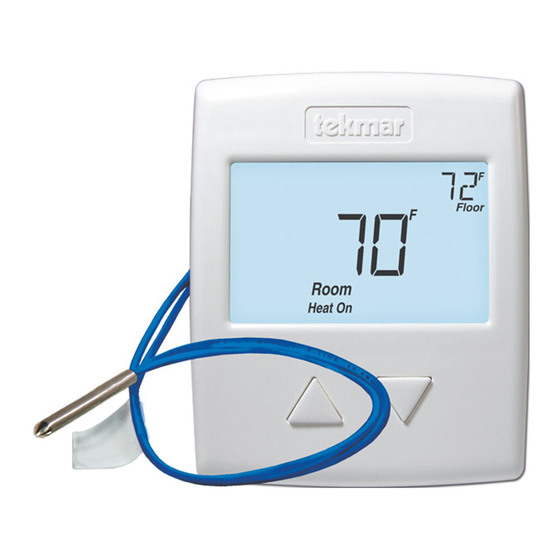
Sommaire des Matières pour Watts tekmar 519
- Page 1 Quick Set-up Guide 519 _ Q Radiant Thermostat 519 06/16 Zoning Replaces: 02/14 Location Interior Wall Behind Door 5 feet 1.5 m Exterior Wall Remove Mounting Base Installation to Wall Thermostat Base Thermostat Front Wall © 2016 tekmar 519 _ Q - 06/16...
-
Page 2: User Interface
No Power No Power No Power Do not over Rh W1 S1 Rh W1 S1 Rh W1 S1 Com Away tighten wiring screws. Hand tighten only. 24 V User Interface Away © 2016 tekmar 519 _ Q - 06/16 2 of 12... -
Page 3: Backlight
TYPE Device Type number. Hold the button to view the software version. ESCAPE Release the buttons to return to the home screen. © 2016 tekmar 519 _ Q - 06/16 3 of 12... -
Page 4: Room Sensor
Display Setting Installer settings. Press the and buttons together for 5 more seconds. AUXILIARY SENSOR Select the type of auxiliary sensor. Available when an auxiliary sensor is automatically detected. NONE = no auxiliary sensor, ROOM = Indoor Sensor, OUT = Outdoor Sensor, FLOR = Slab Sensor ROOM SENSOR Select if the built-in room temperature sensor is on or off. The built-in room sensor can only be disabled when an auxiliary room or slab sensor is connected. -
Page 5: Emplacement
Guide d’installation rapide 519 _ Q Radiant Thermostat 519 06/16 Zonage Remplace: 02/14 Emplacement Mur intérieur Derrière 5 pi. porte 1,5 m Mur extérieur Retirez la base de montage Installation au mur Base de thermostat Façade du thermostat © 2016 tekmar 519 _ D - 06/16 5 of 12... -
Page 6: Installation À La Boîte Électrique
No Power No Power Rh W1 S1 Rh W1 S1 Rh W1 S1 Com Away serrer les vis sur les borniers. Serrez à la main 24 V seulement. Interface d’utilisateur Away © 2016 tekmar 519 _ Q - 06/16 6 of 12... -
Page 7: Paramètres Critiques
TYPE Numéro de type de dispositif. Maintenez le bouton pour afficher la version du logiciel. RETOUR ÉCRAN D’ACCUEIL Relâchez les boutons pour revenir à l’écran d’accueil. © 2016 tekmar 519 _ Q - 06/16 7 of 12... -
Page 8: Capteur Auxiliaire
Afficheur Paramètres Paramètres d’installateur. Appuyez sur les touches ensemble pour plus de 5 secondes. CAPTEUR AUXILIAIRE Sélectionnez le type de capteur auxiliaire. Disponible quand une capteur auxiliaire est automatiquement détectée. NONE = pas de capteur auxiliaire, ROOM = capteur intérieure, FLOR = capteur de dalle CAPTEUR D’AMBIANCE Choisir si la capteur intégrée de la température ambiante est active ou inactive. - Page 9 06/16 División en Remplazado zonas por: 02/14 Ubicación Pared interior Detrás de la puerta 5 pies 1,5 m Pared exterior Quite la base de montaje Instalación de la base de montaje Base del Thermostat termostato Base Frente del Thermostat termostato Front Pared Wall © 2016 tekmar 519 _ Q - 06/16 9 of 12...
-
Page 10: Interfaz Del Usuario
No Power No Power No sobre Rh W1 S1 Rh W1 S1 Rh W1 S1 Com Away apriete los tornillos del ter- minal. Apriete a 24 V mano. 6. Interfaz del usuario Away © 2016 tekmar 519 _ Q - 06/16 10 of 12... - Page 11 TIPO Número del tipo de dispositivo. Mantenga presionado el botón para ver la versión de software del dispositivo. ESCAPE Suelte los botones para regresar a la pantalla principal. © 2016 tekmar 519 _ Q - 06/16 11 of 12...
- Page 12 Pantalla Configuración Ajustes del instalador. Mantenga presionados los botones al mismo tiempo por 5 segundos más. SENSOR AUXILIAR Seleccione el tipo de sensor auxiliar. Esta opción se encuentra disponible cuando un sensor auxiliar fue detectado. NONE (Ninguno) = no hay un sensor auxiliar, ROOM (Ambiente) = Sensor interior, EXTERIOR = Sensor exterior, FLOR (PISO) = Sensor de piso.


