Table des Matières
Publicité
Les langues disponibles
Les langues disponibles
Liens rapides
BETRIEBSANLEITUNG
de
MIT SICHERHEITSHINWEISEN
OPERATING INSTRUCTION
en
WITH SAFETY INSTRUCTIONS
MODE D'EMPLOI
fr
AVEC CONSIGNES DE SÉCURITÉ
Technische Änderungen vorbehalten! · Technical changes reserved! · Sous réserve de modifications techniques!
E
FENCE
230V / 12V
230V / 12V
14 - 19
www.ellofence.de
LO
2 - 8
8 - 13
1
Publicité
Table des Matières

Manuels Connexes pour ELLOFENCE M15

Sommaire des Matières pour ELLOFENCE M15
- Page 1 230V / 12V BETRIEBSANLEITUNG 2 - 8 MIT SICHERHEITSHINWEISEN OPERATING INSTRUCTION 8 - 13 WITH SAFETY INSTRUCTIONS MODE D’EMPLOI 14 - 19 AVEC CONSIGNES DE SÉCURITÉ Technische Änderungen vorbehalten! · Technical changes reserved! · Sous réserve de modifications techniques! www.ellofence.de...
- Page 2 Weidezaun. Der Ohmwert liegt hier bei 0,04 Ohm pro Meter. Ein Standardband/ -litze hat Ohm Werte von 14 bis 15 Ohm pro Meter. Unsere Ellofence Qualitäten hingegen haben einen Wert von 0,08 Ohm bis 0,40 Ohm pro Meter. Wir sind also sehr nahe an der perfekten Leitfähigkeit eines Eisendrahtes.
-
Page 3: Wichtige Hinweise
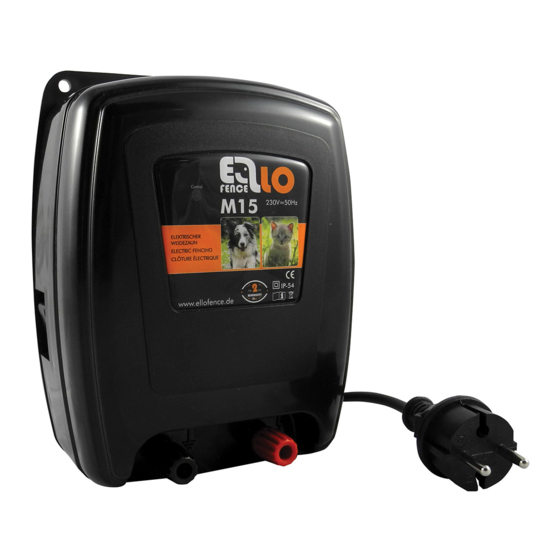
Am Ellofence M15/M30 befinden sich an der Oberseite zwei kleine Schlaufen (bei den Ellofence Ge- häusen M15, M60, M100, M300 und M500 sind es zwei Löcher). Hier können Sie das Gerät einhängen und an zwei Schrauben oder Nägeln befestigen, die Sie vorher an einer Wand montiert haben. -
Page 4: Die Richtige Erdung
Erdstab darauf. Nochmals die beiden Erdstäbe soweit wie möglich in den Boden einschlagen. Nun schrauben Sie am oberen Ende das Erdkabel an. Wenn Sie ein Ellofence Gerät gekauft haben mit der Verwendung von 2 oder 3 Erdstäben, gehen Sie so vor, wie oben beschrieben. - Page 5 Eine geeignete Stelle für die Den Erdstab fixieren..und in den Boden schlagen. Erdung suchen. 230V Die M6 Schraube entfernen..und den zweiten Erdstab..auf den ersten Erdstab auf- schrauben. Bajonett Auch diesen Erdstab wieder bis Mit der M6 Schraube wird das Hinweis: zum Anschlag in den Boden Erdkabel fixiert.
- Page 6 INSTALLIEREN DES WEIDEZAUNBANDES / -LITZE Jetzt bauen Sie ihren Zaun auf. Zäunen Sie das ausgewählte Gelände ein. Haben Sie ein Set mit Kunststoffpfählen, dann gehen Sie wie folgt vor: Sie stecken die Kunststoffpfähle mit einem Abstand von ca. 3 bis 5m in den Boden um das Gelände, je nach der Größe des Geländes und wie es am besten passt.
-
Page 7: Funktion Des Zaunes
Haben Sie ein Set mit Isolatoren, dann gehen Sie wie folgt vor: Sie stecken Holzpfähle mit einem Abstand von ca. 3 bis 5m in den Boden um das Gelände, je nach der Größe des Geländes oder wie es am besten passt. Dann schrauben Sie die Ringisolatoren in die Pfähle, immer in der gleichen Höhe. - Page 8 The ohm value here is 0.04 ohms per meter. A standard tape/twine has ohm values of 14 to 15 ohms per meter. Our Ellofence qualities, on the other hand, have a value of 0.08 ohms to 0.40 ohms per meter. So we are very close to the perfect conductivity of an iron wire.
-
Page 9: Important Instructions
There are two small loops on the top of the Ellofence M15/M30 (there are two holes on the Ellofence M15, M60, M100, M300 and M500 housings). Here you can hang the device and attach it to two screws or nails that you have previously mounted on a wall. - Page 10 This is the ground connection. If the grounding does not reach the moist layers of soil in very dry or sandy soil, use another Ellofence bayonet ground rod, which you can screw onto the existing one in order to reach deeper and moister layers of soil.
- Page 11 Find a suitable place for groun- Fix the earth stake..and drive into the ground. ding. 230V Remove the M6 screw..and the second earth rod..unscrew at first. Bajonett Also push this earth rod into the The underground cable is fixed Attention: ground.
- Page 12 INSTALLATION FENCE TAPE / TWINE Now build your fence. Fence the selected terrain. If you have a set with plastic posts, then proceed as follows: You insert the plastic stakes into the ground around the site approximately 3 to 5m apart, depending on the size of the site and how it fits best.
- Page 13 If you have a set with isolators, then proceed as follows: They drive wooden stakes into the ground around the site approximately 3 to 5m apart depending on the size of the site or how it fits best. Then screw the ring insulators into the posts, always at the same height.
-
Page 14: Manuel De Service
MANUEL DE SERVICE Ce manuel contient des instructions de montage pour divers ensembles de clôtures électriques Ellofence: 1. Pour les ensembles à monter sur des piquets en bois 2. Pour les kits à assembler avec des piquets en plastique CARACTÉRISTIQUES TECHNIQUES ELLOFENCE CLOTURES... -
Page 15: Installation De L'appareil
Il faut toutefois que ce ne soit pas une zone à risque d‘incendie. Sur l‘Ellofence M15/M30 se trouvent, sur le côté supérieur, deux petites boucles (il y a deux trous dans les boîtiers Ellofence M60, M100, M300 et M500). Ici vous pouvez accrocher l‘appareil et le fixer à... - Page 16 Ensuite, enfoncez les deux piquets de terre le plus profondément possible dans le sol. Maintenant, vissez le câble de terre sur l‘extrémité supérieure. Si vous avez acheté un appareil Ellofence avec l‘utilisation de 2 ou 3 piquets de terre, procédez comme décrit ci-dessus.
- Page 17 Trouvez un endroit approprié Fixer le piquet de terre..et conduire dans le sol. pour la mise à la terre. 230V Retirer la vis M6..et le deuxième piquet de ...dèvisser d`abord. terre... Bajonett Repoussez également cette tige Le câble souterrain est fixé avec Remarquer: de terre dans le sol.
-
Page 18: Installation De Ruban Ou De Fil De Cloture
INSTALLATION DE RUBAN OU DE FIL DE CLOTURE Maintenant, construisez votre clôture et clôturer le terrain sélectionné Si vous avez un kit de clôture à piquet en plastique, procédez comme suit: Vous placez les piquets en plastique à environ 3 à 5 m l‘un de l‘autre dans le sol autour du site, en fonction de la taille du site et de la façon dont il s‘adapte le mieux. -
Page 19: Si Vous Disposez D'un Ensemble D'isolateurs, Procédez Comme Suit
Si vous disposez d‘un ensemble d‘isolateurs, procédez comme suit: Placez les piquets en bois espacés de 3 à 5 m dans le sol autour du terrain. Vissez ensuite les isolants dans les poteaux à la même hauteur. Après avoir vissé les isolateurs, tendez le ruban ou le fil du pre- mier isolateur du premier poteau jusqu‘au dernier isolateur du dernier poteau. - Page 20 550 010 · Ellofence M15 · Weidezaunband / tape / ruban 12,5mm, 100m · 10 grüne Gartenpfähle / posts / piquet en plastique · Erdpfahl / earth post / piquet de terre 0,33m · 1,5m Zaunanschlusskabel / fence connection cable / cable de ligne ·...
- Page 21 550 015 · Ellofence M15 · Weidezaunband / tape / ruban 12,5mm, 200m · 10 grüne Gartenpfähle / posts / piquet en plastique · Erdpfahl / earth post / piquet de terre 0,33m · 1,5m Zaunanschlusskabel / fence connection cable / cable de ligne ·...
- Page 22 550 003 · Ellofence M15 · Weidezaunband / tape / ruban 12,5mm, 100m · 25 Isolatoren / insulators / isolateurs · Erdpfahl / earth post / piquet de terre 0,33m · 1,5m Zaunanschlusskabel / fence connection cable / cable de ligne ·...
- Page 23 550 011 · Ellofence M15 · 200m Weidezaunlitze / fencing twine / fil de cloture electrique · 25 Ringisolatoren / insulators / isolateurs · Erdpfahl / earth post / piquet de terre 0,33m · 1,5m Zaunanschlusskabel / fence connection cable / cable de ligne ·...
- Page 24 Hinweise für die Benutzung unserer Paddocksets Wir bieten als fertige Sets nur einen Zaun von 200m oder 400m an. Selbstverständlich kann dieser Zaun auch verlängert werden. Ob Sie ein 12V oder ein 230V Gerät einsetzen, bleibt Ihnen überlassen. Denken Sie nur daran, dass ein 230V Gerät immer geschützt sein muss vor Nässe und Feuchtigkeit. Unser M60 bzw.
- Page 25 200m / 230V 200m / 230V 550 007 · Ellofence M60 · Weidezaunband / tape / ruban 12,5mm, 200m · 25 Isolatoren / insulators / isolateurs · 2 x Erdpfahl / earth post / piquet de terre 0,33m · 1,5m Zaunanschlusskabel / fence connection cable / cable de ligne ·...
- Page 26 Hinweise für die Benutzung unserer Wildschweinsets Wenn Sie in unserer Broschüre lesen, dass man für die Wildschweinabwehr nur sehr starke Geräte einsetzen soll, so ist das im Prinzip richtig. Sie haben hier allerdings ein Set gekauft mit nur 50m, 125m oder 250m Zaunlänge, und dabei sind die mitgelieferten Geräte genau richtig ausgelegt.
- Page 27 550 024 · Ellofence M60 · Weidezaunlitze / twine / fil, 200m · 10 grüne Gartenpfähle / posts / piquet en plastique · 25 Ringsolatoren / insulators / isolateurs · 2 x Erdpfahl / earth post / piquet de terre 0,33m ·...
- Page 28 Ellofence GmbH & Co. KG Röntgenstraße 3 · 23701 Eutin Telefon: 0 176 23 10 63 97 email: service@ellofence.de www.ellofence.de...