Table des Matières
Publicité
Les langues disponibles
Les langues disponibles
Liens rapides
MULTIPLE PRODUCT CODES (LEAVE BLANK IF N/A)
SAFETY INFORMATION
WARNING
!
FIRE OR EXPLOSION HAZARD
If the information in these instructions are
not followed exactly, a fi re or explosion may
result causing property damage, personal
injury, or loss of life.
- Do not store or use gasoline or other
fl ammable vapors and liquids in the vicinity of
this or any other appliance.
INSTALLER:
Leave this manual with the appliance
CONSUMER:
Retain this manual for future reference
Wolf Steel Ltd., 24 Napoleon Rd., Barrie, ON, L4M 0G8 Canada / 103 Miller Drive, Crittenden, Kentucky, USA, 41030
Phone (705)721-1212 • Fax (705)720-9081 • www.continentalfi replaces.com • ask@continentalfi re.com
$10.00
CEFL32FH / CEFL42FH / CEFL50FH / CEFL60FH / CEFL72FH / CEFL100FH
ADD MANUAL TITLE
WALLMOUNT ELECTRIC FIREPLACE
WARNING - KEEP BATTERIES OUT OF REACH OF CHILDREN
- SWALLOWING MAY LEAD TO SERIOUS INJURY IN AS LITTLE AS 2 HOURS
OR DEATH, DUE TO CHEMICAL BURNS AND POTENTIAL PERFORATION OF
THE OESOPHAGUS.
- IF YOU SUSPECT YOUR CHILD HAS SWALLOWED OR INSERTED A
BUTTON BATTERY, IMMEDIATELY SEEK URGENT MEDICAL ASSISTANCE.
- EXAMINE DEVICES AND MAKE SURE THE BATTERY COMPARTMENT IS
CORRECTLY SECURED, E.G. THAT THE SCREW OR OTHER MECHANICAL
FASTENER IS TIGHTENED. DO NOT USE IF COMPARTMENT IS NOT
SECURE.
- DISPOSE OF USED BUTTON BATTERIES IMMEDIATELY AND SAFELY. FLAT
BATTERIES CAN STILL BE DANGEROUS.
- TELL OTHERS ABOUT THE RISK ASSOCIATED WITH BUTTON BATTERIES
AND HOW TO KEEP THEIR CHILDREN SAFE.
CSA /
INTERTEK
LOGO
MATERIAL: CLASS IIIA-2 PERMANENT LEXAN ADHESIVE LABEL, MINIMUM THICKNES
TEMPERATURE RATING MINIMUM 79°C (175°F) RATING
INSTALLATION AND
OPERATION MANUAL
(IF MULTIPLE, _____ ILLUSTRATED)
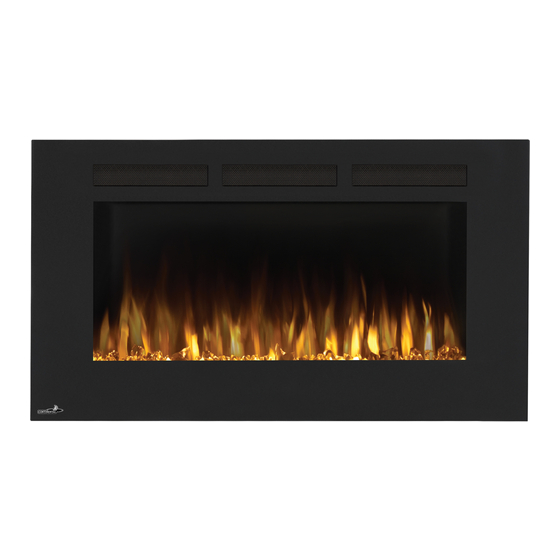
ADD PRODUCT IMAGE
WARNING!
This appliance has a remote that requires button
batteries that are hazardous to young children
CERTIFIED TO THE CANADIAN AND AMERICAN NATIONAL STANDARDS:
ENGLISH
FRENCH PG. 29
PRODUCT NAME™
(CEFL50FH ILLUSTRATED)
ADD PRODUCT CODE
FOR INDOOR USE ONLY
CSA 2.22 NO. 46 / UL 1278
W415-1730 / B / 07.28.17
AVER
ENFANTS
- L'INGESTION
HEURES OU LA
RATION POTEN
- SI VOUS PEN
BOUTON, CON
- EXAMINEZ LE
BATTERIE EST
EST SERRÉE.
- ÉLIMINER LE
SÉCURITÉ. LE
- RENSEIGNEZ
FAÇON DE GA
Publicité
Chapitres
Table des Matières

Manuels Connexes pour Continental Fireplaces CEFL32FH


Sommaire des Matières pour Continental Fireplaces CEFL32FH
- Page 1 CEFL32FH / CEFL42FH / CEFL50FH / CEFL60FH / CEFL72FH / CEFL100FH MULTIPLE PRODUCT CODES (LEAVE BLANK IF N/A) ENGLISH FRENCH PG. 29 INSTALLATION AND ADD MANUAL TITLE OPERATION MANUAL WALLMOUNT ELECTRIC FIREPLACE PRODUCT NAME™ (CEFL50FH ILLUSTRATED) ADD PRODUCT CODE (IF MULTIPLE, _____ ILLUSTRATED)
-
Page 2: Safety Information
safety information WARNING • If equipped with a heater, this appliance can be hot when operated and can cause severe burns if contacted. • Do not operate appliance before reading and understanding operating instructions. Failure to operate appliance according to operating instructions could cause fi re or injury. •... - Page 3 safety information WARNING • To prevent a possible fi re, do not block air intakes or exhaust in any manner. Do not use on soft surfaces, like a carpet, where openings may become blocked. • Always plug appliances directly into a wall outlet/receptacle. Never use an extension cord or relocatable power tap (outlet/power strip).
-
Page 4: Table Des Matières
table of contents general information dimensions product information general instructions unpacking and testing appliance hardware parts list rating plate information locating appliance minimum clearance to combustibles installation minimum mantel clearances framing installing the appliance recessing the appliance into the wall installing the appliance into a mantel rubber feet installation hard wiring installation... -
Page 5: Dimensions
1.0 general information dimensions SIDE VIEW FRONT VIEW TOP VIEW CEFL32FH 32" 21 5/8" 4 15/16" 20 1/2" 27 5/16" 12" 22 9/16" (813mm) (550mm) (125mm) (520mm) (695mm) (304mm) (573mm) 42" 21 5/8" 4 15/16” 20 1/2" 37 1/2"... -
Page 6: General Instructions
general information general instructions • Prior to plugging your appliance into an electrical outlet, verify that the house circuit breakers for the outlet are on. • The appliance may emit a slight, harmless odour when fi rst used. This odour is normal and it is caused by the initial heating of internal appliance elements and will not occur again. -
Page 7: Hardware List
Quantity Ref. # Description CEFL32FH CEFL42FH CEFL50FH CEFL60FH CEFL72FH CEFL100FH Wood Screws Drywall Anchors Metal Screws Cover Plate Strain Relief Metal Bracket Cord Corner Cord Corner Rubber Foot W415-1730 / B / 07.28.17... -
Page 8: Rating Plate Information
INSTALLATION DANS UNE CHAMBRE A COUCHER, UNE FOR MOBILE HOME INSTALLATION. SALLE DE BAIN ET UN STUDIO. APPROPRIE POUR INSTALLATION DANS UNE MAISON MOBILE. MASTER CONTRACT: 161746 CONTRAT-CADRE: 161746 NEFL32FH CEFL32FH NEFL60FH CEFL60FH NEFL42FH CEFL42FH MODELS / MODÈLES NEFL72FH CEFL72FH... -
Page 9: Minimum Clearance To Combustibles
2.0 installation installation WARNING • Risk of fi re! The power cord must not be pinched against a sharp edge. Secure cord to avoid tripping or snagging to reduce the risk of fi re, electric shock, or personal injury. Do not run cord under carpeting. Do not cover cord with throw rugs, runners, or similar items. -
Page 10: Minimum Mantel Clearances
installation minimum mantel clearances WARNING • When using paint or lacquer to finish the mantel, the paint or lacquer must be heat resistant to prevent discoloration. Mantel 8" (203mm) Wall Floor Side View W415-1730 / B / 07.28.17... -
Page 11: Framing
Finishing Material (Non-load 5" 3 1/2" bearing) 127mm 89mm MODEL NO. 21" (53.5cm) 27 13/16" (70.7cm) CEFL32FH CEFL42FH 21" (53.5cm) 38" (96.5cm) 21" (53.5cm) 45 15/16" (116.6cm) CEFL50FH CEFL60FH 21" (53.5cm) 55 13/16" (141.8cm) 21" (53.5cm) 67 7/8" (172.5cm) -
Page 12: Installing The Appliance
installation installing the appliance Due to the many different materials used on different walls, it is highly BODY recommended that you consult your local builder before you install this GLASS FRONT appliance on the wall. Select a location that is not prone to moisture and is located at least 36"... -
Page 13: Recessing The Appliance Into The Wall
installation recessing the appliance into the wall Due to the many different finish materials used on walls, it is highly recommended that you consult your local builder before you install this appliance in the wall. Select a location that is not prone to moisture and is located at least 36" (91.4cm) away from combustible materials such as curtain drapes, furniture, bedding, paper, etc. -
Page 14: Installing The Appliance Into A Mantel
installation note: The appliance tabs come bent. You must bend the tab flat by hand when fully recessing the appliance into the wall. See Figure 4. FIG. 4 installing the appliance into a mantel Remove the glass front, refer to "front glass installation" section for removal instructions. Install the rubber feet onto the bottom of the appliance for stability, refer to "rubber feet installation"... -
Page 15: Rubber Feet Installation
installation rubber feet installation Place the appliance face down on a soft surface. Using a screw driver, remove the screws on the bottom of the appliance. Install the 4 rubber feet (6 rubber feet for CEFL60/72/100FH) onto the bottom of the appliance using the screws from Step B, see below. -
Page 16: Hard Wiring Installation
installation hard wiring installation WARNING • Turn off the appliance completely and let it cool down before servicing. Only a qualified service person should service and repair this electric appliance. Hard wiring connection If it is necessary to hard wire this appliance, a qualified electrician must remove the cord connection, and wire the appliance directly to the house hold wiring. -
Page 17: Front Glass Installation
3.0 finishing finishing WARNING • Power supply service must be completed prior to finishing to avoid reconstruction. • Heat vents and air openings cannot be covered in any circumstances. front glass installation WARNING • Glass may be hot. Do not touch glass until cooled. •... -
Page 18: Front Glass Removal
finishing FIG. 3 front glass removal FOR WALL MOUNT, PARTIAL RECESS AND MANTEL INSTALLED APPLIANCE ONLY: Remove the 2 screws from the top of the appliance, as shown below. Have two people lift the glass up and away from the appliance, holding the glass vertical not flat while carrying. -
Page 19: Main Power Button
operating instructions 4.0 operating instructions WARNING • While the appliance is operating do not remove the glass panel. This will cause the remote control and touch panel to disfunction. Once the appliance has been plugged into a grounded electrical outlet, it is ready to operate. note: Ensure the house circuit breakers for the power supply are turned on. -
Page 20: Maintenance
maintenance 5.0 maintenance WARNING • Preparation for maintenance: always disconnect the power and allow the electric appliance to cool before performing any cleaning, maintenance, or relocation of this electric appliance. Turn controls to off and remove plug from outlet or turn of the house circuit breaker to electric appliance receptacle. •... -
Page 21: Wiring Diagram
6.0 wiring diagram WARNING • Turn off the appliance completely and let cool before servicing. Only a qualified service person should service and repair this electric appliance. CEFL32FH CEFL42FH CEFL50FH W415-1730 / B / 07.28.17... - Page 22 wiring diagram CEFL60FH CEFL72FH CEFL100FH W415-1730 / B / 07.28.17...
-
Page 23: Replacement Parts
7.0 replacement parts replacement parts WARNING • Failure to position the parts in accordance with this manual or failure to use only parts specifi cally approved with this appliance may result in property damage or personal injury. Contact your dealer for questions concerning prices and policies on replacement parts. Normally, all parts can be ordered through your Authorized dealer / distributor. - Page 24 REF. CEFL32FH CEFL42FH CEFL50FH CEFL60FH CEFL72FH CEFL100FH Description W300-0226 W300-0224 W300-0227 W300-0228 W300-0229 W300-0230 Front Glass W475-1192 W475-1185 W475-1193 W475-1194 W475-1195 W475-1196 Acrylic Plastic Panel W405-0053 W405-0053 W405-0053 W405-0053 + W405-0053 + W405-0053 + LED Light W405-0054 W405-0054...
- Page 25 8.0 troubleshooting replacement parts WARNING • Turn off the appliance completely and let cool before servicing. Only a qualifi ed service person should service and repair this electric appliance. sympton problem test solution Dim or no fl ame Flame brightness not selected. See “operation”...
-
Page 26: 9.0 Warranty
9.0 warranty replacement parts CONTINENTAL® electric appliances are manufactured under the strict Standard of the world recognized ISO 9001 : 2008 Quality Assurance Certifi cate. CONTINENTAL® products are designed with superior components and materials, assembled by trained craftsmen who take great pride in their work. -
Page 27: Service Warranty
10.0 service warranty replacement parts W415-1730 / B / 07.28.17... - Page 29 MULTIPLE PRODUCT CODES (LEAVE BLANK IF N/A) CEFL32FH / CEFL42FH / CEFL50FH / CEFL60FH / CEFL72FH / CEFL100FH FRENCH PG. 21 FRANÇAIS INSTRUCTIONS ADD MANUAL TITLE D’INSTALLATION ET D’OPÉRATION FOYER ÉLECTRIQUE PRODUCT NAME™ (CEFL50FH ILLUSTRATED) ADD PRODUCT CODE (IF MULTIPLE, _____ ILLUSTRATED) ADD PRODUCT IMAGE CONSIGNES DE SÉCURITÉ...
-
Page 30: Consignes De Sécurité
consignes de sécurité AVERTISSEMENT • Si équipé avec un chauffage, cet appareil peut être chaud lorsqu’il fonctionne et peut causer de graves brûlures en cas de contact. • Ne faites pas fonctionner l’appareil avant d’avoir lu et compris les instructions d’utilisation. L’incapacité de respecter les instructions pourrait causer un incendie ou des blessures corporelles. - Page 31 consignes de sécurité AVERTISSEMENT • Pour prévenir les risques d’incendie, ne bloquez pas les entrées d’air et les sorties d’air de quelque manière que ce soit. Ne placez pas cet appareil sur une surface molle telle qu’un tapis où les ouvertures pourraient se bloquer.
- Page 32 table des matiéres informations générales dimensions homologations instructions générales unpacking and testing appliance list de piéces plaue d’homologation emplacement de l’appareil mise à la terre de l’appareil dégagements minimaux aux matériaux combustibles installation dégagements minimaux aux matériaux ossature installation de l’appareil sur le mur encastremenet de l’appareil dans le mur d’installer l’appareil dans un tablette installation des pieds en caoutchouc...
-
Page 33: Informations Générales
1.0 informations générales dimensions SIDE VIEW FRONT VIEW TOP VIEW CEFL32FH 32" 21 5/8" 4 15/16" 20 1/2" 27 5/16" 12" 22 9/16" (813mm) (550mm) (125mm) (520mm) (695mm) (304mm) (573mm) 42" 21 5/8" 4 15/16” 20 1/2" 37 1/2"... -
Page 34: Instructions Générales
informations générales instructions générales • Avant de brancher votre appareil dans une prise de courant, vérifi ez si le disjoncteur de la maison pour ce circuit est allumé. • Il est possible que l’appareil dégage une légère odeur inoffensive lors de la première utilisation. Cela est une condition normale causée par le chauffage initial des éléments de l’appareil. -
Page 35: List De Piéces
Quantity Ref. # Description CEFL32FH CEFL42FH CEFL50FH CEFL60FH CEFL72FH CEFL100FH Vis à Bois Ancrages Pour Cloisons Sèches Vis Métalliques Plaque de Couverture Décharge De Traction Support Métallique Cache du Cordon Coin de Cordon Pied En Caoutchouc... -
Page 36: Plaue D'homologation
INSTALLATION DANS UNE CHAMBRE A COUCHER, UNE FOR MOBILE HOME INSTALLATION. SALLE DE BAIN ET UN STUDIO. APPROPRIE POUR INSTALLATION DANS UNE MAISON MOBILE. MASTER CONTRACT: 161746 CONTRAT-CADRE: 161746 NEFL32FH CEFL32FH NEFL60FH CEFL60FH NEFL42FH CEFL42FH MODELS / MODÈLES NEFL72FH CEFL72FH... -
Page 37: Dégagements Minimaux Aux Matériaux Combustibles
2.0 installation installation AVERTISSEMENT • Risque d’incendie! Le cordon d’alimentation ne doit pas être coincé contre une arrète vive. Fixez le cordon pour éviter les chutes ou les accrochages afi n de réduire le risque d’incendie, de choc électrique ou de blessures corporelles. -
Page 38: Dégagements Minimaux Aux Matériaux
installation dégagements minimaux aux matériaux WARNING • Lorsque vouus utilisez de la peinture ou du vernis comme finition pour votre tablette, assurez-vous qui’ils soient résistants à la chaleur afin de prévenir la décoloration. TABLETTE 8" (203mm) PLANCHER VUE DU CÔTÉ W415-1730 / B / 07.28.17... -
Page 39: Ossature
Matériels de Finition (NON CHARGER 5" 3 1/2" ROULEMENT) 127mm 89mm MODEL NO. 21" (53.5cm) 27 13/16" (70.7cm) CEFL32FH CEFL42FH 21" (53.5cm) 38" (96.5cm) 21" (53.5cm) 45 15/16" (116.6cm) CEFL50FH CEFL60FH 21" (53.5cm) 55 13/16" (141.8cm) 21" (53.5cm) 67 7/8" (172.5cm) -
Page 40: Installation De L'appareil Sur Le Mur
installation installation de l’appareil sur le mur APPAREIL Puisque les murs peuvent être recouverts de divers matériaux, nous vous GARNITURE DE conseillons fortement de retenir les services d’un professionnel qualifié pour ces GRILLAGE D’AVANT travaux. Choisissez un endroit non sujet à l’humidité et situé à au moins 3 pieds (0,9 m) des articles combustibles, tels que les rideaux, meubles, literie, 21 5/8"... -
Page 41: Encastremenet De L'appareil Dans Le Mur
installation encastremenet de l’appareil dans le mur En raison de trops de matériels finis différentes utilisé sur les murs, il est extrêmement recommandé que vous consultez votre constructeur local avant que vous installez cet appareil dans le mur. Choisissez un endroit non sujet à l’humidité et situé à au moins 36 pouces (914.4mm) des articles combustibles, tels que les rideaux, meubles, literie, papier, etc. -
Page 42: D'installer L'appareil Dans Un Tablette
installation note: Les onglets de l’appareil sont pliés. Vous devez plier l’onglet plat quand vous encastré entièrement l’appareil dans le mur, voyez ci-dessous, voir la Figure 4. FIG. 4 d’installer l’appareil dans un tablette Enlever la vitre avant, se référer à la section, “installation de la vitre avant” Installez les pieds en caoutchauc sur la bas de l’appareil pour la stabilité, se référer à... -
Page 43: Installation Des Pieds En Caoutchouc
installation installation des pieds en caoutchouc Placez l’appareil à l’envers (face vers le bas) sur une surface molle. À l’aide d’un tournevis, enlevez les vis sur le fond de l’appareil. Installez les 4 pieds en caoutchouc (6 pieds en caoutchouc pour CEFL60/72 /100FH) sur le fond de l’appareil à... -
Page 44: Branchement Par Cable
installation branchement par cable WARNING • Coupez l’alimentation électrique à l’appareil et laissez-le refroidir avant d’effectuer un entretien. Seul un technicien de service quialifé peut effectuer l’entretien ou la réparation de cet appareil électrique. Si c’est nécessaire de faire un branchement par câble, un électricien qualifié peut retirer le cordon d’alimentation de l’appareil et brancher ce dernier directement au câblage de la maison. -
Page 45: D'installation Du L'avant Vitrée
3.0 finitions finishing WARNING • Le raccordement par câble doit être complété avant la finition afin d’éviter toute reconstuction. • Les entrées d’air et les sorties d’air del’appareil ne doivent jamis être couvertes. d’installation du l’avant vitrée AVERTISSEMENT • La vitre peut être chaude. Ne touchez pas la vitre jusqu’à ce qu’elle ait refroidi. •... -
Page 46: L'enlévement Du L'avant Vitrée
finishing FIG. 3 l’enlévement du l’avant vitrée Pour montage murale, recess partielle et tablette installé appareil uniquement Retirez les 2 vis du haut de l’appareil, comme illustré ci-dessous. Ayant deux personnes, soulevez le verre haut et loin de l’appareil, tenant le verre vertical pas à... -
Page 47: Interrupteur
operating instructions 4.0 operating instructions WARNING • Alors que l’appareil fonctionne ne pas enlever le panneau de verre. Cela parce que la télécommande et l’écran tactile de dysfonctionnement. L’appareil est prêt à fonctionner dès qu’il est correctement branché dans une prise de courant mise à la terre. note: Assurez-vous que les disjoncteurs de la maison pour ce circuit soient allumés. -
Page 48: 5.0 Entretien
maintenance 5.0 entretien WARNING • Préparation pour l’entretien débranchez toujours l’alimentation électrqiue et laissez l’appareil refroidir avant de le nettoyer, de procéder à son entretien ou de la relocaliser. Tournez les contrôles à “OFF” et retirez la fiche de la prise de courant ou fermeze le disjoncteur du circuit de votre appareil. •... -
Page 49: Schéma De Cablage
6.0 schéma de cablage WARNING • Coupez l’alimentation électrique à l’appareil et laissez-le refroidir avant d’effecteur un entretien. Seul un technicien de service qualifié peut effectuer l’entretien ou la réparation de cet appareil électrique. CEFL32FH CEFL42FH CEFL50FH W415-1730 / B / 07.28.17... - Page 50 schéma de cablage CEFL60FH CEFL72FH CEFL100FH W415-1730 / B / 07.28.17...
-
Page 51: Rechanges
7.0 rechanges rechanges AVERTISSEMENT • Omettre de positionner les pièces conformément à ce manuel ou d’utiliser uniquement des pièces spécifi quement approuvées pour cet appareil peut causer des dommages matériels ou des blessures corporelles. Contactez votre détaillant pour les questions concernant les prix et la disponibilité des pièces de remplace- ment. - Page 52 REF. CEFL32FH CEFL42FH CEFL50FH CEFL60FH CEFL72FH CEFL100FH Description W300-0226 W300-0224 W300-0227 W300-0228 W300-0229 W300-0230 Facade Vitrée W475-1192 W475-1185 W475-1193 W475-1194 W475-1195 W475-1196 Panneau en Plastique Acrylique W405-0053 W405-0053 W405-0053 W405-0053 + W405-0053 + W405-0053 + Lumiére Du DEL W405-0054...
-
Page 53: Guide De Dépannage
8.0 guide de dépannage guide de dépannage AVERTISSEMENT • Coupez l’alimentation électrique à l’appareil et laissez-le refroidir avant d’effectuer un entretien. Seulement un technicien de service qualifi é peut effectuer l’entretien ou la réparation de cet appareil électrique. symptôme problème solution La luminosité... - Page 54 entraîné le déclenchement de l’interrupteur thermique. guide de dépannage La carte de circuit imprimé est Inspectez la carte de circuit imprimé est remplacez-le au besoin. brûlé. La télécommande Les piles sont faibles. Remplacez les piles de la télécommande. ne fonctionne pas. Dysfonctionnement du récepteur S’assurez que le récepteur à...
-
Page 55: 9.0 Garantie
9.0 garantie guide de dépannage Les foyers électriques CONTINENTAL® sont fabriqués conformément aux normes strictes du Certifi cat d’Assurance de Qualité mondialement reconnu ISO 9001 : 2008. Les produits CONTINENTAL® sont conçus avec des composants et des matériaux de qualité supérieure, assemblés par des artisans qualifi és qui sont fi ers de leur travail. - Page 56 guide de dépannage W415-1730 / B / 07.28.17...