
Manuels Connexes pour SilverCrest SGBR 1500 A1


Sommaire des Matières pour SilverCrest SGBR 1500 A1
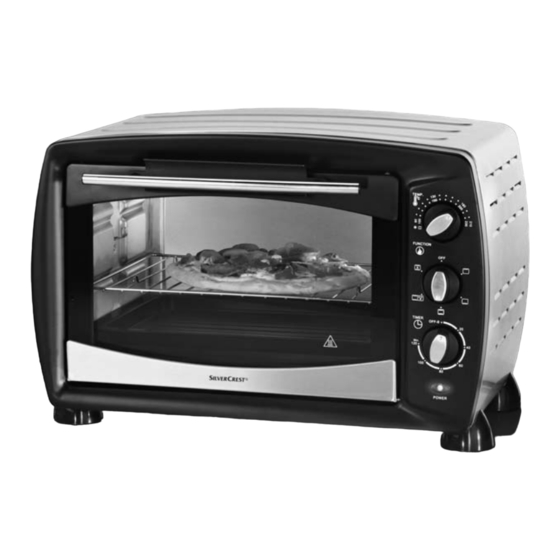
- Page 1 MINI FOUR/GRIL SGBR 1500 A1 MINI FOUR/GRIL GRILL- UND BACKAUTOMAT Mode d'emploi Bedienungsanleitung ELECTRIC OVEN & GRILL Operating instructions IAN 102464...
- Page 2 Avant de lire le mode d'emploi, ouvrez la page contenant les illustrations et familiarisez-vous ensuite avec toutes les fonctions de l'appareil. Klappen Sie vor dem Lesen die Seite mit den Abbildungen aus und machen Sie sich anschließend mit allen Funktionen des Gerätes vertraut. Before reading, unfold the page containing the illustrations and familiarise yourself with all functions of the device.
-
Page 4: Table Des Matières
Importateur ............14 SGBR 1500 A1... -
Page 5: Introduction
♦ Mode d'emploi REMARQUE Contrôlez le matériel livré directement après avoir procédé au déballage afi n de vous assurer que tout est complet et que rien n'a été endommagé. Si nécessaire, veuillez vous adresser au service après-vente. SGBR 1500 A1... -
Page 6: Consignes De Sécurité
Risque d'électrocution. Ne plongez jamais l'appareil dans de l'eau ou d'autres liquides ! Il y a danger de mort par électrocution si des restes de liquide entrent en contact avec des pièces sous tension pendant le fonctionnement. SGBR 1500 A1... -
Page 7: Attention - Risque De Blessure
Attendre que l'appareil soit refroidi. Sinon risque de brûlure. Laissez d'abord l'appareil refroidir avant de le transporter. ► Utilisez toujours des gants ou des maniques lorsque vous manipulez ► l'appareil chaud. Attention ! Surface brûlante ! SGBR 1500 A1... - Page 8 (chiff on, manique, etc.). Ne jamais utiliser l'appareil pour sécher des textiles ou un objet ► quelconque, que ce soit en posant l'objet à sécher sur ou dans l'appareil. Danger d'incendie ! SGBR 1500 A1...
-
Page 9: Installation
Vérifi ez qu'il y a un espace suffi sant autour de l'appareil pour la ventilation. ■ Nettoyez toutes les pièces, comme indiqué au chapitre "Nettoyage et entretien". SGBR 1500 A1... -
Page 10: Utiliser Le Tournebroche
Posez ensuite l'autre extrémité du tournebroche z ■ ment 1. avec la rainure profonde dans le logement du tournebroche 9 (fi g. 2): Fig. 2 : Poser le tournebroche z dans le logement du tournebroche 9. SGBR 1500 A1... -
Page 11: Utiliser Le Plateau/La Grille
7) Laissez l'appareil refroidir et nettoyez l'appareil Fig. 4 : Accrochage de la pince 0 avec la grille e tel que stipulé au chapitre "Nettoyage et entretien". L'appareil est maintenant prêt à l'emploi. Fig. 5 : Accrochage de la pince 0 avec le plateau q. SGBR 1500 A1... -
Page 12: Utilisation De L'appareil
" ". l'aide du commutateur de fonctions 3. ■ Lorsque vous réglez la température pour les fonctions "Chaleur haut + bas/chaleur tour- nante/tournebroche" ou "chaleur haut + bas/chaleur tournante" reportez-vous à l'échelle graduée signalée par " ". SGBR 1500 A1... -
Page 13: Grillade Avec Tournebroche
(voir chapitre "Utilisation du tourne- broche"). Le voyant de contrôle 5 indique que l'appareil est 6) Refermez la porte vitrée 6. allumé. Le bouton de la minuterie 4 se déplace maintenant dans le sens inverse des aiguilles d'une montre vers "OFF-0". SGBR 1500 A1... - Page 14 Ainsi, il sera croustillant. 9) Lorsque la durée programmée est écoulée, retirez la broche du poulet grillé doucement avec la pince w. Desserrez les bornes du tournebroche t et retirez le poulet du tournebroche z. SGBR 1500 A1...
-
Page 15: Nettoyage Et Entretien
Ne nettoyez pas les pièces de l'appareil dans le lave-vaisselle ! ► Ne nettoyez pas l'enceinte de cuisson avec un spray pour four, étant donné que les résidus ne peuvent plus être enlevés sur les barreaux chauff ants. SGBR 1500 A1... -
Page 16: Dépannage
Si vous ne parvenez pas à remédier aux pannes à l'aide des indications données ci-dessus ou si vous constatez d'autres types de pannes, veuillez vous adresser à notre service après-vente. SGBR 1500 A1... -
Page 17: Garantie Et Service
Tel.: 0800 919270 E-Mail: kompernass@lidl.fr IAN 102464 Service Belgique Tel.: 070 270 171 (0,15 EUR/Min.) E-Mail: kompernass@lidl.be IAN 102464 Heures de service de notre hotline : du lundi au vendredi de 8 h à 20 h (HEC) SGBR 1500 A1... - Page 18 Importeur ............28 SGBR 1500 A1...
-
Page 19: Technische Daten
1 Gitterrost ♦ 2 Zangen ♦ Drehspieß mit 2 Klemmen ♦ 1 Krümelblech ♦ Bedienungsanleitung HINWEIS Kontrollieren Sie den Lieferumfang direkt nach dem Auspacken auf Vollständigkeit und Beschä- digungen. Wenden Sie sich, wenn nötig, an den Service. SGBR 1500 A1... -
Page 20: Sicherheitshinweise
► an. Es besteht sonst die Gefahr eines elektrischen Schlags. Tauchen Sie das Gerät niemals in Wasser oder andere Flüssig- keiten! Hier kann Lebensgefahr durch elektrischen Schlag entstehen, wenn im Betrieb Flüssigkeitsreste auf spannungsfüh- rende Teile gelangen. SGBR 1500 A1... - Page 21 Gerät abgekühlt ist. Sie könnten sich andernfalls verbrennen. Lassen Sie das Gerät nach dem Gebrauch erst abkühlen, bevor ► Sie es transportieren. Benutzen Sie immer Topfhandschuhe oder Topfl appen, wenn Sie ► mit dem heißen Gerät hantieren! Vorsicht! Heiße Oberfl äche! SGBR 1500 A1...
- Page 22 Es dürfen sich während des Betriebs keine leicht brennbaren ► Materialien in unmittelbarer Umgebung des Grill- und Backauto- maten befi nden (z. B. Geschirrhandtuch, Topfl appen etc.). Trocknen Sie niemals Textilien oder Gegenstände auf, über oder ► im Gerät. Es besteht Brandgefahr. SGBR 1500 A1...
-
Page 23: Aufstellen
Stellen Sie das Gerät auf einem festen, ebenen und hitzebeständigen Untergrund (z.B. Edel- stahlarbeitsplatten oder Natursteinarbeitsplatten wie Granit) auf. Sorgen Sie für ausreichende Belüftung rund um das Gerät. ■ Reinigen Sie alle Teile wie im Kapitel „Reinigung und Pfl ege“ beschrieben. SGBR 1500 A1... -
Page 24: Drehspieß Benutzen
Drehspießaufnahme 9 und ziehen Sie ßes z mit der tiefen Nut in die Drehspießauf- dann den Drehspieß z aus dem Antrieb 1. nahme 9 (Abb. 2): Abb. 2: Drehspieß z in die Drehspießaufnahme 9 legen SGBR 1500 A1... -
Page 25: Backblech/Gitterrost Benutzen
Timer 4 auf „OFF - 0“. 7) Lassen Sie das Gerät abkühlen und reinigen Sie das Gerät wie im Kapitel „Reinigen und Pfl egen“ beschrieben. Das Gerät ist nun betriebsbereit. Abb. 5: Einhaken der Zange 0 beim Backblech q. SGBR 1500 A1... -
Page 26: Bedienen Des Gerätes
Skala zu benutzen (siehe „Ober- & Unterhitze/Umluft/Drehspieß“ Kapitel „Temperaturregler“.) oder „Ober- & Unterhitze/Umluft“ – Anschließend wählen Sie mit dem Funktions- einstellen, orientieren Sie sich an der mit „ “ schalter 3 die gewünschte Funktion. gekennzeichneten Skala. SGBR 1500 A1... -
Page 27: Grillen Mit Drehspieß
6) Schließen Sie die Glastür 6. dann zurück auf die gewünschte Grill- bzw. Backzeit. Die Kontrollleuchte 5 zeigt an, dass das Gerät eingeschaltet ist. Der Schalter des Timers 4 bewegt sich nun gegen den Uhrzeigersinn auf „OFF - 0“ zu. SGBR 1500 A1... - Page 28 Speiseöl. So wird es knusprig. 9) Wenn die eingestellte Zeit abgelaufen ist, entnehmen Sie den Grillspieß mit dem Grill- hähnchen vorsichtig mit der Zange w. Lösen Sie die Drehspießklemmen t und ziehen Sie das Grillhähnchen vom Drehspieß z. SGBR 1500 A1...
-
Page 29: Reinigung Und Pfl Ege
Reinigungsmittel. Diese können die Oberfl äche beschädigen! ► Reinigen Sie die Teile des Gerätes nicht in der Spülmaschine! ► Reinigen Sie den Garraum nicht mit einem Backofenspray, da sich Rückstände auf den Heizstäben nicht mehr entfernen lassen. SGBR 1500 A1... -
Page 30: Fehlerbehebung
Lebensmittelrückstände. Glastür 6 fort, bis die Rauchent- auf. wicklung verschwunden ist. Sollten sich die Störungen nicht mit oben stehenden Fehlerbehebungen beheben lassen, oder wenn Sie andere Arten von Störungen feststellen, wenden Sie sich bitte an unseren Service. SGBR 1500 A1... -
Page 31: Garantie Und Service
Tel.: 0820 201 222 (0,15 EUR/Min.) E-Mail: kompernass@lidl.at IAN 102464 Service Schweiz Tel.: 0842 665566 (0,08 CHF/Min., Mobilfunk max. 0,40 CHF/Min.) E-Mail: kompernass@lidl.ch IAN 102464 Erreichbarkeit Hotline: Montag bis Freitag von 8:00 Uhr – 20:00 Uhr (MEZ) SGBR 1500 A1... - Page 32 Importer .............42 SGBR 1500 A1...
-
Page 33: Introduction
♦ 2 tongs 50/60 Hz Max. power consumption: 1500 W ♦ Rotisserie with 2 clamps ♦ 1 crumb tray ♦ Operating instructions NOTE Check contents for completeness and damage immediately after unpacking. Contact Customer Services if necessary. SGBR 1500 A1... -
Page 34: Safety Instructions
Never touch the appliance, power cable or power plug with wet ► hands. There is a risk of electric shock! NEVER immerse the appliance in water or other liquids! Risk of electrocution if residual liquids come into contact with live components during operation. SGBR 1500 A1... - Page 35 Wait until the appliance has cooled down. Otherwise, you could be burnt. Allow the appliance to cool down after use before transporting it. ► Always use oven gloves or a pot holder if you need to take hold ► of the appliance. Caution! Hot surface! SGBR 1500 A1...
- Page 36 When the appliance is in use, ensure that there are no easily ► infl ammable materials in the immediate vicinity (e.g. dishcloths, oven cloths, etc.). Never dry textiles or other objects on or above the appliance. ► This increases the risk of fi re! SGBR 1500 A1...
-
Page 37: Setting Up
Place the appliance on a solid, level and heat- resistant surface (e.g. stainless steel worktops or natural stone worktops such as granite). Ensure there is suffi cient ventilation around the appliance. ■ Clean all components as described in the section “Cleaning and care”. SGBR 1500 A1... -
Page 38: Using The Rotisserie
fi tting 9 and then pull the rotisserie z the deep groove in the spit fi tting 9 (Figure 2): from the drive 1. Fig. 2: Insert the rotisserie z in the spit fi tting 9. SGBR 1500 A1... -
Page 39: Using The Baking Tray/Rack
Fig. 4: Hooking the tongs 0 onto the rack e the appliance as described in the chapter “Cleaning and care”. The appliance is now ready for use. Fig. 5: Hooking the tongs 0 onto the baking tray q SGBR 1500 A1... -
Page 40: Operating The Appliance
Select the required function with the function ”. switch 3. ■ If you set the temperature for the functions “Upper & lower heat/hot air/rotisserie” or “Upper & lower heat/hot air” use the scale marked with “ ”. SGBR 1500 A1... -
Page 41: Grilling With The Rotisserie
The control lamp 5 indicates that the appliance is now switched on. The switch of the timer 4 now rotates itself anti-clockwise to “OFF - 0”. SGBR 1500 A1... - Page 42 This will make it crispy. 9) Once the set time is up, carefully remove the rotisserie with the chicken using the tongs w. Loosen the skewer clamps t and pull the chicken off the rotisserie z. SGBR 1500 A1...
-
Page 43: Cleaning And Care
► Do not clean the components of the appliance in a dishwasher! ► Do not clean the cooking chamber with an oven spray as this may make residues on the heating elements impossible to remove. SGBR 1500 A1... -
Page 44: Troubleshooting
6 develop during use. heating elements. open until the smoke stops. If the malfunction cannot be corrected with the above suggestions, or if you have found some other kind of malfunction, please contact our Customer Service. SGBR 1500 A1... -
Page 45: Warranty And Service
Repairs made after expiry of the warranty period are chargeable. Service Great Britain Tel.: 0871 5000 720 (£ 0.10/Min.) E-Mail: kompernass@lidl.co.uk IAN 102464 Hotline availability: Monday to Friday 08:00 - 20:00 (CET) SGBR 1500 A1... - Page 46 KOMPERNASS HANDELS GMBH BURGSTRASSE 21 44867 BOCHUM DEUTSCHLAND / GERMANY www.kompernass.com Version des informations · Stand der Informationen Last Information Update: 06/ 2014 · Ident.-No.: SGBR1500A1-022014-2 IAN 102464...