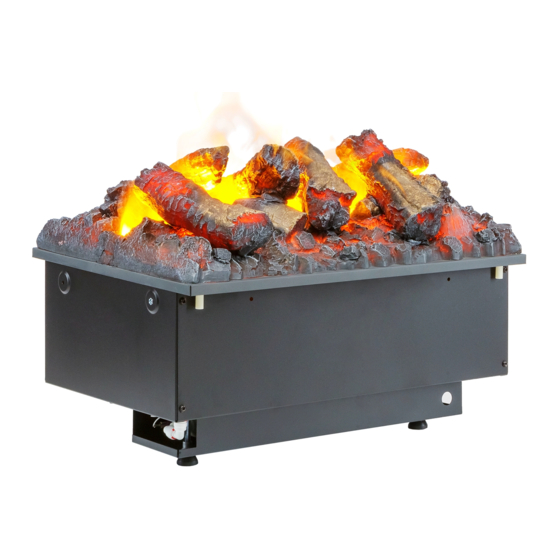
Page 1
CAS500R CAS1000R 08/53963/0 Issue 2 OCN 11034 The product complies with the European Safety Standards and the European Standard Electromagnetic Compatibility (EMC). These cover the essential requirements of EMC Directives and the LVD Directive.
Page 2
MODEL DIM ‘A’ CAS500R 508mm CAS1000R 1017mm FUEL BED DIM ‘B’ METAL 304mm 354mm Min: 190mm Max: 260mm Dim A 300mm Dim B Fig.1 400mm 400mm 400mm Fig.2 Fig.3 >210cm >210cm Eg. 42cm x 5cm Eg. 14.5cm x 14.5cm...
Page 3
Fig.4 >420cm Eg. 20.5cm x 20.5cm >420cm Eg. 84cm x 5cm >420cm >420cm Eg. 84cm x 5cm Eg. 84cm x 5cm Fig.6A Fig.6B Fig.6 Fig.5 Fig.7...
Page 8
GB ....................1 DE ....................9 NL ....................17 FR ....................25 IT ....................33 PL ....................41...
Page 9
Dimplex CAS500R, CAS1000R Introduction Please read this information guide carefully to be able to safely install, use and maintain your product. When using electrical appliances, basic precautions should always be followed to reduce the risk of fire, electrical shock and injury to persons, including the following: If the appliance is damaged, check with the supplier before installation and operation.
General Information Only use filtered/decalcified water in this appliance. Unpack the appliance carefully and retain the packaging for possible future use, in the event of moving or returning the fire to your supplier. Always ensure that the appliance is sitting on a level surface. The appliance is a flame effect only.
Page 11
3. Lift off the access cover by removing the retaining screw (Fig 5). 4. Unscrew and remove the Live, Neutral and Earth wires (Fig 6A) 5. Unscrew the cable clamp (Fig 6B) and remove the supply cord. 6. The electrician can then connect the wire from the appliance to the connection box (by following the steps above in reverse) ensuring that it incorporates a double pole isolating switch, having a contact separation of at least 3mm.
Multiple Product Installation Follow steps 1-4 in “Installing the Product into Surround/Enclosure” to fit the first product. It is important that the first product is orientated so that the side of the product with the slots is left free and not connected to first end of the installation (Fig 18).
RECEIVER CONTROLS The product can also be controlled using the receiver which is supplied with the product. (Fig 12) CAS500R • is the on/standby button. Press it to turn on and off the flame effect. • is used to mute the fire crackling sound. Press this to turn on and off the crackling sound. The volume can be adjusted on the manual controls of the appliance.
Page 14
7. When all products are paired, test the remote control by pressing the button. If any of the products fail to receive a signal from the remote control you can bring that product back in line with the others via the Manual Controls or the receiver controls.
8. Put a small amount of washing up liquid into the sump, and using a soft brush, gently clean all surfaces in the sump and gently clean the transducer including the cone and metal discs located in the top grooved surface. 9.
Page 16
Troubleshooting Symptom Cause Corrective Action Product will not oper- Electrical connection issue Ensure product has working electrical con- ate. nection. Low water reading Refill the water tank(s) of the product. See “Low Water / Refilling the Water Tanks” above. Product will not oper- Low water reading Refill the water tank(s) of the product.
Page 17
Dimplex CAS500, CAS1000 Einleitung Lesen Sie diese Informationen bitte sorgfältig, damit Sie das Gerät sicher installieren und warten können. Wichtiger Sicherheitshinweis Wenn elektronische Geräte verwenden, sollten stets grundlegende Sicherheitsvorkehrungen treffen, um die Gefahr von Feuer, einem elektrischen Schlag und Verletzungen zu vermeiden. Dazu zählen: Ist das Gerät beschädigt, sprechen Sie vor der Installation und Inbetriebnahme unverzüglich...
Allgemeine Informationen Verwenden Sie für das Gerät nur gefiltertes bzw. entkalktes Leitungswasser. Packen Sie das Gerät sorgfältig aus und bewahren Sie die Verpackung für den Fall auf, dass Sie das Gerät zu Ihrem Lieferanten bringen oder zurückschicken müssen. Stellen Sie immer sicher, dass das Gerät auf einer ebenen Fläche steht. Es handelt sich dabei lediglich um ein Gerät mit Flammeffekt.
Page 19
5. Schrauben Sie die Kabelklemme auf (Abb. 6B) und entfernen Sie das Stromkabel. 6. Der Elektriker kann anschließend das Kabel des Geräts mit der Anschlussdose verbinden (indem er oben genannte Schritte in umgekehrter Reihenfolge durchführt) und sicherstellen, dass ein doppelpoliger Isolierschalter vorhanden ist, der eine Kontakttrennung von mindestens 3 mm aufweist.
Installation mehrerer Produkte Folgen Sie den Schritten 1-4 in „Installation des Produkts in der Einfassung/im Gehäuse“. Es ist wichtig, dass das erste Gerät so aufgestellt wird, dass die Seite mit den Schächten frei bleibt und nicht an das erste Ende der Installation angeschlossen wird (Abb.
Page 21
des Knistergeräusches zu reduzieren Die Minimal-Lautstärke ist deaktiviert. Sie hören einen Piepton, wenn das niedrigste Level erreicht wurde. • dient zum Erhöhen der Knisterlautstärke. Drücken, um die Lautstärke des Knistergeräusches zu erhöhen. Sie hören einen Piepton, wenn die höchste Stufe erreicht wurde. EMPFÄNGER-STEUERUNG Das Gerät kann auch durch den Empfänger gesteuert werden, der dem Produkt beiliegt.
Page 22
dass alle Geräte an die Stromquelle sowie die Wasserversorgung angeschlossen sind. Wenn Sie CAS1000R- und CAS500R- Produkte miteinander koppeln, wählen Sie bitte die Fernsteuerung mit den sechs Tasten als Master-Fernsteuerung. 1. Koppeln Sie das erste Produkt wie in den Schritten 1-4 oben beschrieben. 2.
2. Heben Sie das Brennstoffbett vorsichtig ab und legen Sie es beiseite. 3. Entfernen Sie den Wassertank von seiner Position oberhalb des Sammelbehälters. 4. Trennen Sie die elektrische Verbindung zu den Verneblern auf der rechten Seite des Sammelbehälters. (Abb. 23) 5.
Page 24
Problembehebung Symptom Ursache Problembehebung Gerät funktioniert Problem mit der elektrischen Stellen Sie sicher, dass das Produkt über eine nicht. Verbindung funktionierende elektrische Verbindung verfügt. Niedriger Wasserstand (Messwert) Füllen Sie den bzw. die Wassertanks des Produkts wieder auf. Siehe „Niedriger Wasserstand / Wiederauffüllen der Wassertanks“...
Page 25
Dimplex CAS500, CAS1000 Introductie Lees deze informatiehandleiding zorgvuldig door voor het veilig installeren, gebruiken en onderhouden van uw product. Belangrijk veiligheidsadvies Bij gebruik van elektrische apparaten dienen basisvoorzorgmaatregelen altijd in acht genomen te worden om het risico op brand, elektrische schokken en verwondingen bij personen te...
Algemene informatie Gebruik in dit apparaat uitsluitend gefilterd/ontkalkt water. Haal het apparaat voorzichtig uit de verpakking en bewaar de verpakking voor mogelijk toekomstig gebruik, zoals verhuizingen of het terugbrengen naar de leverancier. Zorg er altijd voor dat het apparaat op een vlakke ondergrond staat. Het apparaat geeft alleen een vlameffect.
Page 27
4. Schroef de spanningsdraad, de neutrale draad en de aarddraad los en verwijder deze (fig. 6A). 5. Schroef de kabelklem los (fig. 6B) en verwijder het netsnoer. 6. De elektricien kan vervolgens de draad van het apparaat met de aansluitdoos verbinden (door de bovenstaande stappen in omgekeerde volgorde uit te voeren) en ervoor zorgen dat deze een tweepolige isolatieschakelaar bevat met een contactscheiding van minstens 3 mm.
Installatie van meerdere producten Volg de stappen 1-4 van “Het product in de ombouw/behuizing installeren” om het eerste product te installeren. Het is belangrijk dat het eerste product zodanig wordt gericht dat de zijkant van het product met de sleuven vrij blijft en niet is aangesloten op het eerste uiteinde van de installatie (fig.
Page 29
BEDIENING ONTVANGER Het product kan ook worden bediend met behulp van de ontvanger die bij het product wordt geleverd. (fig. 12.) CAS500R • is de aan/stand-by-knop. Druk erop om het vlameffect in of uit te schakelen. • wordt gebruikt om het knetterende geluid te dempen. Druk erop om het knetterende geluid in of uit te schakelen. Het volume kan worden aangepast via de handmatige bediening van het apparaat.
Page 30
6. Herhaal de bovenstaande stappen om het volgende product te koppelen. 7. Wanneer alle producten zijn gekoppeld, test u de afstandsbediening door op de knop te drukken. Als een van de producten geen signaal van de afstandsbediening ontvangt, kunt u dat product weer in de groep opnemen via de handmatige bediening of via de bediening van de receiver.
mondstuk uit de clip. Herhaal dit voor de rechterkant (fig. 24). Het mondstuk kan nu worden opgetild en opzij worden geplaatst (fig. 25). 6. Til de opvangbak voorzichtig op (fig. 26) en zorg ervoor dat hij waterpas blijft, zodat u geen water morst. Plaats hem in de gootsteen.
Probleemoplossing Symptoom Oorzaak Corrigerende actie Product werkt niet. Problemen met elektrische Zorg ervoor dat het product een werkende aansluiting elektrische verbinding heeft. Hervul het/de waterreservoir(s) van het product. Laag waterindicatie Zie het gedeelte “Laag water/Watertank bijvullen” hierboven. Product werkt niet. Laag waterindicatie Hervul het/de waterreservoir(s) van het product.
Page 33
Dimplex CAS500R, CAS1000R Introduction Prière de lire attentivement ce mode d'emploi afin d'installer, d'utiliser et d'entretenir votre produit en toute sécurité. Toujours observer les précautions de base lors de l'utilisation d'appareils électriques, afin de réduire le risque d'incendie, de chocs électriques et de blessures personnelles, notamment : Si l’appaeil est endommagé, contacter le fournisseur avant de l’installer et de le mettre en...
L'appareil porte un symbole d'avertissement NE PAS COUVRIR. Cet appareil n'est pas équipé d'un dispositif pour contrôler la température ambiante. Ne pas utiliser cet appareil dans des pièces exiguës lorsque des personnes s'y trouvant ne sont pas en mesure de quitter la pièce sans aide, à moins qu'une supervision constante soit assurée. Informations générales Utiliser uniquement de l'eau filtrée/décalcifiée dans cet appareil.
L'appareil peut être raccordé au câblage fixe du lieu via un boîtier de raccordement adapté placé près de l'appareil. Cette installation électrique doit être réalisée par un électricien compétent et doit être strictement conforme au règlement en vigueur de l'I.E.E (institution britannique des ingénieurs électriciens) sur l'installation électrique des bâtiments. L'électricien peut retirer la prise fournie comme suit : 1.
Contrôle de multiples produits Chaque produit peut être appairé à sa propre télécommande, ou de multiples produits peuvent être appairés à une seule télécommande. Noter qu'un maximum de six produits individuels (CAS500R/CAS1000R) peuvent être connectés à une seule télécommande Bluetooth. Cela permettra de contrôler tous les produits d'un coup avec une seule télécommande. En outre, le logiciel du produit a été...
• est le bouton de mode test. Il est utilisé par le fabricant et le technicien de maintenance. • est le bouton de réduction de flamme. Appuyer dessus pour réduire la hauteur/l'intensité de votre flamme. Un bip retentira quand le niveau minimum est atteint. •...
soient raccordés au secteur et soient alimentés en eau. Si vous appairez les produits CAS1000R et CAS500R, choisir la télécommande à 6 boutons comme télécommande principale. 1. Appairer le premier produit comme décrit dans les étapes 1-4 ci-dessus. 2. Sur le second produit, appuyer sur l'interrupteur à bascule en position (I) d'allumage ; un unique bip retentit. 3.
1. Appuyer sur l'interrupteur « A » pour le mettre en position « OFF » (0) (Fig 21). 2. Ôter délicatement la couche de combustible et la mettre de côté. 3. Retirer le réservoir d'eau de son emplacement sur le bac. 4.
Dépannage Symptôme Cause Mesure corrective Le produit ne Problème de branchement électrique Vérifier que le raccordement électrique du fonctionne pas. produit fonctionne. Niveau d'eau faible Remplir le(s) réservoir(s) d'eau du produit. Voir « Niveau d'eau faible / remplissage des réservoirs d'eau » ci-dessus. Le produit ne Niveau d'eau faible Remplir le(s) réservoir(s) d'eau du produit.
Page 41
Dimplex CAS500R, CAS1000R Introduzione Leggere attentamente le informazioni riportate in questa guida al fine di installare, utilizzare e mantenere il prodotto in modo sicuro. Quando si utilizzano apparecchiature elettriche, è necessario attenersi sempre alle precauzioni fondamentali per ridurre i rischi di incendio, scossa elettrica e lesioni personali, compreso quanto segue: Se l'apparecchiatura è...
L'apparecchiatura riporta un'etichetta con la dicitura “DO NOT COVER” (NON COPRIRE). Questa apparecchiatura non è dotata di dispositivo di controllo della temperatura ambiente. Non utilizzare questa apparecchiatura in locali di piccole dimensioni quando occupati da persone non in grado di lasciare il locale autonomamente, salvo non sia prevista la costante supervisione. Informazioni generali Utilizzare esclusivamente acqua filtrata/decalcificata all'interno dell'apparecchiatura.
Page 43
L'apparecchiatura può essere collegata al cablaggio fisso dei locali tramite un'apposita scatola di collegamento posizionata nelle vicinanze. Questa installazione elettrica deve essere eseguita da un elettricista competente e in stretta conformità alle attuali normative I.E.E per le apparecchiature elettriche negli edifici. L'elettricista può...
Controllo di più prodotti È possibile abbinare ogni prodotto al proprio telecomando o abbinare più prodotti a un unico telecomando. Si tenga presente che è possibile collegare un massimo di sei prodotti (CAS500R/CAS1000R) a un solo telecomando Bluetooth. Ciò consentirà il controllo di tutti i prodotti contemporaneamente da un unico telecomando. In aggiunta, il software del prodotto è...
Page 45
• è il tasto per diminuire l'effetto fiamma. Premerlo per ridurre l'altezza/intensità della fiamma. L'apparecchiatura emetterà un “bip” quando viene raggiunto il livello minimo. • è il tasto per aumentare l'effetto fiamma. Premerlo per aumentare l'altezza/intensità della fiamma. L'apparecchiatura emetterà un “bip” quando viene raggiunto il livello massimo. •...
Page 46
1. Associare il primo dispositivo come descritto nei passaggi 1-4 sopra riportati. 2. Sul secondo prodotto, premere l'interruttore a bilanciere nella posizione “ON” (I); l'apparecchiatura emetterà un “bip”. 3. Premere il tasto nella pulsantiera; il prodotto si accenderà. 4. Premere il tasto nella pulsantiera;...
3. Estrarre il serbatoio dell'acqua dalla sua posizione in cima alla vaschetta. 4. Scollegare il connettori elettrici ai trasduttori, situati sul lato destro della vaschetta (Fig. 23). 5. Ci sono due clip arancioni che fissano l'ugello sulla vaschetta; uno a sinistra e uno a destra dell'ugello. Sul lato sinistro, premere la clip con una mano e con l'altra sollevare l'ugello dalla clip.
Risoluzione dei problemi Sintomo Causa Soluzione Il prodotto non Problema del collegamento elettrico Assicurarsi che il prodotto abbia un funziona. collegamento elettrico funzionante. Basso livello dell'acqua Riempire il serbatoio (o i serbatoi) del prodotto. Consultare il paragrafo “Livello dell'acqua basso/Riempimento del serbatoio dell'acqua”.
Page 49
Dimplex CAS500R, CAS1000R Wprowadzenie Prosimy o uważne przeczytanie niniejszej Instrukcji, która ułatwi instalację, użytkowanie i konserwację produktu. Podczas użytkowania urządzeń elektrycznych należy zawsze stosować środki ostrożności celem zmniejszenia ryzyka pożaru, porażenia lub innych urazów, opisane niżej: Jeśli urządzenie jest uszkodzone, przed przystąpieniem do jego instalacji i eksploatacji należy skontaktować...
Informacje ogólne W urządzeniu należy używać wyłącznie wodę filtrowaną/odwapnioną. Urządzenie należy ostrożnie rozpakować i zachować opakowanie do przyszłego użycia – na wypadek przewożenia lub zwrotu do dostawcy. Urządzenie należy ustawiać na stabilnej, płaskiej powierzchni. Urządzenie stwarza jedynie efekt płomienia. Urządzenie należy zamontować w obudowie lub wbudować w ścianę. Uwaga: w przypadku używania kominka w miejscu o bardzo niskim poziomie hałasu może być...
Page 51
3. Podnieść pokrywę dostępu przez usunięcie śruby mocującej (rys. 5). 4. Odkręcić śrubę i usunąć przewody: pod napięciem, neutralny i uziemiający (rys. 6A). 5. Odkręcić śruby zacisku linowego (rys. 6B) i wyjąć przewód zasilający. 6. Elektryk może następnie podłączyć przewód od urządzenia do skrzynki przyłączeniowej (przez wykonanie opisanych wyżej kroków w odwrotnej kolejności), zapewniając, aby przewód dysponował...
Instalacja wielu urządzeń jednocześnie Wykonaj kroki 1-4 opisane w punkcie „Instalacja produktu w obudowie”, aby zamocować pierwszy produkt. Ważne jest, aby pierwszy produkt ustawić tak, by jego bok zawierający szczeliny pozostał wolny i niepodłączony do pierwszego końca instalacji (rys. 18). 1.
PRZYCISKI STERUJĄCE ODBIORNIKA Produktem można też sterować za pomocą znajdującego się w zestawie odbiornika. (Rys. 12) CAS500R • to przycisk włączenia/uśpienia. Naciśnij go, aby włączyć lub wyłączyć efekt płomienia. • służy do wyciszania odgłosu „trzeszczenia” paleniska. Naciśnij go, aby włączyć lub wyłączyć efekt trzeszczenia. Jego głośność...
Page 54
7. Po sparowaniu wszystkich produktów przetestuj działanie pilota, naciskając przycisk. Jeśli któryś z produktów przestanie odbierać sygnał z pilota, możesz uzgodnić jego działanie z działaniem pozostałych za pomocą przycisków sterowania ręcznego lub przycisków znajdujących się na odbiorniku. UZYSKIWANIE POŻĄDANEGO EFEKTU PŁOMIENIA 1.
8. Wlej niewielką ilość płynu do mycia do zbiornika ociekowego i za pomocą miękkiej szczotki ostrożnie wymyj wszystkie jego powierzchnie oraz delikatnie wyczyść przetwornik, łącznie ze stożkiem i tarczami metalowymi zlokalizowanymi w rowku górnym. 9. Po oczyszczeniu starannie opłukaj zbiornik ociekowy czystą wodą, aby usunąć wszystkie ślady środka do czyszczenia. 10.
Rozwiązywanie problemów Objaw Przyczyna Działania naprawcze Produkt nie działa. Problem z połączeniem elektrycznym Sprawdź, czy produkt dysponuje prawidłowo działającym połączeniem elektrycznym. Niski odczyt poziomu wody Uzupełnij zbiornik(i) na wodę w produkcie. Zobacz punkt „Niski poziom wody / uzupełnianie zbiorników na wodę” powyżej. Produkt nie działa.