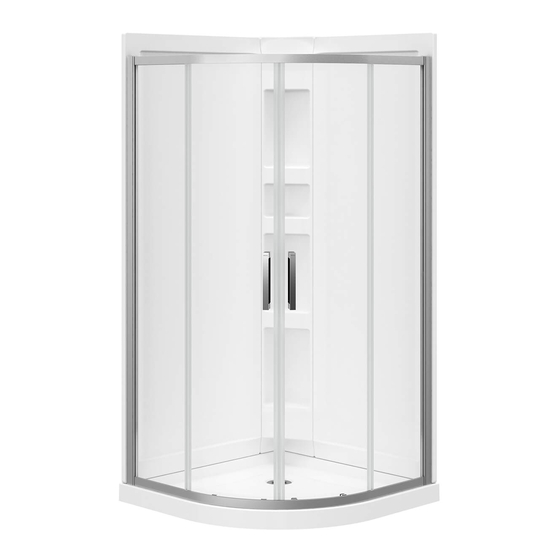
Publicité
Liens rapides
INSTALLATION INSTRUCTIONS
GUIDE D'INSTALLATION
GUÍA DE INSTALACIÓN
Read all instructions carefully before proceeding.
Lire toutes les instructions attentivement avant de commencer
l'installation.
Leer detenidamente todas las instrucciones antes de comenzar
la instalación.
IMPORTANT
• Record the serial number
IMPORTANT
• Noter le numéro de série
IMPORTANTE
• Registre el número de serie
FOR CORNER DOORS INSTALLATION
POUR INSTALLATION DES PORTES EN COIN
PARA LA INSTALACIÓN DE PUERTAS EN ESQUINA
MODEL • MODÈLE • MODELO
106540
SAVE THIS GUIDE FOR FUTURE REFERENCE.
CONSERVER POUR UN USAGE ULTÉRIEUR.
CONSERVE ESTE MANUAL COMO REFERENCIA.
Serial number • Numéro de série • Número de Serie
Publicité

Sommaire des Matières pour MAAX 106540
- Page 1 POUR INSTALLATION DES PORTES EN COIN GUÍA DE INSTALACIÓN PARA LA INSTALACIÓN DE PUERTAS EN ESQUINA MODEL • MODÈLE • MODELO 106540 Read all instructions carefully before proceeding. SAVE THIS GUIDE FOR FUTURE REFERENCE. CONSERVER POUR UN USAGE ULTÉRIEUR. Lire toutes les instructions attentivement avant de commencer l’installation.
- Page 2 PARTS PIÈCES PIEZAS AND COMPONENTS ET COMPOSANTES Y COMPONENTES 084=Chrome, Cromo 305=Brushed nickel, Nickel brossé, Níquel cepillado 173=Dark bronze, Bronze foncé, Bronce oscuro INSTALLATION WITH OPTIONAL WALLS | INSTALLATION AVEC DES MURS OPTIONNELS INSTALACIÓN CON MUROS OPCIONALES Part Nom de la pièce Pieza Code Cant.
- Page 3 TOOLS OUTILS HERRAMIENTAS REQUIRED REQUIS NECESARIAS Electric drill Level Pencil Perceuse électrique Niveau Crayon Taladro eléctrico Nivel Lápiz Clear silicone sealant Phillips screwdriver Silicone claire Tournevis étoile Square Sellador de silicona Destornillador Équerre transparente estrella Escuadra ⅛" drill bit Security equipment Measuring tape Équipement de sécurité...
- Page 4 BEFORE AVANT ANTES YOU BEGIN DE COMMENCER DE COMENZAR A two person installation is recommended. STANDARD Une installation par deux personnes est recommandé. Se recomienda realizar la instalación entre dos personas. A. Verify measurements using the dimensions shown in the tables. A wooden structure is required to support the shower walls, see chart below.
- Page 5 A. If they are covered, remove finished wall to expose bottom of studs. Confirm that the studs are vertical (plumb) within 3/8'' and square. B. The drain pipe should be 2'' diameter (outside diame- ter should be 2-3/8'') and centered 12⅛" from the studs. The top of the pipe should be smooth (free of burr or flare) and straight (not on an angle).
- Page 6 A. Complete drain assembly (refer to step 2, ASSEMBLY AND INSTALLATION of the instructions enclosed in the drain packaging). B. Install the base directly against the studs and confirm that the drain pipe is centered in the drain head and the base is leveled in all directions.
- Page 7 A. Install the base directly against the studs and confirm that the drain pipe is centered in the drain head and the base is leveled in all directions. Please refer to drain guide for drain installation. B. With a 3/16" bit, drill holes in the base flange then secure the base to the wall studs with #8 x 1¼"...
- Page 8 A two person installation is recommended. Une installation par deux personnes est recommandé. Se recomienda realizar la instalación entre dos personas. A. Refer to door 137449 installation guide 10037632 to follow steps to install the door. A. Reportez-vous au guide d'installation 10037632 de la porte 137449 pour suivre les étapes d'installation de la porte.
-
Page 11: Garantie Limitée - Canada
LIMITED WARRANTY — UNITED STATES MAAX Bath Inc. offers express limited warranty on each of its products. This warranty extends only to the original owner/end-user for personal household use. For commercial uses, additional limitations apply. For accessing product Limited warranty please visit: www.maax.com/us-warranty... - Page 12 Technical Services / Service technique / Servicio técnico T. 1 877 GET-MAAX (1 877 438-6229) F. 1 888 361-2045 10038627 © 2008 MAAX Bath Inc. PRINTED IN CANADA / IMPRIMÉ AU CANADA / IMPRESO EN CANADA 2020-07-28...


