Table des Matières
Publicité
Les langues disponibles
Les langues disponibles
Liens rapides
Publicité
Table des Matières

Manuels Connexes pour Apex iCH Auto


Sommaire des Matières pour Apex iCH Auto
- Page 1 Auto CPAP System Instruction Manual ...
- Page 3 Table of Content English User’s manual ..............P. 1 Español Manual de Instrucciones ..........P.25 Português Instruçõ es de Utilização ..........P.54 Français Instructions d'utilisation..........P.82 Deutsch Gebrauchsanleitung ............P.112 Nederlands Gebruikershandleiding ..........P.141 Italiano Manuale di istruzioni ............P.170 Model No.: 9S-007201, 9S-007202 Please read the instruction manual before use.
- Page 4 Auto/English IMPORTANT SAFEGUARDS SAVE THESE INSTRUCTIONS READ ALL INSTRUCTIONS BEFORE USING WARNING – THIS DEVICE IS NOT INTENDED FOR LIFE SUPPORT. It may stop operating due to power interruption without hazard to patient. If oxygen is used with the device, the oxygen flow must be turned off when the device is not in use.
- Page 5 Auto/English DANGER -To reduce the risk of electrocution: Always unplug this product immediately after using. Do not use while bathing. Do not place or store product where it can fall or be pulled into a tub or sink. Do not place in or drop into water or other liquid.
-
Page 6: General Information
Auto/English 1. Introduction This manual should be used for initial set up of the system and saved for reference purpose. 1.1 General Information Obstructive Sleep Apnea (OSA) is a condition that an intermitted and repetitive obstruction of the upper respiratory tract causes a complete (apnea) or partial (hypopnea) block of breathing airflow during sleep. -
Page 7: Intended Use
Auto/English EMC Warning Statement This equipment has been tested and found to comply with the limits for medical devices to the IEC/EN 60601-1-2. These limits are designed to provide reasonable protection against harmful interference in a typical medical installation. This equipment generates, uses and can radiate radio frequency energy and, if not installed and used in accordance with the instructions, may cause harmful interference to other devices in the vicinity. - Page 8 Auto/English...
-
Page 9: Product Description
Auto/English 2. Product Description 2.1 Unpacking the Contents Components include: (1) Main CPAP device with integrated heated humidifier (2) Power supply adapter and AC power cord (3) User manual (4) Flexible air tubing, 1.8 m length (5) Carrying bag (6) SD card and USB cable NOTE: Please use a SD card (smaller than 4GB) which complies with SDHC standard. - Page 10 Auto/English 3.1 Disassembling the Water Chamber 1. Turn the device off and allow the heater and water to cool. If necessary, disconnect the flexible tubing from the water chamber. 2. Place thumb on the top of the water chamber and tip it upward as shown in Figure 3-1.
- Page 11 Auto/English NOTE: Make sure the silicon connector on the inlet connector fits securely over the CPAP device air outlet. CAUTION: Do not overfill the water chamber. Damage to the device may occur. CAUTION: Use only room temperature water; do not fill the chamber with hot or chilled water.
-
Page 12: Control Panel Description
Auto/English 4. Operation NOTE: Always read the operating instructions before use. 4.1 Control Panel Description Buttons on control panel and main use of the buttons: START/STANDBY To start the treatment, simply press the "START/STANDBY" button. To stop the treatment, press the "START/STANDBY" button again. The display will switch between [STANDBY] and Therapy Pressure [ XX.X cmH... -
Page 13: Function Description
Auto/English 4.2 Function Description Getting Started – First time use. For first-time use, follow the steps below: 1. Make sure that your doctor or care provider has initialized and configured the appropriate treatment values into the unit. 2. Make sure that your package contains a face or nasal mask with headgear. If not, your doctor or care provider can recommend the type of mask and headgear you must obtain 3. - Page 14 Auto/English NOTE: The minimum pressure is only to be prescribed by a doctor. (7) Initial Pressure (only APAP mode) Press "MENU" button to select [Init. XX.XcmH O] or [Init. XX.XhPa] menu. Here you can view the current pressure setting displayed in cmH O or hPa unit.
- Page 15 Auto/English (15) Compliance Information Hold "UP" and "DOWN" button to read compliance information while in the standby screen. Press “START/STANDBY” button to go back to standby screen Period When entering the compliance information mode, the LCD screen should start blinking to allow you to select the period.
- Page 16 Auto/English 4.4 Flowchart of Menu settings Enter the user's menu mode by pressing the “MENU” button. CPAP APAP CPAP APAP Mode Mode Pressure Unit Pressure Unit < cmH O / hPa > < cmH O / hPa > Ramp...
- Page 17 Auto/English 4.5 Flowchart of Compliance Information reading Period (Time Frame) < 1 d /7d / 30 d / 90 d> Usage Hours < xxx > hrs Average Compliance Hours per day < x.x > hrs /d ...
-
Page 18: Using The Sd Card
Auto/English detected, heating will automatically stop with the heater indicator lights off. (e.g. removing the mask will stop the machine from operating.) If the air leakage problem is eliminated, heater will resume again. Danger: In order to avoid the destruction or damage to the device or even the hazard of electric shock, when the water chamber is attached, DO NOT fill water from the outlet port of the water chamber. -
Page 19: Air Filter
Auto/English 2. Remove the air tubing and headgear straps from the mask. 3. Wash the mask system according to the instructions supplied with it. 4. Wash the air tubing in warm water using mild detergent. Rinse thoroughly, hang and allow to dry. - Page 20 Auto/English Use a mild detergent to wash all the chamber parts. Rinse all the parts with clear water and allow them to air dry. All items of the chamber are subject to normal wear and tear and may eventually be replaced.
- Page 21 Auto/English 6. Troubleshooting The table below lists troubleshooting solutions for the problems that may happen. If the problem persists, contact your equipment provider’s service agent. P r o b l e m P o s s i b l e C a u s e s...
- Page 22 Auto/English Water Leakage 1. Water chamber is not properly 1. Remove the water chamber from assembled. the heated humidifier, pour out 2. Water chamber worn out. the water and reassemble the water chamber again, making sure water chamber closes...
-
Page 23: Technical Specifications
Auto/English 7. Technical Specifications I t e m S p e c i f i c a t i o n s Power Supply 60W, DC 24V, 2.5A Power Adapter DELTA ELECTRONICS, Model No.: MDS-060BAS24 A Input: AC 100~240VAC, 50/60Hz,1.5-0.75A Output rating: 24Vdc, 2.5A, 60W... - Page 24 Auto/English Symbols BF symbol, which indicated this product is according to the degree of protecting against electric shock for type BF equipment. Attention, should read the instructions. Refer to instruction manual Attention, should read the instructions. Class II Protected against solid foreign objects of 12.5 mm and greater; Protected against vertically falling water drops.
- Page 25 Apex Medical Corp. (hereafter ‘Apex’) gives the customer a limited manufacturer warranty on new original Apex products and any replacement part fitted by Apex in accordance with the warranty conditions applicable to the product in question and in accordance with the warranty periods from date of purchase as listed below.
-
Page 26: Guidance And Manufacturer's Declaration- Electromagnetic Emissions
Auto/English Appendix A: EMC Information Guidance and Manufacturer’s Declaration- Electromagnetic Emissions: This device is intended for use in the electromagnetic environment specified below. The user of this device should make sure it is used in such an environment. Emissions Test... -
Page 27: Guidance And Manufacturer's Declaration- Electromagnetic Immunity
Auto/English Guidance and Manufacturer’s Declaration- Electromagnetic Immunity: This device is intended for use in the electromagnetic environment specified below. The user of this device should make sure it is used in such an environment. Immunity Test Levels HOME Basic EMC... - Page 28 Auto/English Recommended separation distance 150kHz to 80MHz =0.6 80MHz to 800MHz =1.2 800 MHz to 2.7GHz Where P is the maximum 3 V/m 80 MHz to 10 V/m 80 MHz to output power rating of the 2.7 GHz 2,7 GHz...
- Page 29 Auto/English Recommended separation distances between portable and mobile RF communications equipment and this device: This device is intended for use in an electromagnetic environment in which radiated RF disturbances are controlled. The customer or the user of this device can help prevent electromagnetic interference...
- Page 30 Auto/ Español CONSEJOS IMPORTANTES CONSERVE ESTAS INSTRUCCIONES EN LUGAR SEGURO LEA ATENTAMENTE ESTAS INSTRUCCIONES ANTES DE USAR EL APARATO AVISO – ESTE APARATO NO ESTÁ DESTINADO A SER UTILIZADO COMO SOPORTE VITAL. Podrí a dejar de funcionar por una interrupción en el suministro eléctrico, lo que no supondrí a peligro alguno para el paciente.
- Page 31 Auto/ Español ATENCIÓ N – Asegúrese de que el entorno de la máquina se encuentre seco y limpio. El polvo y las partí culas podrí an afectar al tratamiento. Mantenga despejada la toma de entrada de aire situada en la parte posterior de la máquina para evitar que el dispositivo se sobrecaliente y pueda resultar dañado.
- Page 32 Auto/ Español No trate de hacer funcionar el dispositivo antes de haber instalado la máscara y el compartimiento del agua. 10. Quite el compartimiento del agua del dispositivo cuando no esté en uso, la entrada de agua en el dispositivo puede provocar descargas eléctricas o daños.
-
Page 33: Informació N De Carácter General
Auto/ Español 1. Introducción Hay que utilizar estas instrucciones para la configuración inicial del sistema, y deberán ser conservadas para su consulta. 1.1 Informació n de carácter general La Apnea Obstructiva del Sueño (AOS) es un estado originado por la obstrucción intermitente y repetitiva del sistema respiratorio de las ví... -
Page 34: Uso Previsto
Auto/ Español Advertencia CEM (compatibilidad electromagnética) Este equipo ha sido testado y se ha demostrado que cumple los lí mites marcados para aparatos médicos según las normas IEC 60601-1-2:2007. Estos lí mites han sido diseñados para facilitar una protección contra interferencias nocivas en una instalación médica. Este equipo genera, emplea y puede irradiar energí... -
Page 35: Descripción Del Producto
Auto/ Español 2. Descripción del producto 2.1 Incluye los siguientes componentes: Complementos incluidos: (1) Dispositivo CPAP con humidificador calentador integrado (2) Adaptador de energí a y cable de alimentación AC (3) Manual de instrucciones (4) Tubo de aire flexible de 1,8 m de longitud... -
Page 36: Vista General Del Sistema
Auto/ Español 2.2 Vista General del Sistema Pantalla LCD Botón Aumentar & Reducir Botón Iniciar/Standby Botón de Menu Ranura para Tarjeta SD/Conector mini-USB Filtro de Aire Plataforma del Calentador Indicador del Calentador Botón de Control del Calentador 10. Salida de Aire 11. - Page 37 Auto/ Español 3. Instalación 3.1 Desmontaje del Compartimiento de Agua Apague el dispositivo y permita enfriar el calentador y agua. Si es necesario, desconecte la tubo flexible del compartimiento de agua. Coloque el dedo pulgar sobre la parte superior del compartimiento de agua y viértalo como se muestrada en la Figura 3-1.Tire hacia fuera del compartimiento de agua .
- Page 38 Auto/ Español NOTA: Asegú rese de que el conector de silicona se ajusta sobre la salida de aire del dispositivo CPAP. CUIDADO: No sobrepase la line de relleno del compartimiento de agua. Esto puede causar daño al dispositivo. CUIDADO: Use solamente agua a temperatura ambiental; no llene el compartimiento con agua caliente o frí...
- Page 39 Auto/ Español...
-
Page 40: Descripción Del Panel De Control
Auto/ Español 4. Funcionamiento NOTA: Lea siempre las instrucciones uso. 4.1 Descripció n del panel de control Uso de los botones del panel de control: ARRANQUE / STANDBY Para comenzar el tratamiento, pulsar simplemente el botón "START/STANDBY". Para detener el tratamiento, pulsar de nuevo el botón "START/STANDBY". La pantalla variará... -
Page 41: Descripción Del Funcionamiento
Auto/ Español 4.2 Descripció n del funcionamiento Inicio – cómo utilizarlo por primera vez. Cuando vaya a utilizarlo por primera vez, siga los siguientes pasos: 1. Asegúrese de que su médico o profesional sanitario haya configurado los valores de tratamiento adecuados en el equipo. - Page 42 Auto/ Español NOTA: La presión terapéutica sólo puede ser prescrita por un médico. (5) Presión máxima (sólo en el modo APAP) Pulsar el botón “MENU” para seleccionar en el menú [Max. XX.XcmH2O] o [Max. XX.XhPa]; podrá ver el ajuste de la presión actual en unidades cmH2O o hPa. La presión máxima solo podrá...
- Page 43 Auto/ Español (12) Despertador Pulsar el botón “MENU” para seleccionar en el menú [Clock Alarm on/off]; pulsar el botón “UP” o "DOWN" para activar o desactivar el reloj despertador. Cuando el reloj despertador está activado, en la parte izquierda de la pantalla se verá la hora. Pulsar el botón “UP”...
- Page 44 Auto/ Español las 4 horas durante diferentes periodos. Pulse el botón "ARRIBA" o "ABAJO" para leer la última o la siguiente información de cumplimiento. [AHI XX.X] registra el ì ndice Apnea Hiponea medio (AHI) durante diferentes periodos de tiempo. Pulse el botón "ARRIBA" o "ABAJO" para leer la última o la siguiente información de cumplimiento.
- Page 45 Auto/ Español 4.4 Diagrama de ajustes del menú Introducir el modo menú del usuario pulsando el botón “MENU”. Modo Modo CPAP APAP CPAP APAP Unidad de presión Unidad de presión < cmH O / hPa > < cmH O / hPa >...
- Page 46 Auto/ Español 4.5 Diagrama de lectura de informació n de cumplimiento Periodo (Plazo de tiempo) < 1 /7d / 30 d / 90 d> Horas de uso < xxx > hrs (Promedio horas de cumplimiento al dí a) <...
- Page 47 Auto/ Español 4.6 Utilizar el humificador calentador 1. Gire el botón de control del calentador situado en la parte posterior del dispositivo para activar el calentador. El indicador de encendido del calentador se encenderá en color naranja (figura 4-1).
- Page 48 Auto/ Español...
-
Page 49: Limpieza Y Mantenimiento
Auto/ Español 5. Limpieza y mantenimiento 5.1 Dispositivo El dispositivo debe ser examinado y limpiado regularmente (al menos cada 30 dí as). Limpiar con un paño húmedo y un detergente suave y mantenerlo limpio del polvo. Si se utiliza otro detergente, elegir uno que no tenga efectos quí... -
Page 50: Filtro De Aire
Auto/ Español 5.3 Filtro de aire Para el funcionamiento óptimo del aparato, el filtro de aire debe de ser limpiado al menos una vez cada dos semanas, o más a menudo, si el dispositivo se utiliza en un entorno muy polvoriento. Se recomienda que el filtro sea cambiado cada 6 meses. -
Page 51: Solución De Problemas
Auto/ Español 6. Solución de problemas La siguiente tabla enumera las soluciones a posibles problemas que se puedan producir. Si el problema persiste, contactar con el proveedor del equipo. P r o b l e m a C a u s a s p o s i b l e s S o l u c i o n e s No se ve nada en la pantalla 1. - Page 52 Auto/ Español máquina). Verifique si el cable de No pasa flujo de aire por el 1. Dispositivo no está encendido alimentación está correctamente tubo de la máscara o funcionando conectado. incorrectamente. Conecte de nuevo el tubo. 2. Tubo no está correctamente Desbloquee/desenrole el tubo.
- Page 53 Auto/ Español Mensajes de Error / Advertencia en la pantalla LCD Tipo de mensaje Definición Mensaje en LCD Error de las configuraciones del sistema Error 001 Error por fallo del generador de flujo Error 002 Error de ajuste de temporizador...
-
Page 54: Especificaciones Técnicas
Auto/ Español 7. Especificaciones técnicas Ar t íc u l o E s p e c i f i c a c i o n e s Fuente de alimentación 60W, DC 24V, 2.5A Adaptador de Energí a DELTA ELECTRONICS, Model No.: MDS-060BAS24 A Input: AC 100~240VAC, 50/60Hz,1.5-0.75A... - Page 55 Auto/ Español SÍ MBOLOS Fabricante. Representante autorizado para la comunidad europea. Atención, deberí a leer estas instrucciones. Consulte las instrucciones de funcionamiento. Consultar el manual de instrucciones Sí mbolo BF que indica que este producto cumple el grado de protección contra el choque eléctrico para equipos de tipo BF.
-
Page 56: Asistencia Técnica
10. Garantí a limitada Apex Medical Corp. (en lo sucesivo ‘Apex’) concede al cliente una garantía limitada sobre los productos originales Apex nuevos y sobre cualquier pieza de recambio suministrada por Apex de acuerdo con las condiciones de garantí... -
Page 57: Guía Y Declaració N Del Fabricante - Emisiones Electromagnéticas
Auto/ Español Apéndice A:información sobre compatibilidad electromagnética Guía y Declaració n del Fabricante - Emisiones Electromagnéticas: Este dispositivo está diseñado para su uso en el entorno electromagnético especificado a continuación. El usuario del dispositivo deberá asegurarse de que sea utilizado en dicho entorno. - Page 58 Auto/ Español Guía y Declaració n del Fabricante - Emisiones Electromagnéticas: Este dispositivo está diseñado para su uso en el entorno electromagnético especificado a continuación. El usuario del dispositivo deberá asegurarse de que sea utilizado en dicho entorno. Nivel de la Prueba de inmunidad Estándar...
- Page 59 Auto/ Español 80 MHz 80% AM a 1 Distancia de separación recomendada: de 150 kHz a 80 MHz =0.6 de 80 MHz a 800 MHz =1.2 de 800 MHz a 2.7 GHz Donde P es la potencia de salida nominal máxima del transmisor en...
- Page 60 Auto/ Español Distancias de separació n recomendadas entre los equipos portátiles y mó viles de comunicaciones por radiofrecuencia y este dispositivo. Este dispositivo está diseñado para su uso en un entorno electromagnético en que las alteraciones producidas por radiofrecuencias radiadas estén controladas. El cliente o el usuario del dispositivo pueden contribuir a evitar las interferencias electromagnéticas manteniendo la distancia mí...
- Page 61 Auto/Português PRECAUÇ Õ ES IMPORTANTES GUARDE ESTAS INSTRUÇ Õ ES LEIA TODAS AS INSTRUÇ Õ ES ANTES DE USAR O APARELHO AVISO – 1. ESTE DISPOSITIVO NÃ O ESTÁ CONCEBIDO COMO SISTEMA DE RESPIRAÇ Ã O ARTIFICIAL. Pode deixar de funcionar devido a cortes de energia mas não põe em perigo a vida do paciente.
- Page 62 Auto/Português ATENÇ Ã O – Certifique-se de que o ambiente em volta da máquina é seco e limpo. O pó e as partí culas estranhas poderão afectar o tratamento. Mantenha desobstruí da a entrada de ar situada na parte traseira da máquina, para evitar o sobreaquecimento e a danificação do dispositivo.
- Page 63 Auto/Português 11. Não utilize se a água entrar em contacto com o dispositivo ou entrar na tubagem. 12. Este dispositivo não se destina a ser utilizado em doentes cujas vias aéreas tenham sido sujeitas a bypass. 13. Não coloque cobertores ou roupas sobre o dispositivo.
-
Page 64: Informação Geral
Auto/Português 1. Introdução Este manual deve ser utilizado para a montagem inicial do sistema e guardado para futuras consultas. 1.1 Informação Geral A Apneia Obstrutiva do Sono (AOS) é um episódio no qual a obstrução repetitiva e intermitente do tracto respiratório superior provoca o cesse completo (apneia) ou parcial (hipo apneia) da respiração... -
Page 65: Uso Previsto
Auto/Português 1.2 Uso previsto Este aparelho está destinado a fornecer uma pressão positiva contí nua às vias respiratórias (CPAP) para o tratamento da Apneia Obstrutiva do Sono em adultos (AOS). O humidificador com aquecedor integrado foi concebido para aumentar a humidade do ar proveniente do CPAP, aliviando dessa forma os sintomas de secura no nariz e garganta que são sentidos por algumas... - Page 66 Auto/Português 2.2 Visão Global do Sistema 1. Visor LCD 2. Botão Cima e Baixo 3. Botão Ligar/Suspensão 4. Botão Menu 5. Ranhura para cartões SD/conector mini-USB 6. Filtro de Ar 7. Plataforma do Aquecedor 8. Indicador do Aquecedor 9. Maní pulo de Controlo do Aquecedor 10.
-
Page 67: Instalação
Auto/Português 3. Instalação 3.1 Desmontagem da Câmara da Á gua Desligue o dispositivo e deixe arrefecer o aquecedor e a água. Caso necessário, desligue a tubagem flexí vel da câmara de água. Posicione o polegar na parte superior da câmara de água e levante-a para cima, conforme é... - Page 68 Auto/Português NOTA: Certifique-se de que o conector de silicone no conector de entrada fica devidamente encaixado sobre a saí da de ar do CPAP. ATENÇ Ã O: Não encha demasiado a câmara de água. Poderá danificar o dispositivo. ATENÇ Ã O: Utilize apenas água à temperatura ambiente; não encha a câmara com água quente ou gelada.
-
Page 69: Descrição Do Painel De Controlo
Auto/Português 4. Funcionamento NOTA: Antes do uso, ler sempre as instruções de funcionamento. 4.1 Descrição do painel de controlo Disposição dos botõ es no painel de controlo e uso principal dos botõ es: ARRANQUE / STANDBY Para começar o tratamento, carregar simplesmente no botão "START/STANDBY". Para deter o tratamento, carregar de novo no botão "START/STANDBY". -
Page 70: Descrição Do Funcionamento
Auto/Português 4.2 Descrição do funcionamento Começar – Primeira utilização. Para a primeira utilização do aparelho, siga estas instruções: 1. Certifique-se de que o seu médico ou terapeuta iniciaram e configuraram o aparelho com os valores de tratamento adequados para o seu caso. - Page 71 Auto/Português (4) Pressão Terapêutica (só no modo CPAP) Pressione o botão de "MENU" para seleccionar o menu [P XX.XcmH2O] ou [P XX.XhPa], onde pode comprovar a configuração actual de pressão apresentada em unidades de cmH2O ou hPa. A pressão terapêutica só pode ser regulada pelo fornecedor do aparelho, por um terapeuta respiratório ou por um médico.
- Page 72 Auto/Português significativa durante 3 minutos. Esta definição apenas poderá ser ajustada pelo fornecedor, por um pneumologista ou médico. (10) Medidor de Cumprimento Pressione o botão de "MENU" para seleccionar o menu [CM XXXX.X hr], onde o medidor de cumprimento regista o número total de horas de terapia que o dispositivo realizou. Este medidor só...
- Page 73 Auto/Português seleccionar o perí odo de 1 a 90 dias. Após a selecção do perí odo, pressione o botão de “MENU” para confirmar. Pressione o botão de "PARA BAIXO" para obter mais informação de cumprimento. ii. Horas de uso / Horas de cumprimento As Horas de Uso [XXX hrs] indicam as horas de realização de terapia durante o perí...
- Page 74 Auto/Português 4.4 Diagrama das Opçõ es dos Menus Passe para o modo do menu do utilizador pressionando o botão de “MENU”. Modo CPAP APAP Modo CPAP APAP Unidade de Pressão Unidade de Pressão <cmH O / hPa> <cmH O / hPa>...
- Page 75 Auto/Português 4.5 Diagrama da informação de cumprimento Perí odo (Tempo) < 1 /7d / 30 d / 90 d> Horas de Uso < xxx > hrs Média de Horas de Cumprimento por Dia < x.x > hrs /d ...
- Page 76 Auto/Português NOTA: NOTA: Quando o sinal 'Low P' é exibido na tela enquanto um grande vazamento de ar é detectado, o aquecimento irá parar automaticamente com as luzes indicadoras do aquecedor apagadas. (Por exemplo, remover a máscara irá parar a máquina.) Se eliminar o problema de vazamento de ar, o aquecedor reiniciará...
-
Page 77: Limpeza E Manutenção
Auto/Português 5. Limpeza e manutenção 5.1 Dispositivo O dispositivo deve ser examinado e limpado de pó regularmente (pelo menos cada 30 dias). Limpar com um pano húmido e um detergente suave e mantê-lo limpo de pó. Se se utiliza outro detergente, escolha um que não tenha efeitos quí... -
Page 78: Câmara De Á Gua
Auto/Português 5.3 Filtro de Ar Para uma óptima utilização do dispositivo, o filtro de ar pode ser limpo pelo utilizador de duas em duas semanas ou mais frequentemente se o dispositivo for usado num ambiente com muita poeira. Recomendamos a substituição do filtro por um novo após 6 meses de uso do dispositivo; no entanto, dependendo do ambiente de utilização o perí... -
Page 79: Solução De Problemas
Auto/Português 6. Solução de problemas A tabela a seguir enumera as soluções perante possí veis problemas que se podem produzir. Se problema persiste, contactar com o fornecedor do equipamento. Problema Causas possí veis Soluções 1. O cabo eléctrico não está... - Page 80 Auto/Português A placa do aquecedor Contacte o seu agente local ou O indicador de sobreaqueceu. representante da UE para aquecedor ligado O indicador do PCB está manutenção. não acende gasto. Contacte o seu agente local ou Grande vazamento de ar é...
- Page 81 Auto/Português Mensagens de Erro / Advertência no ecrã LCD Tipo de mensagem Definição Mensagem em LCD Erro por configuração anormal do Erro: Error 001 sistema. Não se pode executar a Erro por falha do gerador de fluxo. função primária.
-
Page 82: Especificações Técnicas
Auto/Português 7. Especificações técnicas Artigo Especificações 60 W, DC 24 V, 2,5 A Fonte de alimentação Adaptador de Corrente DELTA ELECTRONICS, Model No.: MDS-060BAS24 A Input: AC 100~240VAC, 50/60Hz,1.5-0.75A Output rating: 24Vdc, 2.5A, 60W Intervalo de Pressão 4-20 cmH O (reguláveis em intervalos de 0,5 cmH... - Page 83 Auto/Português práticas correctas a fim de evitar danos pessoais. SÍ MBOLO Fabricante. Mandatário na comunidade Européia. Atenção, devem ler-se as instruções. Consulte as instruções de funcionamento. Consulte o manual de instruções. Sí mbolo BF que indica que este produto cumpre o grau de protecção contra o choque eléctrico para equipamento do tipo BF.
-
Page 84: Assistência Técnica
Apex novos e para qualquer peça de substituição colocada pela Apex, de acordo com as condições de garantia aplicáveis ao produto em questão e de acordo com os perí odos de garantia a contar da data de compra a seguir indicados. Esta garantia não cobre danos causados por acidentes, abuso, alterações, danos causados pela água... -
Page 85: Directrizes E Declaração Do Fabricante - Emissões Electromagnéticas
Auto/Português Apêndice A: Informação EMC Directrizes e declaração do fabricante – Emissões electromagnéticas: Este dispositivo destina-se a ser utilizado em ambientes electromagnéticos tal como especificado em baixo. O utilizador deste dispositivo deve certificar-se de que o mesmo é utilizado no tipo de ambiente a que se destina. - Page 86 Auto/Português Directrizes e declaração do fabricante – Imunidade electromagnética: Este dispositivo destina-se a ser utilizado em ambientes electromagnéticos tal como especificado em baixo. O utilizador deste dispositivo deve certificar-se de que o mesmo é utilizado no tipo de ambiente a que se destina.
- Page 87 Auto/Português Entre 0,15 MHz de rádio cabos, e tendo em atenção a e 80 MHz amador entre distância recomendada 80% AM a 1 kHz 0,15 MHz e 80 calculada segundo a equação aplicável à 80% AM a 1 frequência do transmissor.
- Page 88 Auto/Português Distâncias recomendada entre equipamento de comunicação portátil e RF móvel e este dispositivo Este dispositivo destina-se a ser utilizado em ambientes electromagnéticos com as interferências RF radiadas sob controlo. O utilizador deste dispositivo pode evitar as interferências electromagnéticas mantendo uma distância mí...
-
Page 89: Lisez Attentivement Toutes Les Instructions Avant D'utiliser L'appareil
Auto/ Français PRÉ CAUTIONS IMPORTANTES CONSERVEZ BIEN CES INSTRUCTIONS VEUILLEZ LIRE TOUTES LES INSTRUCTIONS AVANT UTILISATION LISEZ ATTENTIVEMENT TOUTES LES INSTRUCTIONS AVANT D'UTILISER L'APPAREIL AVERTISSEMENT - 1. CET APPAREIL N'EST PAS CONÇ U POUR ETRE UTILISE DANS DES MESURES DE SOUTIEN OU DE MAINTIEN VITAL. -
Page 90: Precaution D'usage
Auto/ Français PRECAUTION D’USAGE – 1. Assurez-vous que l’environnement autour de la machine est sec et propre. La poussière et les particules étrangères peuvent avoir une influence sur le traitement. Le raccord de prise d’air à l’arrière de la machine doit rester libre pour éviter la surchauffe de l’appareil et les dommages résultants. - Page 91 Auto/ Français 7. Ne faites jamais tomber et n'introduisez aucun objet dans un orifice ou un tuyau. 8. Suivez les réglementations nationales pour jeter l'appareil. 9. Ne pas utiliser l'appareil avant d'avoir installé le masque et la chambre à eau.
-
Page 92: Informations Générales
Auto/ Français 1. Introduction Ce manuel doit être utilisé pour réaliser le réglage initial du système et doit être conservé pour pouvoir être consulté ultérieurement. 1.1 Informations Générales L'Apnée Obstructive du Sommeil (AOS) consiste en l'obstruction intermittente et répétitive du conduit respiratoire supérieure qui entraî... -
Page 93: Utilisation Prévue
Auto/ Français Note d'avertissement d'EMC Cet appareil a été testé conforme aux limites exigées pour les appareils médicaux avec la norme EN 60601-1-2:2007. Ces limites ont été définies pour fournir une bonne protection contre les interférences nocives dans les installations médicales traditionnelles. Cet équipement crée, utilise et peut irradier de l'énergie de fréquence radio et, s'il n'est pas installé... -
Page 94: Description Du Produit
Auto/ Français 2. Description du Produit Appareil principal de ventilation spontanée en pression positive continue avec humidificateur chauffant intégré. Adaptateur d'alimentation et cordon d'alimentation CA Manuel d'utilisateur Tuyau d'air flexible de 1,8 m de long. Sac de transport (en option) Carte SD et câble USB... -
Page 95: Présentation Du Système
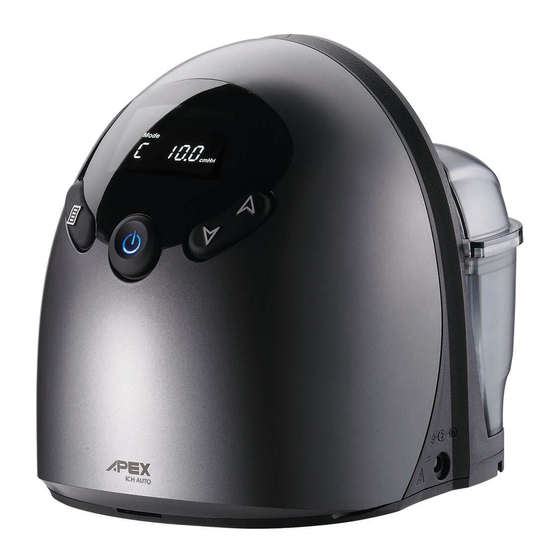
Auto/ Français 2.2 Présentation du système 1. Affichage LCD 2. Bouton fléché haut et bas 3. Bouton Démarrer/Attente 4. Bouton Menu 5. Logiement carte SD/Connecteur mini-USB 6. Filtre à air 7. Plate-forme de l'élément chauffant 8. Indicateur de l'élément chauffant 9. - Page 96 Auto/ Français 3. Installation 3.1 Démontage de la chambre à eau Mettre l'appareil hors tension et attendre que l'élément chauffant et l'eau refroidissent. Le cas échéant, déconnecter la tubulure de la chambre à eau. Placer le pouce sur la partie supérieure de la chambre à eau et incliner vers le haut (voir la Figure 3-1).
-
Page 97: Préparation À L'installation
Auto/ Français REMARQUE: S'assurer que le connecteur au silicium sur le connecteur d'entrée est placé solidement sur la sortie d'air de l'appareil CPAP. MISE EN GARDE: Ne pas trop remplir la chambre à eau. L'appareil pourrait subir des dommages. -
Page 98: Fonctionnement
Auto/ Français 4. Fonctionnement REMARQUE : Veuillez toujours lire les instructions de fonctionnement avant utilisation. 4.1 Description du Panneau de Contrô le Disposition des touches sur le panneau de contrôle et utilisation principale des touches: DÉ MARRAGE/PAUSE Pour commencer le traitement, appuyez simplement sur la touche "START/STANDBY". -
Page 99: Description De La Fonction
Auto/ Français 4.2 Description de la Fonction Guide de Démarrage - Première utilisation. Si vous utilisez cet appareil pour la première fois, veuillez procéder comme indiqué ci-après : Vérifiez que votre médecin ou le soignant a bien initialisé et configuré les valeurs de traitement correctes dans l'appareil. - Page 100 Auto/ Français O/hPa. Pression de thérapie : (uniquement en mode VS-PEP) Appuyez sur la touche "MENU" pour sélectionner le menu [P XX.XcmH O] ou [P XX.XhPa] , vous pouvez alors visualiser le paramétrage défini pour la pression en cours qui s’affiche, exprimé...
- Page 101 Auto/ Français Appuyez sur la touche "MENU" pour sélectionner le menu [CM XXXX.X hr], le compteur de conformité enregistre les heures totales de thérapie pour l’appareil. Ce compteur de conformité doit être exclusivement reprogrammé par le fournisseur, un inhalothérapeute ou un médecin.
- Page 102 Auto/ Français sélection de la plage horaire ou appuyez sur le bouton “DOWN” pour lire d’avantages d’informations sur la conformité . Moyenne d’Heures de Conformité par jour iii. La fonction Moyenne d’Heures de Conformité par Jour [X.X h/j] enregistre le nombre moyen d’heures de conformité...
-
Page 103: Organigramme Des Paramètres De Menu
Auto/ Français 4.4 Organigramme des paramètres de menu Entrez le mode menu de l’utilisateur en appuyant sur la touche “MENU”. APAP CPAP CPAP APAP Mode Mode Unité de Pression Unité de pression < cmH O / hPa > < cmH O / hPa >... -
Page 104: Lecture Des Informations Du Diagramme De Conformité
Auto/ Français 4.5 Lecture des Informations du Diagramme de Conformité Période (Cadre temps) < 1 /7j / 30 j / 90 j> Heures d’utilisation < xxx > h (Conformité moyenne Heures par jour) < x.x > h /j ... -
Page 105: Utilisation De La Carte Sd Pour Récupérer Des Données
Auto/ Français Quand le signal de “Low P” est present sur l’ecran pendant une fuite REMARQUE: excessive, le chauffage s'arrête automatiquement et l'indicateur de chauffage s'éteint. (Par ex. quand le masque est enlevé pendant que la machine est encore allumée.) Si le problème de fuite d'air est éliminé, le chauffrage reprendra. -
Page 106: Nettoyage Et Maintenance
Auto/ Français 5. Nettoyage et Maintenance 5.1 Appareil L'appareil doit être contrôlé et dépoussiéré régulièrement (au moins tous les 30 jours). Essuyez avec un chiffon humide imbibé de détergent doux et protégez-le de la poussière. Si vous utilisez un autre détergent, choisissez celui qui aura le moins d'effets chimiques sur la surface de la mallette en plastique. -
Page 107: Filtre À Air
Auto/ Français 5.3 Filtre à air Pour un fonctionnement optimal de l’appareil, le filtre à air doit être nettoyé par l’utilisateur au moins une fois toutes les deux semaines ou plus souvent si l’appareil est utilisé dans un environnement poussiéreux. Il est recommandé de remplacer le filtre par un filtre neuf après six mois d’utilisation de l’appareil ;... -
Page 108: Dépannage
Auto/ Français 6. Dépannage Le tableau ci-après liste les solutions de dépannage pour les problèmes pouvant survenir. Si le problème persiste, prenez contact avec votre revendeur. Problème Causes Possibles Solutions Rien ne s'affiche à 1. Le câble électrique n'est pas 1. - Page 109 Auto/ Français tout service. Indicateur de l'élément 1. Plaque de l'élément chauffant 1. Contacter l'agent local ou un chauffant pas allumé surchauffe. représentant de l'UE pour 2. indicateur de la carte de circuit tout service. imprimé usé. 2. Contacter l'agent local ou un 3.
- Page 110 Auto/ Français Messages d'Erreur/Avertissement affichés à l'écran LCD Type de message Définition Message à l'écran LCD Erreur due à des paramétrages Error 001 anormaux du système. Erreur due à une panne du générateur Error 002 des flux. Erreur: Erreur due à un paramétrage anormal ou Error 003 à...
-
Page 111: Caractéristiques Techniques
Auto/ Français 7. Caractéristiques Techniques É lément Caractéristiques Alimentation électrique 60W, DC24V, 2.5A Adaptateur d’alimentation DELTA ELECTRONICS, Model No.: MDS-060BAS24 A Input: AC 100~240VAC, 50/60Hz,1.5-0.75A Output rating: 24Vdc, 2.5A, 60W Plage de pression 4-20 cmH O (réglable par incrément de 0,5 cmH Temps de rampe 0-45 minutes (réglable par incrément de 5 minutes) -
Page 112: Remarque, Pré Cautions Et Avertissements
Auto/ Français 8. REMARQUE, PRÉ CAUTIONS ET AVERTISSEMENTS REMARQUE: Indique informations auxquelles vous devez faire particulièrement attention. PRÉ CAUTION : Indique un fonctionnement correct ou des procédures de maintenance pour empêcher tout dommage ou la destruction de l'appareil ou d'autres objets. - Page 113 Auto/ Français SYMBOLE Constructeur. Mandataire dans la communauté Européenne. Attention, lire attentivement les instructions Consultez les instructions de service Consultez le mode d'emploi Symbole BF, qui indique que le produit est conforme au niveau de protection contre les électrocutions pour les équipements de type BF.
-
Page 114: Entretien
10. Garantie Limitée Apex Medical Corp. (ci-après « Apex ») fournit à son client une garantie fabricant limitée sur tous les nouveaux produits Apex originaux et toute pièce de rechange installée par Apex conformément aux conditions de garantie applicables au produit en question et conformément... -
Page 115: Annexe A: Informations Sur Cem
Auto/ Français Annexe A: Informations sur CEM Directive et déclaration du fabricant - É missions électromagnétiques: L'appareil doit être utilisé dans un environnement électromagnétique indiqué ci-dessous. L’utilisateur de cet appareil doit garantir que l’appareil est utilisé dans un environnement approprié. -
Page 116: Directive Et Déclaration Du Fabricant - Immunité Électromagnétique
Auto/ Français Directive et déclaration du fabricant - Immunité électromagnétique: L'appareil doit être utilisé dans un environnement électromagnétique indiqué ci-dessous. L’utilisateur de cet appareil doit garantir que l’appareil est utilisé dans un environnement approprié. Niveau du test d'immunité Environnement... - Page 117 Auto/ Français 0,15 MHz et 80 l’équation applicable à la 80% AM à 1 kHz fréquence de l’émetteur. 80% AM à 1 kHz Distance de séparation recommandée 150kHz à 80MHz =0.6 80MHz à 800MHz =1.2 800 MHz à 2.7GHz Où...
-
Page 118: Distance De Séparation Recommandée Entre L'équipement De Communication Rf Portable Et Mobile Et Cet Appareil
Auto/ Français Distance de séparation recommandée entre l’équipement de communication RF portable et mobile et cet appareil Cet appareil doit être utilisé dans un environnement électromagnétique avec contrôle des perturbations radiées. Le client ou l'utilisateur de cet appareil peut essayer d'éviter le brouillage électromagnétique en maintenant une distance minimale entre l'équipement de communication RF portable et mobile... - Page 119 Auto/Deutsch WICHTIGE SICHERHEITSHINWEISE DIESE ANWEISUNGEN BITTE AUFBEWAHREN LESEN SIE BITTE VOR INBETRIEBNAHME DIE ANWEISUNGEN WARNUNG – DIESES GERÄ T IST NICHT ALS SYSTEM ZUR KÜ NSTLICHEN BEATMUNG VORGESEHEN. Es kann auf Grund von Stromausfällen seinen Betrieb unterbrechen, doch dies gefährdet nicht das Leben des Patienten.
- Page 120 Auto/Deutsch ACHTUNG – Achten Sie darauf, dass das direkte Umfeld des Gerätes trocken und sauber ist. Staub und Fremdkörper können die Behandlung beeinträchtigen. Sorgen Sie dafür, dass der Lufteinlass an der Rückseite des Geräts frei bleibt, um ein Ü berhitzen und einen daraus folgenden Schaden des Gerätes zu verhindern.
- Page 121 Auto/Deutsch Wenn Sie das Produkt entsorgen, befolgen Sie die nationalen Normen. Betreiben Sie das Gerät nicht, bevor die Maske und die Wasserkammer angschlossen wurden. 10. Trennen Sie die Wasserkammer von dem Gerät, wenn es nicht benutzt wird. Wenn Wasser in das Gerät eindringt, kann dies zu Stromschlägen oder Schäden führen.
-
Page 122: Allgemeine Informationen
Auto/Deutsch 1. Einführung Dieses Handbuch muss für die Anfangseinstellung des Systems verwendet und für zukünftiges Nachschlagen aufbewahrt werden. 1.1 Allgemeine Informationen Die obstruktive Schlaf-Apnoe (OSA) ist ein Ereignis, bei dem die wiederholte und intermittierende Obstruktion des oberen Atemtrakts zum vollständigen (Apnoe) oder teilweisen (Hypo-Apnoe) Atemstillstand während des Schlafs führt. -
Page 123: Vorgesehener Verwendungszweck
Auto/Deutsch EMC - Warnhinweis Dieses Gerät wurde nach IEC/EN 60601-1-2 getestet und erfüllt die Grenzwerte für medizinische Geräte dieser Norm. Die Grenzwerte dienen dazu, einen angemessenen Schutz gegen schädliche Interferenzen einer typischen ärztlichen Einrichtung zu gewähren. Dieses Gerät erzeugt, nutzt und verbreitet möglicherweise Strahlungsenergie und kann, falls es nicht gemäß... -
Page 124: Beschreibung Des Produkts
Auto/Deutsch 2. Beschreibung des Produkts 2.1 Auspacken Die Komponenten umfassen: (1) Das eigentliche CPAP-Gerät mit integriertem beheiztem Befeuchter (2) Adapter und Netzkabel (3) Benutzerhandbuch (4) Flexibler Luftschlauch von 1,80 m Länge (5) Tragetasche SD-Card mit Etui in einer Plastikhülle und USB-Kabel WICHTIG: Bitte benutzen Sie nur eine SD-Card (kleiner als 4GB), die den SDHC-Standard erfüllt. - Page 125 Auto/Deutsch 2.2 Ü bersicht LCD Display Schalter für Erhöhung und Absenkung der Werte Start/Standby-Knopf Menüknopf Einschub SD-Card/Mini-USB-Kabel Luftfilter Heizplatte für Luftbefeuchter Anzeige Luftbefeuchter Einstellknopf Luftbefeuchter 10. Luftauslass des Gerätes 11. Netzanschluss 12. Luftauslass der Wasserkammer 13. Zapfen und Zapfenloch 14.
- Page 126 Auto/Deutsch 3. Installation 3.1 Abnehmen der Wasserkammer Schalten Sie das Gerät aus und lassen Sie das Gerät und den Luftbefeuchter abkühlen. Falls notwendig, trennen Sie den flexiblen Schlauch von der Wasserkammer. Setzen Sie den Daumen auf die Oberseite der Wasserkammer und heben Sie sie an, wie in Abb.
- Page 127 Auto/Deutsch WICHTIG: Ü berprüfen Sie, ob die Silikonverbindung sicher auf der Einlass verbindung am Luftauslass des CPAP sitzt. WARNUNG: Machen Sie die Wasserkammer nicht zu voll. Dies kann das Gerät beschädigen. WARNUNG: Benutzen Sie nur Wasser mit Zimmertemperatur; füllen Sie die Kammer nicht mit warmem oder gekühltem Wasser.
- Page 128 Auto/Deutsch...
- Page 129 Auto/Deutsch 4. Funktionsweise WICHTIG: Vor Gebrauch bitte immer die Bedienungsanleitung lesen. 4.1 Beschreibung des Bedienungsfeldes Anordnung der Knöpfe auf dem Bedienungsfeld und wichtigste Verwendung der Knöpfe: START / STANDBY Um die Behandlung zu beginnen, drücken Sie einfach den Knopf "START/STANDBY".
-
Page 130: Beschreibung Der Funktionsweise
Auto/Deutsch 4.2 Erste Schritte – Erstmaliger Gebrauch Für den erstmaligen Gebrauch, folgen Sie den nachstehenden Schritten: Versichern Sie sich, dass Ihr Arzt oder Pfleger die passenden Einstellungen und den Therpiedruck am Gerät konfiguriert hat. Versichern Sie sich, dass Ihr Paket eine Gesichts- oder Nasenmaske mit Kopfband enthält. - Page 131 Auto/Deutsch (4) Therapiedruck (nur CPAP-Modus) Drücken Sie den Knopf "MENU" um das Menü [P XX.XcmH O] oder [P XX.XhPa] auszuwählen. Sie können die aktuelle Druckeinstellung in der Einheit cmH O oder hPa angezeigt sehen. Der Therapiedruck darf nur durch den Lieferanten, einen Atemtherapeuten oder einen Arzt eingestellt werden.
- Page 132 Auto/Deutsch Minuten ein größ eres Leck erkannt werden sollte. Diese Einstellung darf nur vom Hersteller, Therapeuten oder Arzt verändert werden. (10) Behandlungszähler Drücken Sie den Knopf "MENU" um das Menü [CM XXXX.X hr] auszuwählen. Der Behandlungszähler zeichnet die Gesamtzahl der Therapiestunden für das Gerät auf. Der Behandlungszähler sollte nur durch den Lieferanten, einen Atemtherapeuten oder einen Arzt neu...
- Page 133 Auto/Deutsch anfangen zu blinken, um Ihnen zu ermöglichen, den Zeitraum auszuwählen. Drücken Sie den Knopf "UP" oder "DOWN", um den Zeitraum aus 1 Tag bis 90 Tage auszuwählen. Drücken Sie nach Auswahl des Zeitraums "MENU" zur Bestätigung. Drücken Sie den “DOWN”-Knopf, um mehr Compliance-Informationen abzulesen.
- Page 134 Auto/Deutsch Schaubild der Menü-Einstellungen Geben Sie den Menü-Modus des Nutzers durch Drücken des Knopfes “MENU” ein. APAP CPAP APAP CPAP Modus Modus Druckeinheit Druckeinheit < cmH O / hPa> < cmH O / hPa> Ramp Ramp (Rampendauer) (Rampendauer) < 0 ~ 45 > min <...
- Page 135 Auto/Deutsch 4.5 Flowchart fü r das Ablesen der Compliance-Informationen Zeitraum (Zeitrahmen) < 1 /7 T / 30 T / 90 T> Betriebsstunden < xxx > Std. (Average Compliance Hours per day) < x.x > Std. /T ...
- Page 136 Auto/Deutsch abhängig. WICHTIG : Wenn das "Low P" -Signal während einer übermäß igen Leckage auf dem Bildschirm erscheint, wird die Heizung sich automatisch ausschalten und die Heizungsanzeige ebenfalls ausmachen. (z.B. Während des Ablaufs des Geräts entfernt man die Maske.) Wenn das Problem der Luftleckage schon beseitigt hat, wird die Heizung wieder funktionieren.
-
Page 137: Reinigung Und Instandhaltung
Auto/Deutsch 5. Reinigung und Instandhaltung 5.1 Gerät Das CPAP-Gerät muss regelmäßig überprüft und gereinigt werden (mindestens alle 30 Tage). Reinigen Sie es mit einem feuchten Tuch und/oder einem milden Reinigungsmittel und halten Sie es frei von Staub. Wenn Sie ein Reinigungsmittel verwenden, wählen Sie eines, das keine chemischen Auswirkungen auf die Oberfläche des Plastikgehäuses hat. - Page 138 Auto/Deutsch 5.3 Luftfilter Zur Erzielung eines optimalen Gerätebetriebs sollte der Luftfilter mindestens einmal alle zwei Wochen vom Anwender gereinigt werden, wenn dieses Gerät in einer staubigen Umgebung verwendet wird. Wir empfehlen, den Filter nach sechs Monaten des Geräteeinsatzes auszuwechseln - je nach Luftbedingungen kann die Dauer bis zum Ersetzen des Filters jedoch variieren.
- Page 139 Auto/Deutsch 6. Problemlösung In der folgenden Tabelle sind die Lösungen für Probleme aufgeführt, die entstehen können. Falls das Problem anhält, wenden Sie sich bitte an den Lieferanten Ihres Geräts. Problem Wahrscheinliche Grü nde Lösungen Bildschirm Das Stromkabel ist nicht an Ü...
- Page 140 Auto/Deutsch erscheint, wird die Heizung richtige getragen hat. sich automatisch ausschalten und die Heizungsanzeige ebenfalls ausmachen. (z.B. Während des Ablaufs des Geräts entfernt man die Maske.) Kein Luftstrom 1. Das Gerät ist nicht Prüfen Sie, ob das Netzkabel durch die Maske eingeschaltet oder arbeitet korrekt angeschlossen ist.
- Page 141 Auto/Deutsch Fehlermeldungen / Meldungen der LCD-Anzeige Meldung Art der Meldung Definition Fehler durch abnormale Einstellung des Error 001 Systems Fehler durch Versagen des Error 002 Durchflusserzeugers Fehler durch abnormale Einstellung Fehler: Die primäre Error 003 oder Versagen der Kontrolluhr...
-
Page 142: Technische Angaben
Auto/Deutsch 7. Technische Angaben Betreff Angaben Stromversorgung 60W, DC 24V, 2.5A DELTA ELECTRONICS, Model No.: MDS-060BAS24 A Netzadapter Input: AC 100~240VAC, 50/60Hz,1.5-0.75A Output rating: 24Vdc, 2.5A, 60W 4 - 20 cmH O (einstellbar in Intervallen von 0,5 cmH Druckbereich 4 - 19 cmH O (verstellbar in Intervallen von je 0.5 cmH... - Page 143 Auto/Deutsch SYMBOL Das Symbol “BF” zeigt an, dass dieses Produkt den Schutzgrad gegen elektrische Entladung für Geräte vom Typ BF erfüllt. Schauen Sie in der Betriebsanweisung nach In der Betriebsanweisung nachschauen. Achtung, lesen Sie sich diese Anweisungen durch. Klasse II.
- Page 144 Auto/Deutsch 9. Service Die iCH Geräte bieten einen sicheren und zuverlässigen Betrieb wie er in der von Apex Medical bereitgestellten Bedienungsanleitung beschrieben ist. Apex Medical empfielt, dass das iCH einer Kontrolle oder einem Service unterzogen wird, sobald sich Abnutzungsspuren oder Fehlfunktionen zeigen sollten.
- Page 145 Auto/Deutsch Anhang A: EMV-Informationen Hinweise und Herstellererklärungen – Elektromagnetische Emissionen: Dieses Gerät ist zur Nutzung in nachstehend angegebenen elektromagnetischen Umgebungen vorgesehen. Anwender dieses Gerätes sollten dafür Sorge tragen, dass das Gerät in einer solchen Umgebung eingesetzt wird. Einhaltung von...
- Page 146 Auto/Deutsch Hinweise und Herstellererklärungen – Elektromagnetische Verträglichkeit: Dieses Gerät ist zur Nutzung in nachstehend angegebenen elektromagnetischen Umgebungen vorgesehen. Anwender dieses Gerätes sollten dafür Sorge tragen, dass das Gerät in einer solchen Umgebung eingesetzt wird. Immunitätstest Prüfpegel Angaben zum Einhaltung von...
- Page 147 Auto/Deutsch 3 Vrms Der Abstand von 0,15 MHz tragbaren und mobilen bis 80 HF-Kommunikationsge räten zu beliebigen 3 Vrms 6 Vrms in Teilen dieses Gerätes 0,15 MHz bis 80 MHz ISM und (einschließ lich Kabeln) Hochfrequenzleitung 6 Vrms in...
- Page 148 Auto/Deutsch HINWEIS 1: U entspricht der Wechselspannung vor Anwendung des Prüfpegels. HINWEIS 2: Bei 80 und 800 MHz gilt der höhere Frequenzbereich. HINWEIS 3: Diese Richtlinien können möglicherweise nicht in sämtlichen Situationen umgesetzt werden. Die elektromagnetische Ausbreitung wird durch Absorption und Reflexionen von baulichen Einrichtungen, Objekten und Personen beeinflusst.
- Page 149 Auto/Nederlands BELANGRIJKE VEILIGHEIDSAANWIJZINGEN GELIEVE DEZE AANWIJZINGEN TE BEWAREN GELIEVE ALLE AANWIJZINGEN TE LEZEN VOORDAT U DIT TOESTEL IN GEBRUIK NEEMT WAARSCHUWING– 1. DIT APPARAAT IS NIET BEDOELD ALS SYSTEEM VOOR EEN KUNSTMATIGE BEADEMING. De werking kan onderbroken worden door het uitvallen van de stroom, maar dit brengt het leven van de patiënt niet in gevaar.
- Page 150 Auto/Nederlands OPGELET: Controleer of de machine zich in een propere en droge omgeving bevindt. Stof en vreemde deeltjes kunnen de behandeling beï nvloeden. Houd de luchtinlaat aan de achterkant van de machine vrij om een oververhitting en beschadiging van het apparaat te vermijden. Plaats de machine niet in de buurt van een koude of warme luchtbron.
- Page 151 Auto/Nederlands 10. Haal het waterreservoir van het apparaat als dit niet in gebruik is. Als er water in het apparaat doordringt, kan dit schade of een elektrische schok veroorzaken. . 11. Gebruik het systeem niet als het in contact gekomen is met water of als er water in de leidingen geraakt is.
-
Page 152: Algemene Informatie
Auto/Nederlands 1. Inleiding Dit handboek moet voor de aanvankelijke instelling van het systeem gebruikt worden en moet bewaard worden zodat u het later nog kunt raadplegen. 1.1 Algemene informatie De obstructieve slaapapneu (OSA) is een gebeurtenis waarbij de herhaalde en intermitterende obstructie van het bovenste deel van de luchtwegen tot volledige (apneu) of gedeeltelijke (hypo-apneu) ademstilstand tijdens de slaap leidt. - Page 153 Auto/Nederlands EMC - Waarschuwingen Dit apparaat werd volgens EN 60601-1-2 getest en voldoet aan de grenswaarden voor medische hulpmiddelen van deze norm. Deze grenswaarden dienen om een passende bescherming te bieden tegen schadelijke interferenties van een typische geneeskundige installatie. Deze installatie produceert, gebruikt en verspreidt mogelijk frequentie-energie en kan, als ze niet volgens de aanwijzingen geï...
-
Page 154: Beschrijving Van Het Toestel
Auto/Nederlands 2. Beschrijving van het toestel 2.1 Uitpakken De componenten omvatten: (1) Hoofdapparaat CPAP met ingebouwde verwarmde luchtbevochtiger (2) Netadapter en AC-stroomkabel (3) Gebruikershandboek (4) Flexibele luchtslang met een lengte van 1,80 m (5) Draagtas (optioneel ) (6) SD-kaart en USB-kabel OPGELET: Gelieve alleen een SD-kaart (kleiner dan 4GB) te gebruiken die aan de SDHC-norm voldoet. -
Page 155: Overzicht Van Het Systeem
Auto/Nederlands 2.2 Overzicht van het systeem LCD-Bildschirm Toets op / neer Start-/Standby-toets Menutoets SD-kaartgleuf / Mini-USB-aansluiting Luchtfilter Verwarmingsplaat Verwarmingsled Temperatuurregelaar Luchtopening Stroomaansluiting Luchtopening van het waterreservoir Tenon und mortise Vulmarkering Waterreservoir Gesp... - Page 156 Auto/Nederlands 3. Installation 3.1 Uitnemen van het waterreservoir Schakel het apparaat uit en wacht tot de verwarmingsplaat en het water afgekoeld zijn. Trek eventueel de leiding los van het waterreservoir Plaats uw duim op de bovenzijde van het waterreservoir. Druk het zoals op figuur 3-1 getoondwordt naar boven.
-
Page 157: Opstellen Van Het Apparaat
Auto/Nederlands INFO: Controleer of de silicone-aansluiting aan de binnenste aansluiting veilig op de CPAP-verluchtingsopening van het apparaat is bevestigd. OPGELET: Vul het reservoir maximaal tot aan de markering. In het andere geval kan het apparaat beschadigd raken. OPGELET: Gebruik alleen water op kamertemperatuur; vul het reservoir niet met heet of koud water. -
Page 158: Beschrijving Van Het Bedieningspaneel
Auto/Nederlands 4. Werkwijze OPGELET : Lees voor het gebruik de handleiding aandachtig door. 4.1 Beschrijving van het bedieningspaneel Plaats van de knoppen op het bedieningspaneel en belangrijkste gebruik van de knoppen: START / STANDBY Om de behandeling te beginnen, drukt u gewoon op de knop "START/STANDBY". Het beeldscherm varieert tussen [STANDBY] en de therapiedruk [ XX.X cmH... -
Page 159: Beschrijving Van De Werking
Auto/Nederlands 4.2 Beschrijving van de werking Starten – Eerste gebruik. Als u het apparaat voor het eerst gebruikt, voer dan de onderstaande stappen uit: 1. Zorg ervoor dat uw arts of therapeut de eenheid behoorlijk geï nitaliseerd en geconfigureerd heeft met de adequate behandelingswaarden. - Page 160 Auto/Nederlands (4) Therapiedruk (alleen CPAP-modus) Druk op de knop "MENU" om het menu [P XX.XcmH O] of [P XX.XhPa] te selecteren. De actuele drukinstelling in de eenheid cmH O of hPa wordt aangeduid. De druktherapie mag alleen door de leverancier, een ademtherapeut of een arts ingesteld worden.
- Page 161 Auto/Nederlands (11) Alarm Druk op de knop "MENU" om het menu [Alarm on/off] te selecteren. Druk op de knop "UP" (omhoog) of "DOWN" (omlaag), om het alarm in of uit te schakelen. Als het alarm geactiveerd werd, wordt ook het hoorbare alarm met een waarschuwingsmelding geactiveerd die op het LCD-scherm verschijnt.
- Page 162 Auto/Nederlands Het Gemiddelde aantal compliantieuren per dag [X.X hrs/d] houdt het gemiddelde aantal compliantie-uren per dag bij over de diverse tijdframes. Druk op de knop "UP" (omhoog) of "DOWN" (omlaag) om de laatste of volgende compliantiegegevens te lezen. Dagen>4 uur >...
- Page 163 Auto/Nederlands 4.4 Schema van de menu-instellingen Ga naar het gebruikersmenu door op de knop “MENU” te drukken. CPAP APAP CPAP APAP Mode Mode Drukeenheid Drukeenheid < cmH O / hPa > < cmH O / hPa > Ramp Ramp...
- Page 164 Auto/Nederlands Schema voor het lezen van de compliantiegegevens Periode (Tijdframe Frame) < 1 /7d / 30 d / 90 d> Gebruiksuren < xxx > hrs (Gemiddelde complicantie-uren per dag) < x.x > hrs /d >4 (Dagen>4 uren) <...
- Page 165 Auto/Nederlands OPMERKING: Als het "Low P" -signaal op het scherm verschijnt tijdens overmatige lekkage, zal de kachel automatisch uitschakelen en zal de indicator van de verwarming ook uitgaan. (Het masker wordt bijvoorbeeld verwijderd terwijl het apparaat werkt.) Als het probleem van luchtlekkage al is weggenomen, werkt de kachel opnieuw.
-
Page 166: Reiniging En Onderhoud
Auto/Nederlands 5. Reiniging en onderhoud 5.1 Apparaat Het CPAP-apparaat moet geregeld gereinigd worden (minstens om de 30 dagen). Reinig het apparaat met een vochtige doek met een zacht reinigingsmiddel en houd het vrij van stof. Als u een ander reinigingsmiddel gebruikt, kies er dan een dat geen chemische invloed uitoefent op de oppervlakken van de plastic behuizing. -
Page 167: Waterreservoir
Auto/Nederlands 5.3 Luchtfilter Voor een optimale werking van het apparaat, kan de gebruiker de luchtfilter minstens elke twee weken reinigen, of vaker als het apparaat in een stofrijke omgeving wordt gebruikt. Het is aanbevolen de filter te vervangen door een nieuw exemplaar nadat u het apparaat gedurende 6 maanden hebt gebruikt. -
Page 168: Verhelpen Van Problemen
Auto/Nederlands 6. Verhelpen van problemen In de volgende tabel worden enkele oplossingen gegeven voor problemen die kunnen ontstaan. Als het probleem blijft aanhouden, wend u dan tot de leverancier van uw apparaat. Probleem Vermoedelijke reden Oplossingen Beeldscherm De stroomkabel is niet op... - Page 169 Auto/Nederlands De controlelamp van de Oververhitting van de Wend u tot uw plaatselijke verwarmingsplaat brandt verwarmingsplaat handelaar of niet De PCB-indicator is defect. EU-vertegenwoordiger. . Als het "Low P" -signaal op Wend u tot uw plaatselijke het scherm verschijnt...
- Page 170 Auto/Nederlands Foutmeldingen / meldingen op het LCD-scherm Melding op het Aard van de melding Definitie LCD-scherm Fout door een abnormale instelling van Error 001 het systeem. Fout door het falen van de Error 002 Debietverwekker. Fout door abnormale timerinstelling...
-
Page 171: Technische Gegevens
Auto/Nederlands 7. Technische gegevens Artikel Kenmerken Stroomvoorziening 60W, DC 24V, 2.5A Adapter DELTA ELECTRONICS, Model No.: MDS-060BAS24 A Input: AC 100~240VAC, 50/60Hz,1.5-0.75A Output rating: 24Vdc, 2.5A, 60W Drukbereik 4 - 20 cmH O (instelbaar in intervallen van 0,5 cmH "Ramp Time"... - Page 172 Auto/Nederlands SYMBOOL Fabrikant. Gevolmachtigde vertegenwoordiger in de Europese Gemeenschap. Let op, lees de aanwijzingen! Raadpleeg de gebruiksaanwijzing. Zie de instructiehandleiding Het symbool “BF” geeft aan dat dit toestel voldoet aan de beschermingsgraad tegen elektrische ontlading voor apparaten van het type BF.
-
Page 173: Beperkte Garantie
De systemen van de iCH series zijn bedoeld om veilig en betrouwbaar te werken volgens de instructies verstrekt door Apex Medical. Apex Medical raadt aan om de iCH-systemen te laten nakijken en te laten onderhouden door geschoolde techniekers als ze enige tekenen van slijtage vertonen of als u twijfels hebt over de correcte werking van het systeem. - Page 174 Auto/Nederlands Bijlage A: EMV-informatie Aanwijzingen en verklaringen van de fabrikant - elektromagnetische emissies: Dit apparaat is voorzien voor gebruik in de hieronder beschreven elektromagnetische omgevingen. De gebruikers van dit apparaat moeten ervoor zorgen dat het apparaat in een dergelijke omgeving gebruikt wordt.
- Page 175 Auto/Nederlands Aanwijzingen en verklaringen van de fabrikant - elektromagnetische verdraagzaamheid: Dit apparaat is voorzien voor gebruik in de hieronder beschreven elektromagnetische omgevingen. De gebruikers van dit apparaat moeten ervoor zorgen dat het apparaat in een dergelijke omgeving gebruikt wordt.
- Page 176 Auto/Nederlands 150 kHz tot 80 MHz =0.6 80 MHz tot 800 MHz =1.2 800 MHz tot 2.7 GHz 10 V / m 80 MHz tot P komt overeen met het maximale 3 V / m 80 2,7 GHz uitgangsvermogen van de zender in...
- Page 177 Auto/Nederlands aanbevolen afstanden tussen draagbare mobiele HF-communicatieapparaten en dit apparaat Dit apparaat is bedoeld voor gebruik in een elektromagnetische omgeving met gecontroleerde, afgestraalde HF-storingen. De koper of de gebruiker van dit apparaat kan bijdragen tot de vermindering van elektronmagnetische storingen door volgens de onderstaande lijst een minimale afstand te respecteren tussen draagbare en mobiele HF-communicatieapparaten (zenders) en dit apparaat, in overeenstemming met het maximum uitgangsvermogen van de communicatie-apparaten.
- Page 178 Auto/Italiano MISURE DI SICUREZZA IMPORTANTI - CONSERVARE QUESTE ISTRUZIONI IN UN LUOGO SICURO LEGGERE TUTTE LE ISTRUZIONI PRIMA DI USARE QUESTO DISPOSITIVO AVVERTENZA - QUESTO DISPOSITIVO NON È STATO CONCEPITO COME SALVAVITA. Potrebbe smettere di funzionare a causa di un'interruzione di corrente senza alcun rischio per il paziente.
- Page 179 Auto/Italiano ATTENZIONE - Accertarsi che l’ambiente in cui si trova la macchina sia asciutto e pulito. La polvere e le particelle estranee possono incidere sulla terapia. Mantenere sgombra la presa d’aria sulla parte posteriore della macchina per evitare il surriscaldamento o eventuali danni al dispositivo. Non posizionare la macchina vicino a una fonte di calore o d’aria fredda.
- Page 180 Auto/Italiano 10. Disinserire il serbatoio dell’acqua dal dispositivo quando non è in uso: se l’acqua penetra all’interno del dispositivo potrebbe provocare il pericolo di scosse elettriche o altri danni. Non usare il dispositivo in caso di contatto del medesimo con l’acqua o di penetrazione di quest’ultima nel tubo.
-
Page 181: Informazioni Generali
Auto/Italiano 1. Introduzione Seguire le istruzioni di questo manuale per l'installazione iniziale del dispositivo. Conservarlo per eventuali consultazioni future. 1.1 Informazioni generali L'Apnea ostruttiva nel sonno (Obstructive Sleep Apnea - OSA) è una condizione in cui un'ostruzione intermittente e ripetuta del tratto respiratorio superiore porta a un arresto completo (apnea) o parziale (ipopnea) del flusso d'aria durante il sonno. - Page 182 Auto/Italiano Avvertenza sulla compatibilità elettromagnetica Questo dispositivo è stato testato e rispetta i limiti per i dispositivi medicali in base alla IEC/EN 60601-1-2. Tali limiti sono stati concepiti per fornire una protezione ragionevole dalle interferenze dannose in un impianto medico tipico. Questo dispositivo genera, utilizza e può emettere energia in radiofrequenza e, se non viene installato e utilizzato in base alle istruzioni, può...
-
Page 183: Descrizione Del Prodotto
Auto/Italiano 2. Descrizione del prodotto 2.1 Elementi contenuti nella confezione (1) Dispositivo CPAP con umidificatore riscaldato integrato (2) Adattatore di corrente e cavo d'alimentazione (3) Libretto d’istruzioni (4) Tubo flessibile dell'aria di 1,8 m di lunghezza (5) Borsa per trasporto... - Page 184 Auto/Italiano 3. Installazione 3.1 Smontaggio del serbatoio dell’acqua Spegnere il dispositivo e lasciare raffreddare il riscaldatore e l’acqua. Se necessario, staccare i tubi flessibili dal serbatoio dell’acqua. Appoggiare il pollice sulla parte superiore del serbatoio dell’acqua ed inclinarlo verso l’alto come mostrato nella Figura 3-1.
- Page 185 Auto/Italiano Assicurarsi che il connettore di silicone della presa d’aria sia fissato in NOTA: sicurezza all’uscita dell’aria del dispositivo CPAP. ATTENZIONE: Non riempire il serbatoio dell’acqua oltre la linea di riempimento, altrimenti si potrebbe danneggiare il dispositivo. ATTENZIONE: Usare solo acqua a temperatura ambiente; non riempire il serbatoio con acqua calda o refrigerata.
-
Page 186: Descrizione Del Pannello Di Controllo
Auto/Italiano 4. Funzionamento NOTA: Leggere sempre le istruzioni di funzionamento prima dell'uso. 4.1 Descrizione del pannello di controllo Disposizione dei pulsanti sul pannello di controllo e principale uso degli stessi: START/STANDBY Per avviare il trattamento basta premere il pulsante "START/STANDBY". Per arrestare il trattamento premere di nuovo il pulsante "START/STANDBY". -
Page 187: Descrizione Del Funzionamento
Auto/Italiano 4.2 Descrizione del funzionamento Come iniziare - Uso del dispositivo per la prima volta. Per utilizzare il dispositivo per la prima volta, seguire i passi indicati qui sotto: Assicurarsi che il medico o l’operatore sanitario abbia inizializzato e impostato nel dispositivo i valori adatti al trattamento. - Page 188 Auto/Italiano (5) Pressione massima (solo in modalità APAP) Premere il pulsante "MENU" per selezionare il menù [Max. XX.XcmH O] o [Max. XX.XhPa], si può visualizzare l'impostazione attuale della pressione in cmH 0 o hPa. La pressione massima può essere regolata solo dal medico, dall’operatore sanitario o da un terapista respiratorio.
- Page 189 Auto/Italiano (12) Sveglia Premere il pulsante "MENU" per selezionare il menù [Clock Alarm on/off]; premere il pulsante "UP" o "DOWN" per impostare la sveglia su acceso o spento. Quando si imposta la sveglia, l'ora compare sul lato sinistro del display. Premere il pulsante "UP" o "DOWN" per impostare l'ora della sveglia.
- Page 190 Auto/Italiano iv. Giorni>4 Ore > Giorni>4 Ore [ X.X d] registra il numero cumulativo di giorni in cui sono state superate le 4 ore in periodi diversi. Premere il pulsante "UP" o "DOWN" per leggere altre informazioni sulla compliance.
- Page 191 Auto/Italiano 4.4 Diagramma di flusso delle impostazioni del menù Entrare nella modalità menù utente premendo il pulsante "MENU" Modalità Modalità CPAP APAP CPAP APAP Unità di pressione Unità di pressione < cmH O / hPa > < cmH O / hPa >...
- Page 192 Auto/Italiano 4.5 Diagramma di lettura delle informazioni di compliance Periodo < 1 /7 g / 30 g / 90 g> Ore d'impiego < XXX > h (Media delle ore di compliance al giorno) < x.x > h/g ...
- Page 193 Auto/Italiano ottimali dipendono dalla temperatura ambiente e dall’umidità della stanza. NOTA: Quando viene visualizzato il segno "Low P" sullo schermo, mentre viene rilevata una grande perdita d'aria, il riscaldamento si fermerà automaticamente con la spia del riscaldatore spente. (ad esempio, togliere della maschera interromperà...
-
Page 194: Pulizia E Manutenzione
Auto/Italiano 5. Pulizia e Manutenzione 5.1 Dispositivo Il dispositivo deve essere pulita regolarmente (almeno ogni 30 giorni). Spolverare e pulire l'unità con un panno umido e un detergente delicato. Fare attenzione a non usare un detergente in grado di intaccare la superficie della carcassa di plastica. -
Page 195: Manutenzione Del Filtro Dell'aria
Auto/Italiano 5.3 Manutenzione del filtro dell'aria Per il funzionamento ottimale del dispositivo, l’utente deve pulire il filtro dell'aria almeno una volta ogni due settimane o più spesso se il sito è polveroso. Si consiglia di sostituire il filtro con uno nuovo dopo 6 mesi di utilizzo; tuttavia, in base alla qualità... -
Page 196: Soluzione Dei Problemi
Auto/Italiano 6. Soluzione dei problemi Nella seguente tabella sono riportate le soluzioni a eventuali problemi per l'eliminazione dei guasti che dovessero sorgere. Se il problema dovesse persistere, contattare il centro di assistenza più vicino. P r o b l e m a... - Page 197 Auto/Italiano Non c’è flusso d’aria nella Il dispositivo non è acceso 1. Controllare che il cavo maschera oppure non funziona d'alimentazione sia collegato correttamente. correttamente. Il tubo flessibile non è collegato 2. Collegare di nuovo, in modo correttamente. corretto, il tubo flessibile.
- Page 198 Auto/Italiano Appare un messaggio di Errore / Attenzione sul display Tipo di messaggio Definizione Messaggio sul display Errore: Errore dovuto a impostazioni errate del Error 001 Non è possibile sistema. eseguire le Errore per guasto al generatore del flusso.
-
Page 199: Specifiche Tecniche
Auto/Italiano 7. Specifiche tecniche Articolo Specifiche 60 W, 24 Vcc, 2.5 A Alimentazione Adattatore di corrente DELTA ELECTRONICS, Model No.: MDS-060BAS24 A Input: AC 100~240VAC, 50/60Hz,1.5-0.75A Output rating: 24Vdc, 2.5A, 60W Portata della pressione 4-20 cmH 0 (regolabile con incrementi di 0,5 cmH... - Page 200 Auto/Italiano 8. NOTE, ATTENZIONI E AVVERTENZE NOTA: Indica delle informazioni a cui bisogna prestare particolare attenzione. ATTENZIONE: Indica le procedure adeguate per il funzionamento o la manutenzione per evitare danni o la distruzione del dispositivo o di altre proprietà.
- Page 201 Auto/Italiano SIMBOLO Produttore. Rappresentante autorizzato nella Comunità Europea. Attenzione Consultare le istruzioni per l´uso. Fare riferimento al libretto d’istruzioni Simbolo BF, che indica che questo prodotto soddisfa il livello di protezione contro scosse elettriche per dispositivi del tipo BF.
-
Page 202: Assistenza Tecnica
Apex Medical Corp. (in seguito ‘Apex’) concede al cliente una garanzia limitata sui prodotti originali Apex nuovi e su qualsiasi pezzo di ricambio fornito da Apex secondo le condizioni di garanzia applicabili al prodotto e il periodo di garanzia dalla data di acquisto riportati più avanti. - Page 203 Auto/Italiano Appendice A: Informazioni sulla Compatibilità Elettromagnetica Guida e dichiarazione del fabbricante - Emissioni elettromagnetiche Questo dispositivo è stato progettato per l'uso nell'ambiente elettromagnetico specificato di seguito. L'utente di questo dispositivo si deve assicurare che venga utilizzato in un ambiente di questo tipo.
- Page 204 Auto/Italiano Guida e dichiarazione del fabbricante - Immunità elettromagnetica Questo dispositivo è stato progettato per l'uso nell'ambiente elettromagnetico specificato di seguito. L'utente di questo dispositivo si deve assicurare che venga utilizzato in un ambiente di questo tipo. Livello del test di immunità...
- Page 205 Auto/Italiano 80% AM a 1 kHz 0,15 MHz e 80 distanza di separazione minima consigliata, calcolata 80% AM a 1 kHz con l'equazione applicabile alla frequenza del trasmettitore. Distanza di separazione consigliata: = da 150kHz a 80MHz d =0.6 da 80MHz a 800MHz d =1.2 da 800MHz a 2,7G...
- Page 206 Auto/Italiano Distanze di separazione consigliate tra dispositivi di comunicazione RF portatili e mobili e questo dispositivo: Questo dispositivo è stato progettato per l'uso in un ambiente elettromagnetico in cui vengono controllate le interferenze RF. Il cliente o l'utente di questo dispositivo può contribuire a impedire...
- Page 212 Apex Medical S.L. Elcano 9, 6 planta 48008 Bilbao. Vizcaya. Spain Apex Medical Corp. No. 9, Min Sheng St., Tu-Cheng, New Taipei City, 23679, Taiwan www.apexmedicalcorp.com Print-2018/All rights reserved 676056-0000 V1.3...