Table des Matières
Publicité
Les langues disponibles
Les langues disponibles
Liens rapides
PLEASE SAVE THIS OWNERS MANUAL AND READ BEFORE EACH USE.
This manual will explain how to use the battery charger safely and effectively.
Please read and follow these instructions and precautions carefully.
POR FAVOR CONSERVE ESTE MANUAL DEL USUARIO Y LEALO ANTES
DE CADA USO. En este manual le explica cómo utilizar el cargador de batería
de manera segura y confiable. Por favor, lea y siga las siguientes instrucciones
y precauciones.
GARDER LE MANUEL D'INSTRUCTION ET LISEZ LE AVANT CHAQUE
UTILISATION. Ce manuel explique comment utiliser le chargeur de batterie
d'une façon securitaire et efficace. S'il vous plaît lisez et suivez ces instructions
et precautions.
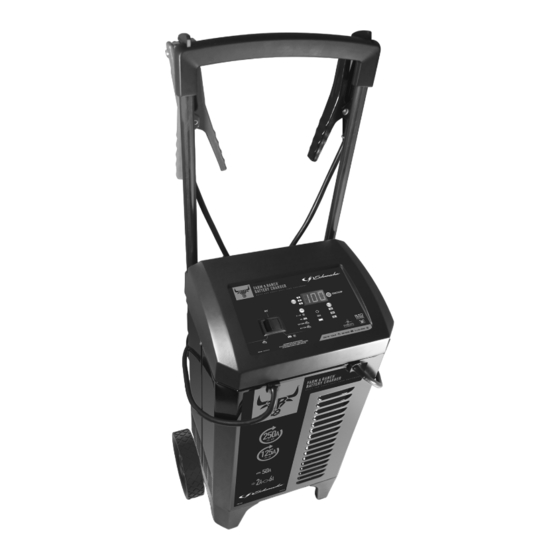
MODEL / MODELO / MODÈLE :
FR01336
Automatic Battery Charger
Cargador de baterías automático
Chargeur de batterie automatique
OWNERS MANUAL / MANUAL DEL USUARIO /
MANUEL D'UTILISATION
0099001819-01
Publicité
Table des Matières
Dépannage

Manuels Connexes pour Schumacher Electric FARM & RANCH FR01336


Sommaire des Matières pour Schumacher Electric FARM & RANCH FR01336
- Page 1 MODEL / MODELO / MODÈLE : FR01336 Automatic Battery Charger Cargador de baterías automático Chargeur de batterie automatique OWNERS MANUAL / MANUAL DEL USUARIO / MANUEL D’UTILISATION PLEASE SAVE THIS OWNERS MANUAL AND READ BEFORE EACH USE. This manual will explain how to use the battery charger safely and effectively. Please read and follow these instructions and precautions carefully.
-
Page 2: Important Safety Instructions
1. IMPORTANT SAFETY INSTRUCTIONS SAVE THESE INSTRUCTIONS. 1.1 SAVE THESE INSTRUCTIONS – 1.8 Do not operate charger if it has received This manual contains important safety a sharp blow, been dropped, or otherwise and operating instructions. damaged in any way; take it to a qualified serviceman. -
Page 3: Preparing To Charge
3. PREPARING TO CHARGE 3.1 If necessary to remove battery from battery without removable cell caps, such vehicle to charge, always remove as valve regulated lead acid batteries, grounded terminal from battery first. Make carefully follow manufacturer’s recharging sure all accessories in the vehicle are off, instructions. -
Page 4: Follow These Steps When Battery Is Outside Vehicle
7. FOLLOW THESE STEPS WHEN BATTERY IS OUTSIDE VEHICLE WARNING: A SPARK NEAR THE 7.4 Position yourself and free end of cable as BATTERY MAY CAUSE A BATTERY far away from battery as possible – then EXPLOSION. TO REDUCE THE RISK OF connect NEGATIVE (BLACK) charger clip A SPARK NEAR THE BATTERY: to free end of cable. - Page 5 Boost mode: – The Digital Display shows the Voltage > OFF > Amperage… battery voltage. Charge/Maintain mode: Charge/Maintain – The charger is in Voltage > OFF > Battery Percentage > 6<>2A Charge/Maintain mode. Amperage… Boost – The charger is in 50A Boost Engine Start mode: mode.
- Page 6 11. OPERATING INSTRUCTIONS CHARGING THE BATTERY Maintain rate is preferred, press the Keep in mind: when charging a battery, Rate Selection button (while still the more a battery is discharged, the boosting) until the Charge/Maintain faster it absorbs charge from the charger. LED is illuminated.
- Page 7 6. When the Digital Display shows “Rdy”, COMPLETION OF CHARGE crank the engine until it starts or 5 Charge completion is indicated by the seconds pass. If the engine does not CHARGED/MAINTAINING (green) start within 5 seconds, wait 45 seconds LED.
-
Page 8: Maintenance And Care
12. MAINTENANCE AND CARE A minimal amount of care can keep your • Coil the input and output cords neatly battery charger working properly for years. when storing the charger. This will help prevent accidental damage to the cords • Clean the clamps each time you are and charger. -
Page 9: Before Returning For Repairs
For REPAIR OR RETURN, contact Customer Service at 1-800-621-5485. DO NOT SHIP UNIT until you receive a RETURN MERCHANDISE AUTHORIZATION (RMA) number from Customer Service at Schumacher Electric Corporation. 15. SPECIFICATIONS Input ...........120V AC @ 60Hz, 11A continuous, 50A intermittent Output ........ - Page 10 Manufacturer does not provide any warranty for any accessories used with this product that are not manufactured by Schumacher Electric Corporation and approved for use with this product. This Limited Warranty is void if the product is misused, subjected to careless handling, repaired, or modified by anyone other than Manufacturer or if this unit is resold through an unauthorized retailer.
-
Page 11: Instrucciones Importantes De Seguridad
1. INSTRUCCIONES IMPORTANTES DE SEGURIDAD GUARDE ESTAS INSTRUCCIONES. 1.1 GUARDE ESTAS INSTRUCCIONES – 1.8 No utilice el cargador si el mismo recibió Este manual contiene instrucciones un golpe fuerte, si se cayó o si sufrió operativas y de seguridad de importancia. daños de cualquier otra forma;... -
Page 12: Preparación Para La Carga
ácido puede producir una corriente de Este cargador no está destinado a cortocircuito lo suficientemente elevada suministrar energía a sistemas eléctricos como para soldar un anillo o provocar de baja tensión más que en una aplicación efectos similares sobre el metal, de un motor de arranque. -
Page 13: Conexiones A Tierra Y Energía De Ca
6.3 Verifique la polaridad de los bornes de cuerpos metálicos. Conecte a una pieza la batería. El borne POSITIVO (POS, metálica de calibre grueso del marco o P, +) de la batería generalmente posee del bloque motor. un diámetro mayor al borne NEGATIVO 6.6 En un vehículo con descarga a tierra (NEG, N, -). -
Page 14: Uso De Un Cable De Extensión
8.3 USO DE UN CABLE DE EXTENSIÓN • El tamaño del cable debe ser lo El uso de una extensión no se suficientemente extenso para el calibre recomienda. Si debe usar una extensión, de amperios del cargador de CA, como siga estas pautas: se especifica a continuación: •... -
Page 15: Botón De Battery Type
BOTÓN DE SELECCIÓN BOTÓN DE BATTERY TYPE DE VELOCIDAD (TIPO DE BATERÍA) Cuando se encuentre en el modo de Utilice este botón para seleccionar el tipo Impulsar o Carga/Mantenimiento, utilice de batería. este botón para seleccionar una de las – Este tipo de batería generalmente siguientes potencias: se utiliza en automóviles, camiones y 50A Impulsar –... - Page 16 11. INSTRUCCIONES DE OPERACIÓN CARGA DE LA BATERÍA se encenderá sin parpadear y se Tenga en cuenta que cuando carga una iniciará el proceso de incremento. batería, mientras más descargada esté, El modo de Impulsar permanecerá absorberá de forma más rápida la carga energizado hasta que se pulse el del cargador.
- Page 17 Modo de Impulsar MODO DE DESULFATACIÓN La pantalla mostrará “SUL” cuando 1. Ajuste el interruptor de ENCENDIDO/ se detecte una batería sulfatada, APAGADO en la posición (central) de y el cargador entrará en modo de APAGADO. desulfatación. Si la desulfatación no tiene 2.
-
Page 18: Mantenimiento Y Cuidado
TIEMPOS DE CARGA CCA = Amperaje de arranque en frío RC = Capacidad de reserva Ah = Amp/hora NR = No TIEMPO DE CARGA TAMAÑO / ÍNDICE DE LA BATERÍA 6A<>2A 6-12 Ah 1½-2½ h BATERÍAS PEQUEÑAS Motocicleta, tractor de jardín, etc. 12-32 Ah 2½-7 h 200-315 CCA... -
Page 19: Antes De Devolver A Reparaciones
Localización y Solución de Problemas PROBLEMA CAUSA POSIBLE SOLUCIÓN El cargador no se Tomacorriente de CA fuera de Controle la posible presencia de enciende incluso al funcionamiento. fusibles abiertos o disyuntores que estar bien conectado. suministren energía al tomacorriente de CA. Conexión eléctrica deficiente. -
Page 20: Garantía Limitada
El Fabricante no presta garantía por lo accesorios utilizados con este producto que no sean los fabricados por Schumacher Electric Corporation y que no estén aprobados para su uso con este producto. La presente Garantía Limitada será nula si el producto se utiliza en forma errónea, se trata de manera inadecuada, es reparado o modificado... -
Page 21: Consignes De Sécurité Importantes
1. CONSIGNES DE SÉCURITÉ IMPORTANTES CONSERVER CES INSTRUCTIONS. 1.1 CONSERVER CES INSTRUCTIONS – 1.8 Ne pas faire fonctionner le chargeur s’il a Ce manuel contient des instructions reçu un choc violent, est tombé par terre importantes concernant la sécurité et le ou a été... -
Page 22: Préparation Pour Le Chargement
recommandé de 12Ah (6V) et 22-59Ah pour recharger des piles sèches qui sont (12V). Il n’est pas conçu pour alimenter un utilisées en électroménager. Ces piles système électrique à basse tension autre peuvent exploser et causer des blessures que dans une application d’un démarreur. et des dommages matériels. -
Page 23: Étapes À Suivre Quand La Batterie Est Installée Hors Du Véhicule
P, +) non mise à la masse de la batterie. loin de la batterie. Ne pas raccorder la Raccorder la pince NÉGATIVE (NOIRE) pince au carburateur, aux canalisations au châssis du véhicule ou au moteur, d’essence ni aux pièces de la carrosserie loin de la batterie. -
Page 24: Directives D'assemblage
9. DIRECTIVES D’ASSEMBLAGE 9.1 Enlever tous les cordons dérouler sur 9.2 Tirez la poignée vers le haut pour les câbles avant d’utiliser le chargeur de l’étendre jusqu’à ce qu’elle se ferme. batterie. (Si nécessaire, appuyez sur les petits boutons argentés vers l’intérieur.) 10. -
Page 25: Consignes D'utilisation
– Le chargeur a détecté qu’une – La construction de Glass Mat batterie est branchée et effectue absorbée permet à l’électrolyte à être l’opération sélectionnée. suspendu à proximité de matière active de Chargé / Maintien – la plaque. En théorie, cela améliore à la La batterie est complètement chargée fois la charge et l’efficacité... -
Page 26: Utiliser La Fonction Demarrage Du Moteur
enfoncée ou que l’interrupteur principal 3. Lorsque le chargeur est branché et MARCHE/ARRÊT soit réglé sur connecté à la batterie du véhicule, réglez ARRÊT. L’appareil ne changera pas l’interrupteur MARCHE/ARRÊT sur la automatiquement en débit Charge / position Démarrage du moteur . -
Page 27: Maintenir Une Batterie
FIN DE CHARGE MAINTENIR UNE BATTERIE Achèvement de charge est indiqué par Le FR01336 charge et maintient batteries l’opération de CHARGÉ / MAINTIEN de 6 et 12 volts, de les maintenir à pleine (vert) LED. Quand il est allumé, le charge. -
Page 28: Dépannage
13. TABLEAU DE DÉPANNAGE ET CODES D’ÉCHEC Codes d’échec CODE DESCRIPTION RAISON / SOLUTION La tension de batterie est toujours en La batterie pourrait être mauvaise; faites-la vérifier ou dessous de 10 V (pour une batterie remplacer. de 12V) or 5V (pour une batterie de 6V) après 2 heures de chargement. -
Page 29: Avant De Retourner Pour Les Réparations
Pour RÉPARATION OU RETOUR, contactez le service téchnique au 1-800-621-5485. NE PAS ENVOYER L’UNITÉ jusqu’à ce que vous receviez une AUTORISATION DE RETOUR DE MARCHANDISE (RMA) auprès du service clientèle au Schumacher Electric Corporation. 15. SPÉCIFICATIONS Tension d’entrée........120V CA @ 60Hz, 11A continu, 50A intermittent Tension de sortie ....... -
Page 30: Garantie Limitée
ACHETEUR DE CE PRODUIT. CETTE GARANTIE LIMITÉE N’EST PAS TRANSFÉRABLES NI CESSIBLES. Schumacher Electric Corporation (le « Fabricant ») garantit ce unité pour deux (2) ans à compter de la date d’achat au détail contre les défauts de matériaux ou de fabrication qui peuvent se produire dans des conditions normales d’utilisation et de soins. - Page 31 ORIGINAL receipt because it will be required for any warranty claims. This warranty is not transferable. Send warranty card only. DO NOT SEND UNIT TO THIS ADDRESS FOR REPAIR. Mail this card to: Schumacher Electric Corporation 801 Business Center Drive Mount Prospect, IL 60056-2179 Name ______________________________________________________________...
-
Page 32: Carte De Garantie
éventuelle réclamation au titre de la garantie. Cette garantie n’est pas transférable. Envoyer la carte de garantie seulement. NE PAS ENVOYER L’UNITÉ À CETTE ADRESSE POUR RÉPARATION. Envoyer cette carte à : Schumacher Electric Corporation 801 Business Center Drive Mount Prospect, IL 60056-2179 (É.-U ) Nom _______________________________________________________________...