Publicité
Les langues disponibles
Les langues disponibles
Liens rapides
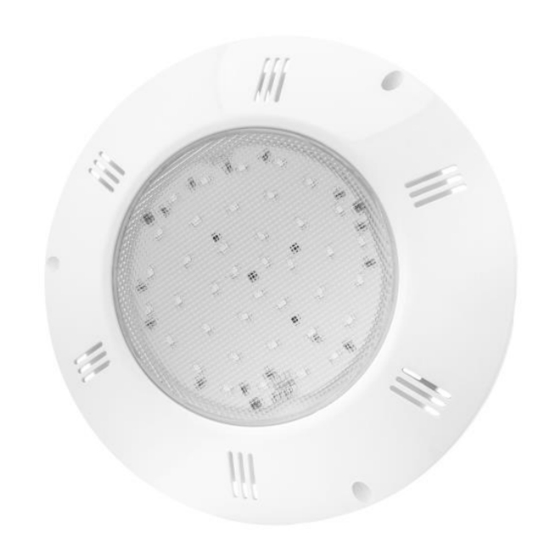
FR / PROJECTEUR PLAT IMMERGE A LED, 501160
EN / UNDERWATER FLAT LED PROJECTOR, 501160
ES / PROYECTOR PLANO SUBACUATICO DE LED, 501160
IT / PROIETTORE PIATTO SUBACQUEO A LED, 501160
DE / LED UNTERWASSER FLACHSCHEINWERFER, 501160
MANUEL D'INSTALLATION & D'ENTRETIEN
INSTALLATION & MAINTENANCE MANUAL
MANUAL DE INSTALACION Y MANTENIMIENTO
MANUALE DI INSTALAZIONE E MANUTENZIONE
MONTAGE- & WARTUNGSHANDBUCH
RoHS
REACH
Publicité

Sommaire des Matières pour Seamaid 501160
- Page 1 FR / PROJECTEUR PLAT IMMERGE A LED, 501160 EN / UNDERWATER FLAT LED PROJECTOR, 501160 ES / PROYECTOR PLANO SUBACUATICO DE LED, 501160 IT / PROIETTORE PIATTO SUBACQUEO A LED, 501160 DE / LED UNTERWASSER FLACHSCHEINWERFER, 501160 MANUEL D’INSTALLATION & D’ENTRETIEN INSTALLATION &...
- Page 2 Fig.2 Fig.1 Projecteur Projector Proiettore Proyector Scheinwerfer Boquilla de Sauganschluβ Prise balai 1,5’ Vacuum fitting 1,5’ Presa Spazzola 1,5’ aspiración 1,5’ 1“1/2 Adaptateur Adaptador F50/F2’’ adapter Riduttore F50/F2’’ Adapter F50/F2‘‘ F50/F2’’ F50/F2’’ Wasserdichter Tube étanche Waterproof tube Tubo stagno Tubo estanco Schutzschlauch Câble 12V 12V cable...
- Page 3 FRANCAIS IMPORTANT : ce manuel d’instructions contient des informations de première importance sur les mesures de sécurité à adopter au moment de l’installation et de la mise en service . Il est donc important de lire les instructions avant de commencer le montage et la mise en marche. Conservez ce manuel pour de futures consultations.
- Page 4 Connectez le câble au circuit d’alimentation ~12V dans la boîte de surface avec les connecteurs étanches Rétablissez l’alimentation électrique ~12V, le projecteur s’allume 5. ENTRETIEN Ce projecteur ne requiert aucune sorte d’entretien. En cas de mauvais fonctionnement, contactez notre service client ou celui de votre revendeur.
- Page 5 ENGLISH IMPORTANT : This instruction manual includes essential information on the safety measures to be implemented for installation and start -up. It is important to read these instructions before beginning installation and start-up. Keep this manual for future reference . Failure to comply with the instructions given by the manufacturer in this manual regarding installation, operational start up and maintenance of the product exonerates the manufacturer or the distributor from any liability for damages affecting persons, t he concerned product or the other...
- Page 6 5. MAINTENANCE This projector does not require any type of maintenance work. In case of improperly working, please contact our customer service or the customer service of our dealer. 6. OPERATION This LED projector is used as a traditional incandescent lamp. The driving mode is given by the On/Off interrupter in the electric panel.
- Page 7 ESPAŇOL IMPORTANTE: este manual de instrucciones contiene informaciones de primera importancia sobre las medidas de seguridad que hay que adoptar en el momento de la instalación y la puesta en funcionamiento. Por eso es importante leer las instrucciones antes de comenzar el montaje y la puesta en marcha.
- Page 8 Conecte el cable al circuito de alimentación 12V AC en la caja de conexión utilizando unos conectores apropiados. Restablezca la alimentación eléctrica 12V AC, el proyector se enciende. 5. MANTENIMIENTO Este proyector no requiere ningún tipo de mantenimiento. En caso de mal funcionamiento, póngase en contacto con nuestro servicio al cliente o el de su revendedor.
- Page 9 ITALIANO IMPORTANTE: questo manuale d’struzioni contiene delle notizie di prima importanza sulle misure di sicurezza da adottare al momento dell'installazione e della messa in servizio. È importante di leggere le istruzioni prima di cominciare il montaggio e di far funzionare il prodotto. Conservate questo manuale per le future consultazioni.
- Page 10 Verificare che il coperchio resti libero di movimento facendolo girare con le mani Connettere il cavo al circuito d’alimentazione ~12V nella scatole di giunzione con dei connettori a tenuta stagna Ristabilire la corrente elettrica ~12V, il proiettore si accende 5.
- Page 11 DEUTSCH WICHTIG: Diese Anweisungshandbuch enthält sehr wichtige Informationen bezüglich der Sicherheitsmaßnahmen, die bei der Installation und der Inbetriebnahme zu beachten sind. Daher müssen die Anweisungen vor der Montage Inbetriebna hme unbedingt durchgelesen werden. Dieses Handbuch bitte für spätere Einsichtnahmen aufbewahren. Die Nichteinhaltung der Anweisungen dieses Handbuchs bei der Installation, der Inbetriebnahme und der Wartung des Produkts entbindet den Fabrikanten oder den Händler von jeglicher Haftung in Bezug auf eventuelle Schäden, die an Personen, am Produkt oder an der restlichen Anlage verursacht werden, und führt zum...
- Page 12 5. WARTUNG Der Scheinwerfer benötigt keinerlei Wartung. Bei einer Betriebsstörung wenden Sie sich bitte an unseren Kundendienst oder den Ihres Händlers. 6. BENUTZUNG Dieser LED-Scheinwerfer funktioniert wie eine herkömmliche Glühlampe. Er wird ab dem Ein-/Aus- Hauptschalter an der Schalttafel angesteuert. Als Option kann man ein Funksteuerungsmodul ~12V derselben Marke anschließen.
- Page 13 PORTUGUÊS IMPORTANTE: este manual de ordens contém informação de primeira importância sobre segurança para adotar na hora da instalação e algum arranque. É assim importante para ler as ordens antes de começar a assembléia. Conserva este manual de ordens para consultas futuras.
- Page 14 5. MANUTENÇÃO Este projetor não requer qualquer tipo de manutenção. No caso de mau funcionamento, contacte nosso atendimento ao consumidor ou a sua loja. 6. USO Este projector LED é usado como uma lâmpada incandescente tradicional. O controle é através do botão de Apague/ Reacenda o painel elétrico.
- Page 16 FR / CARACTERISTIQUES TECHNIQUES EN / TECHNICAL DATA ES / CARACTERISTICAS TECNICAS IT / DATI TECNICI DE / TECHNISCHE ANGABEN 501160 PORT 7500k Blanc 7500k White 7500k Blanco 7500k Bianco 7500k Weiss 7500k Branco 10 000h 10 000h 10 000h...


