Helios MiniVent M1/100P Notice De Montage Et D'utilisation
Masquer les pouces
Voir aussi pour MiniVent M1/100P:
- Notice de montage et d'utilisation (60 pages) ,
- Notice de montage et d'utilisation (8 pages)
Publicité
Les langues disponibles
Les langues disponibles
Liens rapides
Helios Ventilatoren
MONTAGE- UND BETRIEBSVORSCHRIFT
INSTALLATION AND OPERATING INSTRUCTIONS
NOTICE DE MONTAGE ET D'UTILISATION
Kleinlüfter - Mini fan - Mini ventilateur
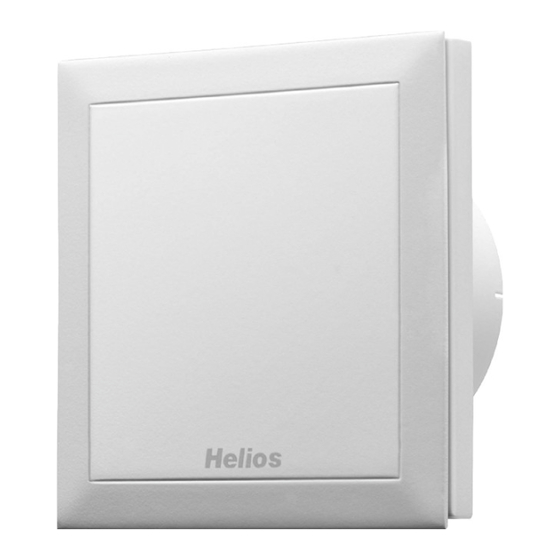
Helios MiniVent
M1/100 P
M1/120 P
- mit zwei Leistungsstufen und Präsenzmelder
- with presence detector
- à 2 vitesses et capteur de mouvement
NR. 19051.003
NO. 19051.003
N° 19051.003
IP 45
D
UK
F
Publicité
Chapitres

Manuels Connexes pour Helios MiniVent M1/100P


Sommaire des Matières pour Helios MiniVent M1/100P
- Page 1 Helios Ventilatoren MONTAGE- UND BETRIEBSVORSCHRIFT NR. 19051.003 INSTALLATION AND OPERATING INSTRUCTIONS NO. 19051.003 NOTICE DE MONTAGE ET D’UTILISATION N° 19051.003 IP 45 Kleinlüfter - Mini fan - Mini ventilateur Helios MiniVent M1/100 P M1/120 P - mit zwei Leistungsstufen und Präsenzmelder - with presence detector - à...
-
Page 2: Table Des Matières
DEUTSCH Helios Ventilatoren MONTAGE- UND BETRIEBSVORSCHRIFT NR. 19051.003 Inhaltsverzeichnis KAPITEL 1. ALLGEMEINE MONTAGE- UND BETRIEBSHINWEISE ........Seite 1 Wichtige Informationen . -
Page 3: Wichtige Informationen
Wenn die nachfolgenden Ausführungen nicht beachtet werden, entfällt unsere Gewährleistung. Gleiches gilt für Haf- tungsansprüche an den Hersteller. Der Gebrauch von Zubehörteilen, die nicht von Helios empfohlen oder angeboten werden, ist nicht statthaft. Eventuell auftretende Schäden unterliegen nicht der Gewährleistung. Wenn sich Feuchtigkeit im Klemmenkasten befindet ist die Tülle nicht fachgerecht ausgeführt. -
Page 4: Leistungsdaten
Montage- und Betriebsvorschrift MiniVent M1/100 P/120 P Leistungsdaten Zum Erreichen der vorgesehenen Leistung ist ein ordnungsgemäßer Einbau, korrekt ausgeführte Abluftführung und ausreichende Zuluftversorgung sicherzustellen. Bei Betrieb von schornsteinabhängigen Feuerstellen im entlüfteten Raum muss diesen bei allen Betriebsbedingungen ausreichend Zuluft zugeführt werden (Rückfrage beim Schornsteinfeger). Die Geräuschangaben erfolgen als A-bewerteter Schalleistungspegel LWA (entspr. -
Page 5: Lieferumfang / Verpackungseinheit
Montage- und Betriebsvorschrift MiniVent M1/100 P/120 P Lieferumfang / Verpackungseinheit KAPITEL 2 Entnehmen Sie die Liefereinheit erst unmittelbar vor dem Einbau aus dem Karton, um mögliche Beschädigungen und Verschmutzungen beim Transport sowie auf der Baustelle zu vermeiden. LIEFERUMFANG UND EINBAU MiniVent M1/100 P/120 P Abb.1 –... -
Page 6: Bohrlöcher
Montage- und Betriebsvorschrift MiniVent M1/100 P/120 P Bohrlöcher: Gehäuse ansetzen Löcher markieren und abbohren. Mit mind. zwei Befestigungsschrauben und Dübeln montieren. Bei Aufputzleitungsverlegung, muss die seitliche Aussparung für den Kabeleintritt (Abb.5, Pos Œ ) im Gehäu- se ausgebrochen werden! Das Anschlusskabel ist so zu verwahren, dass bei Wasserbeaufschlagung kein Wasser entlang des Kabels ACHTUNG eindringen kann. -
Page 7: Anschluss Der Zuleitung
Montage- und Betriebsvorschrift MiniVent M1/100 P/120 P Anschluss der Zuleitung 1. Es ist eine Mantel-Leitung bzw. im Feuchtraum eine NYM Leitung einzusetzen. 2. Leitungsaustritt aus der Wand mindestens 180 mm (Abb. 3). 3. Tülle mit rundem Werkzeug vorstechen oder mit der Zuleitung direkt durchstechen (Abb.5, Pos 3). 4. -
Page 8: Montageflansch Mf 100 (Zubehör)
Montage- und Betriebsvorschrift MiniVent M1/100 P/120 P Montageflansch MF 100 (Zubehör) Bei beengten Platzverhältnissen in Decken, in dünnen Wänden sowie in engen Schächten. MF 100 winkelgerecht an die Wand oder die Decke dübeln (beliebige Anzahl übereinander möglich). Anschließend Ventilator mittels beigefüg- ten Schrauben an MF 100 befestigen (Abb. -
Page 9: Reinigung Und Wartung
Montage- und Betriebsvorschrift MiniVent M1/100 P/120 P Reinigung KAPITEL 5 - Vor der Reinigung sicherstellen, dass das Gerät allpolig vom Netz getrennt ist! - Gegen Wiedereinschalten sichern! REINIGUNG UND - Gerät nur mit feuchtem Tuch reinigen. WARTUNG - Das Gerät ist wartungsfrei. Demontage der Fassade Vorgehensweise: 1. -
Page 10: Funktion Für M1/100 P/120 P
Montage- und Betriebsvorschrift MiniVent M1/100 P/120 P Funktionsweise des Präsenzmelders Der Sensor erfasst die für das menschliche Auge unsichtbare, für Lebewe- sen aber typische Wärmestrahlung. Betritt eine Person den Erfassungsbe- reich des Sensors, erkennt dieser die Raumnutzung und schaltet den Venti- KAPITEL 7 lator ein. -
Page 11: Schaltplan-Übersicht Für M1/100 P/120 P
Montage- und Betriebsvorschrift MiniVent M1/100 P/120 P SCHALTPLAN-ÜBERSICHT Anschluss Kunde Internes Funktionsprinzip / Jumperstellung SS-938 M1/100 P/120 P M1/... P SS-918 Bewegung "1" b) manuell Ein Manueller-Eingang Jumper 1 A / B Kl.1= Kl.1= Kl.2= Kl.2=... - Page 12 ENGLISH Helios Ventilatoren INSTALLATION AND OPERATING INSTRUCTIONS NO. 19051.003 Contents CHAPTER 1. GENERAL INFORMATION ............Page 1 Important information .
-
Page 13: Important Information
If the preceding instructions are not observed all warranty claims and accommodation treatment are excluded. This also applies to any liability claims extended to the manufacturer. The use of accessories not offered or recommended by Helios is not permitted. Potential damages are not liable for warranty. -
Page 14: General Information
Installation and Operation Instructions MiniVent M1/100 P/120 P The catalogue noise levels stated are A-rated sound power levels LWA (to DIN 45635 T.1). The A-rated sound pres- sure level LPA depends on the acoustic condition in the room in which it is installed. These affect considerably the adjusting noise. -
Page 15: Scope Of Delivery / Packing Unit
Installation and Operation Instructions MiniVent M1/100 P/120 P Scope of delivery / packing unit CHAPTER 2 Leave the fan in its box until installation. Check that the fan is in good condition and has not been damaged in transit. SCOPE OF DELIVERY AND MiniVent M1/100 P/120 P fig.1 ASSEMBLY... -
Page 16: Drill Holes
Installation and Operation Instructions MiniVent M1/100 P/120 P Drill holes Set casing against the wall, mark the holes and drill. Fasten with at least 2 screws and plugs. For surface installation the casing is provided with a side entry knockout (Fig.5, Pos.1) for the cable! The mains supply cable is to be kept in such a way that no ingress of moisture is made possible along the ATTENTION cable. -
Page 17: Connection Of The Voltage Supply
Installation and Operation Instructions MiniVent M1/100 P/120 P Connection of the voltage supply 1. A plastic-sheathed cable and /or in a moist room a NYM cable is to be used. 2. Cable exit from the wall at least 180 mm (Fig.3) 3. -
Page 18: Electrical Connection
4000 V. With operation with fluorescent tubes, switch power supplies, electronically regulated halogen bulbs etc. these values can be exceeded. In this case additional suppression shielding activities (not provided by Helios) are necessary (L -, C or RC elements, protection diodes, resistors). -
Page 19: Cleaning And Maintenance
Installation and Operation Instructions MiniVent M1/100 P/120 P Cleaning and maintenance CHAPTER 5 - Before cleaning, ensure that the fan is isolated from the power supply. - Prevent unintentional restart! CLEANING AND - Clean device only with a damp cloth. MAINTENANCE - The device is maintenance-free. - Page 20 Installation and Operation Instructions MiniVent M1/100 P/120 P Operating mode of the motion sensor CHAPTER 7 A sensor registers the heat emission of human beings within its range. If a person enters a room, a switching signal originates in the sensor, which in- FUNCTION duces the control to put the fan into operation.
- Page 21 Installation and Operation Instructions MiniVent M1/100 P/120 P WIRING DIAGRAMM Connection client SS-938 Internal functional principle / Jumper position OVERVIEW M1/... P SS-918 M1/100 P/120 P movement Bewegung "1" b) manual on b) manuell Ein manual input Manueller-Eingang Jumper 1 A / B Kl.1= Kl.1=...
- Page 22 FRANÇAIS Helios Ventilateurs NOTICE DE MONTAGE ET D’UTILISATION N° 19051.003 Sommaire CHAPITRE 1. INFORMATIONS GENERALES CONCERNANT LE MONTAGE ET L’UTILISATION ...Page 1 Informations importantes ..............Page 1 Précautions et consignes de sécurité...
-
Page 23: Chapitre 1. Informations Generales Concernant Le Montage Et L'utilisation
Il en sera de même pour toute implication de responsabilité du fabricant L´utilisation d´accessoires et d´équipement qui ne sont pas directement fournis ou conseillés par Helios n´est pas per- mise. Nous déclinons toute responsabilité en cas de défaut consécutif à leur utilisation. Si la boîte à bornes contient des traces d’humidité, alors le guide du câble d’alimentation n’a pas été... -
Page 24: Caractéristiques Techniques
Notice de montage et d’utilisation MiniVent M1/100 P/120 P Utilisation et fonctionnement uniquement conformément à cette notice de montage et d’utilisation. IMPORTANT Toute autre utilisation n’est pas autorisée. Caractéristiques techniques Un montage conforme aux règles de l’art, un conduit de refoulement correctement réalisé et une amenée d’air suffi- sante permettent d’atteindre les performances prévues. -
Page 25: Chapitre 2. Kit D´installation Et Montage
Notice de montage et d’utilisation MiniVent M1/100 P/120 P Kit d’installation / Conditionnement CHAPITRE 2 Ne déballer qu’au moment de l’installation, afin d’éviter tous dommages et salissures lors du transport ou sur le chantier. KIT D’INSTALLATION ET MiniVent M1/100 P/120 P Fig. -
Page 26: Percements
Notice de montage et d’utilisation MiniVent M1/100 P/120 P Percements: Positionner la virole, marquer l’emplacement des fixations et percer. Fixer en utilisant au minimum deux vis de fixati on avec chevilles. En cas de pose du câble en apparent, il faut briser l’évidement pour le passage de câble prévu sur le coté du caisson (Fig. -
Page 27: Raccordement Électrique
Notice de montage et d’utilisation MiniVent M1/100 P/120 P Raccordement électrique 1. Prévoir un câble électrique gainé ou du type NYM (H05VV-F) en local humide. 2. Sortir une longueur de câble minimum de 180 mm du mur (Fig. 3) 3. Si nécessaire, élargir l'embout d'entrée du câble avec un outil cylindrique ou passer directement le câble. (Fig. -
Page 28: Entretoise Por Mf 100 (Accessoire)
Notice de montage et d’utilisation MiniVent M1/100 P/120 P Entretoise pour MF 100 (accessoire) Pour montage plafonnier et dans parois minces. Cheviller le MF 100 d’équerre sur mur ou plafond. Fixer à l’aide des vis jointes le ventilateur sur le support de montage (fig. 10/11). Adapté... -
Page 29: Chapitre 5. Nettoyage Et Entretien
Notice de montage et d’utilisation MiniVent M1/100 P/120 P Nettoyage CHAPITRE 5 - Avant nettoyage, s’assurer que l’appareil soit bien hors tension ! - Sécuriser contre toute remise en route accidentelle ! NETTOYAGE ET - Nettoyer l’appareil uniquement avec un chiffon humide. ENTRETIEN - L’appareil ne nécessite pas d’entretien. - Page 30 Notice de montage et d’utilisation MiniVent M1/100 P/120 P Fonctionnement du capteur de mouvement CHAPITRE 7 Une cellule infrarouge enregistre la chaleur humaine. Si une personne pénètre dans le volume de détection, le capteur reconnaît la présence humaine et FONCTION enclenche le ventilateur.
- Page 31 Notice de montage et d’utilisation MiniVent M1/100 P/120 P ENSEMBLE DE SCHÉMAS Raccordement client Principe de fonctionnement / Jumper SS-938 ÉLECTRIQUES M1/... P SS-918 M1/100 P/120 P Capteur Bewegung "1" b) Marche forcée b) manuell Ein Marche forcée Manueller-Eingang Jumper 1 A / B Bo.1 Bo.1...
- Page 32 HELIOS Ventilateurs · Le Carré des Aviateurs · 157 av. Charles Floquet · 93155 Le Blanc Mesnil Cedex CH HELIOS Ventilatoren AG · Steinackerstraße 36 · 8902 Urdorf / Zürich GB HELIOS Ventilation Systems Ltd. · 5 Crown Gate · Wyncolls Road · Severalls Industrial Park · Colchester · Essex · CO4 9HZ...