
Manuels Connexes pour AYA ARM2001A+


Sommaire des Matières pour AYA ARM2001A+
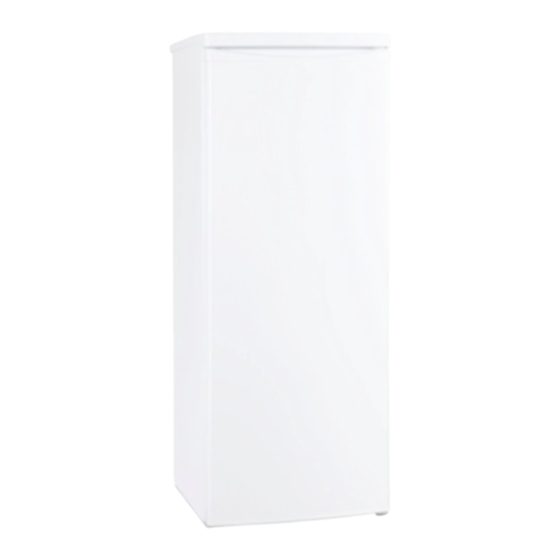
- Page 1 ARM2001A+ REFRIGERATEUR 1 PORTE Four a Micro-ondes Microwave Oven 1 DOOR FRIDGE INSTRUCTIONS D’UTILISATION INSTRUCTIONS FOR USE...
-
Page 2: Table Des Matières
Table des matières Consignes de sécurité importantes Instructions d’installation Description de votre réfrigérateur Utilisation de votre réfrigérateur Entretien et nettoyage Réversibilité de la porte -11- Dépannage -12- Spécifications techniques -14- Mise au rebut de l’appareil -15-... -
Page 3: Consignes De Sécurité Importantes
1.CONSIGNES DE SECURITE IMPORTANTES - 1 -... - Page 4 - 2 -...
- Page 5 Risque d’incendie - 3 -...
-
Page 6: Instructions D'installation
2. INSTRUCTIONS D’INSTALLATION Avant d’utiliser cet appareil, retirez la poignée de la porte du sachet en plastique- et installez-la sur la porte. Puis retirez les deux bouchons pour couvrir les vis. Les bou- chons et les vis peuvent aussi être utilisés lorsque le sens d’ouverture de la porte est- inversé... - Page 7 Si vous installez votre réfrigérateur près d’un mur, laissez un espace suffisant sur le- côté d’ouverture de la porte. N’installez jamais votre réfrigérateur près des sources de chaleur et des rayons directs- du soleil. Branchement électrique AVERTISSEMENT:NE RETIREZ PAS LA PRISE DE TERRE. N’UTILISEZ PAS UN ADAPTATEUR.
- Page 8 Mise à la terre Assurez-vous d’avoir une alimentation électrique de 230 Volt /50 Hz AC (10 ampères) et comportant une mise à la terre appropriée. Il est recommandé de prévoir un circuit sép- aré destiné à cet appareil. Utilisez une prise qui ne peut pas être éteinte à l’aide d’un inter- rupteur ou une chaîne de traction.
-
Page 9: Description De Votre Réfrigérateur
3. DESCRIPTION DE VOTRE REFRIGERATEUR Compartiment congélateur Compartiment réfrigérateur Lampe Réglage thermostat Clayettes de rangement Balconnets de contre porte Bac à légumes et fruits Pieds réglables -7 -... -
Page 10: Utilisation De Votre Réfrigérateur
4. UTILISATION DE VOTRE REFRIGERATEUR Afin d’obtenir la meilleure performance, utilisez votre réfrigérateur en respectant les instructions indiquées dans ce manuel. Réglage du thermostat Le thermostat pour contrôler le compartiment réfrigérateur et le compartiment cong élateur est situé au-dessus de la clayette supérieure du compartiment réfrigérateur. Lors que vous installez votre réfrigérateur pour la première fois, réglez le thermostat sur la va leur «... -
Page 11: Entretien Et Nettoyage
Conservation des aliments surgelés Le compartiment congélateur est conçu pour conserver des aliments surgelés et congeler des produits alimentaires frais. Ne congelez pas une trop grande quantité d’aliments à la fois, plus vite les aliments sont congelés, mieux ils conserveront leur qualités. De même, veillez à... - Page 12 Remplacement de l’ampoule •Débranchez le réfrigérateur de l’alimentation électrique avant de retirer l’ampoule défectueuse. •Assurez-vous de la remplacer avec une nouvelle ampoule de même type et d’une puissance de 10-watts(La lampe dans l’appareil est de 115V, 10W) Pannes de courant Si l’électricité...
-
Page 13: Réversibilité De La Porte
•Avant de charger l’appareil avec des aliments frais emballés, assurez-vous qu’ils- soient refroidis à la température ambiante. •La couche de glace ou de gel augmente la consommation d’énergie, vous devez donc- effectuer un processus de dégivrage dès que la couche est de 3-5mm d’épaisseur. •Si l’appareil est muni d’un condenseur extérieur, les parois arrière doivent être toujours propre, nettoyées de poussière ou d’impuretés. -
Page 14: Dépannage
1.Retirez les deux vis (6) à l’arrière du couvercle supérieur. Puis retirez le couvercle supérieur (7) en le soulevant à l’arrière et en le glissant doucement vers l’avant. 2.Retirez les 2 vis (1) qui tiennent la charnière supérieure (5) du réfrigérateur. 3.Retirez la charnière supérieure (5). - Page 15 3. Les aliments dans le compartiment réfrigérateur sont gelés…Vérifiez si: -- Le thermostat est réglé sur une température trop basse. -- Les aliments qui sont conservés dans le compartiment touchent la paroi arrière du réfrigérateur. 4. Le compartiment réfrigérateur ne refroidissent pas suffisamment…Vérifiez si: -- Les bouches d’aération sont bloquées, ce qui affecte le flux d’air froid dans le compartiment.
-
Page 16: Spécifications Techniques
8.SPECIFICATIONS TECHNIQUES Marque Référence : ARM2001A+ Catégorie de l’appareil Catégorie 7 réfrigérant ménager : Classe énergétique : 197 kWh/an Consommation d’énergie annuelle : Compartiment réfrigérateur: 153L Volume de conservation Compartiment congélateur : 22L Compartiment réfrigérateur: automatique Dégivrage : Compartiment congélateur : manuel Autonomie: 20,3 h Capacité... -
Page 17: Mise Au Rebut De L'appareil
Le fabriquant et le revendeur ne peuvent pas être tenus responsable de tout accident ou dommage causé par une utilisation impropre de l’appareil, ou si les instructions données dans le présent manuel n’ont pas été respectées. 9.MISE AU REBUT DE L’APPAREIL Il est interdit de disposer cet appareil dans les ordures ménagères. - Page 18 CONTENTS -16- IMPORTANTSAFEGUARDS -19- INSTALLING YOUR REFRIGERATOR -21- DESCRIPTION OF YOUR REFRIGERATOR -22- USING YOUR REFRIGERATOR -24- CLEANING AND MAINTENANCE -26- REVERSE DOOR -27- TROUBLESHOOTING -29- TECHNICAL INFORMATION -30- DISPOSAL OF THE APPLIANCE...
-
Page 19: Important Safeguards
THIS PRODUCT IS FOR HOUSEHOLD USE ONLY! Please read these instructions carefully before the first use ofthis product and save this manual for your future reference. 1.IMPORTANTSAFEGUARDS - 16 -... - Page 20 - 17 -...
- Page 21 8.This appliance must be only us- ed for its intended purpose. 9.Before using check that the volt- age of wall outlet corresponds to rated voltage marked on the rating plate. 10.To avoid the risk of suffocation, keepthe packaging away from children. 11.Please abandon the refrigerator according to local regulators for it use flammable blowing gas and refrigerant.
-
Page 22: Installing Your Refrigerator
2 . INSTALLING YOUR REFRIGERATOR User should take out the door handle in the plastic bag, and install it into the door. Then take out the two handle stopples and cover the installed screws with them. The handle stopple and screw stopple in the plastic bag can be used when the user wants the door to be opened from left. -
Page 23: Electrical Requirement
ELECTRICAL REQUIREMENT WARNING: DO NOT REMOVE GROUND PRONG. DO NOT USE AN ADAPTOR. DO NOT USE EXTENSION CORD. Failure to follow these instructions can result in death, fire or electrical shock. Before you move your refrigerator into its final location, it is important to make sure you have the proper electrical connection. -
Page 24: Description Of Your Refrigerator
3. DESCRIPTION OF YOUR REFRIGERATOR Freezer compartment Refrigerating compartment Lamp Thermostat Storage shelves Door balconnets Crisper Adjustable feet -21 -... -
Page 25: Using Your Refrigerator
4. USING YOUR REFRIGERATOR To obtain the best possible results form your refrigerator, it is important that you operate it properly. Setting the Thermostat controls Controls for the refrigerator and freezer are located at the fop shelf of the refrigera ting compartment. - Page 26 Frozen Food Storage The freezer compartment is designed for storing frozen food and for freezing food at home. Successful freezing depends on the correct packaging. When you close and seal the package you must not allow air or moisture in or out. If you do, you could have food odor and taste transfer throughout the refrigerator, and also dry out frozen food.
- Page 27 5. MAINTAINNG YOUR REFRIGERATOR The refrigerator should be clean at least once a month to prevent odors form building up. Wipe up spills immediately. To clean your refrigerator: •Unplug it. •Remove all movable parts from inside, such as shelves and crisper. Etc. •Use a clean sponge or soft and a mild detergent in warm water.
- Page 28 Defrosting R efrigerator compartment – Defrosting process is automatic by thermostat knob Melted frost flow into drip tray and automatic evaporating. Freezer compartment – Defrosting for the freezer compartment is by manual process. •Turn the thermostat knob to set at OFF position and leave open the freezer door. •Remove all foods, ice cube tray and shelf or transfer to refrigerating compartment.
-
Page 29: Reverse Door
6. REVERSE DOOR - 26 -... -
Page 30: Troubleshooting
1.Remove the two screws. (6) securing the top. Remove the top (7) 2.Remove the 2 screws holding the top hinge (5) on the body. 3.Remove the top hinge (5). 4.Lift and remove the refrigerator door. Store it on an area without the risk of damage. 5.Remove the 2 screws (8) holding the bottom hinge (2). - Page 31 -- The power supply cord is unplugged. -- A household fuse or circuit breaker has tripped. -- A light bulb is loose in the socket. -- A light bulb has burned out. 3. Food in the refrigerator compartment freezing…Check if -- The thermostat knob is set too cold.
-
Page 32: Technical Information
8.TECHNICAL INFORMATION Brand AYA ARM200 1A+ Category of household cat alogue 7 refrigerating ap plian ce rgy cla Ann ual energy consumption 197 kWh/an Refrigerator : 153L Storage volume Freezer : 22L Refrigerator: au tomatic Defrost Freezer: man ual Autonomy... -
Page 33: Disposal Of The Appliance
We decline liability for any damage or accident derived from any use of this product which is not in conformity with the instructions contained in this booklet. 9.DISPOSAL FE THE APPLIANCE It is prohibited to dispose of this appliance in domestic household waste. For disposal there are several possibilities: a)The municipality has established collection systems, where electronic waste can be disposed of at least free of charge to the user. - Page 34 BUT INTE R NATIO NA L 1, AVE NU E S PINO ZA 77184 E M E R AINV ILLE , FR ANCE - 31 -...