Corsair CARBIDE Série Guide D'installation
Masquer les pouces
Voir aussi pour CARBIDE Série:
- Mode d'emploi (60 pages) ,
- Guide d'installation (51 pages) ,
- Guide de démarrage rapide (14 pages)
Table des Matières
Publicité
Liens rapides
CARBIDE SERIES
®
HIGH AIRFLOW MID-TOWER CASE
INSTALLATION GUIDE
GUIDE D'INSTALLATION
INSTALLATIONSHANDBUCH
n
n
GUIDA DI INSTALLAZIONE
GUÍA DE INSTALACIÓN
n
n
安装指南
インストールガイド
n
n
Corsair Components Inc
© 2013 Corsair Components, Inc.
Landing Parkway
All rights reserved. Corsair, the sails logo and Carbide Series are registered trademarks of Corsair
Fremont • California • 94538 • USA
in the United States and/or other countries. All other trademarks are the property of their respective
owners. Product may vary slightly from those pictured.
corsair com
Publicité
Table des Matières

Manuels Connexes pour Corsair CARBIDE Série


Sommaire des Matières pour Corsair CARBIDE Série
- Page 1 © 2013 Corsair Components, Inc. Landing Parkway All rights reserved. Corsair, the sails logo and Carbide Series are registered trademarks of Corsair Fremont • California • 94538 • USA in the United States and/or other countries. All other trademarks are the property of their respective owners.
- Page 2 Conçu pour les montages personnalisés Come tutti i case di Corsair, Carbide Series Air 540 è assembly, upgrades, and maintenance quick and easy. À l'image de tous les boîtiers Corsair, le Carbide Series Air Für Systembauer konzipiert...
- Page 3 вытяжным и двумя всасывающими 140mm вентиляторами ーズ AF140L 吸気ファンおよび排気ファンを備えています。 础, 可相比典型的机箱风扇更低的噪声水平提供强大的气流性能。 de entrada y salida Corsair Air Series AF140L de 140mm. Corsair Air Series AF140L. Конструкция AF140L основана AF140L は、受賞歴のある AF140 を基にしており、標準的 Basado en el galardonado AF140, el AF140L proporciona на...
-
Page 4: Lieferumfang
CONTENTS CONTENU LIEFERUMFANG CONTENUTO CONTENIDO 包装内零组件 パッケージの内容 Carbide Series ® Air 540 Boîtier d ordinateur Carbide Series ® Air 540 Case per PC mid-tower Chasis semitorre de PC Корпус для ПК Carbide Series ® Air 540 Carbide Series ® Air 540 High Airflow Mid-Tower mi-tour Carbide Series ®... - Page 5 CONTENTS CONTENU LIEFERUMFANG CONTENUTO CONTENIDO 包装内零组件 パッケージの内容 Fan screws (short) MBD/HDD screws ODD/SSD screws Motherboard Stando s Cable ties Vis courtes Vis pour carte Vis pour lecteur Support pour carte mère Attaches pour câbles pour ventilateur mère/disque dur optique/disque SSD Abstandhalter Kabelbinder Kurze Schrauben...
- Page 6 Corsair AF140L (x3) fans included CPU backplate cutout 3 ventilateurs Corsair AF140L inclus Trappe donnant accès à la plaque arrière du processeur (x3) Corsair AF140L-Lüfter im Lieferumfang enthalten CPU-Aussparung in der Rückwand 3 ventole Corsair AF140L incluse Fessura per CPU nella piastra posteriore (x3) Ventiladores AF140L de Corsair incluidos Panel extraíble para CPU...
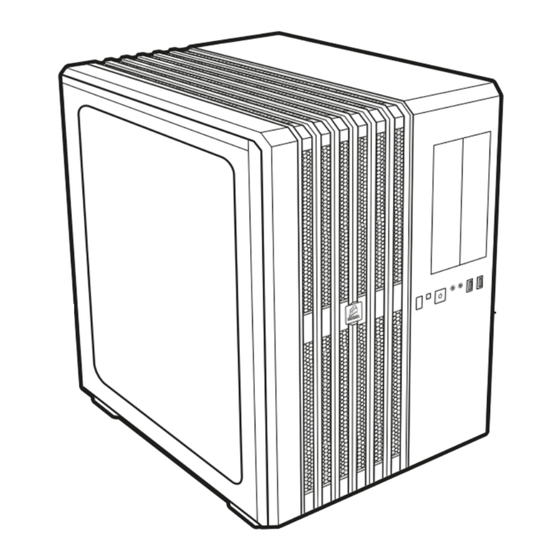
- Page 7 CARBIDE SERIES AIR 540 HIGH AIRFLOW MID-TOWER CASE ® Built-in cable routing cutouts with grommets Trous de câblage avec œillets Integrierte gummiverkleidete Kabelführungsö nungen Fessure per la gestione dei cavi con passacavi Aberturas troqueladas para cables integradas, con arandelas 带护线环的内置电缆布线保险装置 組み込み型ケーブルルーティングカットアウト...
-
Page 8: Removing The Side Panels
Removing the side panels Installing the motherboard Install your motherboard’s I/O shield Unscrew thrumbscrews and remove, then pull side panels outward (see motherboard manual for guidance) Align motherboard with the stando s in the case NOTE: It is advised that both side panels are completely removed Secure with included screws ( MBD/HDD screws) and set aside when building your system to avoid accidental damages... -
Page 9: Installing The Pci-E/Pci Cards
Installing the Power Supply (PSU) Installing the PCI-E/PCI Cards Remove thumbscrews and corresponding slot cover(s) Unscrew and remove PSU mounting bracket Install the add-on card & secure with thumbscrews Place the PSU on the bottom of the case with the fan side facing outwards Align holes &... - Page 10 Installing 5.25" Drive/Devices (ODD) Remove the front panel 5.25" drive bay cover Insert ODD into drive bay until tool-free latch clicks securing the drive To remove drive, push tool-free tab to release Installation d'un disque dur/périphérique Installazione di dispositivi/unità da 5,25" 5,25"...
- Page 11 Installing 3.5" HDD/ 2.5" SSD Remove Tool-free 3.5" HDD tray Insert HDD into HDD tray Align HDD holes with the tray pins to secure NOTE: Tool-free 3.5" HDD tray are also compatible with 2.5" SSD Installation d'un disque dur de 3,5 pouces Installazione dell'unità...
- Page 12 Installing 2.5" SSD into Tool-free expandable SSD cage Installing Hot-swap connectors Plug the Sata connector to the Sata power cable Place the SSD into the tool-free cage until you feel it secure Plug the Sata data cable to the motherboard Sata header To remove the SSD, pull tab to release Installation d'un disque SSD de 2,5 pouces dans Instalación de una SSD de 2,5"...
-
Page 13: Installing Front I/O Connectors
Attach case fan cables to motherboard headers Installing front I/O connectors See motherboard manual for front panel header locations and pin-outs See motherboard manual for fan header locations Attachez les câbles ventilateur du boîtier aux fiches Enchufe los cables de los ventiladores de la carcasa Installation des connecteurs d'E/S avant Instalación de los conectores frontales de E/S de la carte mère... - Page 14 How to remove/install SSD Cage How to remove front magnetic dust filters Unscrew the thumbscrews from rear top dust filter To remove, push the tab down to release the SSD cage Pull the top dust filter back and upwards to remove Lift SSD cage up to remove Pull the front dust filter up and outwards to remove To install, align the SSD cage with holes and slide down until secure...