Table des Matières
Publicité
Liens rapides
Owner's Manual
Owner's Manual
with Assembly Instructions
with Assembly Instructions
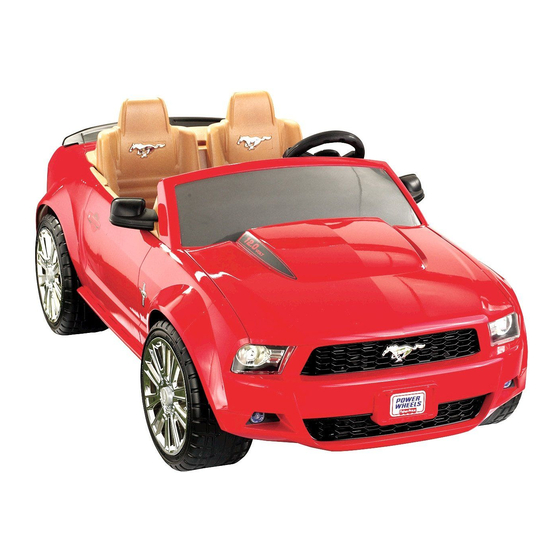
Model P8195
Model
P8195
• •
Product features may vary from the photograph above.
Product features may vary from the photograph above.
• •
Las características del producto pueden variar de las mostradas arriba.
Las características del producto pueden variar de las mostradas arriba.
• •
Les caractéristiques du produit peuvent varier par rapport à l'illustration ci-dessus.
Les caractéristiques du produit peuvent varier par rapport à l'illustration ci-dessus.
Manual del usuario
Manual del usuario
con instrucciones de montaje
con instrucciones de montaje
modelo P8195
modelo
P8195
Please read this manual and save it with your
Please read this manual and save it with your
original sales receipt.
original sales receipt.
• Tools needed for assembly: Phillips Screwdriver
• Tools needed for assembly: Phillips Screwdriver
(not included) and Assembly Tool (included).
(not included) and Assembly Tool (included).
• Use only with a Power Wheels® ® 12 Volt
• Use only with a Power Wheels
Rechargeable Battery and Power Wheels
Rechargeable Battery and Power Wheels® ® 12 Volt
Charger with Type 12V connector (both included).
Charger with Type 12V connector (both included).
• Requires three "AA" (LR6) alkaline
• Requires three "AA" (LR6)
alkaline batteries for
simulated radio operation (not included).
simulated radio operation (not included).
Leer este manual y guardarlo con el comprobante
Leer este manual y guardarlo con el comprobante
de venta original.
de venta original.
• Herramientas necesarias para el montaje:
• Herramientas necesarias para el montaje:
desatornillador de cruz (no incluido) y herramienta
desatornillador de cruz (no incluido) y herramienta
de ensamblaje (incluida).
de ensamblaje (incluida).
• Usar solo con una batería recargable Power Wheels
• Usar solo con una batería recargable Power Wheels
de 12V y un cargador Power Wheels de 12V con
de 12V y un cargador Power Wheels de 12V con
conector tipo 12V (ambos incluidos).
conector tipo 12V (ambos incluidos).
• El radio funciona con 3 pilas
• El radio funciona con 3 pilas alcalinas
alcalinas "AA"
(LR6) x 1,5V (no incluidas).
(LR6) x 1,5V (no incluidas).
• LEA LAS INSTRUCCIONES ANTES DE USAR
• LEA LAS INSTRUCCIONES ANTES DE USAR
ESTE PRODUCTO.
ESTE PRODUCTO.
Lire le présent guide et le garder avec le reçu
Lire le présent guide et le garder avec le reçu
de caisse original.
de caisse original.
• Outils requis pour l'assemblage : tournevis cruciforme
• Outils requis pour l'assemblage : tournevis cruciforme
(non fourni) et outil d'assemblage (fourni).
(non fourni) et outil d'assemblage (fourni).
• Utiliser seulement avec une batterie rechargeable
• Utiliser seulement avec une batterie rechargeable
Power Wheels de 12 V et un chargeur
Power Wheels de 12 V et un chargeur
Power Wheels de 12 V muni d'un connecteur
Power Wheels de 12 V muni d'un connecteur
de 12 V (fournis tous les deux).
de 12 V (fournis tous les deux).
• La radio factice fonctionne avec trois piles
• La radio factice fonctionne avec trois piles
alcalines AA (LR6), non fournies.
alcalines
AA (LR6), non fournies.
Guide de l'utilisateur
Guide de l'utilisateur
incluant les instructions
incluant les instructions
pour l'assemblage
pour l'assemblage
modèle P8195
modèle
P8195
12 Volt
12 Volt
batteries for
"AA"
Publicité
Table des Matières

Manuels Connexes pour Power Wheels P8195


Sommaire des Matières pour Power Wheels P8195
- Page 1 (not included) and Assembly Tool (included). (not included) and Assembly Tool (included). • Use only with a Power Wheels • Use only with a Power Wheels® ® 12 Volt 12 Volt Rechargeable Battery and Power Wheels Rechargeable Battery and Power Wheels® ® 12 Volt 12 Volt Charger with Type 12V connector (both included).
- Page 2 Ce produit contient un aimant. Ne pas l’utiliser Consumer Relations. • Si tiene alguna pregunta sobre su vehículo à proximité d’objets sensibles aux Power Wheels, póngase en contacto con el champs magnétiques. In Canada, Mattel Canada Inc., 6155 Freemont departamento de Atención al cliente: •...
-
Page 3: Electrical Hazard Peligro Eléctrico Dangers Liés À L'électricité
- Use of the wrong type battery or charger could cause a fi re or explosion resulting in serious injury. - Use of Power Wheels components in products other than Power Wheels® vehicles could cause overheating, fi re or explosion. -
Page 4: Riding Hazard Peligro Al Conducir Dangers Liés À La Conduite
IMPORTANT INFORMATION INFORMACIÓN DE IMPORTANCIA RENSEIGNEMENTS IMPORTANTS RIDING HAZARD PELIGRO AL CONDUCIR DANGERS LIÉS À LA CONDUITE WARNING ADVERTENCIA AVERTISSEMENT • Prevent Injuries and Deaths • Direct Adult Supervision Required • Never Ride at Night. • Keep Children Within Safe Riding Areas. These areas must be: - Away from swimming pools and other bodies of water to prevent drownings - Generally level to prevent tipovers... -
Page 5: Parts Piezas Pièces
• Si llega a tener problemas con este producto, o si falta alguna pieza, póngase en contacto con el departamento de Atención al cliente de Power Wheels. • Identifi que todas las piezas antes del montaje y guarde todo el material de embalaje hasta que el montaje esté completo, para asegurarse de que no se deseche ninguna pieza. - Page 6 PARTS PIEZAS PIÈCES Hood 2 Wheel Covers Front Wheels (Left and Right) Cofre 2 cubiertas de rueda Ruedas delanteras (izquierda y derecha) Capot 2 enjoliveurs Roues avant (gauche et droite) Steering Wheel Steering Wheel Cap 2 Bushings 4 Hubcaps Volante Tapa del volante 2 cojinetes 4 tapones...
- Page 7 PARTS PIEZAS PIÈCES 12 Volt Battery 12 Volt Charger Batería de 12V Cargador de 12V Batterie de 12 V Chargeur de 12 V 1 cm -16 Lock Nut – 2 0,4 cm x 3,8 cm Pin – 1 #8 x 1,9 cm Screw – 29 Tuerca ciega 16 de 1 cm –...
- Page 8 PARTS PICTURE ILUSTRACIÓN DE PIEZAS ILLUSTRATION DES PIÈCES Note: Some parts shown are assembled to both sides of the vehicle. Nota: Algunas de las piezas mostradas se montan en ambos lados del vehículo. Remarque : Certaines pièces illustrées devront être assemblées de chaque côté du véhicule. P8195pr-0720...
- Page 9 - Use of the wrong type battery or charger could cause a fi re or explosion resulting in serious injury. - Use of Power Wheels components in products other than Power Wheels® vehicles could cause overheating, fi re or explosion.
- Page 10 “12V’’ (entrada de 120 V~, pour charger la batterie Power Wheels de 12 V. that may result in the risk of fi re, electric shock 60 Hz, salida de 12 Vcc) para cargar la batería Remarque : Examiner régulièrement le chargeur...
- Page 11 BATTERY CHARGING CARGAR LA BATERÍA CHARGE DE LA BATTERIE • Enchufar el conector del cargador en la • Brancher le connecteur du chargeur sur la batería batterie • Enchufar el cargador en un tomacorriente • Brancher le chargeur sur une prise de courant Power Indicator de pared estándar.
-
Page 12: Assembly Montaje Assemblage
ASSEMBLY MONTAJE ASSEMBLAGE WARNING ADVERTENCIA AVERTISSEMENT Children can be harmed by small parts, sharp edges and sharp points in the vehicle’s unassembled state, Front Bumper or by electrical items. Care should be Bumper Support taken in unpacking and assembly of Defensa delantera Soporte de defensa the vehicle. - Page 13 ASSEMBLY MONTAJE ASSEMBLAGE Front Wheel (Marked R R ) Lock Nut Rueda derecha (rotulada R R ) Tuerca ciega Wheel Cover Front Axle Washer Bushing Assembly Tool Roue avant (identifiée par un R R ) Écrou de sécurité Cubierta de rueda Eje delantero Arandela Cojinete...
- Page 14 ASSEMBLY MONTAJE ASSEMBLAGE Mirror Hubcaps Espejo Tapones Miroir Chapeaux de moyeu Grill Rejilla Calandre Mirror Cover Dash Assembly Cubierta del espejo Unidad del tablero Couvre-miroir Tableau de bord Hubcaps • Fit the grill onto the front number. • Fit a mirror and mirror cover to an end of the Tapones •...
- Page 15 ASSEMBLY MONTAJE ASSEMBLAGE 17 17 Posts Posts Postes Postes DASH VIEW Tiges Tiges VISTA DEL TABLERO BACK VIEW VUE DU TABLEAU DE BORD VISTA DESDE ATRÁS • Before applying the labels, wipe the surface VUE ARRIÈRE of the vehicle with a clean, dry cloth to remove any dust or oils.
- Page 16 ASSEMBLY MONTAJE ASSEMBLAGE Atención: se recomienda usar pilas alcalinas • Ne jamais court-circuiter les bornes des piles. • Utiliser uniquement des piles de même type ou para una mayor duración. de type équivalent, comme conseillé. • Cerrar la tapa del compartimiento de pilas 1,5V x 3 "AA"...
- Page 17 ASSEMBLY MONTAJE ASSEMBLAGE Rear Deck Rear Deck Unidad del alerón Unidad del alerón Hood Becquet arrière Becquet arrière Cofre Capot Spoiler Alerón Aileron BACK VIEW VISTA DESDE ATRÁS VUE ARRIÈRE • Fit the spoiler onto the rear deck. • Fit the tabs on the rear deck into the slots in •...
- Page 18 ASSEMBLY MONTAJE ASSEMBLAGE • Insertar el extremo sujetador de un cinturón Short Seat Belts corto en la ranura cerca del borde exterior del asiento. Asegurarse de que el lado del cinturón Cinturones de seguridad cortos de seguridad con el sujetador apunte hacia el Ceintures de sécurité...
- Page 19 ASSEMBLY MONTAJE ASSEMBLAGE Steering Column Cap Steering Column Cap Tapa de la columna de mando Tapa de la columna de mando Capuchon de colonne de direction Capuchon de colonne de direction Steering Column Steering Column Columna de mando Columna de mando Colonne de direction Colonne de direction BACK VIEW...
- Page 20 ASSEMBLY MONTAJE ASSEMBLAGE Steering Wheel Press Wheel Press Wheel Steering Wheel Cap Steering Wheel Cap Volante Presionar el volante Presionar el volante Tapa del volante Tapa del volante Volant Appuyer sur le volant Appuyer sur le volant Garniture du volant Garniture du volant Steering Column Large Opening...
-
Page 21: Decoration Decoración Décoration
DECORATION DECORACIÓN DÉCORATION Please Note: Your vehicle comes with replacement warning labels which you can apply over the factory applied warning label if English is not your primary language. Select the warning label with the appropriate language for you. • Before applying the labels, wipe the surface of the vehicle with a clean, dry cloth to remove any dust or oils. - Page 22 DECORATION DECORACIÓN DÉCORATION BACK VIEW VISTA DESDE ATRÁS VUE ARRIÈRE DOOR VIEW VISTA DE LAS PUERTAS VUE DES PORTIÈRES P8195pr-0720...
- Page 23 DECORATION DECORACIÓN DÉCORATION LEFT VIEW VISTA DESDE LA IZQUIERDA VUE DU CÔTÉ GAUCHE RIGHT VIEW VISTA DESDE LA DERECHA VUE DU CÔTÉ DROIT P8195pr-0720...
-
Page 24: Battery Installation Colocación De La Batería Installation De La Batterie
12 voltios. El uso de cualquier otra batería dañará el vehículo. Asegurarse de cargar la batería por lo menos 18 horas usando el cargador Power Wheels de 12V incluido antes de usar el vehículo por primera vez. Cargar la batería durante por lo menos 14 horas después de cada uso del vehículo. -
Page 25: Entretien
Ne pas ranger la batterie à une température Remember to charge the new battery for at • Usar únicamente una batería Power Wheels de supérieure à 24 °C ou inférieure à -23 °C. least 18 hours before fi rst use. -
Page 26: Mise Au Rebut
Mise au rebut • Your Power Wheels ® battery is a non-spillable, • La batería Power Wheels es una batería de • La batterie Power Wheels ® est une batterie sealed lead-acid battery. It must be recycled ácido plomo sellada que no derrama líquido. - Page 27 SAFE DRIVING RULES NORMAS DE SEGURIDAD PARA CONDUCIR RÈGLES POUR UNE CONDUITE EN TOUTE SÉCURITÉ RIDING HAZARD PELIGRO AL CONDUCIR DANGERS LIÉS À LA CONDUITE WARNING ADVERTENCIA AVERTISSEMENT • Prevent Injuries and Deaths • Direct Adult Supervision Required • Never Ride at Night. •...
- Page 28 SAFE DRIVING RULES NORMAS DE SEGURIDAD PARA CONDUCIR RÈGLES POUR UNE CONDUITE EN TOUTE SÉCURITÉ Teach Safety Rules to Children 10. Do not operate the vehicle near fl ammable 7. No permitir que ningún niño maneje el vapors (gasoline, paint thinner, acetone, vehículo en bajadas o subidas empinadas.
-
Page 29: Apprendre Les Règles De Sécurité Aux Enfants
SAFE DRIVING RULES NORMAS DE SEGURIDAD PARA CONDUCIR RÈGLES POUR UNE CONDUITE EN TOUTE SÉCURITÉ Apprendre les règles de sécurité 5. Ne jamais conduire près d’un plan d’eau 10. Ne jamais rien mettre près des pièces aux enfants (piscine, ruisseau), ou à proximité mobiles du véhicule. - Page 30 VEHICLE OPERATION OPERACIÓN DEL VEHÍCULO FONCTIONNEMENT DU VÉHICULE • As assembled, your vehicle is ready to roll Beginner Use - Low Speed Drive To Back Up in low speed (4 km/h, maximum). After your Principiantes – Velocidad lenta Para avanzar en reversa child has mastered the basic skills of driving Utilisation pour débutant –...
- Page 31 VEHICLE OPERATION OPERACIÓN DEL VEHÍCULO FONCTIONNEMENT DU VÉHICULE • Make sure the shifter is in the low speed STOP Advanced Use - High Speed Drive position. HACER ALTO Avanzados – Velocidad rápida • Loosen and remove the screw in the shifter box. ARRÊT Utilisation pour conducteur expérimenté...
- Page 32 • Pour s’assurer que le véhicule demeure en a Power Wheels® authorized service center. bon état, il est conseillé de faire examiner For the location of the authorized service régulièrement le véhicule dans un Centre de center nearest you, please contact service autorisé...
- Page 33 Do not drive up hills or run into fi xed objects, which can cause the wheels to stop spinning while power is still being supplied to the motors. If a thermal fuse continually trips, contact your local Power Wheels® authorized service center. P8195pr-0720...
- Page 34 Even with proper care, a rechargeable battery does not last forever. full charge Average battery life is 1 to 3 years depending on the vehicle use and use conditions. Replace the battery with a new Power Wheels® 12 volt rechargable battery. Do not substitute parts. Vehicle is overloaded...
- Page 35 PROBLEMS AND SOLUTIONS GUIDE PROBLEM POSSIBLE CAUSE SOLUTION Vehicle runs in low speed, but High speed lock-out not disconnected The vehicle was pre-set to run only in low speed. To allow the does not run in high speed. vehicle to run in low and high speed, you must disconnect the High Speed Lock-Out.
-
Page 36: Guía De Problemas Y Soluciones
¡IMPORTANTE! Si llega a tener algún problema con su vehículo, primero consulte la guía de problemas y soluciones de abajo. Si no logra resolver el problema, póngase en contacto con el Servicio de atención al cliente de Power Wheels. PROBLEMA CAUSA POSIBLE SOLUCIÓN... - Page 37 La duración promedio de una batería es de 1 a 3 años, según el uso del vehículo y las condiciones de uso. Sustituir la batería por una nueva batería recargable Power Wheels de 12V. No usar piezas de otras marcas.
- Page 38 GUÍA DE PROBLEMAS Y SOLUCIONES PROBLEMA CAUSA POSIBLE SOLUCIÓN El vehículo sólo avanza El tornillo de velocidad rápida no El vehículo fue preestablecido para funcionar únicamente a velocidad lenta está desconectado a velocidad lenta. Para que también funcione a velocidad rápida, deberá...
-
Page 39: Problèmes Et Solutions
fi xes, qui pourraient faire en sorte que les roues cessent de tourner pendant que le moteur est en marche. Si le fusible thermique se déclenche sans arrêt, communiquer avec le Centre de service autorisé Power Wheels le plus proche. P8195pr-0720... - Page 40 éternellement. Elle dure en moyenne de 1 à 3 ans, selon l’usage qui est fait du véhicule et les conditions d’utilisation. La remplacer seulement par une batterie neuve rechargeable Power Wheels de 12 V. Utiliser uniquement des pièces du fabricant.
- Page 41 PROBLÈMES ET SOLUTIONS PROBLÈME CAUSE POSSIBLE SOLUTION Le véhicule roule à vitesse Le dispositif inhibiteur n’est Le véhicule a été réglé en usine pour ne fonctionner qu’à vitesse réduite, mais pas pas débranché réduite. Pour faire fonctionner le véhicule aux vitesses réduite à...
- Page 42 Wheels (acheté d’un détaillant autorisé de produits pare-chocs à pare-chocs* original, contra defectos en material o mano Power Wheels) contre tout vice de matériau ou de de obra. fabrication. La garantie limitée de six (6) mois ne One year limited warranty from the date of s’applique qu’à...
- Page 43 P8195pr-0720...
- Page 44 Ford Oval and Mustang are registered trademarks owned and licensed by Ford Motor Company. Manufactured by Fisher-Price, Inc. www.ford.com Ford Oval et Mustang sont des marques déposées de Ford Motor Company utilisées sous licence. Fabriqué par Fisher-Price, Inc. www.ford.com Fisher Price, Inc., a subsidiary of Mattel, Inc., East Aurora, NY 14052 U.S.A. ©2009 Mattel, Inc.