Table des Matières
Publicité
Les langues disponibles
Les langues disponibles
Liens rapides
AUFBAU- UND GEBRAUCHSANLEITUNG
DE
INSTRUCTIONS ON ASSEMBLY AND USE
EN
ISTRUZIONI PER IL MONTAGGIO E PER L'USO
IT
Hersteller: HUDORA | Jägerwald 13 | 42897 Remscheid | Germany
www.hudora.de
INSTRUCCIONES DE MONTAJE Y DE USO
ES
INSTRUCTIONS DE MONTAGE ET MODE D'EMPLOI
FR
MONTAGE- EN GEBRUIKSHANDLEIDING
NL
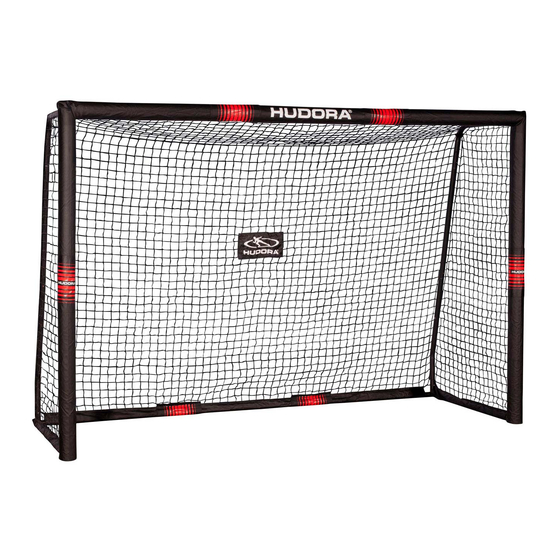
Art.-Nr. 76914, 76915
Stand 10/16
1/8
Publicité
Table des Matières

Manuels Connexes pour Hudora 76914


Sommaire des Matières pour Hudora 76914
- Page 1 INSTRUCCIONES DE MONTAJE Y DE USO INSTRUCTIONS ON ASSEMBLY AND USE INSTRUCTIONS DE MONTAGE ET MODE D’EMPLOI ISTRUZIONI PER IL MONTAGGIO E PER L’USO MONTAGE- EN GEBRUIKSHANDLEIDING Art.-Nr. 76914, 76915 Stand 10/16 Hersteller: HUDORA | Jägerwald 13 | 42897 Remscheid | Germany www.hudora.de...
-
Page 3: Technische Spezifikationen
Schritt 9: Um das Tornetz zusätzlich zu spannen, fädeln Sie die Spannungsleine auf rückseitig) | 2 x Schaumstoffrohr kurz (Öffnung rückseitig) | 6 x Heringe (76914), Höhe der Stangen 9 durch das Netz und verknoten die losen Enden an den Stangen. -
Page 4: Technical Specifications
| 7 x Foam tube closed (pre-assembled) | 2 x Foam tube long (opening on the back) | 2 x Foam tube short (opening on the back) | 6 x Tent pegs (76914), Finally fix the goal frame by means of the pegs on the ground. Ascertain that the 7 x Tent pegs (76915) (for stand fixing) | 1 x These instructions ground is suitable for the application of pegs (e.g. -
Page 5: Specifiche Tecniche
Fase 4: Spingere i pali della porta 1, 2 e 3 con tubi in gommapiuma premontati ACQUISTATO QUESTO PRODOTTO! (traversa) nei passanti a tunnel G, H e I della rete della porta. Il logo HUDORA è La preghiamo di leggere molto attentamente questo manuale. Il manuale fa parte posizionato al centro del passante a tunnel H. -
Page 6: Especificaciones Técnicas
(travesaño de portería) en los lazos de túnel G, H y I de la red de por- parte integrante del producto. Consérvelo por ello cuidadosamente, al igual que el tería. El logo de HUDORA debe quedar posicionado en el centro del lazo de túnel embalaje, para posteriores consultas y preguntas. Entregue asimismo el manual H. -
Page 7: Spécifications Techniques
Étape 4 : Insérez les poteaux de but 1, 2 et 3 avec les tubes en mousse prémon- ET NOUS VOUS EN FÉLICITONS ! tés (barre du but) dans les passants G, H et I du filet de but. Le logo HUDORA est Veuillez lire attentivement le présent mode d’emploi. Le mode d’emploi fait partie in- positionné... - Page 8 Stap 4: Schuif de doelstangen 1, 2 en 3 met voorgemonteerd schuimstof buizen MET DE KOOP VAN UW PRODUCT! (doellat) in de tunnel-lussen G, H en I van het doelnet. Het HUDORA logo is centraal Lees de gebruiksaanwijzing zorgvuldig door. De gebruiksaanwijzing is een vast op tunnel-lus H gepositioneerd.