Page 1
EV250 EVAPORATIVE COOLER Instructions for use. Keep these instructions Visit www.delonghi.com for a list of service centers near you. ELECTRIC CHARACTERISTICS 120 V~ 60 Hz CLIMATISEUR À ÉVAPORATION Mode d’ e mploi . Conservez cette notice Visitez www.delonghi.com pour y voir une liste des centres de réparation proches de chez vous.
Important safeguards not fit fully in the outlet, reverse the plug. If it still does not fit, contact a qualified electrician. • Use this appliance only as described in this Do not attempt to defeat this safety feature. instruction manual. •...
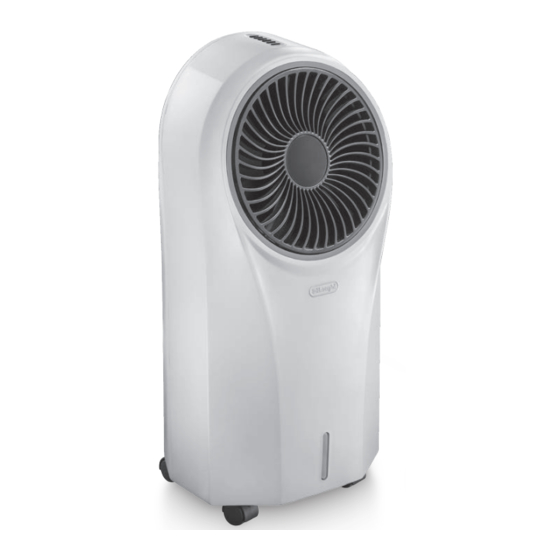
1. DESCRIPTION D3. “AUTO OFF” (see B6) D4. Fan speed (see B2) 1.1 Description of the appliance (A) D5. Fan mode selection (see B4) A1. Rotating vent D6. Cooler/Humidifying. Press to select or deselect the function A2. Water level indicator A3.
Page 6
2.2 Cooler/Humidifying 5. Put the ice box/pack in the freezer and leave it in until it is frozen (fig. 7); Fill the water tank before selecting this function. 1. Extract the water tank (fig. 4) and fill with MAX 4.5L (152 oz) of fresh tap water (do not overload the water tank: see water level indicator A2).
Page 7
2. NATURAL - Press the MODE button (B4 or D5) once. The You can also adjust vertically the vent by lightly pushing the vent appliance performs random ventilation cycles at different to orientate the air flow (fig. 13): always adjust the vent when speeds, interrupted by a few seconds of stop (fig.
3. REFILLING THE WATER TANK 4.1 Cleaning the dust filter and the cooling pad To avoid clogging of the dustproof filter, please clean the filter Please note: regulary. The frequency of cleaning is to be related to the wor- Turn off the unit and let sit two minutes before removing drawer king time: if used daily, it is suggested to clean filter weekly.
4.2 Cleaning the water tank Please note: • If you change or dispose the remote control, the bat- Please note: tery must be removed and disposed of according to local Turn off unit and let sit two minutes before removing drawer to recycling regulations.
Page 10
5. TROUBLESHOOTING Below is a list of some of the possible malfunctions. If the problem cannot be resolved as described, contact Customer Service. PROBLEM CAUSE SOLUTION No discharge of air Cord is not plugged in Make sure power cord is plugged in and the swi- tch is ON Power is not ON Turn the unit ON by pressing the...
Avertissements à courant alternatif polarisée (fiche disposant d’une lame plus large que l’autre). Cette fiche • Utilisez l'appareil en suivant exclusivement cette peut être insérée dans la prise d’une seule notice. Comme pour tous les appareils électriques, manière possible. Il s’agit d’une fonction de ces instructions essaient de contempler la plupart sécurité.
modifications qui ne sont pas approuvées par le partie responsable pour la conformité pourraient annuler l’autorité de l’utilisateur d’utiliser l’appareil. • AVERTISSEMENT: Pour éviter tout risque d'incendie ou de choc électrique, ne pas brancher cet appareil à un variateur d'intensité à semi-conducteur. •...
3. Appuyer sur la touche (B1 ou D1). L’appareil s’allu- 3. Appuyer sur la touche (B3 ou D6): le symbole corre- me à la vitesse de ventilation “MED” et avec la “ionisation” spondant s’allume à l’ é cran (fig. 5). L’air traverse le disposi- tif de refroidissement et sort rafraîchi, en contribuant ainsi active (fig.
3. SLEEP- Appuyer deux fois sur la touche MODE (B4 ou D5). L’appareil fonctionne automatiquement pendant 30 minu- tes à la vitesse MAX, puis 30 minutes à la vitesse MED : il continue à la vitesse MIN (fig. 11). 7. Réinsérer le réservoir d’ e au, allumer l’appareil et sél- ectionner la fonction “Refroidissement/Humidification”...
Avant de lancer la fonction Refroidissement/humidification, toujours s’assurer qu’il y ait de l’ e au dans le réservoir. Si l’ e au termine, durant l’utilisation, l’appareil émet un signal sonore et le symbole clignote (fig. 15): l’appareil continuera cependant de ventiler.
: si utilisé quotidiennement, il est recommandé de nettoyer le • Extraire le réservoir d’ e au (fig. 4) ; • Nettoyer soigneusement avec un détergent hygiénisant, filtre chaque semaine. • Extraire le filtre anti-poussière et le support du panneau disponible dans les commerces (fig.
Page 17
• Ne pas jeter les piles au feu car elles pourraient exploser ou Les changements ou les modifications qui ne sont pas approuvées par le partie responsable pour la conformité relâcher des liquides dangereux. pourraient annuler l’autorité de l’utilisateur d’utiliser •...
Page 18
PROBLEM CAUSE SOLUTION Odors and colored water When the appliance is new At first use, the appliance will have an odor, which will dissipate within a few hours of initial use. The color in the water will also dissipate after a few uses.
Page 19
Advertencias • Este producto está equipado con una clavija de corriente alterna polarizada (una clavija con un • Use este electrodoméstico sólo como se indica polo con dimensiones mayores que las del otro). en este manual de instrucciones. Como con Esta clavija se inserta sólo en un sentido en el cualquier electrodoméstico, las instrucciones tomacorriente.
Page 20
• ADVERTENCIA: No usar con cualquier aparato que 1.3 Descripción del display (C) tiene un control de velocidad de estado solido. C1. Visor programación “auto OFF” (autoapagado) C2. “Enfriamiento/humidificación” activo • Este producto cumple con la concentración C3. “Ionizador” activo (siempre encendido, ya que la función máxima permisible de ozono de 0.050 partes está...
Page 21
sitivo de enfriamiento y sale refrescada, contribuyendo de esta forma a disminuir la temperatura del ambiente; 2.1 Seleccione la velocidad de ventilación 1. Pulse la tecla (B2 o D4); 2. Cada vez que se pulsa la tecla, la velocidad de ventilación Nota: cambia ( MED,...
Page 22
3. SLEEP- Pulse una vez la tecla MODE (B4 o D5). El aparato funciona automáticamente 30 minutos a velocidad MÁX, luego 30 minutos a velocidad MED: continúa a velocidad MÍN (fig. 11). 7. Vuelva a meter el depósito de agua, encienda el aparato y seleccione la función “Enfriamiento/Humidificación”: el aire emitido por el aparato será...
Antes de poner en marcha la función enfriamiento/humidifica- ción, asegúrese siempre de que hay agua en el depósito. Si el agua se acaba durante el uso, el aparato emite una señal acústica y el símbolo parpadea (fig. 15): en cualquier caso, el apara- to seguirá...
Page 24
tiempo de uso: si se utiliza cotidianamente se aconseja limpiar • Saque el depósito de agua (fig. 4); • Limpie meticulosamente con un detergente higienizante, el filtro todas las semanas. disponible en el mercado (fig.20). • Saque el filtro antipolvo y el soporte del panel evaporador (fig.17);...
• This equipment has been tested and found to comply with - Consult the dealer or an experienced radio/TV technician the limits for a Class B digital device, pursuant to part 15 of for help. the FCC Rules. These limits are designed to provide reaso- Changes or modifications not expressly approved by the nable protection against harmful interference in a residen- party responsible for compliance could void the user’s au-...
Page 26
PROBLEMA POSIBLE CAUSA SOLUCIÓN Olores y agua coloreada El aparato es nuevo En el primer uso, el aparato tendrá un olor que se disipará unas pocas horas después del uso inicial. El color en el agua también se disipará después de algunos usos.
Page 27
De’Longhi Appliances via Seitz, 47 31100 Treviso Italia www.delonghi.com...