GYS mi E200 FV Mode D'emploi
Masquer les pouces
Voir aussi pour mi E200 FV:
- Mode d'emploi (41 pages) ,
- Mode d'emploi (64 pages) ,
- Mode d'emploi (32 pages)

Manuels Connexes pour GYS mi E200 FV


Sommaire des Matières pour GYS mi E200 FV
- Page 1 Gysmi E200 FV p. 3-7 / 28-32 p. 8-12 / 28-32 p. 13-17 / 28-32 p. 18-22 / 28-32 p. 23-27 / 28-32 73502-V4.3-01/04/15 73502_V2_29/04/2013...
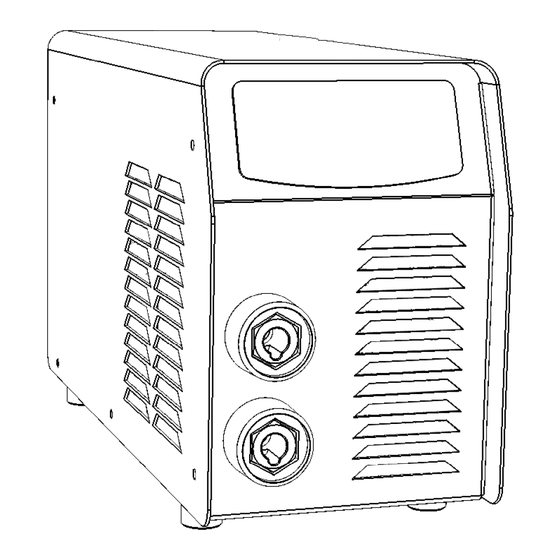
- Page 2 FACE AVANT/FRONTAL SIDE/FRONTSEITE UND ANSCHLÜSSE/CARA DELANTERA/ПЕРЕДНЯЯ ПАНЕЛЬ Afficheur Voyant mode Voyant mode Sélecteur Bouton sélection/ Voyant de protection Bouton de mise en « soudage à « soudage à valeur + validation thermique marche / veille l’électrode » (MMA) l’électrode réfractaire» ou - (TIG) Display...
- Page 3 DESCRIPTION Merci de votre choix ! Afin de tirer le maximum de satisfaction de votre poste, veuillez lire avec attention ce qui suit : Ces postes de soudure Inverter, portables, ventilés, sont conçus pour le soudage à l’électrode enrobée (MMA) et à électrode réfractaire (TIG Lift) en courant continu (DC).
- Page 4 Il sera parfois nécessaire de le couper avant l’écrou si ce dernier n’est pas adapté au manodétendeur 4. Sélectionner la position TIG avec le sélecteur . (presser 3 secondes) 5. Régler l’intensité souhaitée (afficheur ) grâce aux touches , selon l’épaisseur à souder (30A/mm). 6.
- Page 5 NTRETIEN • L'entretien ne doit être effectué que par une personne qualifiée. • Couper l'alimentation en débranchant la prise, et attendre l’arrêt du ventilateur avant de travailler sur l'appareil. A l’intérieur, les tensions et intensités sont élevées et dangereuses. • Deux à trois fois par an, enlever le capot et dépoussiérer à la soufflette. En profiter pour faire vérifier la tenue des connexions électriques avec un outil isolé...
- Page 6 RECOMMANDATION POUR RÉDUIRE LES ÉMISSIONS ÉLECTRO-MAGNÉTIQUES Généralité L’utilisateur est responsable de l’installation et de l’utilisation de l’appareil suivant les instructions du fabricant. Si des perturbations électromagnétiques sont détectées, il est de la responsabilité de l’utilisateur de résoudre la situation suivant les recommandations données dans la notice ou avec l’assistance technique du fabricant. Evaluation de la zone de soudage Avant d’installer l’appareil, l’utilisateur devra évaluer les problèmes électro-magnétiques potentiels qui pourraient se présenter dans la zone où...
- Page 7 NOMALIES CAUSES Anomalies Causes Remèdes L’appareil ne délivre pas de courant et Attendre la fin de la période de La protection thermique du poste s’est le voyant jaune de défaut thermique refroidissement, environ 2 min. Le voyant enclenchée. est allumé s’éteint.
- Page 8 DESCRIPTION Thank you for choosing our product! In order to take the most of your welder, please read the following instructions carefully: These welding are, Inverter, portable welder, for covered electrode and TIG Lift in DC. It allows welding with rutiles, basic, stainless steel.
- Page 9 6. Set the gas flow on flewmeter of the gas cylinder, and then open the valve of the torch 7. To boot : Touch the electrode on Raise the electrode 2 to 5 the welding part mm of the part to be welded 8.
- Page 10 MAINTENANCE • Refer all servicing to qualified personnel. • Disconnect the generator and wait until the ventilator stopped before working on the unit. Inside the device, voltages and current are dangerous. • 2 or 3 times a year, remove the steel cover and blow off the dust with compressed air. Let check the electrical connections (with an insulated tool) and the insulations by qualified personnel.
- Page 11 RECOMMENDATION TO REDUCE ELECTRO-MAGNETIC EMISSIONS General The user is responsible for installing and using the arc welding equipment according to the manufacturer’s instructions. If electromagnetic disturbances are detected, then it shall be the responsibility of the user of the arc welding equipment to resolve the situation with the technical assistance of the manufacturer.
- Page 12 TROUBLESHOOTING Anomalies Causes Remedies The welder thermal protection Wait for the end of the cooling time, The device does not deliver any has turned on. around 2 minutes. The indicator current and the yellow indicator lamp turns off. lamp of thermal defect lights The display is on but the device The cable of the earth clamp or...
- Page 13 BEZEICHNUNG Wir freuen uns, dass Sie sich für ein Markengerät unserer Firma entschieden haben und danken Ihnen für das entgegengebrachte Vertrauen. Bitte lesen Sie sorgfältig vor dem Erstgebrauch diese Betriebsanleitung. Die GYSMI E200 sind tragbare, luftgekühlte Schweißinverter, konzipiert um Schweißarbeiten an ummantelten- (MMA) und hitzebeständigen (WIG Lift) Elektroden bei Gleichstrom (DC) durchführen zu können.
- Page 14 • Lassen Sie das Gerät auch nach Schweißende einige Zeit am Stromnetz angeschlossen, damit sich das GYSMI abkühlen kann Die GYS-Schweißgeräte entsprechen in ihrer Charakteristik einer Konstantstromquelle. Die Einschaltdauer entspricht wie unten beschrieben der Norm EN60974-1 (bei 40°C und einem 10min Zyklus):...
- Page 15 Gerätes mit Pressluft. Lassen Sie regelmäßig Prüfungen des GYS Geräts auf seine elektrische Betriebssicherheit von qualifiziertem Fachpersonal durchführen • Trennen Sie vor dem Öffnen des GYS Gerätes die Stromversorgung zum Gerät und warten Sie, bis der Ventilator sich nicht mehr dreht. Im Gerät sind die Spannungen sehr hoch und deshalb gefährlich •...
- Page 16 HINWEISE ZUR REDUZIERUNG VON ELEKTROMAGNETISCHEN STÖRUNGEN Allgemein Es liegt in der Verantwortung des Anwenders dafür Sorge zu tragen, dass die Schweißausrüstung nach den Vorgaben des Herstellers angeschlossen und verwendet wird. Liegen elektromagnetische Störungen vor, ist der Anwender dafür verantwortlich dieses Problem mithilfe des technischen Supports des Herstellers zu beheben. Prüfung des Schweißbereiches Prüfen Sie vor Anschluss der Schweißausrüstung die Arbeitsumgebung auf potentielle elektromagnetische Probleme.
- Page 17 Das betreffende Gerät bitte immer mit Kaufbeleg und kurzer Fehlerbeschreibung ausschließlich über den Fachhandel einschicken. Die Reparatur erfolgt erst nach Erhalt einer schriftlichen Akzeptanz (Unterschrift) des zuvor vorgelegten Kostenvoranschlags durch den Besteller. Im Fall einer Garantieleistung trägt GYS ausschließlich die Kosten für den Rückversand an den Fachhändler.
- Page 18 DESCRIPCION Gracias por su elección! Para sacar la mayor satisfacción de su aparato, lea atentamente lo que sigue : Los aparatos son de soldadura Inverter, portables, con ventilación, para la soldadura con electrodos recubiertos (MMA) y con electrodos refractarios (TIG Lift) en corriente continua (DC). En modo MMA, permiten soldar todo tipo de electrodos: rutile, inox, básico.
- Page 19 7. Para cebar : a. tocar con el electrodo el b. levantar el electrodo de 2 metal que soldar a 5mm del metal que soldar Al final de la soldadura: levantar el arco 2 veces (arriba-abajo-arriba-abajo) para iniciar el desvanecimiento automático (ver el párrafo abajo).
- Page 20 MANTENIMIENTO • El mantenimiento deber ser realizado por una persona calificada. • Cortar la alimentación desconectando el enchufe de la toma y esperar la parada del ventilador antes de empezar las reparaciones sobre el aparato. Al interior, las tensiones e intensidades son elevadas y peligrosas. •...
- Page 21 RECOMENDACIÓN PARA REDUCIR LAS EMISIONES ELECTRO-MAGNETICAS Generalidad El usuario es responsable de la instalación y del uso del equipo según las instrucciones del fabricante. Si se detectan perturbaciones electromagnéticas, es de la responsabilidad del usuario de resolver la situación según las recomendaciones dadas en el manual de uso o con la asistencia técnica del fabricante.
- Page 22 ANOMALIAS, CAUSAS, REMEDIOS Anomalías Causas Remedios El aparato no libera ninguna Esperar el final del enfriamiento corriente y el indicador luminoso La protección térmica del (más o menos 2 mn). El indicador amarillo de defecto térmico está aparato se ha puesto en marcha. luminoso se apaga encendido .
- Page 23 ОПИСАНИЕ Благодарим вас за выбор аппарата нашей марки! Чтобы полностью использовать его возможности, пожалуйста, изучите данную инструкцию : являются малогабаритными сварочными инверторами со встроенным вентилятором для сварки электродом с обмазкой (MMA) и тугоплавким электродом (TIG Lift) на постоянном токе (DC). При сварке МMA аппараты позволяют...
- Page 24 2. Подсоедините горелку с вентилем (арт. 044425) к отрицательной полярности (-). 3. Подсоедините газовую трубку горелки к газовому баллону 4. Выбрать позицию TIG с помощью переключателя (нажимать 3 секунды). 5. Отрегулируйте желаемую силу тока (индикатор ) с помощью кнопок Отрегулируйте расход газа на редукторе газового баллона и отгоройте вентиль на горелке 7.
- Page 25 УХОД И ОБСЛУЖИВАНИЕ • Обслуживание аппарата должно производится только квалифицированным персоналом. • Всегда отключайте аппарат от сети, дождитесь остановки вентиляторов. Токи и напряжения внутри аппарата значительны и представляют опасность. • Регулярно снимайте крышку аппарата и очищайте его от пыли. Пользуясь случаем, обратитесь к кварифицированному...
- Page 26 РЕКОМЕНДАЦИИ ДЛЯ СНИЖЕНИЯ ЭЛЕКТРОМАГНИТНОГО ИЗЛУЧЕНИЯ Общие сведения Пользователь несет ответственность за установку и использование аппарата в соответствие с указаниями производителя. При обнаружении электромагнитных излучений пользователь должен разрешить проблему, следуя рекомендациям, указанным в инструкции, или с помощью технической поддержки производителя. Оценка сварочной зоны Перед...
- Page 27 AНОМАЛИИ, ВОЗМОЖНЫЕ ПРИЧИНЫ, ВАРИАНТЫ РЕШЕНИЙ Аномалии Возможные причины Решения Аппарат не выдает сварочный Ждите охлаждения в течение ток, при этом горит желтая Сработала тепловая защита приблизительно 2 минут, до лампа индикатора термозащиты аппарата. выключения лампы индикатора. Лампочка выкличится. Кабель зажима массы или Дисплей...
- Page 28 CE Kennzeichnung: 2012 DECLARACION DE CONFORMIDAD : GYS certifica que el aparato de soldadura E200 FV es fabricado en conformidad con las directivas baja tensión 2006/95/CE del 12/12/2006, y las directivas compatibilidad electromecánica 2004/108/CE del 15/12/2004. Esta conformidad está establecida por el respeto a las normas EN 60974-1 de 2005, EN 60974-10 de 2007 y EN 50445 de 2008.
- Page 29 SCHÉMA ÉLECTRIQUE / CIRCUIT DIAGRAM / SCHALTPLAN Gysmi E200 FV...
- Page 30 PIÈCES DE RECHANGE/ SPARE PARTS / ERSATZTEILE/ RECAMBIOS / ЗАПЧАСТИ GYSMI E 200 FV N° Désignation E200 FV Douilles / Connectors / Schweißbuchsen / Conectores / Коннекторы 51469 Clavier/ Display / Anzeige / Teclado / Дисплей / Οθόνη 51914 Carte électronique / Electronic card / Elektronikplatine / Tarjeta electrónica / Электронная плата 97143C Cordon secteur / Power cord / Netzkabel / Cable de conexión / Сетевой...
- Page 31 ICÔNES/ SYMBOLS/ ZEICHENERKLÄRUNG / ICONOS/ ПЕРЕДНЯЯ ПАНЕЛЬ Ampère Ampere Amperio Ампер Volt Volt Volt Voltios Вольт Hertz Hertz Hertz Hertz Герц Soudage à l’électrode enrobée (MMA – Manual Metal Arc Schweißen mit umhüllter Elektrode (MMA) Schweißen mit umhüllter Elektrode (E-Handschweißen) Soldadura con electrodos refractarios (TIG –...
- Page 32 Nombre d'électrodes normalisées soudables en 1 heure en continu, avec 20 secondes entre chacune, divisé par le nombre d'électrodes soudables dans les mêmes conditions sans disjonction thermique. Number of standardized electrodes weldable over 1 hour of continuous work, divided by the number of electrodes weldable in the same conditions without thermal shutdown Elektroden Anzahl die inerhalb einer Arbeitsstunde verschweißt werden können, geteilt durch Elektroden- Anzahl die tatsächlich verschweißt sind (Abkühlphasen des Geräts)