
Manuels Connexes pour AYA BD105A


Sommaire des Matières pour AYA BD105A
- Page 1 BD105A BD205A BD305A BD405A BD505A BD605A CONGÉLATEUR COFFRE INSTRUCTIONS D’UTILISATION INSTRUCTIONS FOR USE...
- Page 2 Index Page Choix de l’emplacement d’installation ....................2 Plaquette d’homologation ........................2 Connexion électrique.......................... 2 Réglage de la température ......................... 3 Voyants lumineux ..........................3 Alarme sonore ............................ 3 Mise en fonction de l'appareil ......................3 Congélation / conservation des aliments frais..................4 Hauteur maximale d’empilage ......................
- Page 3 Mode d’emploi Vous trouverez ci-dessous toutes indications importantes se rapportant à l’utilisation de l’appareil. Avertissements concernant la sécurité Les instructions du mode d’emploi concernent divers modèles. C’est pourquoi des différences de détails peuvent Suivant sa composition, le réfrigérant s’avère facilement exister selon le type d’appareil.
- Page 4 et s’abstenir absolument de brancher l’appareil sur le réseau. • jaune = INTERRUPTEUR DE CONGELATION RAPIDE Réglage de la température Lorsque qu’il est enclenché, le thermostat est mis hors fonction. Pour empêcher température soit Le compresseur produit sa fonction de refroidissement accidentellement modifiée, la manette du thermostat CONG LATION...
- Page 5 décongelés ou à moitié décongelés. La re congélation est Veiller à ce qu’au plus tôt 24 heures après avoir mis des en principe déconseillée. aliments frais, l’on puisse ajouter la quantité adéquate à la Congélation / Conservation des aliments frais capacité...
- Page 6 Mise en garde concernant la sécurité intérieures sont très sensibles et ne supportent pas le Ne jamais utiliser d’appareils électriques, tels que séchoir contact avec des objets pointus. Se servir exclusivement à cheveux, ventilateur, ou d’appareils émettant des de grattoirs en plastique ou en bois non pointus. flammes vives (par ex.
- Page 7 14 Eclairage intérieur • si l'appareil est allumé (commande de température en (pas sur tous les modèles) position diverse de zéro). Les appareils munis d’éclairage interne possèdent un Attention ! interrupteur. En cas de panne ou de chute de tension, l’isolation des En ouvrant l’appareil, l’éclairage s’allume automatiquement parois de l’appareil permet une durée de conservation de et s’éteint automatiquement à...
- Page 8 Congélateur TABLEAU DE CONSERVATION -18°C < Durée appr. de conservation (mois) Aliments frais Emballage approprié 10-12 Viande hachée > Sachet de congélation en polyéthylène > Saucisses > Sachet de congélation en polyéthylène > Petits poissons > Sachet de congélation en polyéthylène >...
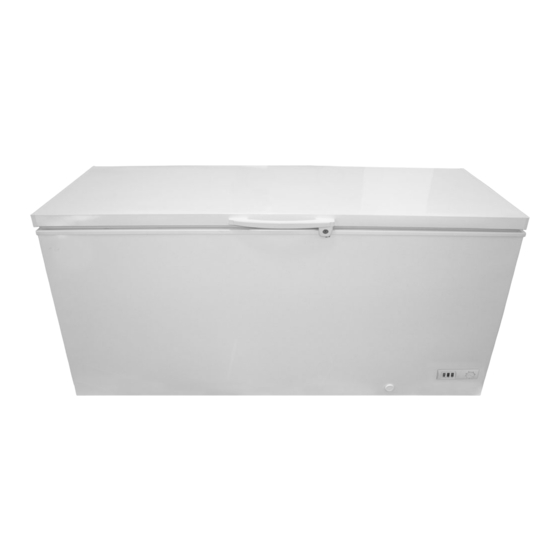
- Page 9 Composants Couvercle du congélateur Garniture du couvercle (join) Eclairage intérieur Compartiment de conservation Cloison Comp. de pré-congélation Boîtier Bouchent (écouler l'eau) Panneau de commande Grille de ventilation Régulateur de température thermostat m n o Touche super-congélation jaune ALARM rouge (en marche) vert POWER Condensateur exterieur...
- Page 10 220-240V 220-240V 220-240V Fréquence 50 Hz 50 Hz 50 Hz 50 Hz nominale Puissance d’entrée 110W 135W 135W BD105A/205A sans interrupteur et la lumière Consommation 0.48 0.63 0.76 0.88 1.01 1.15 kW h/24h Fluide frigorigène 110g 114g R600a Poids net...
- Page 11 Contents Page Electrical Safety Instruction..................…...…….…. 10 Installation........................……………… 11 Rating plate......................……………………… .11 Connection to power supply ...................………………… .11 Switching on / off and temperature selection..............…………….. 11-12 Indicator-lights......................…………….. .12 Warning buzzer……...................……………………... 12 Start-up......................…………….………..12 Freezing/storage of fresh food................……………………... 12-13 Maximum stacking height..................………………….….. 13 Storage time......................……………………...
- Page 12 Directions for use Omit any mechanical influence on the cooling system, In the following, you will find all the important information especially on the condenser as far as available. for the use of your appliance. With some appliances the condenser is built into the The instructions for use apply to several models, which is external wall.
- Page 13 To switch on: Turn the control (l) to the right Start-up adjust temperature to the level you require, between: (slight cooling) and Fully unpack the appliance. "1" (lowest temperature) Remove the polystyrene parts in the compressor "7" To switch off: Turn the control to the left chamber (if supplied).
- Page 14 • Use by date (consumption date) (see “storage table”) After being defrosted, food must be consumed immediately but latest within the next 24 hours. Then continue as follows a) We recommend you place fresh foods in the fast Precautions and advice freezing compartment at the side (f) (not all models are equipped) or on the bottom of the freezer.
- Page 15 To prevent frosted food from defrosting, carry out When ice and frost layers form on the inner walls up to a steps from 1 to 17 within max. two hours. certain thickness, they act as an insulation element and prevent the coldness being released from the inner walls. 19.
- Page 16 (see: ” Refilling of fresh food” ). What is when.... The manufacturer works constantly at the further No function (appliance not running) development of all products. Please therefore bear this in mind as the form, set up and technology are subject to change, without prior notice.
- Page 17 STORAGE TABLE CHEST FREEZERS -18°C < approx. storage time in months Fresh food Suitable packaging 10-12 Mincemeat > Polyethylene freezer bag > Sausages > Polyethylene freezer bag > Small fish > Polyethylene freezer bag > Heart / liver > Polyethylene freezer bag >...
- Page 18 Components Chest lid Lid seal Interior light Storage compartment Separator Fast freeze compartment Housing Plug (defrost water) Control panel Ventilation grid Temperature control Thermostat m n o Fast freeze key yellow Alarm Power green Condenser depending on Model Control panel versions FIG.
- Page 19 50 Hz 1.POWER PLUG 2.GREEN LAMP 3.SWITCH 4.LIGHTING 5.YELLOW SWITCH 6.FAN 7.THERMOSTAT 8.MOTOR PROTECTOR 9.COMPR- ESSOR 10.STARTER 11.RED LAMP 12.RUNNING CAPACITOR Power input 110W 135W 135W Note:BD105A/205A without switch and light; Power Only BD605A with Fan. consumption 0.48 0.63 0.76 0.88 1.01...