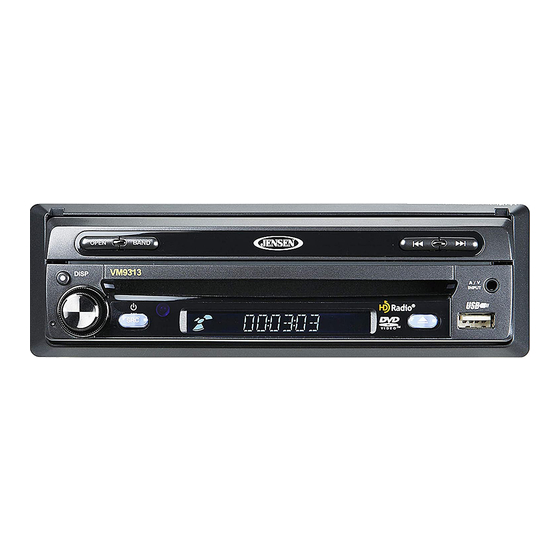
Jensen VM9313 Instructions D'installation
Masquer les pouces
Voir aussi pour VM9313:
- Instructions d'installation et d'opération (106 pages) ,
- Guide de référence rapide (68 pages)
Table des Matières
Publicité
Les langues disponibles
Les langues disponibles
Liens rapides
Para obtener instrucciones en Español, diríjase a la página 6.
HD Radio Module connecting DIN cable
You will need these tools and supplies to install your VM9313:
Torx type, flat-head and Philips screwdrivers
Ÿ
Wire cutters and strippers
Ÿ
Tools to remove existing radio (screwdriver, socket wrench set or other tools)
Ÿ
Electrical tape
Ÿ
Crimping tool
Ÿ
Volt meter/test light
Ÿ
Crimp connections
Ÿ
18 gauge wire for power connections
Ÿ
16 – 18 gauge speaker wire
Ÿ
WARNING! Never install this unit where operation and viewing could interfere with
safe driving conditions.
VM9313
VM9313
DISP
VM9313 Head Unit
Cosmetic trim ring
Wiring harness power/speaker
Mounting hardware for the head unit
Single DIN sleeve
3
jLink iPod Cable
HDRM-1 HD Radio Module
Instruccionnes de Instalación
Pour des instructions en Francais, référez-vous à la page 11.
What's in the Box
Parking brake sensor extension wire
Tools and Supplies
Installation Guide
Instructions d'installation
Remote Control
SD to USB adaptor
Mounting hardware for
HDRM-1 HD Radio Module
Owners Manual
Quick Start Guide
A / V
INPUT
Publicité
Table des Matières

Sommaire des Matières pour Jensen VM9313
- Page 1 Cable Quick Start Guide HDRM-1 HD Radio Module HD Radio Module connecting DIN cable Tools and Supplies You will need these tools and supplies to install your VM9313: Torx type, flat-head and Philips screwdrivers Ÿ Wire cutters and strippers Ÿ...
-
Page 2: Optional Equipment
To prevent a short circuit, be sure to turn off the ignition and remove the negative (-) battery cable prior to installation. NOTE: If the VM9313 is to be installed in a car equipped with an on-board drive or navigation computer, do not disconnect the battery cable. If the cable is disconnected, the computer memory may be lost. -
Page 3: Final Installation
NOTE: When replacing a fuse, be sure to use correct type and amperage to avoid damaging the radio. The VM9313 uses one 15 amp fuse, located in the black filter box in-line with the main wire harness. - Page 4 AUX IN 1...
- Page 5 HDRM-2 HD Radio Module...
-
Page 6: Qué Hay En La Caja
Cable de jLink iPod Guía de Referencia Rápida Módulo de HD Radio HDRM-1 Control Remoto Herramientas y Suministros Necesitará estas herramientas y suministros para instalar su VM9313: Destornilladores del tipo Torx, cabeza plana y Philips Ÿ Cortador y Pelador de Cable Ÿ... -
Page 7: Equipo Opcional
Para evitar un cortocircuito, asegúrese de cortar el encendido y quitar el cable negativo (-) de la batería antes de la instalación. NOTA: Si el VM9313 será instalado en un automóvil equipado con una computadora de abordo o de navegación, no desconecte el cable de la batería. Si se desconecta el cable, podría perderse la memoria de la computadora. -
Page 8: Instalación Final
NOTA: Cuando reemplaza un fusible, asegúrese de usar el tipo y amperaje correctos para evitar daños a la radio. El VM9313 usa un fusible de 15 amp, ubicado en la caja trasera de filtro en línea con el cableado principal. - Page 9 AUX IN 1...
- Page 10 A la Radio Conectador de la antena HDRM-2 HD Radio Module...
-
Page 11: Ce Qu'il Y A Dans La Boîte
Module par HD Radio de HDRM-1 Télécommande Outils et fournitures Vous aurez besoin de ces outils et fournitures pour installer votre VM9313 : Tournevis à poinite à six lobes, tournevis à tête fraisée et tournevis Philips Ÿ Coupe-fils et dénudeurs Ÿ... -
Page 12: Débrancher La Pile
(-) avant d’installation. A NOTER : Si le VM9313 est à installer dans une voiture équipée d’un lecteur à bord ou un ordinateur de navigation, ne débranchez pas la pile. Si le câble est débranché la mémoire de l’ordinateur peut être perdue. -
Page 13: Installation Finale
ACC à l’alimentation avec un interrupteur. A NOTER : Lorsque vous remplacer un fusible, soyez sûr d’utilisez le type et l’ampérage corrects pour éviter d’endommager la radio. Le VM9313 utilise un fusible 15 amp, situé dans la boîte noire à filtre aligné avec le harnais. - Page 14 AUX IN 1...
-
Page 15: Á L'unité Principale
Á l'Unité Principale Connecteur d'antenne HDRM-2 HD Radio Module... - Page 16 Audiovox Electronics Corporation Hauppauge, NY 11788 www.jensen.com © 2009 Audiovox v. 030509 Printed in China/Impreso en China/Imprimé en Chine...


