Publicité
Les langues disponibles
Les langues disponibles
Liens rapides
Publicité

Manuels Connexes pour Signature STI4FLEX/2


Sommaire des Matières pour Signature STI4FLEX/2
- Page 1 T A B L E À I N D U C T I O N STI4FLEX/2...
- Page 3 -10- -18- -19- -20- -22- -23- -26-...
- Page 10 AVERTISSEMENT : N’utilisez que des protège-roues conçus par le fabricant de l’appareil de cuisson ou indiqués par le fabricant de l’appareil dans les instructions à utiliser comme gardes appropriés ou de cuisson incorporés dans l’appareil. L’utilisation de gardes inappropriés peut causer des accidents. 1.
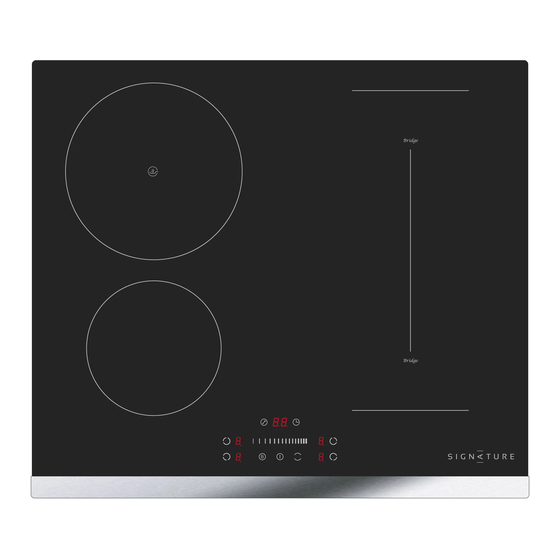
- Page 11 STI4FLEX/2 2 zones 1 flexible 220-240V~ /380-415V 3N~ 50Hz ou 60Hz 7400W 590X520X62 560X490 STI4FLEX/2 Table à induction 2 zones 1 flexible Zones de cuisson à induction Zone 1:16.0 Zone 2:21.0 L:38.6 W:18.0 Zone 1:191.6 Zone 2:181.4 flexible:188.1 187.0...
- Page 13 N’utilisez pas de récipients avec un fond abîmé ou arrondi ou des rebords dentelés. Assurez-vous que le fond de votre récipient est adapté au diamètre de la zone de cuisson et qu’il soit bien positionné au centre de la surface vitrée. En utilisant une casserole, une énergie légèrement plus large sera utilisée à...
- Page 14 Presser la touche pour sélectionner la zone de chauffage et un indicateur auprès de la touche clignotera. Sélectionnez la puissance en appuyant sur le curseur •Si aucune puissance n'est sélectionnée au bout d'une minute, la power up table de cuisson va s'éteindre automatiquement. Pour la remise en fonctionnement, recommencez par l'étape 1.
- Page 15 3.3.3 Utiliser la fonction Booster Activer la fonction Booster Toucher le bouton de sélection du foyer. Touchez le bouton Booster , l'afficheur du foyer affiche “P” et la puissance montre maximum. Annuler la fonction Booster Toucher le bouton de sélection du foyer pour lequel vous souhaitez annuler la fonction Boost.
- Page 16 sont acceptables) Nous recommandons de ne pas utiliser de configuration autre que les trois indiquées ci-dessus, car cela peut affecter la chauffe de l'appareil. Comme deux zones indépendantes Pour utiliser la zone modulable comme deux foyers différents, deux choix de chauffe sont possibles. (a) Placez un ustensile de cuisson sur la partie supérieure ou la partie inférieure de la zone modulable.
- Page 17 Appuyez sur la touche Le voyant lumineux de la minuterie va afficher “ Lo“ Pour déverrouiller les touches Appuyez sur la touche pendant secondes pour déverrouiller les touches. orsque la table de cuisson est verrouillée, vous pouvez uniquement appuyer sur la touche « MARCHE/ARRÊT »...
- Page 18 La sonnerie bipe pendant 30 secondes et l'afficheur du minuteur affiche «- -» quand la durée réglée est écoulée. b) Réglage de la minuterie pour éteindre une zone de cuisson Régler un foyer Toucher le bouton de sélection du foyer pour lequel vous souhaitez régler la minuterie.
- Page 19 Régler plusieurs foyers: La procédure de réglages de plusieurs foyers est similaires à celle de réglage d'un foyer; Lorsque vous réglez la durée de plusieurs foyers simultanément, les points des foyers concernés sont allumés. L'affichage du minuteur indique la durée en minutes. Le point de la zone correspondante clignote. L'affichage est le suivant : (réglé...
- Page 24 l'appareil...
- Page 25 La table de cuisson à induction intègre une fonction d'autodiagnostic. Elle permet aux techniciens de contrôler le fonctionnement de plusieurs composants sans démonter ou désinstaller la table de cuisson de la surface d’installation. Dépannage 1) Codes d'erreur s'affichant pendant l'utilisation par le consommateur et solutions correspondantes ; Code d’erreur Problème Solution...
- Page 26 Attendez que la température de l'IGBT redevienne normale. Appuyez sur le bouton « marche/ arrêt » pour redémarrer l'appareil. Vérifiez Température élevée de l'IGBT . que le ventilateur fonctionne normalement, SI ce n’ est le cas, le changer. Vérifiez que l’ alimentation électrique est La tension de l'alimentation électrique est supérieure à...
- Page 27 L'indicateur du La température de la table de La température ambiante est mode de cuisson cuisson est élevée. peut-être trop élevée. Les s'allume, mais entrées d'air sont peut-être l'appareil ne bouchées. chauffe pas. Il y a un problème avec le Vérifiez que le ventilateur fonctionne normalement.
- Page 28 Coupez le plan de travail conformément aux dimensions indiquées sur le schéma. Pour l'installation et l'utilisation, un espace minimal de 5 cm doitêtre laissé tout atour du trou Vérifiez que le plan de travail a une épaisseur d’ au moins 30mm. Sélectionnez un plan de travail dont le matériau est isolé...
- Page 29 Min. 5 cm Max. 5 mm Max. 5 mm...
- Page 31 supports TABLE supports...
- Page 34 ENLEVEMENT DES APPAREILS MENAGERS USAGES La directive européenne 2012/19/UE sur les déchets d'équipements électriques et électroniques (DEEE) exige que les appareils ménagers usagés ne soient pas jetés dans le flux normal des déchets municipaux. Les appareils usagés doivent être collectés séparément afin d'optimiser le taux de valorisation et de recyclage des matériaux qui les composent, et de réduire l'impact sur la santé...
- Page 35 I N S T R U C T I O N M A N U A L - EN I N D U C T I O N H O B STI4FLEX/2...
- Page 36 - 3- -16- -17- -18- -19- -20- -22-...
- Page 41 WARNING: Use only hob guards designed by the manufacturer of the cooking appliance or indicated by the manufacturer of the appliance in the instructions for use as suitable or hob guards incorporated in the appliance. The use of inappropriate guards can cause accidents. 1.
- Page 42 STI4FLEX/2 2 zones 1 area 220-240V~/380-415V 3N~50Hz or 60Hz 7400W 590X520X62 560X490 T e chnical information Symbol Value Unit Model identi cation STI4FLEX/2 Type of hob Built-in hob Number of cooking zones and/or areas 2 zones 1 area Heating technology(induction cooking zones...
- Page 43 3. Operation of Product 3.1 Touch Controls The controls respond to touch, so you don’t need to apply any pressure. • Use the ball of your finger, not its tip. • • You will hear a beep each time a touch is registered. Make sure the controls are always clean, dry, and that there is no object (e.g.
- Page 44 Do not use cookware with jagged edges or a curved base. Make sure that the base of your pan is smooth, sits flat against the glass, and is the same size as the cooking zone. Use pans whose diameter is as large as the graphic of the zone selected. Using a pot a slightly wider energy will be used at its maximum efficiency.
- Page 45 Touching the heating zone selection control, and an indicator next to the key will flash Select a heat setting by touching the slider control • If you don’t choose a heat setting within 1 minute, the power up Induction hob will automatically switch off. You will need to start again at step 1.
- Page 46 3.3.3 Using the Boost function Activate the boost function Touching the heating zone selection control. Touching the boost control , the zone indicator show “P” and the power reach Max. Cancel the Boost function Touching the heating zone selection control that you wish to cancel the boost function Touching the "Boost"...
- Page 47 We don’t recommend other operations except for above mentioned three operations because it might effect the heating of appliance As two independent zones To use the flexible area as two different zones, you can have two choices of heating. (a) Put a pan on the right up side or the right down side of the flexible zone. (b)Put two pans on both sides of the flexible zone.
- Page 48 To unlock the controls Touch and hold the lock control for a while. When the hob is in the lock mode, all the controls are disable except the ON/OFF you can always turn the induction hob off with the ON/OFF control in an emergency, but you shall unlock the hob first in the next operation.
- Page 49 b) Setting the timer to turn one cooking zone off Set one zone Touching the heating zone selection control that you want to set the timer for. In short time, touch timer control, the “10” will show in the timer display and the “0” flashes. Set the time by touching the slider control.
- Page 50 The steps for setting more zones are similar to the steps of setting one zone; When you set the time for several cooking zones simultaneously, decimal dots of the relevant cooking zones are on. The minute display shows the min. timer. The dot of the corresponding zone flashes. The shown as below: (set to 15 minutes) (set to 45 minutes)
- Page 51 4.1 Cooking Tips When food comes to the boil, reduce the temperature setting. • Using a lid will reduce cooking times and save energy by retaining the heat. • Minimize the amount of liquid or fat to reduce cooking times. •...
- Page 52 cookware and the amount you are cooking. Experiment with the induction hob to find the settings that best suit you. Heat setting Suitability • delicate warming for small amounts of food 1 - 2 • melting chocolate, butter, and foods that burn quickly •...
- Page 53 Spillovers on the 1. Switch the power to the cooktop off. • The cooktop may beep and turn touch controls 2. Soak up the spill itself off, and the touch controls 3. Wipe the touch control area with a may not function while there is clean damp sponge or cloth.
- Page 54 Pans do not become hot The induction hob cannot Use cookware suitable for induction and appears in the detect the pan because it is not cooking. See section ‘Choosing the right display. suitable for induction cooking. cookware’. The induction hob cannot detect Centre the pan and make sure that its the pan because it is too small for base matches the size of the cooking...
- Page 55 Please inspect whether power supply is Supply voltage is below the rated voltage. normal. Supply voltage is above the rated voltage. Power on after the power supply is normal. Reinsert the connection between the display board and the power board. Communication error.
- Page 56 The Main board is Replace the power board. damaged. Fan motor sounds The fan motor is Replace the fan. abnormal. damaged. The above are the judgment and inspection of common failures. Please do not disassemble the unit by yourself to avoid any dangers and damages to the induction hob. 9.
- Page 57 A(mm) B(mm) C(mm) 50 min. 20 min. Air intake Air exit 5mm WARNING: Ensuring Adequate Ventilation Make sure the induction cooker hob is well ventilated and that air inlet and outlet are not blocked. In order to avoid accidental touch with the overheating bottom of the hob, or getting unexpectable electric shock during working, it is necessary to put a wooden insert, fixed by screws, at a minimum distance of 50mm from the bottom of the hob.
- Page 58 9.2 Before installing the hob, make sure that The work surface is square and level, and no structural members interfere with space requirements. • The work surface is made of a heat-resistant and insulated material. • If the hob is installed above an oven, the oven has a built-in cooling fan. •...
- Page 59 TABLE BRACKET Under any circumstances, the brackets cannot touch with the inner surfaces of the worktop after installation (see picture) 9.6 Cautions 1. The induction hotplate must be installed by qualified personnel or technicians. We have professionals at your service. Please never conduct the operation by yourself. 2.
- Page 60 • If the total number of heating unit of the appliance you choose is not less than 4, the appliance can be connected directly to the mains by single-phase electric connection, as shown below. If the cable is damaged or to be replaced, the operation must be carried out the by after-sale agent •...
- Page 61 CORRECT DISPOSAL OF THIS PRODUCT European directive 2012/19/EU on Waste from Electrical and Electronic Equipment (WEEE), requires that used household appliances are not thrown into the normal municipal waste stream. Used appliances must be collected separately in order to optimize the rate of recovery and recycling of materials that compose them, and to reduce the impact on human health and on the environment.
- Page 64 BUT INTERNATIONAL 1 Avenue Spinoza 77184 Emerainville, France...