Philips FC6161 Mode D'emploi
Masquer les pouces
Voir aussi pour FC6161:
- Manuel d'utilisation (140 pages) ,
- Mode d'emploi (144 pages)

Manuels Connexes pour Philips FC6161


Sommaire des Matières pour Philips FC6161
- Page 1 All manuals and user guides at all-guides.com Register your product and get support at www.philips.com/welcome FC6161...
- Page 2 All manuals and user guides at all-guides.com...
- Page 3 All manuals and user guides at all-guides.com...
- Page 4 All manuals and user guides at all-guides.com...
- Page 5 All manuals and user guides at all-guides.com English 6 Español 16 Français 27 indonEsia 38 한국어 48 Bahasa MElayu 58 português 69 ภาษาไทย 79 Tiếng ViệT 87 繁體中文 97 简体中文 106...
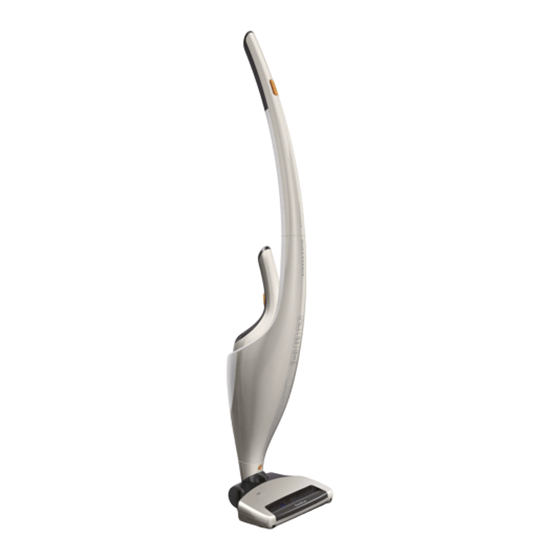
- Page 6 All manuals and user guides at all-guides.com English introduction Congratulations on your purchase and welcome to Philips! To fully benefit from the support that Philips offers, register your product at www.philips.com/welcome. general description (Fig. 1) A Stick On/off button MAX button for maximum power...
- Page 7 Always use the vacuum cleaner with the filter unit assembled. Electromagnetic fields (EMF) This Philips appliance complies with all standards regarding electromagnetic fields (EMF). If handled properly and according to the instructions in this user manual, the appliance is safe to use based on scientific evidence available today.
- Page 8 All manuals and user guides at all-guides.com English Fasten the screw with a screwdriver or coin. Place the stick on the floor nozzle (‘click’) (Fig. 4). preparing for use Charging the batteries It takes approx. 7 hours to fully charge the batteries. Put the adapter of the charging base in the wall socket. Place the handheld vacuum cleaner in the stick (‘click’) (Fig.
- Page 9 All manuals and user guides at all-guides.com English If you want to leave the appliance for a while or if you want to remove the handheld vacuum cleaner from the stick during use, you can use the parking position. Push the stick towards the floor nozzle to put it in parking position (Fig. 10).
- Page 10 All manuals and user guides at all-guides.com English Quick emptying You can empty the dust compartment quickly in the following way: Press the nozzle release button (1) and take the detachable nozzle off the handheld vacuum cleaner (2) (Fig. 14). Shake the contents of the dust compartment into a dustbin (Fig. 15). First attach the bottom of the detachable nozzle and then push the top of the detachable nozzle towards the vacuum cleaner until it locks into place (‘click’). (Fig. 16) thorough cleaning You can empty and clean the dust compartment thoroughly in the following way: Hold the handheld vacuum cleaner over a dustbin, press the dust compartment release...
- Page 11 All manuals and user guides at all-guides.com English Clean the inner filter and the outer filter with a brush or with a standard vacuum cleaner if they are very dirty. Note: If necessary you can clean the inner filter and the outer filter in cold or lukewarm water. Dry the inner and outer filter thoroughly before you use the filter unit again. Place the inner filter back onto the filter holder (1) and turn it anticlockwise to attach it (2).
- Page 12 To purchase accessories for this appliance, please visit our online shop at www.shop.philips.com/ service. If the online shop is not available in your country, go to your Philips dealer or a Philips service centre. If you have any difficulties obtaining accessories for your appliance, please contact the Philips Consumer Care Centre in your country.
- Page 13 Remove the rechargeable batteries (Fig. 41). guarantee and service If you need service or information or if you have a problem, please visit the Philips website at www. philips.com/support or contact the Philips Consumer Care Centre in your country. You find its phone number in the worldwide guarantee leaflet.
- Page 14 If you can switch on the Take the appliance to your dealer or a appliance after a few hours service centre authorised by Philips for charging, the charging light is repair. defective. If the appliance still does not Take the appliance to your dealer or a charge, it may be defective.
- Page 15 All manuals and user guides at all-guides.com English Problem Cause Solution If you are using the stick, Wipe the contact strips on the stick and the contact strips on the stick the handheld vacuum cleaner clean with a and/or on the handheld dry cloth.
- Page 16 All manuals and user guides at all-guides.com Español introducción Enhorabuena por la compra de este producto y bienvenido a Philips. Para sacar el mayor partido de la asistencia que Philips le ofrece, registre su producto en www.philips.com/welcome. Descripción general (fig. 1) A Bombilla de tubo Botón de encendido/apagado...
- Page 17 Utilice siempre el aspirador con la unidad de filtrado puesta. Campos electromagnéticos (CEM) Este aparato Philips cumple todos los estándares sobre campos electromagnéticos (CEM). Si se utiliza correctamente y de acuerdo con las instrucciones de este manual, el aparato se puede usar...
- Page 18 All manuals and user guides at all-guides.com Español Antes de utilizarlo por primera vez Quite cualquier lámina protectora o plástico del aparato. Coloque el soporte trasero en la parte trasera de la base de carga (“clic”) (fig. 2). Nota: Sólo tiene que hacer esto una vez. No desmonte nunca el soporte trasero de la base de carga. Nota: No tiene que colocar el soporte trasero si la estabilidad adicional que éste proporciona no es necesaria.
- Page 19 All manuals and user guides at all-guides.com Español uso de la unidad de tubo Puede utilizar la unidad de tubo para limpiar suelos y alfombras. Cuando utilice la unidad de tubo, asegúrese siempre de que el compartimento para el polvo esté colocado en el aspirador de mano, para evitar deterioros del mismo.
- Page 20 All manuals and user guides at all-guides.com Español accesorios El aspirador de mano incorpora los siguientes accesorios: una boquilla estrecha para aspirar los rincones o espacios estrechos. un cepillo pequeño para limpiar las superficies delicadas. Coja el accesorio que desee utilizar del compartimento para guardar de la base de carga. Acople el accesorio a la boquilla desmontable (fig. 13). Limpieza Antes de limpiar la base de carga, desenchufe siempre el adaptador de la toma de corriente. Limpie el exterior del aspirador de mano, el exterior de la unidad de tubo y el exterior de la base de carga con un paño húmedo.
- Page 21 All manuals and user guides at all-guides.com Español Limpieza de la unidad de filtrado Asegúrese de limpiar la unidad de filtrado con regularidad. Limpieza rápida Puede limpiar de forma rápida la unidad de filtrado de la siguiente manera: Sostenga el aspirador de mano sobre el cubo de la basura, presione el botón de liberación del compartimento para el polvo (1) y quítelo (2) (fig. 17).
- Page 22 All manuals and user guides at all-guides.com Español Pulse el botón de liberación del cepillo para suelos (1) para desmontar el tubo del cepillo para suelos (2) (fig. 27). Retire las partículas de suciedad de gran tamaño de la junta. Vuelva a colocar el tubo en el cepillo para suelos (“clic”). Limpieza del cepillo giratorio Si el piloto de “cepillo bloqueado”...
- Page 23 Si desea adquirir accesorios para este aparato, visite nuestra tienda en línea en www.shop.philips. com/service. Si la tienda en línea no está disponible en su país, diríjase a su distribuidor Philips o a un centro de servicio Philips. Si tiene cualquier dificultad para obtener accesorios para su aparato, póngase en contacto con el Servicio de Atención al Cliente de Philips en su país.
- Page 24 Si necesita información o si tiene algún problema, visite la página Web de Philips en www.philips. com/support, o póngase en contacto con el Servicio de Atención al Cliente de Philips de su país. Hallará el número de teléfono en el folleto de la garantía mundial. Si no hay Servicio de Atención al Cliente en su país, diríjase a su distribuidor local de Philips.
- Page 25 Si puede encender el aparato Lleve el aparato a su distribuidor o a un tras unas horas de carga, el centro de servicio autorizado por Philips piloto de carga está para su reparación. defectuoso. Si el aparato sigue sin cargarse, Lleve el aparato a su distribuidor o a un puede estar defectuoso.
- Page 26 All manuals and user guides at all-guides.com Español Problema Causa Solución El aspirador de mano Puede que el compartimento Vacíe el compartimento para el polvo. no funciona para el polvo esté lleno. correctamente cuando uno de los accesorios está conectado a la boquilla desmontable.
- Page 27 All manuals and user guides at all-guides.com Français introduction Félicitations pour votre achat et bienvenue dans l’univers Philips ! Pour profiter pleinement de l’assistance Philips, enregistrez votre produit sur le site à l’adresse suivante : www.philips.com/welcome. Description générale (fig. 1) A Aspirateur balai Bouton marche/arrêt...
- Page 28 Installez toujours l’ensemble filtre dans l’aspirateur avant de l’utiliser. Champs électromagnétiques (CEM) Cet appareil Philips est conforme à toutes les normes relatives aux champs électromagnétiques (CEM). Il répond aux règles de sécurité établies sur la base des connaissances scientifiques actuelles s’il est manipulé...
- Page 29 All manuals and user guides at all-guides.com Français Enclenchez la section supérieure du tube sur la section inférieure (clic) (fig. 3). Remarque : Cette opération n’est à exécuter qu’une seule fois. Ne séparez jamais la section supérieure du tube de sa section inférieure. Serrez la vis à l’aide d’un tournevis ou d’une pièce de monnaie. Insérez l’aspirateur balai dans la brosse pour sol (clic) (fig. 4). avant l’utilisation Charge des batteries Une charge complète de l’appareil dure environ 7 heures. Branchez l’adaptateur de la base de recharge sur la prise secteur.
- Page 30 All manuals and user guides at all-guides.com Français Si vous souhaitez retourner à la vitesse normale, appuyez de nouveau sur le bouton MAX. Remarque : Pendant l’utilisation, le voyant « Brosse bloquée » peut clignoter en rouge pour indiquer que la brosse rotative est bloquée.
- Page 31 All manuals and user guides at all-guides.com Français nettoyage Débranchez toujours l’adaptateur de la prise secteur avant de nettoyer la base de recharge. Nettoyez l’extérieur de l’aspirateur à main, de l’aspirateur balai et de la base de recharge à l’aide d’un chiffon humide. Pour obtenir des informations sur le vidage et le nettoyage du compartiment à poussière et sur le nettoyage de l’ensemble filtre, suivez les instructions des sections « Vidage et nettoyage du compartiment à poussière » et « Nettoyage de l’ensemble filtre » ci-dessous. Vidage et nettoyage du compartiment à poussière Veillez à vider et nettoyer régulièrement le compartiment à poussière de l’aspirateur à main. Remarque : Il n’est pas nécessaire de placer l’aspirateur à main au-dessus d’une poubelle lorsque vous l’ouvrez.
- Page 32 All manuals and user guides at all-guides.com Français Nettoyage de l’ensemble filtre Veillez à nettoyer l’ensemble filtre régulièrement. nettoyage rapide Pour nettoyer l’ensemble filtre rapidement, suivez la procédure ci-dessous : Tenez l’aspirateur à main au-dessus d’une poubelle, appuyez sur le bouton de déverrouillage du compartiment à poussière (1), puis retirez le compartiment à poussière (2) (fig. 17). Tournez le mécanisme de vibration qui se trouve dans le porte-filtre plusieurs fois. (fig. 21) Le mécanisme de vibration permet de détacher la poussière du filtre intérieur. Pour remettre en place le compartiment à poussière, alignez la rainure du compartiment à poussière avec la projection de l’aspirateur à main. Commencez par fixer le bas du compartiment à poussière (1), puis poussez sa partie supérieure vers l’appareil (2) jusqu’à ce qu’il s’enclenche (clic). (fig. 20) nettoyage en profondeur Pour nettoyer soigneusement l’ensemble filtre, suivez la procédure ci-dessous : Tenez l’appareil au-dessus d’une poubelle, appuyez sur le bouton de déverrouillage du compartiment à poussière (1), puis retirez le compartiment à poussière (2) (fig. 17).
- Page 33 All manuals and user guides at all-guides.com Français Appuyez sur le bouton de déverrouillage de la brosse pour sol (1) pour détacher l’aspirateur balai de la brosse pour sol (2) (fig. 27). Enlevez les grandes particules de saleté de l’élément d’articulation. Insérez à nouveau l’aspirateur balai dans la brosse pour sol (clic). nettoyage de la brosse rotative Lorsque le voyant « Brosse bloquée » se met à clignoter rouge, la brosse rotative est bloquée. Si cette situation se produit, suivez les étapes ci-dessous pour nettoyer la brosse rotative. Appuyez sur le bouton marche/arrêt de l’aspirateur balai pour éteindre l’appareil.
- Page 34 Ne jetez pas les batteries avec les ordures ménagères mais déposez-les dans un point de collecte. Vous pouvez également déposer l’appareil dans un Centre Service Agréé Philips. Les employés de ce centre retireront les batteries pour vous et les mettront au rebut d’une manière respectueuse de l’environnement (fig. 36).
- Page 35 Web de Philips à l’adresse www.philips.com/ support ou contactez le Service Consommateurs Philips de votre pays. Vous trouverez le numéro de téléphone correspondant sur le dépliant de garantie internationale. S’il n’existe pas de Service Consommateurs Philips dans votre pays, renseignez-vous auprès de votre revendeur Philips local.
- Page 36 Si vous pouvez allumer l’appareil Confiez l’appareil à votre revendeur ou après quelques heures de à un Centre Service Agréé Philips pour chargement, le voyant de charge réparation. est défectueux. Si l’appareil ne se charge toujours Confiez l’appareil à...
- Page 37 All manuals and user guides at all-guides.com Français Problème Cause Solution Il est possible que l’ensemble filtre Placez correctement l’ensemble filtre ne soit pas placé correctement dans le compartiment à poussière. dans le compartiment à poussière. L’aspirateur à Le compartiment à poussière est Videz le compartiment à...
- Page 38 All manuals and user guides at all-guides.com indonEsia pendahuluan Selamat atas pembelian Anda dan selamat datang di Philips! Untuk memanfaatkan sepenuhnya dukungan yang ditawarkan Philips, daftarkan produk Anda di www.philips.com/welcome. gambaran umum (gbr. 1) A Tongkat Tombol on/off Tombol MAX untuk daya maksimum...
- Page 39 Selalu gunakan penyedot debu bersama unit filter yang terpasang. Medan elektromagnet (EMF) Alat dari Philips ini telah mematuhi semua standar yang berkenaan dengan medan elektromagnet (EMF). Jika ditangani dengan benar dan sesuai dengan instruksi yang diberikan dalam petunjuk penggunaan ini, alat ini aman digunakan berdasarkan pada bukti ilmiah yang kini tersedia.
- Page 40 All manuals and user guides at all-guides.com indonEsia persiapan penggunaan Mengisi daya baterai Mengisi daya baterai hingga penuh memerlukan waktu kurang lebih 7 jam. Pasang adaptor dudukan pengisi daya di stopkontak dinding. Pasang penyedot debu genggam pada tongkat (hingga berbunyi ‘klik’) (Gbr. 5). Catatan: Pastikan penyedot debu genggam dalam keadaan mati saat Anda memasangnya ke tongkat.
- Page 41 All manuals and user guides at all-guides.com indonEsia Jika Anda ingin meninggalkan alat sebentar atau jika Anda ingin melepaskan penyedot debu genggam dari tongkat sewaktu digunakan, Anda dapat menggunakan posisi parkir. Tekan tongkatnya ke arah nozel lantai untuk menempatkannya ke posisi parkir (Gbr. 10). Setelah digunakan, tekan tombol on/off untuk mematikan alat. Menggunakan penyedot debu genggam Anda dapat menggunakan penyedot debu genggam tanpa tongkat untuk menyedot debu pada area yang kecil dan sulit dijangkau, seperti meja, furnitur, kursi mobil, dll.
- Page 42 All manuals and user guides at all-guides.com indonEsia pengosongan cepat Anda dapat mengosongkan wadah debu secara cepat dengan cara berikut ini: Tekan tombol pelepas nozel (1) dan lepaskan nozel lepas-pasang dari penyedot debu genggam (2) (Gbr. 14). Guncangkan isi wadah debu ke dalam tempat sampah (Gbr. 15). Pasang bagian bawah nozel lepas-pasang terlebih dulu, kemudian tekan bagian atasnya ke arah alat hingga terkunci pada tempatnya (hingga berbunyi ‘klik’). (Gbr. 16) pembersihan saksama Anda dapat mengosongkan dan membersihkan wadah debu secara saksama dengan cara berikut ini: Pegang penyedot debu genggam di atas tempat sampah, tekan tombol pelepas wadah debu (1)
- Page 43 All manuals and user guides at all-guides.com indonEsia Bersihkan filter dalam dan filter luar dengan sikat atau dengan penyedot debu standar jika sangat kotor. Catatan: Jika perlu, Anda dapat membersihkan filter dalam dan filter luar dengan air dingin atau suam- suam kuku. Keringkan filter dalam dan filter luar dengan saksama sebelum Anda menggunakan unit filter kembali.
- Page 44 Kami sarankan Anda mengganti filter dalam dan filter luar setelah lama digunakan atau jika Anda tidak dapat lagi membersihkannya dengan benar. Filter dalam yang baru tersedia dengan nomor tipe 4322 004 93471. Hubungi dealer Philips Anda. Mengganti filter dalam dan filter luar Lepaskan unit filter dari wadah debu (Gbr. 18).
- Page 45 Untuk membeli aksesori alat ini, harap kunjungi toko online kami di www.shop.philips.com/ service. Jika toko online tidak ada di negara Anda, kunjungi dealer Philips atau pusat layanan Philips. Jika Anda mengalami kesulitan untuk mendapatkan aksesori alat ini, hubungi Pusat Layanan Konsumen Philips di negara Anda.
- Page 46 Jika alat masih tidak mengisi, Bawalah alat Anda ke dealer atau pusat berarti alatnya rusak. layanan resmi Philips untuk diperiksa atau diperbaiki Penyedot debu Wadah debu mungkin tidak Pasang wadah debu ke penyedot debu genggam tidak dipasang dengan benar.
- Page 47 All manuals and user guides at all-guides.com indonEsia Masalah Penyebab Solusi Jika Anda menggunakan Seka strip kontak pada tongkat dan tongkat, strip kontak pada penyedot debu genggam dengan kain tongkat dan/atau pada penyedot kering. Lalu pasang penyedot debu debu genggam mungkin kotor genggam pada tongkat.
- Page 48 All manuals and user guides at all-guides.com 한국어 소개 필립스 제품을 구입해 주셔서 감사합니다! 필립스가 드리는 지원 혜택을 받으실 수 있도 록 www.philips.co.kr에서 제품을 등록하십시오. 각 부의 명칭 (그림 1) A 스틱 1 전원 버튼 2 최대 출력을 제공하는 MAX 버튼...
- Page 49 All manuals and user guides at all-guides.com 한국어 중요 사항 본 제품을 사용하기 전에 이 사용 설명서를 주의 깊게 읽고 나중에 참조할 수 있도록 잘 보관하십시오. 위험 물, 다른 용액 또는 가연성 물질은 절대 흡입하지 마십시오. 타고 남은 재는 완전히 꺼져서...
- Page 50 All manuals and user guides at all-guides.com 한국어 나사를 드라이버나 동전으로 조이십시오. 스틱을 바닥 노즐에 ‘딸깍’ 소리가 나도록 장착하십시오 (그림 4). 사용 전 준비 배터리 충전 배터리를 완전히 충전하는 데는 약 7시간이 걸립니다. 충전대의 어댑터를 벽면 콘센트에 꽂으십시오. 핸디형 진공 청소기를 스틱에 ‘딸깍’ 소리가 나도록 장착하십시오 (그림 5). 참고: 스틱에 장착할 때 핸디형 진공 청소기의 전원을 껐는지 확인하십시오. 청소기를 충전대에 올려놓으십시오 (그림 6). 충전하는 동안에는 충전 표시등이 켜집니다. (그림 7) 참고: 충전 표시등은 배터리 충전량을 알려주지는 않습니다. 배터리가 완전히 충전되면 충전 과정이 멈추고 에너지 절약을 위해 충전 표시등이 꺼 집니다. 참고: 배터리가 완전히 충전된 후에도 제품을 충전대에 그대로 두셔도 됩니다. 단, 5분 간격으로 충전 표시등이 3초간 켜지는데, 이것은 배터리가 완전히 충전되어 있는지 여부 를 충전대가 확인하고 있다는 것을 나타냅니다. 참고: 청소기의 전원을 켠 채로 충전대에 놓으면 제품이 2초 후에 자동으로 꺼지고 배터 리가 충전되지 않습니다. 에너지 절약 장기간 제품을 사용하지 않을 경우, 에너지 절약을 위해 벽면 콘센트에서 어댑터를 뽑아 놓으십시오.
- Page 51 All manuals and user guides at all-guides.com 한국어 제품을 잠시 그 자리에 두거나 사용하는 동안 스틱에서 핸디형 진공 청소기를 분리하려는 경우 파킹 위치를 사용할 수 있습니다. 파킹 위치에 놓이도록 스틱을 바닥 노즐 쪽으로 미십시오 (그림 10). 사용 후에는 전원 버튼을 눌러 제품의 전원을 끄십시오. 핸디형 진공 청소기 사용 스틱 없이 핸디형 진공 청소기를 사용하면 테이블, 가구, 자동차 시트 등의 작고 잘 닿지 않는 부분을 청소할 수 있습니다. 핸디형 진공 청소기가 완전 충전되면 12분 간 작동할 수 있습니다. 핸디형 진공 청소기가 스틱에 장착된 경우 스틱에서 핸디형 진공 청소기를 분리하기...
- Page 52 All manuals and user guides at all-guides.com 한국어 먼저 분리형 노즐의 바닥을 부착한 다음 ‘딸깍’ 소리가 나며 고정될 때까지 분리형 노즐의 상단을 진공 청소기 쪽으로 밀어 주십시오. (그림 16) 꼼꼼하게 청소하기 다음과 같은 방법으로 먼지통을 비우고 깨끗하게 청소할 수 있습니다. 휴지통 위에서 핸디형 진공 청소기를 들고 먼지통 분리 버튼을 누른 다음(1) 먼지통 을 분리하십시오(2) (그림 17). 먼지통에서 필터를 분리하십시오 (그림 18). 휴지통에 대고 먼지통을 털어 내용물을 비우십시오 (그림 19). 필요한 경우 젖은 천을 사용하여 먼지통을 닦으십시오. 필요한 경우, 필터를 청소하십시오. 아래의 ‘필터 장치 청소’란을 참조하십시오. 6 필터를 먼지통에 다시 넣으십시오. 7 분리한 먼지통을 다시 부착하려면 먼지통 슬롯을 핸디형 진공 청소기의 돌출부에 맞 추고, 먼지통 아래쪽을 먼저 부착한 다음(1), 위쪽 부분을 딸각 소리가 나면서 잠기 도록 진공 청소기 쪽으로 미십시오(2). (그림 20) 필터 장치 청소 필터를 정기적으로 청소하십시오. 간단하게 청소하기 다음과 같은 방법으로 필터 장치를 간단하게 청소할 수 있습니다. 휴지통 위에서 핸디형 진공 청소기를 들고 먼지통 분리 버튼을 누른 다음(1) 먼지통...
- Page 53 All manuals and user guides at all-guides.com 한국어 8 필터를 먼지통에 다시 넣으십시오 (그림 26). 참고: 필터 장치가 올바르게 끼워졌는지 확인하십시오. ‘Up’ 단어가 먼지통의 상단 쪽을 향해야 합니다. 9 분리한 먼지통을 다시 부착하려면 먼지통 슬롯을 핸디형 진공 청소기의 돌출부에 맞 추고, 먼지통 아래쪽을 먼저 부착한 다음(1), 위쪽 부분을 딸각 소리가 나면서 잠기 도록 진공 청소기 쪽으로 미십시오(2). (그림 20) 바닥 노즐 조인트 청소 큰 먼지 조각이 들어가면 바닥 노즐의 조인트가 막힐 수 있습니다. 이러한 경우, 다음 단 계에 따라 조인트를 청소하십시오. 스틱의 전원 버튼을 눌러서 제품의 전원을 끄십시오. 핸디형 진공 청소기 분리 버튼을 누르고(1) 스틱에서 핸디형 진공 청소기를 분리하십 시오(2) (그림 11). 바닥 노즐 분리 버튼을 눌러(1) 바닥 노즐에서 스틱을 분리하십시오(2) (그림 27). 조인트에서 큰 먼지 입자를 제거하십시오.
- Page 54 참고: 필터 장치가 올바르게 끼워졌는지 확인하십시오. ‘Up’ 단어가 먼지통의 상단 쪽을 향해야 합니다. 액세서리 주문 본 제품의 액세서리를 주문하려면 필립스 웹사이트 www.philips.co.kr을 방문하십시오. 해당 국가에서 온라인 쇼핑이 불가능한 경우 필립스 대리점이나 필립스 서비스 센터에 문의하십시오. 본 제품의 액세서리를 구하기 어려운 경우에는 필립스 고객 상담실로 문 의하십시오. 연락처 정보는 전세계 제품 보증서에 기재되어 있습니다.
- Page 55 객 상담실: (080)600-6600(수신자부담) 문제 해결 이 란은 본 제품을 사용하면서 가장 일반적으로 경험하게 되는 문제와 그 해결 방법을 제 시합니다. 아래의 정보로도 문제를 해결할 수 없는 경우 www.philips.com/support를 방 문하여 자주 묻는 질문(FAQ) 목록을 참조하거나 필립스 고객 상담실로 문의하십시오. 문제점...
- Page 56 All manuals and user guides at all-guides.com 한국어 문제점 원인 해결책 충전 후 몇 시간이 지난 후에 제 필립스 대리점이나 필립스 지정 품 전원을 켤 수 있는 경우 충전 서비스 센터에서 제품의 수리를 표시등에 결함이 있는 것입니다. 요청하십시오. 제품이 여전히 충전되지 않을 경 필립스...
- Page 57 All manuals and user guides at all-guides.com 한국어 문제점 원인 해결책 ‘브러시 막 롤러 브러시가 막혔습니다. 롤러 브러시를 청소하십시오 힘’ 표시등이 (‘청소’란 참조). 빨간색으로 깜 박거립니다. 스틱을 두꺼운 카페트에서 사용 이 경우 롤러 브러시가 막히지 않 하면 ‘브러시 막힘’ 표시등이 고...
- Page 58 All manuals and user guides at all-guides.com Bahasa MElayu pengenalan Tahniah atas pembelian anda, dan selamat datang ke Philips! Untuk mendapat manfaat sepenuhnya daripada sokongan yang ditawarkan oleh Philips, daftarkan produk anda di www.philips.com/ welcome. perihalan umum (gamb. 1) A Batang...
- Page 59 Selalu gunakan pembersih vakum dengan unit turas yang dipasang. Medan elektromagnet (EMF) Perkakas Philips ini mematuhi semua standard berkenaan medan elektromagnet (EMF). Jika perkakas ini dikendalikan dengan betul dan mengikut arahan dalam manual pengguna ini, ia selamat untuk digunakan berdasarkan bukti saintifik yang terdapat pada hari ini.
- Page 60 All manuals and user guides at all-guides.com Bahasa MElayu Bersedia untuk menggunakan Mengecas bateri Bateri perkakas memerlukan lebih kurang 7 jam untuk dicas sepenuhnya. Letakkan penyesuai tapak pengecasan di dalam soket dinding. Letakkan pembersih vakum kendalian tangan di dalam unit batang (‘klik’) (Gamb. 5). Nota: Pastikan pembersih vakum kendalian tangan dimatikan apabila anda meletakkannya di dalam batang.
- Page 61 All manuals and user guides at all-guides.com Bahasa MElayu Jika anda hendak meninggalkan perkakas buat sementara waktu atau jika anda hendak menanggalkan pembersih vakum kendalian tangan daripada unit batang sepanjang penggunaan, anda boleh menggunakan kedudukan penempatan. Tolak batang ke arah muncung lantai untuk meletakkannya pada kedudukan penempatan (Gamb.
- Page 62 All manuals and user guides at all-guides.com Bahasa MElayu Mengosongkan dan membersihkan petak habuk Pastikan anda mengosongkan dan membersihkan petak habuk pembersih vakum kendalian tangan dengan kerap. Nota: Anda tiidak perlu memegang pembersih vakum kendalian tangan di atas bakul sampah ketika membukanya.
- Page 63 All manuals and user guides at all-guides.com Bahasa MElayu Pegang perkakas di atas tong sampah, tekan butang pelepas petak habuk (1) dan keluarkan petak habuk (2) (Gamb. 17). Keluarkan unit turas dari bekas habuk (Gamb. 18). Putar penuras luar mengikut arah jam (1) dan keluarkannya dari pemegang penuras (2) (Gamb.
- Page 64 Penuras dalam yang baru boleh didapati dengan nombor jenis 4322 004 93471. Hubungi wakil penjual Philips anda. Mengganti penuras dalam dan penuras luar Keluarkan unit turas dari bekas habuk (Gamb. 18).
- Page 65 Untuk membeli aksesori perkakas ini, sila lawati kedai dalam talian kami di www.shop.philips. com/service. Jika kedai dalam talian tidak tersedia di negeri anda, pergi ke pembekal Philips atau pusat khidmat Philips. Jika anda menghadapi kesukaran untuk mendapatkan aksesori bagi perkakas anda, sila hubungi Pusat Layanan Pelanggan Philips di negara anda.
- Page 66 Mencarisilapan Bab ini merumuskan masalah paling lazim yang mungkin anda hadapi dengan perkakas ini. Jika anda tidak dapat menyelesaikan masalah dengan maklumat di bawah, lawati www.philips.com/support untuk mendapatkan senarai soalan lazim atau hubungi Pusat Layanan Pelanggan di negara anda. Masalah...
- Page 67 All manuals and user guides at all-guides.com Bahasa MElayu Masalah Sebab Penyelesaian Pembersih vakum Petak habuk mungkin tidak Pasang petak habuk pada pembersih kendalian tangan dipasang dengan betul pada vakum kendalian tangan dengan betul. tidak memvakum perkakas. dengan betul. Petak habuk mungkin sudah Kosongkan petak habuk.
- Page 68 All manuals and user guides at all-guides.com Bahasa MElayu Masalah Sebab Penyelesaian Lampu ‘berus tersumbat’ mungkin Dalam kes ini, berus golek tidak tersekat akan berkelip merah kerana anda dan kuasa sedutan tidak berkurangan. menggunakan unit batang pada Anda boleh terus menggunakan unit permaidaini yang berpail tebal.
- Page 69 All manuals and user guides at all-guides.com português introdução Parabéns pela sua compra e bem-vindo à Philips! Para tirar todo o partido da assistência fornecida pela Philips, registe o seu produto em www.philips.com/welcome. Descrição geral (fig. 1) A Tubos Botão ligar/desligar Botão MAX para potência máxima...
- Page 70 Utilize sempre o aspirador com o filtro colocado. Campos electromagnéticos (CEM) Este aparelho da Philips respeita todas as normas relacionadas com campos electromagnéticos (CEM). Se for manuseado correctamente e de acordo com as instruções neste manual do utilizador, este aparelho proporciona uma utilização segura, como demonstrado pelas provas científicas actualmente disponíveis.
- Page 71 All manuals and user guides at all-guides.com português Preparar para a utilização Carregar as baterias Para carregar totalmente as baterias são necessárias cerca de 7 horas. Ligue o adaptador da base de carga à tomada eléctrica. Coloque o aspirador portátil no cabo (ouve-se um estalido) (fig. 5). Nota: Assegure-se de que o aspirador portátil está desligado quando o colocar no cabo. Coloque o aparelho na base de carga (fig. 6).
- Page 72 All manuals and user guides at all-guides.com português Se quiser parar de utilizar o aparelho temporariamente ou se quiser retirar o aspirador portátil do cabo durante a utilização, pode utilizar a posição de arrumação. Empurre o cabo em direcção à escova para o chão para a posição de arrumação (fig. 10). Após a utilização, prima o botão ligar/desligar para desligar o aparelho. Utilizar o aspirador portátil Pode utilizar o aspirador portátil sem o cabo para aspirar áreas pequenas e difíceis de alcançar, como mesas, mobiliário, bancos de automóvel, etc. Quando o aspirador portátil estiver completamente carregado, tem autonomia para 12 minutos. Se o aspirador portátil estiver colocado no cabo, prima o botão ligar/desligar no cabo para desligar o aparelho, antes de retirar o aspirador portátil do cabo.
- Page 73 All manuals and user guides at all-guides.com português Prima o botão de libertação do bocal (1) e retire o bocal amovível do aspirador portátil (2) (fig. 14). Esvazie o conteúdo do compartimento para o pó para um caixote do lixo (fig. 15). Primeiro encaixe o fundo do bocal amovível e, em seguida, pressione a parte superior da escova amovível em direcção ao aspirador até esta bloquear na posição correcta (ouve-se um estalido). (fig. 16) Limpeza profunda...
- Page 74 All manuals and user guides at all-guides.com português Limpe o filtro de entrada e o filtro de saída com uma escova ou com um aspirador convencional se estes estiverem muito sujos. Nota: Se necessário, pode lavar os filtros de entrada e de saída em água fria ou morna. Seque completamente os filtros de entrada e de saída antes de utilizar novamente o filtro. Coloque novamente o filtro de entrada no respectivo suporte (1) e rode-o para a esquerda para o encaixar (2). (fig. 24) Coloque novamente o filtro de saída no respectivo suporte (1) e rode-o para a esquerda...
- Page 75 Aconselhamos a substituição dos filtros de entrada e de saída após um período de utilização prolongado ou quando já não for possível limpá-los adequadamente. Os filtros de entrada novos estão disponíveis sob a referência 4322 004 93471. Contacte o seu distribuidor Philips. Substituir os filtros de entrada e de saída Retire o filtro do compartimento para o pó (fig. 18).
- Page 76 Para comprar acessórios para este aparelho, visite a nossa loja online em www.shop.philips.com/ service. Se não tiver uma loja online disponível no seu país, dirija-se ao seu distribuidor Philips ou a um centro de assistência Philips. Se tiver dificuldades em obter acessórios para o seu aparelho, contacte o Centro de Apoio ao Cliente da Philips no seu país.
- Page 77 Se o aparelho continuar a não Leve o aparelho ao seu distribuidor ou a carregar, este poderá estar um centro de assistência autorizado pela avariado. Philips para ser inspeccionado ou reparado O aspirador O compartimento para o pó Encaixe o compartimento para o pó...
- Page 78 All manuals and user guides at all-guides.com português Problema Causa Solução A junta da escova para chão pode Limpe a junta da escova para chão estar bloqueada por partículas de (consulte o capítulo “Limpeza”). sujidade grandes. O pó sai para O compartimento para o pó...
- Page 79 ขอแสดงความยิ น ดี ท ี ่ ค ุ ณ สั ่ ง ซื ้ อ และยิ น ดี ต อ นรั บ ส ผ ลิ ต ภั ณ ฑ ข อง Philips! เพื ่ อ ให ค ุ ณ...
- Page 80 ผลิ ต ภั ณ ฑ ข อง Philips ได ม าตรฐานด า นคลื ่ น แม เ หล็ ก ไฟฟ า (EMF) หากมี ก ารใช ง านอย า งเหมาะสมและสอดคล อ งกั บ คำ า แนะนำ า ในค ม ื อ...
- Page 81 All manuals and user guides at all-guides.com ภาษาไทย การเตรี ย มตั ว ก อ นใช ง าน การชาร จ แบตเตอรี ่ ใช เ วลา 7 ชม. ในการชาร จ แบตเตอรี ่ ใ ห เ ต็ ม เสี ย บอะแดปเตอร ข องแท น ชาร จ เข า กั บ เต า รั บ บนผนั ง ประกอบเครื...
- Page 82 All manuals and user guides at all-guides.com ภาษาไทย กดปุ ่ ม ปลดเครื ่ อ งดู ด ฝุ ่ น แบบมื อ ถื อ (1) และถอดเครื ่ อ งออกจากท อ (2) (รู ป ที ่ 11) กดปุ ่ ม เป ด /ป ด เพื ่ อ เป ด สวิ ต ช เ ครื ่ อ งดู ด ฝุ ่ น แบบมื อ ถื อ (รู ป ที ่ 12) หลั...
- Page 83 All manuals and user guides at all-guides.com ภาษาไทย การทำ า ความสะอาดแผ น กรอง คุ ณ ควรทำ า ความสะอาดชุ ด แผ น กรองฝุ ่ น เป น ประจำ า การทำ า ความสะอาดอย า งรวดเร็ ว คุ ณ สามารถทำ า ความสะอาด ชุ ด แผ น กรองฝุ ่ น ได อ ย า งรวดเร็ ว ด ว ยวิ ธ ี ต อ ไปนี ้ : ถื...
- Page 84 หากต อ งการสั ่ ง ซื ้ อ อุ ป กรณ เ สริ ม สำ า หรั บ เครื ่ อ งนี ้ ให ไ ปที ่ ร า นค า ออนไลน ข องเรา www.shop.philips.com/service หากไม ม ี ร ...
- Page 85 หากคุ ณ ต อ งการขอรั บ บริ ก ารหรื อ ต อ งการทราบข อ มู ล หรื อ หากคุ ณ มี ป ญ หา โปรดเข า ชมเว็ บ ไซต ข อง Philips ได ท ี ่ www.philips.com/support หรื อ ติ...
- Page 86 หากคุ ณ สามารถเป ด สวิ ต ช เ ครื ่ อ งได ห ลั ง จากก นำ า เครื ่ อ งดู ด ฝุ ่ น ไปที ่ ต ั ว แทนจำ า หน า ย Philips หรื อ ศู น ย บ ริ ก ารที ่ ไ ด ร ั บ อนุ ญ าตจ...
- Page 87 Chúc mừng bạn đã mua được sản phẩm Philips mới và chào mừng bạn đến với Philips! Để có được lợi ích đầy đủ từ sự hỗ trợ do Philips cung cấp, hãy đăng ký sản phẩm tại www.philips.com/welcome.
- Page 88 Điện từ trường (EMF) Thiết bị Philips này tuân thủ tất cả các tiêu chuẩn liên quan đến điện từ trường (EMF). Nếu được sử dụng đúng và tuân thủ các hướng dẫn trong sách hướng dẫn này, theo các bằng chứng khoa học hiện nay, việc sử...
- Page 89 All manuals and user guides at all-guides.com Tiếng ViệT Lắp tay cầm vào ống hút sàn (nghe tiếng ‘click’) (Hình 4). Chuẩn bị sử dụng máy Sạc pin Mất khoảng 7 giờ để sạc đầy pin. Cắm bộ nối tiếp của đế sạc vào ổ điện. Lắp máy hút bụi cầm tay vào tay cầm (nghe tiếng ‘click’) (Hình 5). Lưu ý: Đảm bảo rằng máy hút bụi cầm tay tắt khi lắp máy vào tay cầm. Đặt thiết bị vào đế sạc (Hình 6).
- Page 90 All manuals and user guides at all-guides.com Tiếng ViệT Sử dụng máy hút bụi cầm tay Bạn có thể sử dụng máy hút bụi cầm tay không có tay cầm để hút bụi các khu vực nhỏ và khó tiếp cận, như...
- Page 91 All manuals and user guides at all-guides.com Tiếng ViệT Làm sạch toàn bộ Bạn có thể trút sạch bụi và làm sạch ngăn chứa bụi hoàn toàn bằng cách sau: Giữ máy hút bụi cầm tay phía trên thùng rác, nhấn nút tháo ngăn chứa bụi (1) và tháo ngăn chứa bụi (2) (Hình 17). Tháo bộ lọc ra khỏi ngăn chứa bụi (Hình 18). Lắc ngăn chứa bụi bằng tay kia của bạn để trút sạch bụi vào thùng rác (Hình 19). Nếu cần, lau sạch ngăn chứa bụi bằng khăn ẩm. Nếu cần thiết, hãy vệ sinh bộ lọc. Xem thêm phần ‘Vệ sinh bộ lọc’ dưới đây. 6 Đặt bộ lọc trở lại ngăn chứa bụi. Để lắp lại ngăn chứa bụi, hãy căn cho khe trên ngăn chứa bụi khớp với chỗ lồi ra trên máy hút bụi có thể tháo rời. Trước tiên lắp phần đáy của ngăn chứa bụi (1) và sau đó đẩy phần trên của ngăn chứa bụi vào máy hút bụi (2) cho đến khi ngăn chứa bụi khớp vào đúng vị trí...
- Page 92 All manuals and user guides at all-guides.com Tiếng ViệT Đặt bộ lọc trở lại ngăn chứa bụi (Hình 26). Lưu ý: Đảm bảo rằng bạn lắp bộ phận lọc theo đúng cách. Từ ‘up’ (lên) phải trỏ lên phía trên của ngăn chứa bụi. 9 Để lắp lại ngăn chứa bụi, hãy căn cho khe trên ngăn chứa bụi khớp với chỗ lồi ra trên máy hút bụi có thể tháo rời. Trước tiên lắp phần đáy của ngăn chứa bụi (1) và sau đó đẩy phần trên của ngăn chứa bụi vào máy hút bụi (2) cho đến khi ngăn chứa bụi khớp vào đúng vị trí (nghe tiếng ‘click’). (Hình 20) Vệ...
- Page 93 Nếu không có cửa hàng trực tuyến cho quốc gia của bạn, hãy đến đại lý Philips hoặc trung tâm dịch vụ của Philips. Nếu bạn gặp bất kỳ khó khăn nào trong việc đặt mua phụ kiện, vui lòng liên hệ với Trung Tâm Chăm Sóc Khách Hàng của Philips ở quốc gia của bạn.
- Page 94 Bảo hành và dịch vụ Nếu bạn cần biết dịch vụ hay thông tin hay nếu bạn gặp trục trặc, vui lòng vào trang web của Philips tại www.philips.com/support hoặc liên hệ với Trung Tâm Chăm Sóc Khách Hàng của Philips tại quốc gia bạn.
- Page 95 Nếu bạn có thể bật thiết bị Mang thiết bị đến đại lý của bạn hoặc trung sau khi sạc một vài giờ, đèn tâm dịch vụ được ủy quyền của Philips để báo sạc bị hỏng. sửa chữa. Nếu thiết bị vẫn không sạc, Mang thiết bị...
- Page 96 All manuals and user guides at all-guides.com Tiếng ViệT Sự cố Nguyên nhân Giải pháp Máy hút bụi cầm Ngăn chứa bụi có thể đầy. Đổ sạch bụi trong ngăn chứa bụi ra. tay hoạt động không bì n h thường khi một trong các phụ...
- Page 97 All manuals and user guides at all-guides.com 繁體中文 簡介 感謝您購買本產品並歡迎加入飛利浦!請於 www.philips.com/welcome 註冊您的產品, 以善用飛利浦提供的支援。 一般說明 (圖 1) A U 型 1 開/關按鈕 2 MAX 按鈕表示最大吸力 3 手桿上部 4 連接手桿上部與下部的螺絲 5 手桿下部 6 地板吸頭接頭 7 地板吸頭釋放鈕 8 「清潔刷阻塞」指示燈 9 地板吸嘴 10 扣件 11 前輪...
- Page 98 All manuals and user guides at all-guides.com 繁體中文 重要事項 在使用本產品前,請先仔細閱讀本使用手冊,並保留使用手冊以供日後參考。 危險 請勿用來吸水或任何其它液體。請勿吸取易燃性物質,且請勿吸取未完全冷卻的灰 燼。 切勿將本產品、充電座或電源變壓器浸泡在水中或任何其他液體中,或者在水龍頭下 沖洗。 警示 在您連接電源之前,請先檢查轉換器上所標示的電壓是否與您當地的電源系統電壓一 致。 吸塵器、充電座或電源變壓器損壞時,請勿使用。 如果電源變壓器或充電座損壞,務必更換與原來型號相同的變壓器或充電座,以免發 生危險。 轉換器內含一個變壓器。請勿切斷轉換器而以其他插頭取代,否則會造成危險。 8 歲以上兒童及身體官能或心智能力退化者,或是經驗與使用知識缺乏者,可在獲得本 產品之安全使用說明,或由確認安全使用產品的人士從旁監督,並且瞭解潛在危險的 狀況下使用本產品。 請勿讓孩童將本產品當成玩具。 唯有在成人監督下,孩童才可清空集塵室、清潔濾網與本產品。。 警告 在清潔充電座之前,請務必將電源變壓器由牆上插座拔下。 本吸塵器只能使用隨附的電源變壓器及充電座進行充電。充電時電源變壓器會微微發 熱,這是正常的現象。 使用後請務必將吸塵器的電源關閉。 充電座上接點金屬片的電壓極低,因此並不會有危險。 使用時,請勿將排氣孔阻塞。 充電前請先關閉產品電源。 永遠使用吸塵器組裝隨附的濾網。 電磁波 (EMF) 本飛利浦產品符合電磁波 (Electromagnetic fields,EMF) 所有相關標準。只要使用方式正 確並依照本使用手冊之說明進行操作,根據現有的科學研究資料,使用本產品並無安全顧...
- Page 99 All manuals and user guides at all-guides.com 繁體中文 使用前準備 為電池充電 產品充飽電約需要 7 個小時。 將充電座的電源變壓器插入牆上插座。 將手提式吸塵器插入手桿 (會聽見「喀噠」一聲)。 (圖 5) 注意: 將手提式吸塵器放入手桿時,請確認電源開關已經關閉。 將產品放置在充電座上。 (圖 6) 充電指示燈亮起,表示產品正在進行充電。 (圖 7) 注意: 充電指示燈並不會提供電池電量的相關訊息。 當電池完全充飽時,充電過程會停止,充電指示燈會熄滅以節省能源。 注意: 即使電池已經充飽電了,您仍可將產品留在充電座上。每隔 5 分鐘,充電指示燈 會持續亮 3 秒。這表示充電座在檢查電池是否仍完全充飽電。 注意: 如果產品電源開啟時仍置於充電座時,產品會在 2 秒後自動關閉電源開關,且不 會為電池充電。 節約能源 如果您將有很長一段時間不會使用本產品,請將變壓器拔離牆壁的插座以節約能源。 使用此產品 此款直立式無線吸塵器的吸力無法與一般大型吸塵器相提並論。在軟質地板上的清潔效能 可能比不上一般吸塵器,但在硬式地板上的清潔效能則一樣優異。 使用手桿 您可以使用手桿清潔地板與地毯。 使用手桿時,請務必確認集塵室連接著手提式吸塵器,避免損害手提式吸塵器。 將手提式吸塵器妥善插入手桿 (會聽見「喀噠」一聲)。 (圖 5) 按下手桿的開/關按鈕,開啟電源。 (圖 8) 產品開始會以正常速度運作。使用這種速度可以獲得最佳的操作時間與最低噪音。此 速度的操作時間可超過 20 分鐘。 若要以最大速度操作產品,請按下 MAX 按鈕。採用此速度可以達到最佳的清潔效能。 此速度的操作時間是 11 分鐘。 (圖 9) 如果您想切換回正常速度,再次按下...
- Page 100 All manuals and user guides at all-guides.com 繁體中文 使用手提式吸塵器 您可以不接上手桿即使用手提式吸塵器清潔窄小區域與死角,例如桌子、家具、車內座椅 等。 手提式吸塵器完全充電後,可提供 12 分鐘的操作時間。 如果手提式吸塵器置於手桿中,從手桿移除吸塵器前,請按下手桿上的開/關按鈕以關 閉產品電源。 注意: 若在手提式吸塵器以正常速度運作時予以移除,則手提式吸塵器會在取出時以較低 的馬力操作。請關閉電源後重新啟動,以確保手提式吸塵器以完整馬力運作。 按下手提式吸塵器釋放鈕 (1) 並將手提式吸塵器從手桿移除 (2)。 (圖 11) 按開/關按鈕開啟手持式吸塵器。 (圖 12) 使用後,請再次按電源開/關按鈕,關閉手提式吸塵器電源。 注意: 將手提式吸塵器放回手桿之前,請確定已關閉電源。 注意: 如果將手提式吸塵器放入手桿時,電源仍為開啟狀態,動力刷毛將無法作用,清潔 效能將不盡理想。若要啟動動力刷毛,請按下開/關按鈕以關閉產品電源,然後再次按下 開/關按鈕以開啟產品電源。 配件 手提式吸塵器附有下列配件: 縫隙吸頭用來清除角落或狹窄的縫隙處。 毛刷頭用來清除細緻的表面。 從充電座的收納槽取出您要使用的配件。 將配件安裝至拆卸式吸頭。 (圖 13) 清潔 在清潔充電座之前,請務必將電源變壓器由牆上插座拔下。 使用濕布清潔手提式吸塵器外部、手桿外部以及充電座外部。 如需清空並清潔集塵室或清潔濾網的資訊,請遵循下方「清空並清潔集塵室」與「清 潔濾網」章節的指示。 清空並清潔集塵室 確定您定期清空與清潔清手提式吸塵器的集塵室。 注意: 在垃圾桶上方打開手提式吸塵器時,不要需一直握著。 快速清空 您可以使用下列方式快速清空集塵室:...
- Page 101 All manuals and user guides at all-guides.com 繁體中文 從集塵室拆下濾網。 (圖 18) 用手搖動集塵室將內容物清空到垃圾桶。 (圖 19) 必要時,請以濕布清潔集塵室。 必要時,請清潔濾網。請參閱下方的「清潔濾網」章節。 6 將濾網裝回集塵室中。 7 若要重新接上集塵室,請將集塵室的凹槽對準手提式吸塵器的對應點。首先連接集塵 室底部 (1),然後將集塵室上方推入手提式吸塵器 (2) 內,直到卡入定位 (會聽見「喀 噠」一聲)。 (圖 20) 清潔濾網 請確實定期清潔濾網。 快速清潔 您可以利用下列方式快速清潔濾網: 握住手提式吸塵器,下方準備一個垃圾桶承接,按下集塵室釋放鈕 (1),拆下集塵室 (2)。 (圖 17) 將濾網固定器內的振動裝置轉動幾次。 (圖 21) 振動裝置會抖落內部濾網的灰塵。 若要重新接上集塵室,請將集塵室的凹槽對準手提式吸塵器的對應點。首先連接集塵 室底部 (1),然後將集塵室上方推入手提式吸塵器 (2) 內,直到卡入定位 (會聽見「喀 噠」一聲)。 (圖 20) 徹底清潔 您可以利用下列方式徹底清潔濾網: 握住產品,下方準備一個垃圾桶承接,按下集塵室釋放鈕 (1),拆下集塵室 (2)。 (圖 17) 從集塵室拆下濾網。 (圖 18) 以順時針方向轉動外部濾網 (1),然後從濾網固定器上取下 (2)。 (圖 22) 以順時針方向轉動內部濾網 (1),然後從濾網固定器上取下 (2)。 (圖 23) 如果濾網非常髒,可以使用刷子或標準吸塵器,清潔外部濾網及內部濾網。 注意: 可視需要使用冷水或溫水清洗內部和外部濾網。再次使用濾網之前,請先徹底風乾 內部和外部濾網。 6 將內部濾網放回濾網固定器上 (1) 並以逆時針方向轉動直到裝回濾網固定器 (2)。 (圖 24) 7 將外部濾網放回濾網固定器上 (1) 並以逆時針方向轉動直到裝回濾網固定器 (2)。 (圖 25) 8 將濾網裝回集塵室中。 (圖 26) 注意: 確定您正確插入濾網。文字「up」必須指向集塵室上方。...
- Page 102 All manuals and user guides at all-guides.com 繁體中文 清潔地板吸頭接頭 地板吸頭的接頭可能會因大型灰塵顆粒而阻塞。依照下列步驟清潔接頭。 按下手桿上的開/關按鈕,關閉產品電源。 按下手提式吸塵器釋放鈕 (1) 並將手提式吸塵器從手桿移除 (2)。 (圖 11) 按下地板吸頭釋放鈕 (1) 從地板吸頭拆下手桿 (2)。 (圖 27) 移除接頭的大型灰塵顆粒。 將手桿插回地板吸頭 (會聽見「喀噠」一聲)。 清潔動力刷毛 若「清潔刷阻塞」指示燈開始閃紅燈,則表示動力刷毛已阻塞。若發生此情形,請遵照下 方步驟清潔動力刷毛。 按下手桿上的開/關按鈕,關閉產品電源。 按下手提式吸塵器釋放鈕 (1) 並將手提式吸塵器從手桿移除 (2)。 (圖 11) 按下地板吸頭釋放鈕 (1) 從地板吸頭拆下手桿 (2)。 將地板吸頭下上顛倒。 移動動力刷毛,直至切割溝槽面對著您的方向。 (圖 28) 6 使用剪刀剪下累積在動力刷毛附近的頭髮、絲線等。 (圖 29) 7 清除動力刷毛上的毛絮、毛髮和其他灰塵。 注意: 您也可以拆下動力刷毛以利清潔。 卸除動力刷毛 關閉產品。 上下顛倒地板吸頭並打開扣件。 (圖 30) 拉出地板吸頭的動力刷毛。 (圖 31) 清除動力刷毛和溝槽上的毛絮、毛髮和其他灰塵。 重新裝入動力刷毛 首先將距離扣件最遠的動力刷毛端插入吸頭,然後再將距離扣件最近的動力刷毛端插 入吸頭。 (圖 32) 關閉扣件 (會聽見「喀噠」一聲)。 (圖 33) 注意: 如果動力刷毛沒有裝好,您將無法關上扣件。 收納 將配件置於充電座的收納槽中。 (圖 34) 將手桿推向地板吸頭,使手桿放入在安置位置。 (圖 10) 您可將放在手桿中的手提式吸塵器存放在充電座中。 (圖 6)
- Page 103 新的內部濾網型號為 4322 004 93471。請洽詢飛利浦經銷商購買。 更換內部和外部濾網 從集塵室拆下濾網。 (圖 18) 以順時針方向轉動外部濾網 (1),然後再將它從濾網固定器上取下 (2)。 (圖 22) 以順時針方向轉動內部濾網 (1),然後從濾網固定器上取下 (2)。 (圖 23) 在濾網固定器上放入新的內部濾網 (1) 並且以逆時針方向轉動裝入 (2)。 (圖 24) 在濾網固定器上放入新的外部濾網 (1) 並且以逆時針方向轉動裝入 (2)。 (圖 25) 6 將濾網裝回集塵室中。 (圖 26) 注意: 確定您正確插入濾網。文字「up」必須指向集塵室上方。 訂購配件 如需購買本產品的配件,請造訪我們的線上商店:www.shop.philips.com/service。若您所 在國家沒有線上商店,請聯絡您的飛利浦經銷商或飛利浦服務中心。如果無法取得產品的 配件,請聯絡您所在國家的飛利浦客戶服務中心。如需詳細聯絡資料,請參閱全球保證 書。 新的內部濾網型號為 4322 004 93471。 新的 HEPA 濾網型號為 4322 004 93471。 新的隔濾網型號為 4222 459 49431。 新的旋轉刷毛型號為 4222 459 49571。 環境保護 本產品壽命結束時請勿與一般家庭廢棄物一併丟棄。請將該產品放置於政府指定的回 收站,此舉能為環保盡一份心力。 (圖 35) 本產品內建的充電式電池可能含有會污染環境的物質。棄置本產品前,請先取出電...
- Page 104 All manuals and user guides at all-guides.com 繁體中文 保固與服務 若您需要相關服務或資訊,或是有任何問題,請瀏覽飛利浦網站:www.philips.com/ support,或聯絡當地的飛利浦客戶服務中心,您可以在全球保證書上找到聯絡電話。若您 當地沒有客戶服務中心,請洽詢當地的飛利浦經銷商。 故障排除 本章概述您使用產品時最常遇到的問題。如果您無法利用以下資訊解決您遇到的問題,請 造訪 www.philips.com/support,或聯絡您所在國家/地區的飛利浦客戶服務中心。 問題 原因 解決方法 本產品無法運作。 電量可能不足。 為電池充電。 如果您正在使用手桿,手桿 以乾布擦拭手桿上和手提式吸塵器 上與/或手提式吸塵器上的接 上的接點金屬片,輕輕將手提式吸 點金屬片可能有髒污或無法 塵器向左右移動數次,直到聽見「 正確接觸。 喀噠」一聲。 充電指示燈沒有亮 您可能未將產品正確放置在 將產品正確放在充電座上。充電指 起與/或產品未充 充電座上。 示燈會亮起,指出產品正在充電。 電。 您可能未將轉換器正確插入 將轉換器正確地插入插座。 牆壁插座中。...
- Page 105 All manuals and user guides at all-guides.com 繁體中文 問題 原因 解決方法 灰塵會從手提式吸 集塵室可能是滿的。 清空集塵室。 塵器溢出。 可能未正確安裝集塵室。 正確安裝集塵室到手提式吸塵器 中。 濾網可能未正確放入集塵室 將濾網放入集塵室中。 中。 當拆卸式吸頭裝上 集塵室可能是滿的。 清空集塵室。 其中一個配件時, 手提式吸塵器無法 正確地運作。 配件可能阻塞。 清除配件中的堵塞物。 濾網可能堵塞。 清洗內部濾網和外部濾網 (參閱「清 潔」單元)。 「清潔刷阻塞」指 動力刷毛阻塞。 請清潔動力刷毛 (請參閱「清潔」單 示燈閃紅燈。 元)。 「清潔刷阻塞」指示燈可能 如果動力刷毛未阻塞且吸力未減...
- Page 106 All manuals and user guides at all-guides.com 简体中文 简介 感谢您的惠顾,欢迎光临飞利浦!为了您能充分享受飞利浦提供的支持,请在 www. philips.com/welcome 上注册您的产品。 一般说明 (图 1) A 握柄 1 开/关按钮 2 最大吸力 MAX 按钮 3 把杆上半部分 4 将握柄上半部分旋接到握柄下半部分 5 把杆下半部分 6 吸嘴接合点 7 吸嘴拆卸按钮 8 “滚刷阻塞”指示灯 9 吸嘴 10 固定器 11 前轮...
- Page 107 All manuals and user guides at all-guides.com 简体中文 注意事项 使用本产品之前,请仔细阅读本使用说明书,并妥善保管以备日后参考。 危险 切勿吸入水或其它液体。切勿吸入易燃物质,也不要吸入未冷却的灰烬。 切勿将本产品、充电座或适配器浸入水或任何其它液体中,也不要将它们放在水龙头 下冲洗。 警告 在将本产品连接电源前,务必检查当地的电压是否与电源适配器所标电压一致。 如果吸尘器、充电座或适配器已损坏,请勿再使用。 如果适配器或充电座损坏,必须用原装型号更换,以免发生危险。 电源适配器内含有一个变压器。切勿自行更换插头,否则将导致严重后果。 本产品适合由 8 岁或以上年龄的儿童以及肢体不健全、感觉或精神上有障碍或缺乏相 关经验和知识的人士使用,除非有人对他们使用本产品进行监督或指导,以确保他们 安全使用,并且让他们意识到相关的危害。 切勿让儿童玩耍本产品。 儿童只有在监督下才可清空集尘桶、清洁滤网部件和本产品。 注意 清洁充电座之前,务必将适配器从墙上的电源插座中拔出。 只能用本产品随附的适配器和充电座为吸尘器充电。充电期间,适配器会有微热,这 是正常现象。 使用后,请务必关闭吸尘器。 充电座接触片上的电压为低电压,因此没有危险。 吸尘时切勿阻塞排气口。 充电前请关闭产品。 使用吸尘器时,请确保装上过滤部件。 电磁场 (EMF) 这款飞利浦产品符合关于电磁场 (EMF) 的相关标准。据目前的科学证明,如果正确使用并 按照本用户手册中的说明进行操作,本产品是安全的。 首次使用之前...
- Page 108 All manuals and user guides at all-guides.com 简体中文 使用准备 为电池充电 电池充满电大约需要 7 小时。 将充电座的适配器插入电源插座。 将手持式吸尘器插接到握柄上(可听到“咔哒”一声)。 (图 5) 注意: 将手持式吸尘器插接到握柄时,确保关闭产品的电源。 将产品插接到充电座。 (图 6) 充电指示灯亮起,表示吸尘器正在充电。 (图 7) 注意: 充电指示灯无法指示电池的充电量。 电池充满电后,充电过程停止,然后充电指示灯熄灭以节约能源。 注意: 您可以将产品留在充电座中,即使电池已完全充电。每隔 5 分钟,充电指示灯就 会亮起 3 秒。这表示充电座正在检查电池是否仍然充满电。 注意: 如果您将启动状态下的产品放在充电座上,产品会在 2 秒钟后自动关闭,并且电 池不充电。 节约能源 如果在较长一段时间内不再使用本产品,请将适配器从插座中拔下,以节约能源。 使用本产品 不要将本款无线立式吸尘器的吸力与全尺寸标准吸尘器的吸力比较。它在软地板上的清洁 效果可能与标准吸尘器不完全相同,但在硬地板上则完全一样。 使用握柄 您可以使用握柄来清洁地板和地毯。 使用握柄时,务必确保手持式吸尘器上装了集尘桶,以免损坏手持式吸尘器。 将手持式吸尘器正确插接到握柄上(可听到“咔哒”一声)。 (图 5) 按下握柄上的开/关按钮打开产品电源。 (图 8) 产品开始以正常速度工作。使用这种速度可以优化操作时间并减少噪音。这种速度下 的工作时间可超过 20 分钟。 如果要以最高速度工作,请按 MAX(最大)按钮。使用这种速度可以优化清洁效能。 这种速度下的工作时间为 11 分钟。 (图 9) 如果您要切换回正常速度,请再次按...
- Page 109 All manuals and user guides at all-guides.com 简体中文 使用手持式吸尘器 您可以将不带握柄的手持式吸尘器用于清洁小面积和难以触及的区域,例如桌面、家私、 汽车座椅等等。 当手持式吸尘器充满电时,可持续工作 12 分钟。 如果手持式吸尘器插接在握柄上,在从握柄上取下手持式吸尘器之前,请按下握柄上 的开/关按钮关闭产品。 注意: 如果在产品以常速运转时取下手持式吸尘器,则手持式吸尘器吸力更低。为确保以 全部吸力使用手持式吸尘器,请将其关闭再重新打开。 按手持式吸尘器释放按钮 (1) 并从握柄取下手持式吸尘器 (2)。 (图 11) 按开/关按钮启动手持式吸尘器。 (图 12) 使用后,再次按开/关按钮关闭手持式吸尘器。 注意: 确保您先关闭手持式吸尘器再将其插回握柄。 注意: 如果在手持式吸尘器仍然开启的情况下将其插回握柄,滚刷将无法工作,并且清洁 效能不是最佳。要使滚刷运转,请按握柄上的开/关按钮关闭产品,然后再次按开/关按钮 打开产品。 附件 手持式吸尘器随附有以下附件: 一个用于角落或狭窄缝隙吸尘的缝隙吸嘴。 一把用于清洁细致表面的毛刷。 从充电座的储藏空间取出您要使用的附件。 将附件安装到可拆卸式吸嘴上。 (图 13) 清洁 清洁充电座之前,将适配器从墙上的电源插座中拔出。 用湿布清洁手持式吸尘器的表面、握柄的表面以及充电座的表面。 如果您要倒空和清洁集尘桶,或清洁过滤器,请按照下面“倒空并清洁集尘 桶”和“清洁过滤器”部分中的说明执行操作。 倒空并清洁集尘桶 确保定期倒空并清洁手持式吸尘器的集尘桶。 注意: 打开垃圾箱时,无需将手持式吸尘器放在垃圾箱上面。 快速倒空 您可以按照以下方法快速倒空集尘桶:...
- Page 110 All manuals and user guides at all-guides.com 简体中文 彻底清洁 您可以按照以下方法彻底倒空集尘桶: 将手持式吸尘器拿到垃圾桶的上方,按下集尘桶拆卸按钮 (1) 然后卸下集尘桶 (2)。 (图 17) 将过滤器从集尘桶中取出。 (图 18) 用另一只手抖动集尘桶,将尘垢倒入垃圾桶。 (图 19) 如果必要,可用湿布清洁集尘桶。 如果必要,应清洁过滤器。见下面“清洁过滤器”部分。 6 将过滤网重新装回集尘桶。 7 要重新安装集尘桶,可以将集尘桶的槽与手持式吸尘器的突出部分对齐。首先连接集 尘桶的底部 (1),然后将集尘桶的顶部推向吸尘器 (2),直到其锁定到位(可听到“咔 哒”一声)。 (图 20) 清洁过滤器 确保定期清洁过滤器。 快速清洁 您可以按照以下方法快速清洁过滤器: 将手持式吸尘器拿到垃圾桶的上方,按下集尘桶拆卸按钮 (1) 然后卸下集尘桶 (2)。 (图 17) 转几次过滤器架内的震动装置。 (图 21) 震动装置会使过滤器内部的灰尘松动。 要重新安装集尘桶,可以将集尘桶的槽与手持式吸尘器的突出部分对齐。首先连接集 尘桶的底部 (1),然后将集尘桶的顶部推向吸尘器 (2),直到其锁定到位(可听到“咔 哒”一声)。 (图 20) 彻底清洁 您可以按照以下方法彻底清洁过滤器: 将吸尘器拿到垃圾箱上方,按下集尘桶拆卸按钮 (1),然后卸下集尘桶 (2)。 (图 17) 将过滤器从集尘桶中取出。 (图 18) 顺时针旋转外层过滤器 (1),将其从过滤器架上取下 (2)。 (图 22) 顺时针旋转内层过滤器 (1),将其从过滤器架上取下 (2)。 (图 23) 如果过滤网很脏,请用毛刷或标准吸尘器清洁内层过滤网和外层过滤网。 注意: 如果必要,还可以用冷水或温水清洁内层和外层过滤器。在您再次使用过滤器之 前,务必将内层和外层过滤器彻底擦干。 6 将外层过滤器放回过滤器架 (1),然后逆时针旋转将其安装好 (2)。 (图 24) 7 将内层过滤器放回过滤器架 (1),然后逆时针旋转将其安装好 (2)。 (图 25) 8 将过滤网重新装回集尘桶。 (图 26)
- Page 111 All manuals and user guides at all-guides.com 简体中文 清洁吸嘴接合点 吸嘴的接合点可能被大块污垢阻塞。请按照下面的步骤清洁接合点。 按下握柄上的开/关按钮关闭产品电源。 按手持式吸尘器释放按钮 (1) 并从握柄取下手持式吸尘器 (2)。 (图 11) 按吸嘴拆卸按钮 (1) 将握柄从吸嘴取下 (2)。 (图 27) 清理接合点处的大块污垢。 将握柄插回吸嘴(可听到“咔哒”一声)。 清洁滚刷 当“滚刷阻塞”指示灯开始闪烁红色时,即表示滚刷阻塞。如果发生这种情况,请按照下 面的步骤清洁滚刷。 按下握柄上的开/关按钮关闭产品电源。 按手持式吸尘器释放按钮 (1) 并从握柄取下手持式吸尘器 (2)。 (图 11) 按吸嘴拆卸按钮 (1) 将握柄从吸嘴取下 (2)。 将两用吸尘嘴倒转。 移动滚刷,直到切割沟槽朝向您。 (图 28) 6 使用一把剪刀剪掉缠住滚刷的毛发、线头等等。 (图 29) 7 从滚刷上摘下绒毛、毛发及其他污物。 注意: 您也可以拆下滚刷以便于清洁。 拆下滚刷 关闭产品。 将两用毛刷倒转并打开固定器。 (图 30) 将滚刷从吸嘴提出。 (图 31) 从滚刷和沟槽上摘下绒毛、毛发及其他污物。 将滚刷插回。 先将滚刷距固定器最远的一端插入吸嘴,然后再将滚刷距固定器最近的一端插入吸 嘴。 (图 32) 将固定器关闭(可听到“咔哒”一声)。 (图 33) 注意: 如果未正确插入滚刷,则不能关闭固定器。 存储 将附件放在充电座的储藏空间中。 (图 34) 将握柄向地板吸嘴推动,将其锁定在固定位置。 (图 10) 您可将产品存放在充电座上,并将手持式吸尘器插接在握柄上。 (图 6)
- Page 112 新的内层过滤器供应型号为 4322 004 93471 。请联系您的飞利浦经销商。 更换内层和外层过滤器 将过滤器从集尘桶中取出。 (图 18) 顺时针旋转外层过滤器 (1),将其从过滤器架上取下 (2)。 (图 22) 顺时针旋转内层过滤器 (1),将其从过滤器架上取下 (2)。 (图 23) 将新的内层过滤器放在过滤器架上 (1),然后逆时针旋转将其安装好 (2)。 (图 24) 将新的外层过滤器放在过滤器架上 (1),然后逆时针旋转将其安装好 (2)。 (图 25) 6 将过滤网重新装回集尘桶。 (图 26) 注意: 确保正确插入过滤器。“up”字样必须指向集尘桶的顶部。 订购附件 要购买本产品的附件,请访问我们的在线商城 www.shop.philips.com/service。如果您的 国家/地区没有在线商城,请联系您的飞利浦经销商或飞利浦服务中心。如果您购买产品的 附件有困难,请联系您所在国家/地区的飞利浦客户服务中心。可在全球保修卡中找到其详 细联系信息。 新的内层过滤网供应型号为 4322 004 93471 。 新的 HEPA 过滤网供应型号为 4322 004 93471。 新的细过滤网供应型号为 4222 459 49431。 新的滚动式毛刷供应型号为 4222 459 49571。 环保 弃置产品时,请不要将其与一般生活垃圾堆放在一起;应将其交给官方指定的回收中...
- Page 113 All manuals and user guides at all-guides.com 简体中文 保修与服务 如果您需要服务或信息,或者有任何疑问,请访问飞利浦网站:www.philips.com/support。 您也可与您所在国家/地区的飞利浦客户服务中心联系(可从全球保修卡中找到其电话号 码)。如果您所在的国家/地区没有飞利浦客户服务中心,请与当地的飞利浦经销商联系。 故障种类和处理方法 本章归纳了您在使用本产品时最常见的一些问题。如果您无法根据以下信息解决问题,请 访问 www.philips.com/support 查阅常见问题列表,或联系您所在国家/地区的飞利浦客户 服务中心。 问题 原因 解决方法 产品不能工作。 电池电量可能不足。 为电池充电。 如果使用握柄,则握柄和/ 擦拭握柄和手持式吸尘器上的接触片。 或手持式吸尘器上的接触 用干布清洁,然后将手持式吸尘器插接 片可能脏了或接触不良。 到握柄。将手持式吸尘器轻轻向左或向 右移几次,直到听到“咔哒”一声。 充电指示灯不亮 您可能没有将产品正确地 将本产品正确放在充电座上。充电指示 和/或产品不充 放置在充电座上。 灯亮,表示产品正在充电。 电。 您可能没有将适配器正确 将适配器正确插入电源插座。...
- Page 114 All manuals and user guides at all-guides.com 简体中文 问题 原因 解决方法 尘土从手持式吸尘 集尘桶可能已满。 清空集尘桶。 器中溢出。 集尘桶可能没有正确安 将集尘桶正确安装到手持式吸尘器上。 装。 过滤器可能没有正确放置 将过滤网正确放置到集尘桶中。 在集尘桶中。 将一个附件安装到 集尘桶可能已满。 清空集尘桶。 可拆卸式吸嘴时, 手持式吸尘器不能 正常工作。 附件可能阻塞。 从附件中取出阻塞物。 过滤器可能阻塞。 清洁内层过滤网和外层过滤网(见“清 洁”一章)。 “滚刷阻塞”指示 滚刷阻塞。 清洁滚刷(见“清洁”一章)。 灯闪烁红色。 “滚刷阻塞”指示灯可能 在这种情况下,滚刷没有阻塞,吸力不 闪烁红色,因为您在长毛 会降低。您可以继续使用握柄清洁地 绒地毯上使用握柄。...
- Page 115 All manuals and user guides at all-guides.com...
- Page 116 All manuals and user guides at all-guides.com...
- Page 117 All manuals and user guides at all-guides.com...
- Page 118 All manuals and user guides at all-guides.com...
- Page 119 All manuals and user guides at all-guides.com...
- Page 120 All manuals and user guides at all-guides.com...
- Page 121 All manuals and user guides at all-guides.com...
- Page 122 All manuals and user guides at all-guides.com...
- Page 123 All manuals and user guides at all-guides.com...
- Page 124 All manuals and user guides at all-guides.com...
- Page 125 All manuals and user guides at all-guides.com...
- Page 126 All manuals and user guides at all-guides.com...
- Page 127 All manuals and user guides at all-guides.com...
- Page 128 All manuals and user guides at all-guides.com...
- Page 129 All manuals and user guides at all-guides.com...
- Page 130 All manuals and user guides at all-guides.com...
- Page 131 All manuals and user guides at all-guides.com...
- Page 132 All manuals and user guides at all-guides.com...
- Page 133 All manuals and user guides at all-guides.com...
- Page 134 All manuals and user guides at all-guides.com...
- Page 135 All manuals and user guides at all-guides.com...
- Page 136 All manuals and user guides at all-guides.com 4222.003.3510.4...