Publicité
Les langues disponibles
Les langues disponibles
Liens rapides
Publicité

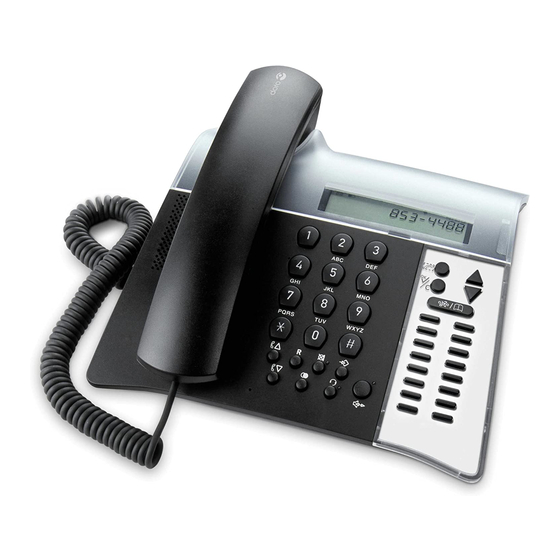
Manuels Connexes pour Doro Congress 205


Sommaire des Matières pour Doro Congress 205
-
Page 19: Raccordement/Réglages De Base
All manuals and user guides at all-guides.com Français Installation Raccordement/Réglages de base Reliez le cordon spiralé au combiné et à la fiche du téléphone marquée 2. Raccrochez le combiné sur la base. 3. Reliez le bloc d’alimentation à la prise du téléphone marquée DC 9V et à la prise de courant. Le réglage de l’alarme clignote à... -
Page 20: Mise En Place Des Batteries
All manuals and user guides at all-guides.com Français Installation Mise en place des batteries Pour protéger les données en mémoire et pour pouvoir utiliser la présentation du nom/ numéro et d’autres fonctions, le téléphone nécessite trois batteries AAA de 1,5V. Les batteries permettent aussi au téléphone de fonctionner pendant quelques jours. -
Page 21: Utilisation
All manuals and user guides at all-guides.com Français Utilisation Appeler Appel normal Prenez le combiné. 2. Composez le numéro de votre correspondant. Appeler avec la fonction de correction Vous pouvez corriger un des chiffres du numéro de téléphone avant de le composer. Composez le numéro. En cas d’erreur, effacez avec la touche 2. -
Page 22: Fonction Mains-Libres
All manuals and user guides at all-guides.com Français Utilisation Fonction Mains-libres Appuyez sur . Le haut-parleur est activé et la LED à côté de la touche s’allume. 2. Composez le numéro de téléphone. Au besoin, utilisez la touche située au dos du téléphone pour régler le volume du haut-parleur. -
Page 23: Chronométrage Des Appels
équivaut à prendre et à reposer le combiné). Remarque! Le casque DORO d’origine est testé et adapté à ce téléphone. Vous pouvez utiliser d’autres types ou marques de casques mais dans ce cas nous ne pourrons pas garantir leur qualité sonore et leur bon fonctionnement. -
Page 24: Répertoire
All manuals and user guides at all-guides.com Français Répertoire Utilisation du répertoire Le répertoire permet d’enregistrer les noms et numéros de téléphone. Il est plus rapide d’appeler un numéro en mémoire que de le composer manuellement. Si vous êtes abonné à la présentation du numéro, le nom/numéro du correspondant s’affiche à... - Page 25 All manuals and user guides at all-guides.com Français Répertoire Appeler un numéro du répertoire Appuyez plusieurs fois sur la touche jusqu’à ce que s’affiche. 2. Faites défiler les entrées avec les touches . Vous pouvez aussi faire une recherche rapide en appuyant une ou plusieurs fois sur la touche numérotée correspondant à...
- Page 26 All manuals and user guides at all-guides.com Français Mémoires Mémoires Ce téléphone dispose de 16 mémoires directes. Une fois un numéro de téléphone enregistré sur une de ces plages, vous le composez en pressant simplement une touche. Les touches des mémoires directes sont numérotées de M1 à...
-
Page 27: Présentation Du Numéro
All manuals and user guides at all-guides.com Français Présentation du numéro Que signifie ‘Présentation du numéro’ ? Présentation du numéro/nom vous permet de voir qui vous appelle avant de répondre ou qui a appelé en votre absence. Si le nom/numéro du correspondant est déjà dans votre répertoire, son nom est affiché. - Page 28 All manuals and user guides at all-guides.com Français Présentation du numéro Effacer les numéros Atteignez l’entrée désirée à l’aide des touches 2. Appuyez sur , EFFACER? s’affiche ou appuyez sur jusqu’à ce que EFFACER TOUT? s’affiche. 3. Appuyez sur jusqu’à ce que le numéro s’efface. Transférer les numéros dans le répertoire Atteignez le numéro désiré...
-
Page 29: Réglage De L'alarme
All manuals and user guides at all-guides.com Français Autres Réglage de l’alarme Lorsque qu’une alarme a été programmée, s’affiche en mode veille. La sonnerie de l’alarme dure une minute. Vous pouvez la couper en appuyant sur n’importe quelle touche du combiné. Appuyez pendant environ 4 secondes sur la touche jusqu’à... -
Page 30: Informations Techniques
Si votre appareil ne fonctionne pas derrière un PABX, sélectionnez le témoin de sonnerie ( Déclaration de conformité Nous, Doro, déclarons la conformité du produit Doro Congress 205 aux dispositions de la directive européenne 1999/5/CE.La déclaration de conformité peut être consultée à l’adresse suivante : www.doro.com/dofc... -
Page 31: En Cas De Problèmes
En tout état de cause, la garantie légale pour vices cachés s’appliquera conformément aux articles 1641 et suivants du Code Civil. Si vous avez des soucis d’utilisation, contactez notre Service d’Assistance Téléphonique au 08 92 68 90 18 ( N° Audiotel - 0,34€/min.). E-Mail : contact@doro.fr FR 13...