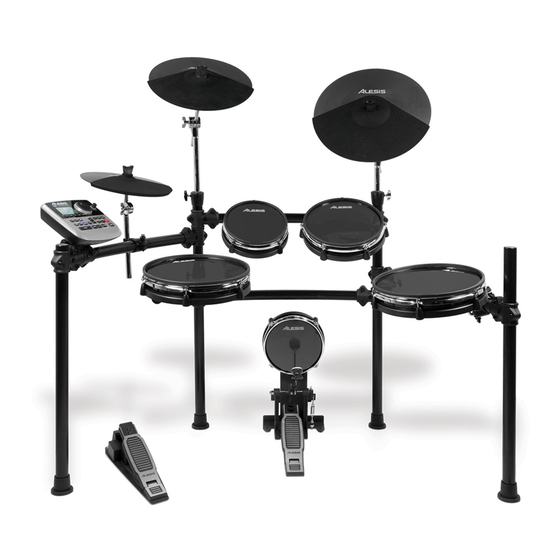
Sommaire des Matières pour Alesis USB Pro Drum Kit
- Page 1 USBProDrum Kit Professional Electronic Drum Kit Controller with Alesis Surge Cymbals QUICKSTART ASSEMBLY MANUAL GUÍA RÁPIDA DE ARMADO GUIDE D’ASSEMBLAGE RAPIDE MANUALE RAPIDO DI MONTAGGIO AUFBAUANLEITUNG...
- Page 2 BOX CONTENTS DRUM KEY 1/4” CABLE SNAKE METAL ROD L-SHAPED ROD DRUM STICK CRASH CYMBAL ROD HI-HAT PEDAL DRUM PADS HI-HAT (SHORT) VERTICAL TUBE W/ HORIZONTAL TUBE VERTICAL TUBE W/ 2 TUBE BASS DRUM PAD 3 TUBE RIDE CONNECTORS CONNECTORS STRAIGHT TUBE W/ CENTER RACK STRAIGHT TUBE W/...
- Page 3 ASSEMBLING THE DRUM RACK CÓMO ARMAR EL BASTIDOR DE LA BATERÍA | ASSEMBLAGE DU SUPPORT POUR BATTERIE MONTAGGIO DEL RACK DELLA BATTERIA | AUFBAU DES DRUMRACKS 1 :::::::::: • Lay the 2 horizontal tubes (L) on the ground. Then, using the drum key, unscrew the bolts connecting the metal rod to the tube connectors (circled in the picture).
- Page 4 5 :::::::::: • Take the two vertical tubes (M and N) and insert them into the tube connectors of the two horizontal tubes (L). Please insert part M into the horizontal tube on your left, and part N into the horizontal tube on your right. •...
- Page 5 8 :::::::::: • Attach the short tube (P) to the bottom tube connector, and attach the long tube with 2 clamps (R) to the top connector on the vertical tube on your left (M). These two tubes will be used for the hi-hat and snare pads, as well as the module.
- Page 6 MOUNTING THE CYMBALS CÓMO MONTAR LOS PLATILLOS | MONTAGE DES CYMBALES MONTAGGIO DEI PIATTI | MONTAGE DER CYMBAL PADS 1 :::::::::: • Begin by connecting the cymbal rods (R and G) to the rack. Connect the longer cymbal rods (R) to the center rack tube (O). Connect the shorter cymbal rod (G) to the upper tube (R) on the left side of the rack.
- Page 7 MOUNTING THE DRUM PADS CÓMO MONTAR LOS PADS DE TAMBORES | MONTAGE DES PADS MONTAGGIO DEI PAD DELLA BATTERIA | MONTAGE DER DRUM PADS 1 ::::::::: • Take the four L-shaped rods (D) and connect them to each of the four drum pads (I), as shown in the picture.
- Page 8 PLACING THE PEDALS CÓMO COLOCAR LOS PEDALES | POSITIONNEMENT DES PÉDALES POSIZIONAMENTO DEI PEDALI | AUFSTELLEN DER PEDALE 1 :::::::::: • Place the bass drum pad (K) on the ground. Attach the metal rods (C) to the bass drum pad (K), using the two long screws (T), as shown in the picture on the left.
- Page 9 MOUNTING THE TriggerIO MODULE CÓMO MONTAR EL MÓDULO TriggerIO | MONTAGE DU MODULE TriggerIO MONTAGGIO DEL MODULO TriggerIO | MONTAGE DES TriggerIO MODULS 1 :::::::::: • Take the TriggerIO module out of the box. Position the mounting base (V) and secure it to the module, using the four mounting screws (V).
- Page 10 CONNECTING THE TriggerIO MODULE CÓMO CONECTAR EL MÓDULO TriggerIO | BRANCHEMENT DU MODULE TriggerIO COLLEGAMENTO DEL MODULO TriggerIO | ANSCHLUSS DES TriggerIO MODULS Please study the following connection diagram to hook up your pads and pedals to the TriggerIO module: Estudie el siguiente diagrama para saber cómo conectar sus pads y pedales al módulo TriggerIO: Examinez bien le schéma de raccordement afin de brancher les pads et les pédales au module TriggerIO: Studiare attentamente il seguente schema per il collegamento dei pad e dei pedali al modulo TriggerIO:...
- Page 11 7 – 51 – 0253 – B...
- Page 12 www.alesis.com...


