Table des Matières
Publicité
Les langues disponibles
Les langues disponibles
Liens rapides
品号32280087601911
"
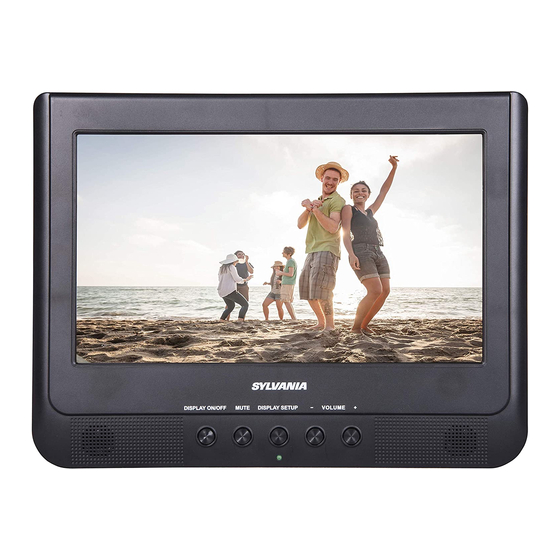
10 DUAL SCREEN PORTABLE DVD PLAYER
MODEL:SDVD1037
DISPLAY ON/OFF
MUTE
DISPLAY SETUP
OPEN
INSTRUCTION MANUAL
Please read this user manual carefully to ensure proper use of this product
and keep this manual for future reference
SYLVANIA is a registered trademark of OSRAM SYLVANIA INC. Used under license.
Publicité
Table des Matières

Manuels Connexes pour Sylvania SDVD1037


Sommaire des Matières pour Sylvania SDVD1037
- Page 1 DISPLAY ON/OFF MUTE DISPLAY SETUP OPEN INSTRUCTION MANUAL Please read this user manual carefully to ensure proper use of this product and keep this manual for future reference SYLVANIA is a registered trademark of OSRAM SYLVANIA INC. Used under license.
-
Page 3: Important Safety Instructions
Important Safety Instructions The lightning flash with arrowhead symbol within an equilateral CAUTION triangle is intended to alert the user to the presence of uninsulated dangerous voltage within the product’ s enclosure that may be of RISK OF ELECTRIC SHOCK sufficient magnitude to constitute a risk of electric shock to persons. - Page 4 Important Safety Instructions Before using the unit, be sure to read all operating instructions carefully. Please note that these are general precautions and may not pertain to your unit. For example, this unit may not have the capability to be connected to an outdoor antenna.
- Page 5 Important Safety Instructions 17) Overloading Do not overload wall outlets and extension cords as this can result in a risk of fire or electric shock. 18) Object and liquid entry Never push objects of any kind into the product through openings as they may touch dangerous voltage points or short out parts that could result in fire or electric shock.
- Page 6 Important Safety Instructions NOTES ON MOISTURE CONDENSATION: NOTES ON HANDLING: • Moisture condensation damages the DVD When shipping the DVD player, always use player. Please read the following carefully. the original shipping carton and packing materials. For maximum protection, repack •...
-
Page 7: About Discs
About Discs THE REGION NUMBER FOR THIS DVD PLAYER IS: See the following page for information regarding region numbers. PLAYABLE DISCS: The following discs can be played back on this DVD player: DISC TYPES: Data on most DVDs is divided into sections called titles and then into subsections called chapters, each of which is given a title or chapter number. -
Page 8: Product Overview
Product Overview MAIN UNIT: OPEN PLAY/PAUSE ( ): Press to switch between play and pause. STOP ( ): Press to stop playback. OPEN: Press to open the CD door. VOLUME-: Press to decrease the volume level. VOLUME+: Press to increase the volume level. Charge Indicator: Red indicator will light when the unit is charging, and it will turn green when fully charged. - Page 9 Product Overview MAIN UNIT: POWER DC IN PHONE AV OUT SD/MMC CARD DC OUT 15. ON/OFF: Power ON/OFF switch. Slide to ON position to power on, slide to OFF position to shut off. 16. PHONE: Headphone jack. 17. AV OUT: Audio/Video output jack. SD/MMC: Card slot.
-
Page 10: Remote Control
Remote Control 1. DISPLAY ON/OFF: To turn ON or OFF the screen. 2. TITLE: To display the title menu of current disc. Use the Direction and ENTER buttons to select and play the desired title. 3. DISC MENU: To display the menu of current disc. -
Page 11: Battery Installation
Remote Control 23. REPEAT: Press repeatedly to set repeat mode. 24. A-B: During playback, press to set the beginning point of A-B repeat. Press again to set the end point of A-B repeat.The unit will start playback at the selected section.To resume normal playback, press the A-B button again. -
Page 12: Power Source
Power Source The unit has a built-in DC 7.4V Lithium-ion rechargeable battery. Recharge it as follows: Charging by supplied AC/DC adapter: 1. Connect the plug from the supplied AC/DC adapter to the DC IN Jack on the main unit. 2. Connect the AC/DC adapter to the wall outlet having AC 100-240V~; 50/60Hz. Notes: •... -
Page 13: Making Connections
Making Connections 1. Connecting the main unit to a TV with A/V connection cable. DC IN PHONE AV OUT SD/MMC CARD DC OUT Video input jack (Yellow) Audio/Video Cable included Audio left channel input jack (White) Audio right channel input jack (Red) Connected to the TV... - Page 14 Making Connections 2. Connecting the main unit to the secondary unit. MAIN UNIT: SECONDARY UNIT: DC to DC cable (included) 3.5mm audio/video cable (included) Note: The secondary unit must be connected to the main unit, it can not be operated independantly.
- Page 15 Operation MAIN UNIT: 1. Recharge or connect the unit to AC/DC Adaptor/ Car Adaptor as previous procedure. 2. Press the OPEN button on main unit to open the CD door. 3. Insert the disc to the center spindle with label side face up and close the lid. 4.
- Page 16 Operation (CD/DVD)PROGRAM: 1. During CD or DVD playback, press the PROG (Program) button.The Program menu appears. 2. Use the numeric buttons to select and set the desired TT (Title), CH (Chapters), tracks you want of the CD or DVD. Start Start Exit Exit...
- Page 17 USB or SD/MMC Card Playback 1. Insert the USB Device or SD/MMC memory card into the USB port/card slot as shown on the figure below. DC IN PHONE AV OUT SD/MMC CARD DC OUT USB device (not included) Note: The unit supports the following file formats: •...
-
Page 18: Setting Menus
Setting Menu Setting Menus: In fully stop mode, press the SETUP button on the remote control, the setting menu will appear on the screen as below. Use the Direction , , , , Numeric and ENTER buttons ENTER to select and highlight the function you need to set or reset. Press the button to or confirm the selection. - Page 19 Setting Menu --Audio Setup Page-- Go To Audio Setup Page IN AUDIO SETUP PAGE: If Aud io Setup is selected, press the ENTER button, the sub-setting menu will appear. Downmix is selected, use the Direction ENTER buttons set it to Lt/Rt; Stereo. •...
- Page 20 Setting Menu Picture Picture Quality IN VIDEO SETUP PAGE: ENTER is selected, use the Direction and 1. If buttons to set the panel "Picture" quality (Sharpness; Brightness; Contrast; Hue or Saturation) as desired. Sharpness: To adjust the sharpness of video output Brightness: To adjust the video brightness level on a scale of -16 to +16.
- Page 21 Setting Menu NTSC IN PREFERENCE SETUP PAGE: Preference page can be opened only in complete stop mode or no disc is playing. 1. If TV Type is selected, use the Direction and ENTER buttons to set to PAL, AUTO or NTSC. (NOTE: The TV system in USA, Canada and Mexico is NTSC.) ENTER buttons to the 2.
- Page 22 Setting Menu ENTER 4. If Password is selected, press button to enter, the subsetting menu will appear. ENTER • If Password Mode is selected, use Direction and buttons to set it ON (activate the rating level setting) or OFF (Password is needed). •...
-
Page 23: Care And Maintenance
Care and Maintenance CARING FOR DISCS Treat the disc carefully. Handle the disc only by its edges. Never allow your fingers to contact with the shiny, unprinted side of the disc. • Do not attach adhesive tape, stickers, etc. to the disc label. •... -
Page 24: What's Included
Specifications Power source of main unit ........Built-in DC 7.4V, Lithium-ion rechargeable battery, recharge by DC 12V, 1.5A AC Adapter ..............Input: 100-240V~, 50/60Hz Output: DC 12V, 1.5A Car Adapter ..............Input Voltage: DC Output Voltage: DC 12V, 2A Power source of remote control: ......DC 3V, 2 x AAA size batteries Disc compatibility: ............DVD/VCD/SVCD/DVCD/CD/CD-R/CD-RW/ DVD±R/DVD±RW... - Page 25 To make a warranty claim, do not return this product to the store. Please email support@curtiscs.com or call 1-800-968-9853. 90 day Year Warranty This product is warranted to be free from defects in material and workmanship for a period of ninety (90) days from the date of original purchase. During this period, your exclusive remedy is repair or replacement of this product or component found to be defective, at our option;...
- Page 26 Mounting Strap Installation Correct Correct CONCAVE CONCAVE Wrong Wrong CONVEX CONVEX...
-
Page 27: Lecteur Dvd Portable
MODÈLE : SDVD1037 DISPLAY ON/OFF MUTE DISPLAY SETUP OPEN MODE D'EMPLOI Lisez ce mode d'emploi avec attention pour garantir l'utilisation correcte de ce produit, et conservez-le pour référence future. SYLVANIA est une marque déposée de OSRAM SYLVANIA INC. Utilisée sous licence. -
Page 28: Consignes De Sécurité Importantes
Consignes de sécurité importantes MISE EN GARDE Le symbole de l’éclair et d’une flèche à l’intérieur d’un triangle équilatéral signale à l’utilisateur, la présence d’une “tension RISQUE DE CHOC ÉLECTRIQUE dangereuse” non isolée à l’intérieur de l’appareil, pouvant être d’une magnitude suffisante pour provoquer un choc électrique. - Page 29 Consignes de sécurité importantes Veuillez lire attentivement ce manuel et le conserver à portée de main. Il existe des mesures de sécurité concernant l’installation et l’utilisation que vous devriez connaître. Lisez ces instructions – Lisez toutes les instructions de sécurité et de fonctionnement avant de mettre l’appareil en marche.
- Page 30 Consignes de sécurité importantes 17) Surcharge – Ne surchargez pas les prises de courant, les rallonges ou les prises à commodité intégrale car ceci peut causer un risque d’incendie ou de choc électrique. 18) Entrée d’objets ou de liquides – N’insérez jamais d’objets d’aucune sorte à l’intérieur du produit à travers les ouvertures car ils pourraient toucher des points de tension dangereux ou court-circuiter des pièces pouvant causer un risque d’incendie ou de choc électrique.
-
Page 31: Remarques Pour La Manipulation
Consignes de sécurité importantes REMARQUES SUR L’HUMIDITÉ CAUSANT DE REMARQUES POUR LA MANIPULATION LA BUÉE : • Si vous expédiez le lecteur DVD,utilisez La buée endommage le lecteur DVD. Veuillez lire toujours l’emballage original, et matériaux de attentivement les instructions ci-dessous : conditionnement. -
Page 32: À Propos Des Disques
À propos des disques Le code de région de ce lecteur DVD est le suivant : Reportez-vous à la page suivante pour en savoir plus sur les codes de région. DISQUES PRIS EN CHARGE : Ce lecteur DVD peut lire les types de disques suivants : TYPES DE DISQUE : Titre 1 Titre 1... -
Page 33: Vue D'ensemble Du Produit
Vue d’ensemble du produit UNITÉ PRINCIPALE : OPEN LECTURE/PAUSE ( ): Appuyez pour basculer entre la lecture et la pause. ARRÊT ( ): Appuyez pour arrêter la lecture. OUVRIR : Pour ouvrir la porte du compartiment du CD. VOLUME- : Appuyez pour réduire le volume. VOLUME+ : Appuyez pour augmenter le volume. - Page 34 Vue d’ensemble du produit UNITÉ PRINCIPALE : POWER DC IN PHONE AV OUT SD/MMC CARD DC OUT 15. ON/OFF : Interrupteur ON/OFF (marche/arrêt). Faites glisser sur ON pour la mise en marche, et sur OFF pour l’arrêt de l’unité. 16. PHONE : Prise pour casque d’écoute. 17.
-
Page 35: Télécommande
Télécommande 1. DISPLAY ON/OFF : Appuyez pour activer ou désactiver l’écran. 2. TITLE (Titre) : Affichage du menu du titre du disque en cours. Utilisez les boutons de direction et ENTER (Entrer) pour sélectionner et effectuer la lecture du titre de votre choix. 3. -
Page 36: Installation Des Piles
Télécommande 19. VOL- (Volume) : Appuyez pour réduire le volume. (Lecture/Pause) : Appuyez pour la lecture ou effectuer une pause. 21. AUDIO : Appuyer de façon répétitive pour sélectionner les canaux audio. 22. MUTE (Sourdine) : Appuyez pour interrompre le son. Appuyez pour reprendre le cours normal de la lecture. -
Page 37: Source D'alimentation
Source d’alimentation recharge selon les L’unité est équipée d’une pile rechargeable CC 7,4V . Effectuez la étapes suivantes : Recharge en utilisant l’adaptateur CA/CC : 1. Branchez la petite prise de l’adaptateur CA/CC fourni sur la prise DC IN (entrée CC) sur l’unité... -
Page 38: Effectuer Les Branchements
Effectuer les branchements 1. Branchement de l’unité principale à un téléviseur équipé d’un câble de connexion A/V. DC IN PHONE AV OUT SD/MMC CARD DC OUT Prise d’entrée vidéo (Jaune) Prise d’entrée audio pour le canal Câble audio/vidéo inclus de gauche (Blanc) Prise d’entrée audio pour le canal de droite (Rouge) Branché... - Page 39 Effectuer les branchements 2. Connexion de l’unité principale avec l’unité annexe. UNITÉ PRINCIPALE : UNITÉ ANNEXE : Câble CC vers CC (inclus) Câble audio/vidéo 3,5 mm (inclus) Remarque : L’unité annexe doit être branchée à l’unité principale. Elle ne pourra pas fonctionner séparément.
-
Page 40: Utilisation
Utilisation 1. Rechargez ou branchez l’adaptateur CA/CC ou adaptateur de véhicule comme lors de l’étape indiquée précédemment. Appuyez sur le bouton OUVRIR pour ouvrir la porte du CD 3. Insérez le disque sur l’axe central, avec l’étiquette tournée vers le haut, et refermez le couvercle. - Page 41 Utilisation PROGRAMMATION (CD/DVD): 1. En cours de lecture (CD/DVD), appuyez sur le bouton PROG (Programme). Le menu de la programmation s’affichera. 2. À l’aide des boutons numériques, sélectionnez et configurez les TT (Titres), CH (Chapitres) et pistes (pour les CD) de votre choix. Start Start Exit...
-
Page 42: Lecture De Clé Usb Ou Cartes Sd/Mmc
Lecture de clé USB ou cartes SD/MMC 1. Insérez le dispositif USB ou la carte mémoire SD/MMC sur le port USB, ou dans la fente pour carte, comme indiqué sur l’illustration ci-dessous : DC IN PHONE AV OUT SD/MMC CARD DC OUT Dispositif USB (Non inclus) -
Page 43: Page De Configuration Générale
Menu des configurations Menu des configurations : Lorsque l’unité est complètement éteinte (hors tension), appuyez sur le bouton SETUP (Configurations) sur la télécommande, et le menu des configurations apparaîtra à l’écran comme sur l’illustration ci-dessous. À l’aide des boutons de directions , , , , numériques, et bouton ENTER sélectionnez et placez en surbrillance la fonction que vous souhaitez configurer, ou réinitialiser. -
Page 44: Menu Des Configurations
Menu des configurations --Audio Setup Page-- Go To Audio Setup Page PAGE DE CONFIGURATION DU L' A UDIO : ENTER Si la configuration des LAUDIO est sélectionnée, appuyez sur le bouton , le sous- menu des configurations apparaîtra : Si le mode DOWNMIX (Mixage réducteur) est sélectionné, utilisez les boutons de directions et le bouton pour configurer sur Lt/Rt, Stéréo. -
Page 45: Page De Configuration Des Préférences
Menu des configurations AV OUT QUALITY est sélectionné, utilisez les boutons de directions et le bouton ENTER pour configurer la netteté, la luminosité, le contraste, gamma, teinte ou saturation de l’entrée de signal vidéo de votre choix. Netteté : Pour ajuster la netteté de la sortie vidéo. Luminosité... -
Page 46: Niveaux D'accès
Menu des configurations 3. Si le mode Parental est sélectionné, utilisez les boutons de directions et le bouton pour configurer le niveau d’accès de votre choix en suivant les étapes suivantes : ENTER • Appuyez sur le bouton pour entrer, et la liste des niveaux d’accès s’affichera. •... -
Page 47: Entretien Et Maintenance
Entretien et maintenance PRENDRE SOIN DES DISQUES Manipulez les disques avec soin. Prenez le disque par ses rebords seulement. Ne laissez jamais vos doigts entrer en contact avec la surface brillante, non imprimée du disque. • Ne fixez pas de ruban adhésif, d’étiquette autocollante, etc. sur l’étiquette du disque. •... -
Page 48: Contenu De L'emballage
Spécifications Source d’alimentation pour l’unité principale ..Pile rechargeable intégrée Li-ion CC 7,4 V, qui se recharge par CC 12V 1,5 A Adaptateur CA ..............Entrée : 100-240V ~50/60 Hz Sortie 12V, 1,5 A Adaptateur de véhicule ..........Entrée de tension : CC 12 V Sortie de tension .............CC 12 V, 2A... - Page 49 Pour faire une demande de garantie, ne retournez pas ce produit au magasin. Veuillez envoyer un courriel électronique à support@curtiscs.com ou appeler le 1-800-968-9853. 90 jours de garantie Ce produit est garanti contre tout défaut de matériel et de fabrication pendant une période de quatre-vingt-dix (90) jours à...
-
Page 50: Installation De La Sangle De Fixation
Installation de la sangle de fixation Correct Correct CONCAVE CONCAVE Faux Faux CONVEXE CONVEXE...