Table des Matières
Publicité
Les langues disponibles
Les langues disponibles
Liens rapides
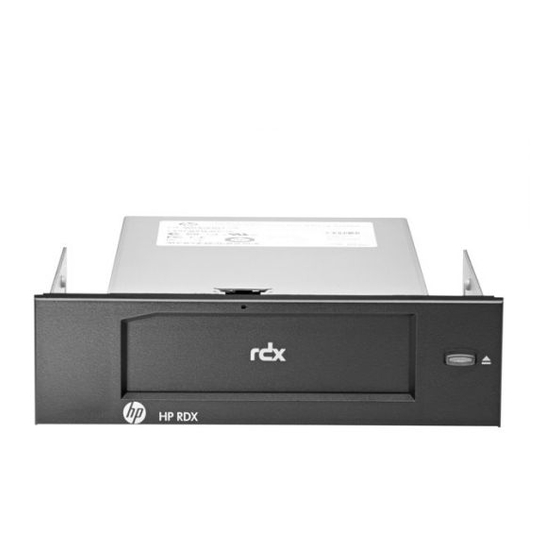
HP RDX USB 3.0
Removable Disk Backup System
Internal drive
Start Here
Commencez ici
Starten Sie hier
IMPORTANT INFORMATION ABOUT
YOUR NEW DRIVE
• Connect to a USB 3.0 port (on a computer running Windows®).
USB 2.0 is supported, but performance will be degraded.
• For optimum performance use HP-branded RDX Removable Disk
cartridges.
• Although RDX Removable Disk cartridges are ruggedly built, they
must be handled with care to ensure data integrity and long life.
• To ensure correct operation of the eject function, install the HP RDX
Utility. This utility also allows you to download and install firmware
upgrades. The utility and firmware upgrades are available from
www.hp.com/support/rdx.
1
Installation overview
IMPORTANT: Disconnect your computer from the main
power supply before installing the RDX Removable Disk
Backup System and observe anti-static precautions.
For important safety, environmental, and regulatory
information, see Safety and Compliance Information for
Server, Storage, Power, Networking, and Rack Products,
available at www.hp.com/support/Safety-Compliance-
EnterpriseProducts.
Use a spare power cable to connect to the computer power
supply. (The drive is not powered from the USB bus.)
For detailed, step-by-step installation instructions, refer to the
user guide found at www.hp.com/support/rdx.
Mounting Screws
An accessory kit containing M3 screws is supplied with the HP RDX
USB 3.0 Internal Removable Disk Backup System for use with servers
that do not have the correct screws available.
Check server schematic for internal USB port
Connect to a dedicated USB 3.0 port on your computer. The drive
is backward compatible with USB 2.0, but performance will be
degraded. Do not connect to a USB 1.1 port. Use the schematic on
the inside of the door or consult your computer documentation to
locate the availability and position of a standard USB 3.0 Type A
socket. If a suitable internal port is not available on the system board,
All manuals and user guides at all-guides.com
HP recommends installing a dedicated host bus adapter. See the
RDX QuickSpecs for recommended products.
NOTE: It is also possible to connect to a USB 2.0 Intel or HP 4-pin
header connector; appropriate cables must be purchased separately.
See the RDX QuickSpecs for recommended products and refer to the
User Guide for cabling instructions.
Power cable
USB cable
Attach USB cable to internal USB 3.0 port
Use the standard USB 3.0 cable supplied with the RDX Removable
Disk Backup System.
2
Completing the installation
Install the HP RDX Utility from www.hp.com/support/rdx. If the
software is not installed, the eject button and right-click eject method
may not work properly.
Install or update backup software:
It is important to check www.hp.com/storage/spock for software
compatibility and install any recommended updates.
Diagnostic tools
The HP RDX Utility contains basic diagnostic tools, enables proper
cartridge ejection, and allows you to download and install firmware
upgrades. The utility and firmware upgrades are available from
www.hp.com/support/rdx.
HP Library & Tape Tools, which can be downloaded free of charge
from www.hp.com/support/tapetools, can also be used to determine
whether your product can operate properly.
Publicité
Table des Matières

Sommaire des Matières pour HP RDX USB 3.0
- Page 1 RDX QuickSpecs for recommended products. Removable Disk Backup System NOTE: It is also possible to connect to a USB 2.0 Intel or HP 4-pin header connector; appropriate cables must be purchased separately. See the RDX QuickSpecs for recommended products and refer to the Internal drive User Guide for cabling instructions.
-
Page 2: Product Information
Using the RDX Removable Disk Product information Backup System Product documentation Product documentation is available in the Storage section of the HP To load a cartridge: Enterprise Information Library: Push the cartridge gently into the unit until it is locked into place with www.hp.com/go/storage/docs... -
Page 3: Lecteur Interne
Vis de montage Un kit d'accessoires contenant des vis M3 est fourni avec HP RDX USB 3.0 Internal Removable Disk Backup System à utiliser avec les serveurs qui ne disposent pas des vis appropriées. -
Page 4: Dernières Étapes De L'installation
(activité de lecture, d'écriture, de recherche). Outils de diagnostic • Orange continu : le lecteur a détecté une condition de panne de L'utilitaire HP RDX contient des outils de diagnostics de base, permet cartouche. l'éjection de la cartouche appropriée, et permet de télécharger et d'installer les mises à... - Page 5 • Obwohl die RDX Removable Disk-Kassetten robust sind, müssen sie umsichtig behandelt werden, um Datenintegrität und langes Produktleben zu gewährleisten. • Installieren Sie das HP RDX Utility, um sicherzustellen, dass die Auswurffunktion ordnungsgemäß arbeitet. Dieses Dienstprogramm ermöglicht es auch, Firmwareaktualisierungen herunterzuladen und USB cable zu installieren.
-
Page 6: Bedeutung Der Leds
Auswurftaste und die Auswurfmethode mittels Rechtsklick möglicherweise nicht ordnungsgemäß. Installieren oder aktualisieren Sie die Sicherungssoftware: Eject button/Power LED Es ist wichtig, dass Sie sich auf der Website www.hp.com/storage/ Activity LED spock zur Softwarekompatibilität informieren und empfohlene Aktualisierungen installieren. Aktivitäts-LED •... - Page 7 All manuals and user guides at all-guides.com...
- Page 8 All manuals and user guides at all-guides.com...


