
Manuels Connexes pour Peg-Perego Baby carriage


Sommaire des Matières pour Peg-Perego Baby carriage
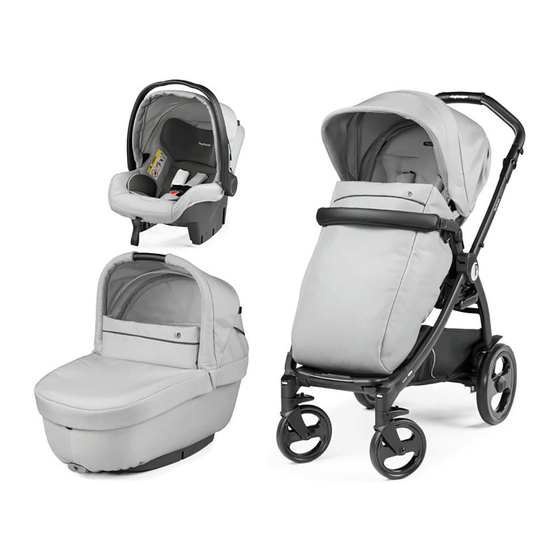
- Page 1 All manuals and user guides at all-guides.com U.S.A./CANADA EN Instructions for use ES Instrucciones de uso FR Notice d’emploi...
- Page 2 All manuals and user guides at all-guides.com...
- Page 3 All manuals and user guides at all-guides.com...
- Page 4 All manuals and user guides at all-guides.com...
- Page 5 All manuals and user guides at all-guides.com...
- Page 6 All manuals and user guides at all-guides.com...
- Page 7 All manuals and user guides at all-guides.com...
- Page 8 All manuals and user guides at all-guides.com...
- Page 9 All manuals and user guides at all-guides.com...
- Page 10 All manuals and user guides at all-guides.com...
- Page 11 All manuals and user guides at all-guides.com...
- Page 12 All manuals and user guides at all-guides.com...
- Page 13 All manuals and user guides at all-guides.com...
- Page 14 All manuals and user guides at all-guides.com Seat Pop-Up 1 BCASPO00• 4 SAPI7549N 7 CFRPPR00--NER 2 ASPI0167L50N 5 MUCI5P22N 8 ITSEPO•N 3 BSASPONA• 6 BSPSPO00•...
- Page 15 All manuals and user guides at all-guides.com Chassis Pop-Up 1 SPST7372DGR 1 0 SOTF0377C 1 7 SPST7323N SPST7372SGR 1 1 MUCI0027N MMVI0526 2 SPST7302N 1 2 SPST7263N 1 8 SPST7351N SPST7302KN 1 3 SPST7286WDNPEG MMVA0260N 3 SPST7357NPEG SPST7286WSNPEG 1 9 ARPI0675NGRNEROG 4 SPST6232KN 1 4 SAPI7304N 2 0 ITCBO01NANL77...
- Page 16 All manuals and user guides at all-guides.com Bassinet Pop-Up 1) MUCI0136N 4) SPST7551N 2) SPST7518N 5) SPST7523GP SPST7519N 6dx) ARPI0677DNGP 3) ASPI0166L31 6sx) ARPI0677SNGP E N Spare parts available in different colours to be specified when ordering. E S Repuestos disponibles en otros colores que se especificarán en el pedido. F R Pièces de rechange disponibles en plusieurs couleurs à spécifier dans la demande. - 16 -...
- Page 17 All manuals and user guides at all-guides.com EN_English MOVING PARTS. _ ALL OPERATING AND ASSEMBLY PROCEDURES SHOULD BE Thank you for choosing a Peg-Pérego product. PERFORMED BY AN ADULT. WARNING _ DO NOT LIFT THE STROLLER BY GRIPPING THE FRONT BAR. THE FRONT BAR IS NOT DESIGNED TO _ READ THE INSTRUCTIONS CAREFULLY WITH STAND LOADS. BEFORE USE AND KEEP THEM FOR _ ENSURE THAT THE STROLLER IS FUTURE REFERENCE. OPENED CORRECTLY AND LOCKED IN FAILURE TO FOLLOW THESE POSITION OF USE. WARNINGS AND INSTRUCTIONS _ CHECK TO MAKE SURE THAT THE COULD RESULT IN SERIOUS INJURY CAR SEAT OR THE BABY CARRIAGE...
- Page 18 All manuals and user guides at all-guides.com RECOMMENDED WEIGHT LIMIT. MECHANISMS. _ THIS PRODUCT IS DESIGNED FOR _ IT COULD BE DANGEROUS TO USE CHILDREN FROM BIRTH UP TO A ACCESSORIES WHICH ARE NOT WEIGHT OF 20 LBS (9 KG). APPROVED BY THE MANUFACTURER. _ FALL HAZARD: DO NOT USE THIS _ DO NOT USE THE BASSINET BASSINET WHEN THE INFANTS WITHOUT ITS FABRIC COVERING, BEGINS TO PUSH UP ON HANDS OR WHICH CANNOT BE REPLACED KNEES OR HAS REACHED 20 LBS. WITH ONE NOT APPROVED BY THE _ SUFFOCATION HAZARD: INFANTS HAVE MANUFACTURER. SUFFOCATED IN GAPS BETWEEN EXTRA _ TAKE CARE WHEN ADJUSTING THE PADDING AND SIDE OF THE BASSINET/ MECHANISMS (HANDLE, BACKREST) CRADLE OR ON SOFT BEDDING. WITH THE CHILD IN THE PRODUCT. USE ONLY THE PAD PROVIDED BY _ IF A SHEET IS USED, CHECK THAT MANUFACTURER. NEVER ADD A PILLOW, DIMENSIONS FIT THE DIMENSIONS COMFORTER, OR ANOTHER MATTRESS OF THIS BASSINET.
-
Page 19: Serial Numbers
All manuals and user guides at all-guides.com wheels, solid handle. 7 BRAKE: Press the lever down to apply the brake on the chassis and lift it to release the INSTRUCTIONS brake. 8 ADJUSTABLE HANDLEBAR: To adjust the 1 OPENING: Before opening the frame, remove height of the handlebar, press both of the (without using blades) any die-cut cardboard. side buttons at the same time (fig_a) and Press down the side fastener, hold the upper swing it into the desired position (fig_b), then section of the handle and rotate it towards release the buttons. you until the frame is fully opened (fig_a). 9 FOLDING UP: The chassis can be folded up Open frame (fig_b). without the seat, with the seat facing the The frame is properly opened when the person pushing (recline the backrest before attachment on the base clicks into place, folding it) or with the seat facing forward. as shown. CAUTION: When placing the seat To fold the stroller, it is best to set the front on the frame, press the seat downwards to wheels to their fixed position and close the ensure it engages securely onto the base. hood (if fitted). Place the handle as shown in 2 FITTING THE WHEELS: Slot the uprights into the figure (fig_a). -
Page 20: Cleaning And Maintenance
All manuals and user guides at all-guides.com MICO, ATON, ATON 2 (A). Pull the shoulder straps towards you PRATICO: Transform your Book Plus S to a (arrow_a) until the buckles are released and lighter strollerwith our compact Pratico seat insert them in the backrest loops (arrow_b). that comes with its very owntravel bag (B). Remove the shoulder straps from the sack BORSA. Diaper-Changing Bag with pad for (arrow_c) and insert them in the most changing the baby (C). appropriate loop (arrow_d), then re-attach CUP HOLDER: may be attached to the the two buckles on the rear of the backrest mushroom button on the frame of the stroller (arrow_e) The buckles are securely attached (D). when a click is heard (fig_f). 2 1 HOOD: To fasten, slide the attachments into CLEANING AND MAINTENANCE the sides of the seat (fig_a) and button the hood to the back of the backrest (fig_b). To PRODUCT MAINTENANCE: protect from the remove the hood: pull out the attachments weather: water, rain, or snow; prolonged and and unbutton. To lift the hood: pull it towards continuous exposure to bright sunlight may you; to close the hood: push it back. The hood give rise to colour changes of various different includes a slot from which you can hang the materials; store this product in a dry place. - Page 21 All manuals and user guides at all-guides.com ACCESSORY repositioned in the hood when it is no longer required. 2 7 VARIO: Stylish foot muff is adjustable to 3 3 4 COVER: place the cover over the Bassinet Pop- different lenght. Up; fasten the buttons on both sides and the MOSQUITO NETTING: can be fastened to the elastics as shown in the figure. hood (fig_b). The cover has different characteristics RAIN CANOPY: can be applied to the hood (Fig. c). depending on the collection. The rubber bands that fasten to the hood SERIAL NUMBERS allow the cover to provide greater protection 2 8 Seat Pop-Up reports information as at the to the child against the elements. date of manufacture of the product. 3 5 HANDLE: the handle is only locked in the _ Product name, date of manufacture and serial vertical position (Fig. a). number of the seat. To lower the handle, press the two side This information is required for any buttons simultaneously and push it complaints.
- Page 22 All manuals and user guides at all-guides.com PEG-PÉREGO S.p.A. open the two zips as shown in figures b and c, in order to remove the padding. Peg Pérego can make changes at any time to 4 3 It is also possible to remove the product's inner the models described in this publication for lining. technical or commercial reasons. PADDING CLEANING PEG-PÉREGO INSTRUCTIONS AFTER-SALES SERVICE If any parts of the item get lost or damaged, INTERNAL PADDING: only use genuine Peg Pérego spare parts. _ Brush the fabric parts to remove dust and For any repairs, replacements, information hand wash at a maximum temperature of 30° on the products and sales of genuine spare without wringing. parts and accessories, contact the Peg _ Do not use chlorine bleach. Pérego Assistance Service and state the serial _ Do not iron. number of the product, if present. _ Do not dry clean.
- Page 23 All manuals and user guides at all-guides.com ES_Español UN CINTURÓN DE SEGURIDAD DE 5 PUNTOS COMPLETO. ADVERTENCIA: Le agradecemos haber elegido un producto Peg-Pérego. NO DEJAR NUNCA AL NIÑO SIN ADVERTENCIA VIGILANCIA. _ USAR SIEMPRE TODOS LOS DISPOSITIVOS DE BLOQUEO CADA _ LEER ESTAS INSTRUCCIONES VEZ QUE LA SILLA DE PASEO NO ESTÉ DETENIDAMENTE Y CONSERVARLAS EN MOVIMIENTO. EN SU LUGAR DURANTE TODA _ PARA EVITAR LESIONES GRAVES, LA VIDA ÚTIL DEL PRODUCTO. ASEGURARSE DE QUE EL NIÑO NO EL INCUMPLIMIENTO DE ESTAS PUEDA MOVERSE PELIGROSAMENTE ADVERTENCIAS E INSTRUCCIONES MIENTRAS SE REGULA EL PRODUCTO.
- Page 24 All manuals and user guides at all-guides.com _ LEER ESTAS INSTRUCCIONES _ NO DEJAR QUE OTROS NIÑOS DETENIDAMENTE Y CONSERVARLAS JUEGUEN SIN VIGILANCIA CERCA DEL EN SU LUGAR DURANTE TODA COCHECITO. LA VIDA ÚTIL DEL PRODUCTO. _ "ANTES DE COLOCAR AL BEBÉ EN EL INCUMPLIMIENTO DE ESTAS EL MOISÉS, ASEGÚRESE DE HABER ADVERTENCIAS E INSTRUCCIONES MONTADO CORRECTAMENTE TODAS PODRÍA OCASIONAR LESIONES LAS PIEZAS". GRAVES O LA MUERTE.
- Page 25 All manuals and user guides at all-guides.com BAJAR COMPLETAMENTE (fig_d). 5 Fije los dos ojales superiores de la cesta en los dos botones grises que se encuentran a AVISO ambos lados de los soportes del tubo de la ESTE ARTÍCULO CUMPLE O cesta. Nótese que los ojales se abren (fig_e). Retire el cartón de la barra trasera. EXCEDE TODOS LOS REQUISITOS IMPORTANTE! Fije los dos ojales inferiores de CONTEMPLADOS POR LAS NORMAS la cesta en los dos botones grises presentes ASTM F 2194 Y POR LAS ÚLTIMAS sobre la barra trasera. Nótese que los ojales se REVISIONES. abren (fig_f). ______________________________________________ ¡ATENCIÓN! si esta operación no se realiza correctamente, la cesta no puede sostener CHASSIS POP-UP el contenido. Fije las aletas delanteras de la cesta en los botones grises del chasis (fig_g). PARA LA INSTALACIÓN CONSULTE NUESTRO VÍDEO DE INSTRUCCIONES EN LA PÁGINA: COMPONENTES DEL ARTÍCULO WWW.PEGPEREGO.COM Comprobar el contenido presente en el 6 RUEDAS DELANTERAS FIJAS O PIVOTANTES: embalaje y contactar al Servicio de Asistencia para que las ruedas delanteras queden en caso de reclamación.
-
Page 26: Números De Serie
All manuals and user guides at all-guides.com y veloz que permite enganchar con un solo atrás o hacia delante. gesto el capazo Navetta, la silla de auto INSTRUCCIONES DE USO Primo Viaggio y la silla Seggiolino Switch/ Seggiolino Pop-Up al chasis: colocarlos y 1 5 BARRA FRONTAL: Para enganchar la barra presionar sobre el producto con ambas frontal, acompañar los ganchos en los brazos manos hasta oír el clic. de la silla y empujar hacia la silla hasta el Accionar siempre el freno del chasis o del encastre (fig_a). Para sacar la barra frontal, carrito antes de enganchar y desenganchar pulsar las dos teclas (fig_b) y extraer (fig_c). los productos (consultar los respectivos Abrir la barra frontal sólo de un lado para manuales de instrucciones). facilitar la entrada y la salida del niño. Comprobar que el elemento de transporte 1 6 RESPALDO: para regular el respaldo, alce del bebé esté correctamente enganchado. la manilla (fig_a) y reclínelo en la posición deseada (fig_b). El respaldo se puede regular NÚMEROS DE SERIE en distintas posiciones 1 3 Book Plus S , incluye información relativa a la 1 7 REPOSAPIÉS: antes de regular el reposapiés, fecha de producción del mismo. - Page 27 All manuals and user guides at all-guides.com presionar hacia abajo con ambas manos hasta torcer, no usar lejía, no planchar, no lavar en el encastre (fig_b). Para asegurar el enganche seco, no usar solventes y no secar utilizando correcto, sujetar la silla por la barra frontal y secadoras de tambor rotativo. tirar hacia arriba. 2 4 DESENGANCHE DE LA SILLA DEL CARRITO: pulsar las dos teclas situadas en los brazos ______________________________________________ de la silla (fig_a) y luego las dos palancas situadas debajo (fig_b) tirando de la silla hacia arriba (fig_c) hasta el desenganche. Si BASSINET POP-UP el respaldo está completamente replegado hacia delante (en la posición de cierre “con vista al mundo”), no es posible desenganchar INSTRUCCIONES DE USO la silla del chasis (fig_d). Entonces, lleve el respaldo hacia atrás hasta la posición de uso, 2 9 APERTURA DE BASSINET Pop-Up: Girar la y desenganche la silla del chasis (fig_e). agarradera de Bassinet Pop-Up; 2 5 CIERRE: para cerrar sobre el carrito la silla 3 0 desenganchar los dos cierres de velcro a orientada hacia la calle, presionar el tirador ambos lados como se ilustra (Fig. y Flechas a) de regulación del respaldo (fig_a) y girarlo y levantar Bassinet Pop-Up por la agarradera...
- Page 28 All manuals and user guides at all-guides.com plegar Bassinet Pop-Up para reducir su mínimo. Las operaciones de limpieza y tamaño. Presionar y empujar las lengüetas mantenimiento sólo deben realizarse por adultos. de los cursores situados debajo de la base _ Se aconseja mantener limpias todas las partes de Bassinet Pop-Up (Fig. a) y desplazarlos al móviles y, en caso necesario, lubricarlas con centro de la base simultáneamente (Fig. b). aceites ligeros. 4 0 Girar la agarradera hacia abajo, pulsando _ Limpiar asiduamente las partes de plástico simultáneamente las dos teclas laterales (Fig. c). con un trapo húmedo sin usar disolventes ni Cerrar los cierres de velcro a ambos lados para otros productos similares. mantener Bassinet Pop-Up cerrada (Fig. d). _ Cepillar las partes de tejido para eliminar el polvo. GANCIOMATIC SYSTEM _ Proteger el producto contra agentes atmosféricos (agua, lluvia o nieve). Una 4 1 Ganciomatic System es el sistema práctico y exposición continua y prolongada al sol puede rápido que permite enganchar Bassinet Pop- causar cambios de color de muchos materiales. Up a los empalmes Ganciomatic de la silla de _ Conservar el producto en un lugar seco.
-
Page 29: Pour Être Utilisé Avec Bassinet
All manuals and user guides at all-guides.com FR_Français COMPLÈTE. AVERTISSEMENT: Merci d’avoir choisi un produit Peg-Pérego. NE JAMAIS LAISSER L’ENFANT SANS AVERTISSEMENT SURVEILLANCE. _ TOUJOURS ACTIONNER LES FREINS LIRE ATTENTIVEMENT CES LORSQUE LE PRODUIT EST A L’ARRET. INSTRUCTIONS ET LES CONSERVER _ POUR ÉVITER DE GRAVES BLESSURES DANS LE LOGEMENT PRÉVU À LORS DU RÉGLAGE DU PRODUIT, CET EFFET PENDANT TOUTE LA S’ASSURER QUE LES MEMBRES DE DURÉE DE VIE DU PRODUIT LE NON L’ENFANT NE SONT PAS EN CONTACT RESPECT DE CES AVERTISSEMENTS AVEC DES PIÈCES EN MOUVEMENT. - Page 30 _ L’EMPLOI D’ACCESSOIRES NON REMBOURRAGE SUPPLÉMENTAIRE ET APPROUVÉS PAR LE FABRICANT PEUT LE CÔTÉ DU COUFFIN/BERCEAU OU S’AVÉRER DANGEREUX. SUR UNE LITERIE MOLLE. N’UTILISER _ NE PAS UTILISER NAVETTA XL SANS QUE LE CAPITONNAGE FOURNI SA HOUSSE EN TISSU. CETTE HOUSSE PAR LE FABRICANT. NE JAMAIS NE PEUT ÊTRE REMPLACÉE QUE PAR AJOUTER D'OREILLER, D’ÉDREDON NI UNE AUTRE HOUSSE APPROUVÉE PAR D’AUTRE MATELAS POUR CRÉER UN LE FABRICANT. REMBOURRAGE. _ TENIR COMPTE DE LA POSITION DE _ NE LAISSEZ JAMAIS VOTRE ENFAN L’ENFANT PENDANT LES OPÉRATIONS TOUT SEUL. DE RÉGLAGE DES MÉCANISMES _ POUR RÉDUIRE LE RISQUE DE MORT (POIGNÉE, DOSSIER). SUBITE DU NOURRISSON, FAIRE _ SI UN DRAP EST UTILISÉ, VÉRIFIER DORMIR L'ENFANT SUR LE DOS. QUE SES DIMENSIONS SONT _ UTILISATION DU SUPPORT : CE ADAPTÉES À CELLES DE LA NACELLE. PRODUIT A ÉTÉ CONÇU POUR UNE _ LES CORDES PEUVENT PROVOQUER LA UTILISATION AVEC UN SUPPORT. STRANGULATION ! NE PAS PLACER LES TOUJOURS UTILISER UN SUPPORT ÉLÉMENTS POSSÉDANT UNE CORDE PEG-PEREGO SPÉCIFIQUE. AVANT AUTOUR DU COU D’UN ENFANT, TOUTE UTILISATION, S’ASSURER QUE COMME LE CORDON D'UNE CAPUCHE - 30 -...
-
Page 31: Composants De L'article
All manuals and user guides at all-guides.com OU CELUI D’UNE TÉTINE. NE PAS montants jusqu'au déclic (fig_c). 3 FIXATION DE L'ANSE : si le tube de l'anse est SUSPENDRE DE CORDE AU-DESSUS tourné vers le haut l'aligner avec la poussette D'UN COUFFIN OU D'UN BERCEAU (Fig_a). ET NE PAS ATTACHER DE CORDE AUX Le fixer au châssis comme sur la figure JOUETS. (Fig_b). Pour compléter le montage, il faut appuyer _ NE PAS PLACER LE MOΪSE PRÈS D’UNE sur les deux boutons se trouvant sur les côtés FENÊTRE OU D’UNE PORTE-FENÊTRE de l'anse (Fig_c) pour amener l'anse jusqu'au OÙ L’ENFANT POURRAIT SE SAISIR fond, jusqu'au déclic (Fig_d). DES CORDES D’UN STORE OU D’UN 4 MONTAGE PANIER : si abaissé, soulever le tube RIDEAU ET S’ÈTRANGLER. du panier en position horizontale. Appuyez sur les boutons argentés sous le montant en métal _ CE PRODUIT A ÉTÉ CONÇU POUR du panier situé au dos de la poussette (fig_a) et ACCUEILLIR L'ENFANT PENDANT LE enlevez le montant (fig_b) Introduisez le montant SOMMEIL. PENDANT LA PHASE DE dans la boucle en tissu au dos du panier, avec les REPOS, LE DOSSIER DE LA NACELLE deux boutons argentés tournés vers le bas (fig_c). Remettez le montant dans ses logements (fig_d). -
Page 32: Nettoyage Et Entretien
All manuals and user guides at all-guides.com soulever (fig_d) et laisser retomber l'anse vers au soleil pourrait entraîner un changement l'avant jusqu'à la fermeture. de couleur de nombreux matériaux; ranger 1 0 Pour une bonne fermeture, vérifier que le cet article dans un lieu sec. crochet latéral soit correctement enclenché NETTOYAGE DU CHÂSSIS: nettoyer (fig_a). Le chariot fermé tient debout tout régulièrement les pièces en plastique à l’aide seul (fig_b). d’un linge humide; ne pas utiliser de solvants 1 1 Pour qu’elle soit plus compacte, il est possible ou autres produits similaires. Veiller à ce d’extraire toutes les roues. que toutes les pièces métalliques restent Pour extraire les roues arrière : tirer le goujon sèches pour prévenir la formation de rouille. vers l’extérieur et extraire la roue comme cela Maintenir le bon état de propreté de toutes est montré sur la figure (fig_a). les pièces mobiles (mécanismes de réglage, Pour extraire les roues avant : appuyez sur mécanismes de fixation, roues, etc.) en la languette comme le montre la figure, et enlevant poussière ou sable; graisser avec extraire la roue (fig_b). une huile légère si nécessaire. TRANSPORT : la poussette peut être PEG-PÉREGO S.p.A. facilement transportée, avec les roues avant fixes, par sa poignée centrale (fig_c). -
Page 33: Accessoires En Option
All manuals and user guides at all-guides.com 1 6 DOSSIER : pour régler le dossier soulever la sur les deux boutons situés sur les accoudoirs poignée (fig_a) et l'incliner dans la position du siège (fig_a), puis sur les deux leviers souhaitée (fig_b). Le dossier est réglable dans situés en-dessous (fig_b) en tirant le siège ver plusieurs positions. le haut (fig_c) jusqu'à ce qu'il se décroche. 1 7 REPOSE-PIEDS: avant de régler le repose- Si le dossier est incliné complètement vers pieds, vérifier que la housse du repose-pieds l'avant (en position fermée face au monde), soit enfilée sur les supports correspondants, il n'est pas possible décrocher le siège du dans le cas contraire, l'enfiler. Pour abaisser chariot (fig_d). Faire donc tourner le dossier le repose-pieds, déplacer vers le bas les deux vers l'arrière jusqu'à la position d'utiliser, puis petits leviers et baisser le repose-pieds. vers le le décrocher du chariot (fig_e). bas (fig. a); pour le relever, le pousser vers le 2 5 FERMETURE : pour fermer le siège sur le haut (fig. b). chariot version face au monde, appuyer sur 1 8 CEINTURE DE SÉCURITÉ À 5 POINTS : pour la poignée de réglage du dossier (fig_a) et l’accrocher, enclencher les deux boucles la tourner complètement vers l'avant (fig_b). de la ceinture ventrale (bretelles attachées, Pour l'ouvrir, tourner le dossier vers l'arrière flèche_a) dans la sangle d’entrejambes (jusqu'au déclic), dans la position d'utilisation... -
Page 34: Déhoussage
All manuals and user guides at all-guides.com de solvants ; ne pas sécher dans un sèche- son encombrement. Appuyer et pousser les linge à tambour rotatif. languettes des curseurs situés sous la base de la Bassinet Pop-Up (Fig. a) et les déplacer simultanément au centre de la base (Fig. b). 4 0 Tourner l'anse vers le bas, en appuyant simultanément sur les deux boutons latéraux (Fig. c). BASSINET POP-UP Accrocher les velcros, des deux côtés, pour tenir la Bassinet Pop-Up pliée (Fig. d). GANCIOMATIC SYSTEM INSTRUCTIONS D’UTILISATION 4 1 Ganciomatic System est le système pratique 2 9 OUVERTURE BASSINET PO-PUP : Tourner et rapide qui vous permet de fixer Bassinet l'anse de la Bassinet Pop-Up vers le haut ; Pop-Up aux fixations Ganciomatic de la 3 0 décrocher les deux velcros, sur les deux côtés, poussette ou à la base du chariot. comme indiqué (Fig. et Flèches a) et soulever Pour fixer la Bassinet Pop-Up, la placer sur le Bassinet Pop-Up par l'anse vers le haut chariot et appuyer des deux mains jusqu'au (Flèche B) ; déclic. -
Page 35: Numéros De Série
All manuals and user guides at all-guides.com adultes. _ Il est recommandé de nettoyer régulièrement les parties mobiles et, si nécessaire, de les lubrifier avec de l’huile légère. _ Nettoyer périodiquement les parties en plastique avec un linge humide ; ne pas utiliser de solvants ou tout produit similaire. _ Épousseter les éléments en tissu pour chasser la poussière. _ Protéger le produit des agents atmosphériques (eau, pluie ou neige) ; une exposition continue et prolongée au soleil peut provoquer la décoloration de nombreux matériaux. _ Conserver le produit dans un endroit sec. ACCESSOIRES EN OPTION 4 4 HABILLAGE PLUIE INTÉGRAL (COVER ALL): Habillage pluie intégral transparent. SAC: sac avec petit matelas pour changer le bébé ; peut être accroché au châssis d'une poussette. 4 5 BASSINET STAND: support pratique et compact. NUMÉROS DE SÉRIE 4 6 Des informations telles que la date de production sont reportées sous la base deBassinet Pop-Up. - Page 36 All manuals and user guides at all-guides.com - 36 -...
- Page 37 All manuals and user guides at all-guides.com - 37 -...
- Page 38 All manuals and user guides at all-guides.com - 38 -...
- Page 39 All manuals and user guides at all-guides.com - 39 -...
- Page 40 All manuals and user guides at all-guides.com PEG PEREGO S.p.A. VIA DE GASPERI 50 20862 ARCORE MB ITALIA tel. 0039 039 60881 fax 0039 039 615869/616454 Servizio Post Vendita - After Sale: tel. 0039 039 6088213 fax: 0039 039 3309992 Conforms to ASTM F833 PEG PEREGO U.S.A. Inc. Safety Standards 3625 INDEPENDENCE DRIVE FORT WAYNE INDIANA 46808 phone 260 482 8191 fax 260 484 2940 Call us toll free: 1 800 671 1701 PEG PEREGO CANADA Inc. 585 GRANITE COURT PICKERING ONTARIO CANADA L1W3K1 phone 905 839 3371 fax 905 839 9542 Call us toll free: 1 800 661 5050 www.pegperego.com...