Publicité

Les langues disponibles
  • FR

Les langues disponibles

  • FRANÇAIS, page 63

Liens rapides

FPR300
Power Rack
FPR350
DE
EN
ES
FR
IT
NL

Publicité

Table des Matières
loading

Sommaire des Matières pour SPORTSTECH FPR300

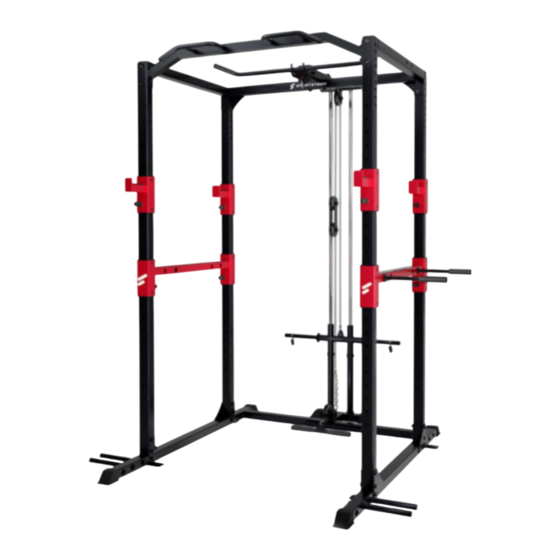
  • Page 1 Power Rack FPR300 FPR350...
  • Page 3 Sehr geehrter Kunde wir freuen uns, dass Sie sich für ein Gerät aus der SPORTSTECH Produktpalette entschieden haben. SPORTSTECH Sportgeräte bieten Ihnen hohe Qualität und neue Technologie. Um die Leistungsfähigkeit des Gerätes voll nutzen zu können und viele Jahre Freude an Ihrem Gerät zu haben, lesen Sie bitte vor der Inbetriebnahme und dem Beginn des Trainings dieses Benutzerhandbuch sorgfältig durch und verwenden Sie das Gerät den Anweisungen entsprechend.
  • Page 4 Aufbau, Benutzung, Abbau. 1. QR-Code scannen 2. Videos anschauen 3. Schnell und sicher starten Link zu den Videos: https://service.innovamaxx.de/fpr300_video Uns gibt es auch auf Social Media! Hol dir die neuesten Produktinfos, Trainingsinhalte uvm. auf unserer: Instagram-Seite Facebook-Seite https://www.instagram.com/sportstech.de https://www.facebook.com/sportstech.de...
  • Page 5 INHALT 1. WICHTIGE SICHERHEITSHINWEISE ................6 2. EXPLOSIONSZEICHNUNG/ERSATZTEILLISTE ..............8 3. TECHNISCHE DATEN ....................8 4. MONTAGE ......................... 9 5. BODENBEFESTIGUNG ....................18 6. WARTUNG UND PFLEGE .................... 19 7. DEHNUNGSÜBUNGEN ....................20 8. DIES KÖNNTE SIE AUCH INTERESSIEREN ..............21...
  • Page 6: Wichtige Sicherheitshinweise

    WICHTIGE SICHERHEITSHINWEISE WICHTIG - Bitte vollständig durchlesen, bevor Sie mit der Montage oder Benutzung beginnen. Um das Risiko schwerer Verletzungen zu verringern, lesen Sie die gesamte Anleitung, bevor Sie Ihr Gerät zusammenbauen oder benutzen. Beachten Sie insbesondere die folgenden Vorsichtsmaßnahmen. MONTAGE •...
  • Page 7 • Menschen mit Einschränkungen sollten das Gerät nur unter Aufsicht einer qualifizierten Person oder eines Arztes benutzen. • Bewahren Sie dieses Gerät im Innenbereich auf, geschützt vor Feuchtigkeit und Staub. Stellen Sie das Gerät nicht in eine Garage, ein Nebengebäude, auf eine überdachte Terrasse oder in die Nähe von Wasser.Wenn Kinder das Gerät unter Aufsicht benutzen dürfen, sollte der jeweilige Stand ihrer geistigen und körperlichen Entwicklung berücksichtigt werden.
  • Page 8: Technische Daten

    Sie die Explosionszeichnung finden Sie die Explosionszeichnung und die Ersatzteile-Liste: und die Ersatzteile-Liste: https://service.innovamaxx.de/fpr300_spareparts https://service.innovamaxx.de/fpr300_spareparts TECHNISCHE DATEN Modell FPR300 Light Modell FPR350 Pro Nettogewicht 63 kg 74 kg Breite min. (mit Bodenbefestigung) 1332 mm 1332 mm Breite max. (Gummiband Befestigung + Dipstation)
  • Page 9 MONTAGE Alle Bauteile und vormontierten Teile noch nicht zu fest anziehen, sie müssen für die Montage beweglich bleiben! Schritt 1 1. Richten Sie als erstes die vertikalen Rahmenschienen so aus, dass die beiden Rahmenschienen (A) mit den 9 Bohrlöchern an der Seite nach oben zeigen und sich vor den Schienen (B) befinden. Die 7 Bohrungen der Rahmenschiene (B) sind ebenfalls nach oben und zur Seite auszurichten.
  • Page 10 Schritt 2 1. Die Standfuß-Rahmen sind so auszurichten, dass die zwei Bohrungen für den unteren Rahmenver- binder nach hinten zeigen und die seitlichen Flachverbinder für die Rahmenschienen nach außen gerichtet sind. 2. Verschrauben Sie den unteren Rahmenverbinder mit vier Schrauben (5), vier Unterlegscheiben und vier Muttern an den Standfüßen.
  • Page 11 Schritt 3 1. Setzen Sie die beiden oberen Querstreben zwischen den Rahmenschienen ein und befestigen Sie diese am vorderen Rahmen, oben mit zwei Schrauben (7) und zwei Unterlegscheiben sowie in der unteren Bohrung mit zwei Schrauben (5), zwei Unterlegscheiben und zwei Muttern. 2.
  • Page 12 Schritt 4 1. Montieren Sie den Latzug-Rahmen am unteren Rahmenverbinder, mit zwei Schrauben (6), vier Unterlegscheiben und zwei Muttern. 2. Befestigen Sie die Umlenkrolle am U-Profil des unteren Rahmenverbinders, mit einer Schraube (3), zwei Unterlegscheiben und der Mutter. 3. Schieben Sie die Hubstange, Unterlegscheiben, Schiebehülsen und wieder Unterlegscheiben in dieser Reihenfolge auf die Führungsstangen.
  • Page 13 Schritt 5 1. Montieren Sie zwei Umlenkrollen, die sich im Latzug-Mast befinden und verwenden Sie dabei die Schrauben (6), 4 Unterlegscheiben und zwei Muttern sowie 4 Umlenkrollenbuchsen. Achten Sie auf die Anordnung der Buchsen wie dargestellt! 2. Montieren Sie die dritte Rolle am U-Profil unterhalb des Latzug-Mastes mit einer Schraube (3), zwei Unterlegscheiben und einer Mutter.
  • Page 14 Schritt 6 1. Bauen Sie zunächst den Flaschenzug zusammmen, indem Sie zwei Rollen zwischen zwei Flachver- binder schrauben. Fixieren Sie die Bauteile mit zwei Schrauben (3), vier Unterlegscheiben und zwei Muttern. 2. Führen Sie das Kabel A durch die Punkte a-e, für den oberen Latzug. Montieren Sie das Ende des Kabels an der Hubstange und verwenden Sie eine Schraube (2), zwei Unterlegscheiben und eine Mutter.
  • Page 15 Sie haben das Grundgerüst bis zu diesem Punkt aufgebaut und es entspricht der Abbildung. Für das Modell FPR300 Light, setzen Sie die Monatge bei Schritt 7 fort. Für das Modell FPR350 Pro, setzen Sie die Monatge bei Schritt 8 fort.
  • Page 16 Schritt 7 für Modell FPR300 Light 1. Montieren Sie mit vier Schrauben (1) und vier großen Unterlegscheiben beide Griffe an der Klimm- zugstange. 2. Befestigen Sie nun die Klimmzugstange an ihren Flachverbindern mit vier Schrauben (5), acht Unter- legscheiben und vier Muttern an den vorderen vertikalen Rahmenschienen.
  • Page 17 Schritt 8 für Modell FPR350 Pro 1. Als erstes setzen Sie die Stangen in die großen Bohrungen der Sprossenrahmen (L/R) ein und schrauben diese leicht fest, mit zehn Schrauben (1) und zehn Unterlegscheiben. Ziehen Sie die Schrauben noch nicht vollständig an! 2.
  • Page 18 BODENBEFESTIGUNG Unten, an den Standfuß-Rahmen befinden sich Flachverbinder mit 6 Bohrungen, die zur Befestigung am Boden dienen. Zur sicheren, stabilen Befestigung des Gerätes ist eine Bodenverankerung notwendig. Verwenden Sie hierfür das mitgelieferte Befestigungsmaterial. Stellen Sie vorher sicher, dass der Boden eben und für die feste Montage geeignet ist.
  • Page 19: Wartung Und Pflege

    WARTUNG UND PFLEGE 1. Die Sicherheit des Gerätes kann nur aufrechterhalten werden, wenn es regelmäßig auf Verschleiß und/oder Abnutzung geprüft wird, z. B. an den Verbindungspunkten. 2. Überprüfen Sie alle Teile vor der Benutzung des Geräts und ziehen Sie sie ggf. fest, ersetzen Sie etwa defekte Teile sofort und verwenden Sie das Gerät solange nicht mehr, bis es wieder in ein- wandfreiem Zustand ist.
  • Page 20 DEHNUNGSÜBUNGEN Bevor Sie das Sportgerät benutzen, ist es am besten, 5 bis 10 Minuten lang Stretching-Übungen zum Aufwärmen durchzuführen. Dehnen vor dem Training hilft die Flexibilität zu verbessern und das Verletzungsrisiko zu mindern. MIT DEM KOPF ROLLEN Drehen Sie den Kopf nach rechts für eine Sekunde, fühlen Sie die Streckung auf der linken Seite des Nackens, dann drehen Sie den Kopf zurück für eine Sekunde, recken Sie Ihr Kinn nach oben und lassen Ihren Mund geöffnet.
  • Page 21: Dies Könnte Sie Auch Interessieren

    Steigern Sie Ihre Performance und Leistung am Power Rack! Erhöhen Sie das Gewicht in Kombination mit einem Hantelset und behalten Sie festen Grip mit Ihren Trainingshandschuhen. Sportstech 2 in 1 innovatives Hantel-Set Kurzhanteln & Langhanteln https://www.sportstech.de/hanteln-ah150-40kg • Egal ob Bizeps Curls oder Bench Pressing – dank extra langem 400mm Verbindungsstück kom- biniert das AH150 2in1 Hantelset beide Funktionen in einem Produkt.
  • Page 22: Entsorgung

    ENTSORGUNG Recyclingkreislauf Verpackungsmaterialien können wieder dem Rohstoffkreislauf zugeführt werden. Entsorgen Sie die Verpackung gemäß den aktuellen Bestimmungen. Informationen erhalten Sie bei den Rückgabe- und Sammelsystemen Ihrer Gemeinde.
  • Page 23 Dear customer, We are pleased you chose a device from the SPORTSTECH product range. SPORTSTECH sports equip- ment offers you high quality and new technology. In order to fully use the potential of your device and be able to enjoy it for many years, please read this manual carefully before starting up and beginning of training, and use the device according to the instruc- tions.
  • Page 24 1. Scan the QR code 2. Watch videos 3. Start fast and safely Link to the videos: https://service.innovamaxx.de/fpr300_video We are also on social media! Get the latest product information, training content and much more on our: Instagram-page Facebook-page https://www.instagram.com/sportstech.de https://www.facebook.com/sportstech.de...
  • Page 25 INDEX INHALT 1. IMPORTANT SAFETY INSTRUCTIONS ................26 2. EXPLODED DRAWING/SPARE PARTS LIST ..............28 3. TECHNICAL DETAILS....................28 4. ASSEMBLY ....................... 29 5. FLOOR FIXING ......................38 6. MAINTENANCE AND CARE ..................39 7. STRETCH EXERCISE ....................40 8. YOU MIGHT ALSO BE INTERESTED IN THIS ..............41...
  • Page 26: Important Safety Instructions

    IMPORTANT SAFETY INSTRUCTIONS IMPORTANT - Please read this user advice and instructions completely before you start with the as- sembly or use. To reduce the risk of serious injury, please read all of these instructions before assem- bling or using your device. Pay particular attention to the following precautions. ASSEMBLY •...
  • Page 27 • Store this device indoors, away from moisture and dust. Do not place the device in a garage, outbuilding, on a covered terrace or near water. If children are allowed to use the device under supervision, their mental and physical development should be taken into account.
  • Page 28: Exploded Drawing/Spare Parts List

    TECHNICAL DETAILS Model FPR300 Light Model FPR350 Pro Net weight 63 kg 74 kg Width min. (with Floor Fixing) 1332 mm 1332 mm Width max.
  • Page 29 ASSEMBLY All components and pre-assembled parts are not fully tightened yet and they have to remain a bit loose for assembly purposes. Step 1 1. First, align the vertical frame rails so that the two frame rails (A) with the 9 drill holes on the side point upwards and are in front of the rails (B).
  • Page 30 Step 2 1. The pedestal frames must be aligned so that the two holes for the lower frame connector point to the rear and the flat connectors on the side for the frame rails point outwards. 2. Screw the lower frame connector to the feet with four screws (5), four washers and four nuts. Make sure that the U-profile points upwards in the middle.
  • Page 31 Step 3 1. Insert the two upper cross struts between the frame rails and fasten them to the front frame, at the top with two screws (7) and two washers and in the lower hole with two screws (5), two washers and two nuts.
  • Page 32 Step 4 1. Attach the lat pulldown frame to the lower frame connector with two screws (6), four washers and two nuts. 2. Attach the pulley to the U-profile of the lower frame connector with a screw (3), two washers and the nut.
  • Page 33 Step 5 1. Mount two pulleys that are in the lat pull-down mast using the screws (6), 4 washers and two nuts as well as 4 pulley bearings. Pay attention to the arrangement of the sockets as shown! 2. Mount the third roller on the U-profile below the lat pull-down mast with a screw (3), two washers and a nut.
  • Page 34 Step 6 1. First, assemble the pulley block by screwing two rollers between two flat connectors. Fix the compo- nents with two screws (3), four washers and two nuts. 2. Feed cable A through points a-e for the top lat pulldown. Mount the end of the cable on the lift rod and use a screw (2), two washers, and a nut.
  • Page 35 You have built the skeleton up to this point and it corresponds to the illustration. For the FPR300 Light model, continue with step 7. For the FPR350 Pro, continue assembly from step 8.
  • Page 36 Step for Model FPR300 Light 1. Use four screws (1) and four large washers to attach both handles to the pull-up bar. 2. Now attach the pull-up bar to its flat connectors with four screws (5), eight washers and four nuts on the front vertical frame rails.
  • Page 37 Step for Model FPR350 Pro 1. First, insert the rods into the large holes in the lattice frames (L / R) and screw them tight with ten screws (1) and ten washers. Do not fully tighten the screws yet! 2. Attach the two frame extensions to the rung frame with four screws (6), eight washers and four nuts, as shown, with the U-profiles pointing downwards.
  • Page 38 FLOOR FIXING At the bottom of the stand frame there are flat connectors with 6 holes that are used for fastening to the floor. Floor anchoring is necessary for secure, stable fastening of the device. Use the fastening/fixing material supplied. Make sure that the floor is level beforehand and is suitable for permanent installation. IMPORTANT: Please also note the relevant safety instructions at the beginning of this manual.
  • Page 39: Maintenance And Care

    MAINTENANCE AND CARE 1. The safety of the device can only be maintained if it is regularly checked for wear and / or wear, e.g. at the connection points. 2. Check all parts before using the device and tighten them if necessary, replace any defective parts immediately and do not use the device until it is in perfect condition again.
  • Page 40: Stretch Exercise

    STRETCH EXERCISE No matter how you do sports, please do some stretch at first, The warm muscle will extend easily, so warm up yourself with 5-10minutes, Then We suggest the following stretch exercise, five times.10 counts for each time or longer do these exercise again after sports. HEAD ROLLS Rotate your head to the right for one count, feeling the stretch up the left side of your neck, then rotate your head back for one count, stretching your chin to the ceiling and letting your mouth open.
  • Page 41 Make your training as efficient and safe as possible now! Benefit from the stability and high quality of the BXF20 training gloves from Sportstech - and enjoy a particularly safe training experience! Full, secure grip thanks to non-slip hand grips.
  • Page 42 DISPOSAL Recycling loop Packaging material can be conveyed back to the raw material cycle. Dispose of packaging material in accordance with legal provisions. Information can be retrieved from the return or collections systems of your community.
  • Page 43 Estimado cliente, Nos complace que haya elegido un dispositivo de la línea de productos SPORTSTECH. Las máquinas de deporte de SPORTSTECH ofrecen una gran calidad y una tecnología innovadora. Con el fin de usar todo el potencial de su dispositivo y para que pueda disfrutarlo durante muchos años, por favor lea este manual cuidadosamente antes de comenzar a ejercitarse, y use el dispositivo de acuer- do a las instrucciones.
  • Page 44 Montaje, Utilizar, Desmontaje. 1. Escanear el código QR 2. Ver vídeos 3. Comienza rápido y seguro Enlace a los videos: https://service.innovamaxx.de/fpr300_video ¡También estamos en redes sociales! Obtenga la última información sobre nuestros productos, entrenamientos y mucho más aquí: Instagram Facebook https://www.instagram.com/sportstech.de https://www.facebook.com/sportstech.de...
  • Page 45 CONTENIDOS INHALT 1. INFORMACIÓN DE SEGURIDAD IMPORTANTE ............... 46 2. DIBUJO DE EXPLSOIÓN/LISTA DE REPUESTOS ............. 48 3. DATOS TÉCNICOS ..................... 48 4. MONTAJE ......................... 49 5. ANCLAJE AL SUELO ....................58 6. MANTENIMIENTO Y CUIDADO ..................59 7. EJERCICIOS DE ESTIRAMIENTO .................. 60 8.
  • Page 46: Información De Seguridad Importante

    INFORMACIÓN DE SEGURIDAD IMPORTANTE ATENCIÓN - Lea completamente estas instrucciones antes de empezar a montar o usar el producto. Para reducir el riesgo de lesiones graves, lea todo el manual antes de montar o utilizar el aparato. Pres- te especial atención a las siguientes precauciones. MONTAJE •...
  • Page 47 • Guarde el aparato en un lugar limpio y seco. No lo guarde en un garaje, un baño, un patio cubierto o cerca del agua; si se permite a los niños utilizar el aparato bajo supervisión, debe tenerse en cuenta su desarrollo mental y físico. Se les debe enseñar y supervisar para que utilicen la unidad correctamente.
  • Page 48: Dibujo De Explsoión/Lista De Repuestos

    DATOS TÉCNICOS modelo FPR300 Light modelo FPR350 Pro Peso neto 63 kg 74 kg Anchura mínima (con montaje en el suelo) 1332 mm 1332 mm Ancho máximo (accesorio de banda elástica +...
  • Page 49 MONTAJE Todos los componentes y piezas que vienen premontados no están apretados para facilitar el montaje. Paso 1 1. Primero alinee los rieles verticales del bastidor de manera que los dos rieles del bastidor (A) con las 9 perforaciones en el lado estén orientadas hacia arriba y frente a los rieles (B). Las 7 perforaciones del riel del bastidor (B) también deben estar alineadas hacia arriba y el lado.
  • Page 50 Paso 2 1. Los bastidores de soporte deben estar alineados de manera que los dos orificios para el conector inferior del bastidor apunten hacia atrás y los conectores planos laterales para los rieles del bastidor apunten hacia afuera. 2. Atornille el conector del bastidor inferior al soporte con cuatro tornillos (5), cuatro arandelas y cuatro tuercas.
  • Page 51 Paso 3 1. Inserte los dos refuerzos transversales superiores entre los rieles del bastidor y fíjelos al bastidor frontal, en la parte superior con dos tornillos (7) y dos arandelas y en el agujero inferior con dos tornillos (5), dos arandelas y dos tuercas. 2.
  • Page 52 Paso 4 1. Monte el bastidor de tracción en el conector del bastidor inferior, usando dos tornillos (6), cuatro arandelas y dos tuercas. 2. Fije la polea al perfil en U del conector del bastidor inferior con un tornillo (3), dos arandelas y la tuerca.
  • Page 53 Paso 5 1. Monte dos poleas, que se encuentran en el mástil de tracción, usando los tornillos (6), 4 arandelas, dos tuercas y 4 conectores de polea. ¡Preste atención a la disposición de los conectores como se muestran! 2. Monte el tercer rodillo en el perfil en U debajo del mástil de tracción con un tornillo (3), dos arande- las y una tuerca.
  • Page 54 Paso 6 1. Primero ensamble la polea atornillando dos rodillos entre dos conectores planos. Fije los compo- nentes con dos tornillos (3), cuatro arandelas y dos tuercas. 2. Coloque el cable A a través de los puntos a-e, para el cable de tracción superior. Monte el extremo del cable en la barra de elevación y usa un tornillo (2), dos arandelas y una tuerca.
  • Page 55 Hasta este punto ha montado la estructura básica y debe estar como en la ilustración. Para el modelo FPR300 Light, siga el paso 7. Para el modelo FPR350 Pro, siga el paso 8.
  • Page 56 Paso 7 para el modelo FPR300 Light 1. Monte ambos mangos a la barra de dominadas con cuatro tornillos (1) y cuatro arandelas grandes. 2. Sujete la barra de dominadas a los conectores planos de los rieles del bastidor vertical delantero con cuatro tornillos (5), ocho arandelas y cuatro tuercas.
  • Page 57 Paso 8 para el modelo FPR350 Pro 1. Primero, inserte las barras en los grandes agujeros del bastidor de los peldaños (I/D) y atorníllelas ligeramente, usando diez tornillos (1) y diez arandelas. ¡No los apriete del todo todavía! 2. Fije las dos extensiones de bastidor con cuatro tornillos (6), ocho arandelas y cuatro tuercas al bastidor del peldaño como se muestra, con los perfiles en U hacia abajo.
  • Page 58: Anclaje Al Suelo

    ANCLAJE AL SUELO En la parte inferior, en el bastidor base, hay conectores planos con 6 agujeros para fijarlos al suelo. Para mantener la seguridad y la estabilidad de la unidad, hay que anclarla al suelo. Use el material de mon- taje suministrado para esto.
  • Page 59: Mantenimiento Y Cuidado

    MANTENIMIENTO Y CUIDADO 1. La seguridad del aparato sólo se puede mantener si se comprueba regularmente su desgaste y/o rotura, por ejemplo, en los puntos de conexión. 2. Compruebe todas las partes antes de utilizar la unidad y apriételas si es necesario, sustituya inme- diatamente cualquier pieza defectuosa y no utilice la unidad hasta que vuelva a estar en perfectas condiciones.
  • Page 60: Ejercicios De Estiramiento

    EJERCICIOS DE ESTIRAMIENTO No importa cómo se ejercite, siempre haga algo de estiramiento primero. El calentamiento muscular hará que sus músculos se extiendan fácilmente, así que caliente al menos 5-10 minutos. Luego le sugerimos hacer los siguientes ejercicios de estiramiento cinco veces. El estiramiento antes del ejercicio le ayuda a mejorar la flexibilidad y reduce los riesgos de lesiones.
  • Page 61 Saca el máximo partido a tu entrenamiento con seguridad. ¡Aprovecha la fijación y la gran calidad de los guantes BXF20 de Sportstech y entrena sin preo- cupaciones! Agarre totalmente seguro gracias a las palmas antideslizantes. Puedes comprar este producto de tu talla a través del siguiente código QR o...
  • Page 62 DESECHO Reciclaje loop El material de empaque puede trasladarse de nuevo al ciclo de materias primas. Deshágase del material de empaque de acuerdo a las normativas legales. Puede encontrar información en los sistemas de recolección de su comunidad.
  • Page 63 FRANÇAIS Cher client, Nous sommes ravis que vous ayez choisi un appareil de la gamme de produits SPORTSTECH. Les équi- pements sportifs SPORTSTECH vous offrent une qualité élevée et une technologie innovante. Afin d'utiliser pleinement le potentiel de votre appareil et de pouvoir l'apprécier pendant de nombreuses années, lisez attentivement ce manuel avant l'utilisation et le début de votre entraînement et utilisez l'ap-...
  • Page 64 3. Démarrez rapidement et en toute sécurité Lien vers les vidéos: https://service.innovamaxx.de/fpr300_video Vous pouvez aussi nous trouver sur les réseaux sociaux! Retrouve les dernières informations sur les produits, le contenu des entraînements et bien plus encore sur notre: la page Instagram la page Facebook https://www.instagram.com/sportstech.de https://www.facebook.com/sportstech.de...
  • Page 65 CONTENU INHALT 1. INFORMATIONS DE SÉCURITÉ IMPORTANTES ............... 66 2. DESSIN ÉCLATÉ/LISTE DES PIÈCES DE RECHANGE ............68 3. DONNÉES TECHNIQUES ..................... 68 4. ENSEMBLE ....................... 69 5. FIXATION AU SOL ...................... 78 6. ENTRETIEN ET MAINTENANCE ..................79 7. EXCERCICE D'ÉTIREMENT ..................80 8.
  • Page 66: Informations De Sécurité Importantes

    INFORMATIONS DE SÉCURITÉ IMPORTANTES IMPORTANT - Veuillez lire attentivement ce qui suit avant de commencer le montage ou l'utilisation. Pour réduire le risque de blessure grave, lisez l'intégralité des instructions ci-dessous avant d'assembler ou d'utiliser votre appareil. Soyez particulièrement attentif aux précautions suivantes. ASSEMBLAGE •...
  • Page 67 • Conservez cet appareil à l'intérieur, protégé de l'humidité et de la poussière. N'installez pas l'appareil dans un garage, une dépendance, sur une terrasse couverte ou à proximité d'eau. Si des enfants sont autorisés à utiliser l'appareil sous surveillance, il convient de tenir compte de l’état de leur développement mental et physique. Ils doivent être encadrés et informés afin d'utiliser l'appareil correctement.
  • Page 68: Dessin Éclaté/Liste Des Pièces De Rechange

    éclaté et la liste des pièces de rechange : et la liste des pièces de rechange : https://service.innovamaxx.de/fpr300_spareparts https://service.innovamaxx.de/fpr300_spareparts DONNÉES TECHNIQUES modèle FPR300 Light modèle FPR350 Pro Poids net 63 kg 74 kg Largeur min. (Avec montage au sol)
  • Page 69 ENSEMBLE Tous les éléments à assembler et les pièces prémontées ne doivent pas être trop serrés au début, ils doivent conserver leur mobilité pour l'assemblage. Étape 1 1. Tout d'abord, disposez les rails verticaux du cadre de telle sorte que les deux rails du cadre (A) avec les 9 trous de perçage sur le côté...
  • Page 70 Étape 2 1. Les socles des cadres doivent être orientés de manière à ce que les deux trous pour la jonction du cadre inférieur pointent vers l'arrière et les raccords plats sur les côtés pour les rails du cadre pointent vers l'extérieur. 2.
  • Page 71 Étape 3 1. Insérez les deux barres transversales supérieures entre les rails du cadre et fixez-les au cadre avant, en haut avec deux vis (7) et deux rondelles ainsi que dans le trou inférieur avec deux vis (5), deux rondelles et deux écrous. 2.
  • Page 72 Étape 4 1. Fixez le cadre à lats pulldown au raccord inférieur du cadre, à l'aide de deux vis (6), quatre rondelles et deux écrous. 2. Fixez la poulie de guidage au profil en U du raccord inférieur du cadre, à l'aide d'une vis (3), de deux rondelles et de l'écrou.
  • Page 73 Étape 5 1. Montez deux poulies de guidage, qui sont situées dans le mât à lats pulldown, en utilisant les vis (6), 4 rondelles et deux écrous ainsi que 4 douilles de poulie de guidage. Faites attention à respecter la disposition des douilles, reportez-vous à...
  • Page 74 Étape 6 1. Assemblez d'abord le palan en vissant deux poulies entre deux raccords plats. Fixez les pièces avec deux vis (3), quatre rondelles et deux écrous. 2. Faites passer le câble A par les points a-e, pour la lat supérieure. Montez l'extrémité du câble sur la barre de levage, utilisez une vis (2), deux rondelles et un écrou.
  • Page 75 À ce stade, vous avez assemblé l'ossature et elle correspond à l'illustration. Pour le modèle FPR300 Light, poursuivez l'assemblage à l'étape 7. Pour le modèle FPR350 Pro, poursuivez l'assemblage à l'étape 8.
  • Page 76 Étape 7 pour le modèle FPR300 Light 1. À l'aide de quatre vis (1) et de quatre grandes rondelles, fixez les deux poignées à la barre de tracti- 2. Fixez maintenant la barre de traction à ses raccords plats avec quatre vis (5), huit rondelles et quatre écrous sur les rails verticaux avant du cadre.
  • Page 77 Étape 8 pour le modèle FPR350 Pro 1. Tout d'abord, insérez les barres dans les grands trous des cadres à barreaux (G/D) et vissez-les légèrement, à l'aide de dix vis (1) et de dix rondelles. Ne resserrez pas encore complètement les vis 2.
  • Page 78: Fixation Au Sol

    FIXATION AU SOL En bas, sur les cadres socle, vous trouverez des raccords plats avec 6 trous qui servent à la fixation au sol. Pour une fixation sécurisée et solide de l'appareil, un ancrage au sol est nécessaire. Utilisez pour cela le matériel de fixation inclus dans la livraison.
  • Page 79: Entretien Et Maintenance

    ENTRETIEN ET MAINTENANCE 1. La sécurité de l'appareil ne peut être maintenue que s'il est régulièrement contrôlé pour détecter une éventuelle usure et / ou de possibles abrasions, par exemple aux points de raccordement. 2. Vérifiez toutes les pièces avant d'utiliser l'appareil et resserrez le cas échéant. Remplacez immédi- atement les pièces défectueuses et n'utilisez pas l'appareil avant qu'il ne soit à...
  • Page 80: Excercice D'étirement

    EXCERCICE D'ÉTIREMENT Peu importe comment vous pratiquez le sport, Veuillez faire quelques étirements avant de commencer votre entraî-nement, le muscle chaud s’étendra facilement, donc réchauffez vous durant 5-10minutes, nous suggérons l'exercice d'étirement suivant : 5 fois ,10 comptes pour chaque fois ou plus, faire ces exercices à...
  • Page 81: Cela Pourrait Également Vous Intéresser

    Améliorez vos performances et votre puissance avec le Power Rack ! Augmentez le poids en combinaison avec un jeu d'haltères et gardez une prise en main sûre avec vos gants d'entraînement. Sportstech 2 en 1 : un jeu d'haltères innovant Haltè- res courts et haltères longs https://www.sportstech.de/hanteln-ah150-20kg •...
  • Page 82: Mise Au Rebut

    MISE AU REBUT Chaîne du recyclage Les matériaux d‘emballage peuvent être transportés vers le cycle des matières premières. La disposition des matériaux d‘emballage, conformément aux dispositions légales. Les informations peuvent être récupérées à partir des systèmes de retour ou de collections.
  • Page 83 ITALIANO Gentile cliente Siamo lieti che abbiate scelto un dispositivo della gamma SPORTSTECH. L'attrezzatura sportiva SPORT- STECH ti offre alta qualità e tecnologia innovativa. Per sfruttare a pieno il potenziale del dispositivo e poterlo utilizzare per molti anni, raccomandiamo di leggere attentamente questo manuale prima di iniziare l’allenamento e di utilizzare il dispositivo seguen-...
  • Page 84 2. Guarda il video 3. Inizia ad allenarti veloce e sicuro Link per il Video: https://service.innovamaxx.de/fpr300_video Ci siamo anche sui social! Scopri le ultime novità sui prodotti, contenuti per l'allenamento e molto altro ancora sul nostro: pagina Instagram pagina Facebook https://www.instagram.com/sportstech.de https://www.facebook.com/sportstech.de...
  • Page 85 INDICE INHALT 1. INFORMAZIONI IMPORTANTI PER LA SICUREZZA ............86 2. DISEGNO ESPLOSO/LISTA DEI PEZZI DI RICAMBIO ............88 3. DATI TECNICI ......................88 4. MONTAGGIO ......................89 5. MONTAGGIO A TERRA ....................98 6. MANUTENZIONE E CURA .................... 99 7.
  • Page 86 INFORMAZIONI IMPORTANTI PER LA SICUREZZA IMPORTANTE - Si prega di leggere attentamente le istruzioni, prima di iniziare l'installazione o l'utilizzo. Per ridurre il rischio di gravi lesioni, leggere l'intero manuale prima di assemblare o utilizzare il dispositi- vo. Prestare particolare attenzione alle seguenti precauzioni. MONTAGGIO •...
  • Page 87 • Le persone con disabilità dovrebbero utilizzare il dispositivo solo sotto la supervisione di una persona qualificata o di un medico. • Conservate questo dispositivo, in un ambiente interno, al riparo da umidità e polvere. Non posizionate l'unità in un garage, in una dependance, in un patio coperto o vicino all'acqua.
  • Page 88: Disegno Esploso/Lista Dei Pezzi Di Ricambio

    DATI TECNICI modello modello FPR300 Light FPR350 Pro Peso netto 63 kg 74 kg Larghezza min. (Con montaggio a pavimento) 1332 mm 1332 mm Larghezza max.
  • Page 89 MONTAGGIO Tutti i componenti e le parti preassemblate non ancora strette bene, devono rimanere mobili per l'installazione! Passo 1 1. Allineare prima le guide verticali del telaio in modo che le due guide del telaio (A) con i 9 fori laterali siano rivolte verso l'alto e si trovino davanti alle guide (B).
  • Page 90 Passo 2 1. I telai del supporto devono essere allineati in modo che i due fori per il connettore del telaio inferiore, siano rivolti verso il retro e i connettori piatti laterali per le guide del telaio, siano rivolti verso l'esterno. 2.
  • Page 91 passo 3 1. Inserite le due traverse superiori tra le guide del telaio e fissatele al telaio anteriore, in alto, con due viti (7) e due rondelle e nel foro inferiore, con due viti (5), due rondelle e due dadi. 2.
  • Page 92 Passo 4 1. Montate il telaio a trazione LAT-machine, sul connettore del telaio inferiore, utilizzando due viti (6), quattro rondelle e due dadi. 2. Fissate la puleggia al profilo ad U, del connettore del telaio inferiore, con una vite (3), due rondelle e un dado.
  • Page 93 Passo 5 1. Installate le due pulegge, che si trovano nel montante della LAT-Machine, utilizzando le viti (6), 4 rondelle e due dadi e 4 boccole per pulegge. Fate attenzione alla disposizione dei boccoli, come mostrato in figura! 2. Montate il terzo rullo sul profilo a U sotto l'albero della Lat-machine con una vite (3), due rondelle e un dado.
  • Page 94 Passo 6 1. Per prima cosa montate la puleggia, avvitando due rulli tra due connettori piatti. Fissate i componenti con due viti (3), quattro rondelle e due dadi. 2. Fate passare il cavo A attraverso i punti a-e, per la lat-machine superiore. Fissate l'estremità del cavo, all'asta di sollevamento e utilizzate una vite (2), due rondelle e un dado.
  • Page 95 La struttura di base è stata assemblata fino a questo punto e dovrebbe corrisponde all'im- magine sull'illustrazione. Per il modello FPR300 Light, continuare il montaggio al punto 7. Per il modello FPR350 Pro, continuare il montaggio al punto 8.
  • Page 96 Passo 7 per il modello FPR300 Light 1. Fissate entrambe le maniglie alla barra di trazione, utilizzando quattro viti (1) e quattro rondelle di grandi dimensioni. 2. A questo punto, fissate la barra di trazione ai suoi connettori piatti con quattro viti (5), otto rondelle e quattro dadi, alle guide verticali anteriori del telaio.
  • Page 97 Passo 8 per il modello FPR350 Pro 1. Per prima cosa inserite le barre nei grandi fori dei pioli (L/R) e avvitatele leggermente, utilizzando dieci viti (1) e dieci rondelle. Aspettate ancora a stringere completamente le viti! 2. Fissate le due prolunghe del telaio, al telaio del piolo con quattro viti (6), otto rondelle e quattro dadi al telaio del piolo, come illustrato, con i profili a U rivolti verso il basso.
  • Page 98 MONTAGGIO A TERRA Nella parte inferiore, sui telai di base, sono presenti connettori piatti con 6 fori per il fissaggio a pavi- mento. L'ancoraggio al pavimento è necessario per un fissaggio sicuro e stabile dell'unità. A tale scopo utilizzate il materiale di montaggio fornito in dotazione. Accertatevi preventivamente che il pavimento sia in piano e adatto al montaggio fisso.
  • Page 99: Manutenzione E Cura

    MANUTENZIONE E CURA 1. La sicurezza del dispositivo può essere mantenuta solo se viene regolarmente controllato, per verifi- carne l'usura e/o lo logorio, ad es. nei punti di collegamento. 2. Controllate tutte le parti prima di utilizzare l'apparecchio e se necessario stringetele, sostituite imme- diatamente le parti difettose e non utilizzate l'apparecchio fino a quando non sarà...
  • Page 100: Esercizi Di Stretching

    ESERCIZI DI STRETCHING Non importa la ragione per cui fai sport, fai in modo di fare sempre esercizi di stretching prima di cominciare. Il uscolo riscaldato si allungherà facilmente, quindi scaldati con degli esercizi per 5-10 minuti. Ti suggeriamo di eseguire i seguenti esercizi cinque volte conta fino a dieci ogni volta o anche più a lungo quando ripeti l’esercizio dopo aver praticato sport.
  • Page 101 Aumentate le vostre prestazioni e la potenza sul Power Rack! Aumentate il peso, in combinazione con un set di manubri e mantenete una presa salda con i vostri guanti da allenamento. Innovativo set di manubri 2 in 1 di Sportstech Manubri e bilancieri https://www.sportstech.de/hanteln-ah150-20kg •...
  • Page 102: Smaltimento

    SMALTIMENTO Riciclaggio dei rifiuti Il materiale di imballaggio può essere trasportato di nuovo al ciclo delle materie prime. Smaltire il materiale di imballaggio in conformità alle disposizioni di legge. Le informazioni possono essere recuperate dai sistemi di ritorno o di raccolta della vostra comunità.
  • Page 103 GEBRUIKSAANWIJZING NEDERLANDS Geachte klant, We zijn blij dat je een apparaat uit het SPORTSTECH-assortiment hebt gekozen. De sportuitrusting van SPORTSTECH brengt hoogwaardige apparaten met nieuwe technologieën. Lees vóór gebruik deze gebruikershandleiding aandachtig door en gebruik het apparaat zoals aangege- ven. Zo zul je ten volle van de prestaties van het apparaat kunnen profiteren en er vele jaren geniet van hebben.
  • Page 104 1. Scan de QR-code 2. Bekijk video‘s 3. Begin snel en veilig Link naar de video's: https://service.innovamaxx.de/fpr300_video We zijn ook actief op social media! Raadpleeg voor de meest recente productinformatie, trainingen en nog veel meer, onze: Instagram-pagina Facebook-pagina https://www.instagram.com/sportstech.de https://www.facebook.com/sportstech.de...
  • Page 105 INHOUD INHALT 1. BELANGRIJKE VEILIGHEIDSINSTRUCTIES ..............106 2. EXPLOSIETEKENING/ONDERDELENLIJST ..............108 3. TECHNISCHE GEGEVENS ................... 108 4. MONTAGE ....................... 109 5. VLOERBEVESTIGING ....................118 6. ONDERHOUD EN ZORG ..................... 119 7. STRETCHOEFENINGEN ....................120 8. DIT KAN OOK INTERESSANT VOOR JE ZIJN ..............121...
  • Page 106: Belangrijke Veiligheidsinstructies

    BELANGRIJKE VEILIGHEIDSINSTRUCTIES BELANGRIJK - lees alles eerst volledig door voordat je met de montage of het gebruik begint. Raad- pleeg de volledige handleiding voordat je het apparaat monteert of gebruikt om het risico van ernstig letsel te beperken. Let vooral op de volgende voorzorgsmaatregelen. MONTAGE •...
  • Page 107 • Plaats dit apparaat binnenshuis, uit de buurt van vocht en stof. Plaats het apparaat niet in een garage, bijgebouwen, op een overdekt terras of in de buurt van water. Wanneer kinderen het apparaat onder toezicht mogen gebruiken, moet rekening worden gehouden met hun mentale en fysieke ontwikkeling. Ze moeten worden gecontroleerd en geïnstrueerd om het apparaat op de juiste manier te gebruiken.
  • Page 108: Technische Gegevens

    TECHNISCHE GEGEVENS model model FPR300 Light FPR350 Pro Netto gewicht 63 kg 74 kg Breedte min. (Met vloermontage) 1332 mm 1332 mm Breedte max.
  • Page 109: Montage

    MONTAGE Draai alle onderdelen en voorgemonteerde onderdelen nog niet te strak aan. Ze moeten beweegbaar blijven voor de montage! Stap 1 1. Lijn eerst de verticale framerails uit zodat de twee framerails (A) met de 9 boorgaten aan de zijkant naar boven gericht zijn en voor de rails (B) staan.
  • Page 110 Stap 2 1. Het standframe moet zo worden uitgelijnd dat de twee gaten voor de onderste frameverbinding naar achteren wijzen en de laterale platte verbindingsstukken voor de framerails naar buiten wijzen. 2. Schroef de verbinding van het onderste frame aan de standvoeten vast met vier schroeven (5), vier sluitringen en vier moeren.
  • Page 111 Stap 3 1. Steek de twee bovenste dwarsbalken tussen de framerails en bevestig ze bovenaan het voorste frame met twee schroeven (7) en twee sluitringen, en in het onderste gat met twee schroeven (5), twee sluitringen en twee moeren. 2. Plaats nu de bovenste frameverbinding vanaf de achterkant tegen de framerails en richt de gaten van de platte verbindingsstukken uit, zodat de drie componenten van de bovenste frameverbinding, de framerails en de bovenste dwarsbalken aan elkaar kunnen worden geschroefd.
  • Page 112 Stap 4 1. Monteer het lattrekframe met twee schroeven (6), vier sluitringen en twee moeren aan het onderste frame. 2. Bevestig de geleiderol aan het U-profiel van de onderste frameverbinding, met een schroef (3), twee sluitringen en de moer. 3. Schuif de hefstang, sluitringen, schuifbussen en weer sluitringen op de geleidende stangen in deze volgorde.
  • Page 113 Stap 5 1. Monteer twee geleiderollen die zich in de lattrekmast bevinden, met de schroeven (6), 4 sluitringen en twee moeren en 4 geleiderolbussen. Let op de plaatsing van de bussen zoals op de afbeelding! 2. Monteer de derde rol op het U-profiel onder de lattrekmast met een schroef (3), twee sluitringen en een moer.
  • Page 114 Stap 6 1. Monteer eerst het katrolblok door twee rollen tussen twee platte verbindingsstukken te schroeven. Bevestig de onderdelen met twee schroeven (3), vier sluitringen en twee moeren. 2. Leid kabel A door punten a-e, voor de bovenste latkabel. Monteer het uiteinde van de kabel aan de hefstang en gebruik een schroef (2), twee sluitringen en een moer.
  • Page 115 Je hebt de basisstructuur tot op dit punt opgebouwd en het komt overeen met de afbeelding. Voor het model FPR300 Light ga je verder met de montage bij stap 7. Voor het model FPR350 Pro ga je verder met de montage bij stap 8.
  • Page 116 Stap 7 voor model FPR300 Light 1. Bevestig beide handgrepen met vier schroeven (1) en vier grote sluitringen aan de optrekstang. 2. Bevestig nu de optrekstang met vier schroeven (5), acht sluitringen en vier moeren aan de voorste verticale framerails via de platte verbindingsstukken.
  • Page 117 Stap 8 voor model FPR350 Pro 1. Steek eerst de stangen in de grote gaten in het frame met sporten (L/R) en schroef ze met tien schroeven (1) en tien sluitringen licht vast. Draai de schroeven nog niet helemaal vast! 2.
  • Page 118 VLOERBEVESTIGING Aan de onderkant van het standframe zijn platte verbindingsstukken met 6 gaten voor bevestiging op de vloer. Een vloerverankering is noodzakelijk voor een veilige en stabiele bevestiging van het apparaat. Gebruik hiervoor het meegeleverde bevestigingsmateriaal. Zorg er op voorhand voor dat de vloer vlak is en geschikt is voor een vaste installatie.
  • Page 119: Onderhoud En Zorg

    ONDERHOUD EN ZORG 1. De veiligheid van het apparaat kan alleen worden gehandhaafd als het regelmatig wordt gecontrole- erd op slijtage, bijvoorbeeld op de verbindingspunten. 2. Controleer alle onderdelen voordat je het apparaat gebruikt en zet ze indien nodig vast, vervang eventuele defecte onderdelen onmiddellijk en gebruik het apparaat pas als het weer in perfecte staat 3.
  • Page 120 STRETCHOEFENINGEN Voor je de loopband gebruikt, kun je het beste 5 tot 10 minuten stretchoefeningen doen voor de opwarming. Stretching voor de training helpt de flexibiliteit te verbeteren en het risico op letsel te verminderen. MET JE HOOFD ROLLEN Draai je hoofd een seconde naar rechts, voel de stretch aan de linkerkant van je nek, draai dan je hoofd een seconde terug, strek je kin omhoog en laat je mond open.
  • Page 121: Dit Kan Ook Interessant Voor Je Zijn

    Verhoog je prestaties en kracht op de Power Rack! Verhoog het gewicht samen met een halterset en bewaar een stevige grip met je trainingshandschoenen. Sportstech 2 in 1 innovatieve halterset Dumbbells en barbells https://www.sportstech.de/hanteln-ah150-20kg • Of het nu gaat om biceps-curls of bankdrukken - dankzij het extra lange 400 mm verbindingsstuk combineert de AH150 2in1 halterset beide functies in één product.
  • Page 122 VERWIJDERING Recyclingcyclus Verpakkingsmaterialen kunnen worden teruggebracht in de grondstoffenkringloop. Voer de verpakking af volgens de geldende voorschriften. Informatie kan worden verkregen uit de retournerings- en ophaalsystemen van je gemeente.
  • Page 124 Verkauf durch / Distributed by / Distribuido por / Distribué / Distribuito da / Verkoop via Sportstech Brands Holding GmbH Potsdamer Platz 11 10785 Berlin +49 30 220 663 520 www.sportstech.de...

Ce manuel est également adapté pour:

Fpr350

Table des Matières