Table des Matières
Publicité
Les langues disponibles
Les langues disponibles
Liens rapides
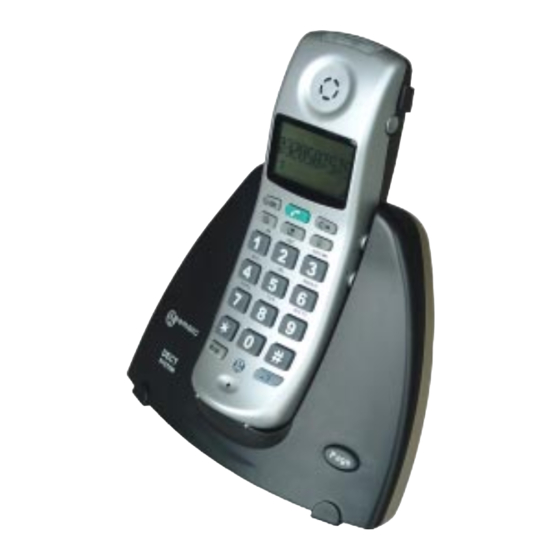
Ampli DECT300
Ampli DECT300
Ampli DECT300
Ampli DECT300
Ampli DECT300
GB
User guide p.2
F
Notice d'utilisation p.31
CAUTION
:THIS
TELEPHONE
SPECIFICALLY DESIGNED FOR PEOPLE WITH HEARING
DIFFICULTIES AND IS PROVIDED WITH A HANDSET
EARPIECE WITH VOLUME CONTROL FOR INDIVIDUAL
REQUIREMENTS. DUE CARE MUST BE TAKEN BY ALL
USERS THAT THE HANDSET EARPIECE VOLUME
CONTROL IS SET TO THE LOWEST LEVEL ACCEPTABLE
BY EACH RESPECTIVE USER. CARE SHOULD THEREFORE
BE EXERCISED TO ENSURE THAT ANY NEW USERS ARE
FAMILIAR WITH THIS REQUIREMENT.
ATTENTION:
PRODUCT
IS
AUX PERSONNES AYANT DES PROBLEMES D'AUDITION.
IL POSSEDE UN ECOUTEUR A VOLUME VARIABLE. A
LA PREMIERE UTILISATION, ASSUREZ VOUS QUE LE
BOUTON DE REGLAGE DU VOLUME SOIT POSITIONNE
SUR LA POSITION VOLUME MINIMUM. LES PERSONNES
MALENTENDANTES POURRONT PAR LA SUITE
AUGMENTER LE VOLUME POUR L'ADAPTER A LEUR
AUDITION.
1
CE TELEPHONE PEUT ETRE DESTINE
Publicité
Chapitres
Table des Matières

Manuels Connexes pour Geemarc Ampli DECT300


Sommaire des Matières pour Geemarc Ampli DECT300
- Page 1 Ampli DECT300 Ampli DECT300 Ampli DECT300 Ampli DECT300 Ampli DECT300 User guide p.2 Notice d’utilisation p.31 CAUTION ATTENTION: :THIS TELEPHONE PRODUCT CE TELEPHONE PEUT ETRE DESTINE SPECIFICALLY DESIGNED FOR PEOPLE WITH HEARING AUX PERSONNES AYANT DES PROBLEMES D’AUDITION. DIFFICULTIES AND IS PROVIDED WITH A HANDSET IL POSSEDE UN ECOUTEUR A VOLUME VARIABLE.
-
Page 2: Table Des Matières
INDEX PAGE DESCRIPTION - Handset and base unit controls GENERAL SETTINGS - How to connect the phone and set the batteries - Charging the batteries - Phone range - Clean the phone BASE SETTINGS - Base ringer volume HANDSET SETTINGS - Menu access - Settings icons displayed on the handset - Handset registration... - Page 3 ANSWERING MACHINE - Answering machine programming option - How to use the answering machine - Answering machine remote control ADDITIONAL HANDSETS - General settings - Using several handsets ( registration ) - Deregister all additional handsets from the base - Internal calls - Call transfer to another registered handset - Headset- Neck loop option ADDITIONAL BASE UNIT...
- Page 4 DESCRIPTION HANDSET DESCRIPTION DESCRIPTION DU COMBINE Ring/Messages light indicator Answering machine key Speaker Indicateur lumineux de Touche répondeur téléphonique Ecouteur Sonnerie/Messages LCD display Afficheur LCD Pick up and hang up key Function and Touche de décroché et de phonebook keys raccroché...
- Page 5 DESCRIPTION HANDSET DESCRIPTION DESCRIPTION DU COMBINE Belt clip Clip ceinture Amplifier volume button adjustment Bouton de réglage volume ampli Batteries cover Couvercle de batteries...
-
Page 6: Base Controls Controles Sur La Base
DESCRIPTION BASE CONTROLS CONTROLES SUR LA BASE Handset cradle Support combiné Charging LED Voyant de charge Charge contacts Page key Contacts de charge Touche de pagination... -
Page 7: Base Connections Connections Sur La Base
DESCRIPTION BASE CONNECTIONS CONNECTIONS SUR LA BASE Ringer volume setting switch Interrupteur de réglage sonnerie * Power adaptor socket ** Line socket * Connecteur adaptateur ** Connecteur cordon de ligne secteur (*) Classified “hazardous voltage” according to EN60950 standard. Classé “tension dangereuse” selon la norme EN60950. (**) Classified TNV-3 according to EN60950 standard. -
Page 8: General Settings
GENERAL SETTINGS 1 - HOW TO CONNECT THE PHONE AND SET THE BATTERIES 1 - Plug the adaptor in the power wall socket and the power plug in the base socket (*). 2 - Connect the line cord plug to the base socket (**). 3 - Connect the line cord to the PTT socket. -
Page 9: Phone Range
GENERAL SETTINGS 3 - PHONE RANGE The phone radio range can work up to 300 m and radio signal can be affected by many factors like a wall, obstacles...The maximum range if there are no obstacles between the phone and the base unit is around 300 m. If the range is restricted by walls in a house or in the office, the base unit should be in a slightly elevated position. -
Page 10: Base Settings
The base ringer volume can be adjusted by using the slider switch located on the base rear panel. The following settings are available: Symbol Function Normal High For product support and help visit our website at www.geemarc.com telephone 01707 384438 or fax 01707 372529... -
Page 11: Handset Settings
HANDSET SETTINGS 1 - MENU ACCESS To activate or deactivate the menu : To move backward in the menu : To move forward in the menu : To confirm a selection 2 -SETTING ICONS DISPLAYED ON THE HANDSET 1 Answering Machine programmin 2 Set ring volume and melod 3 Handset programming 4 Network, flash time and dial... -
Page 12: Handset Ringer Volume, Melody And Shaker
HANDSET SETTINGS 5 - HANDSET RINGER VOLUME, MELODY AND SHAKER To set the volume and melody please follow instructions below: 1 - Press the key. 2 - Press the or the key to select the icon 3 - Press the key to select 4 - Now you can select one of the possibilities below: Press the... -
Page 13: Network Features, Flash Time, Dial Pause
HANDSET SETTINGS 6-2 Normal listening Hearing volume can be adjusted in 4 steps on using the button on the handset rear, press on it successively . This will modify the setting done for the answering machine . It also can be more amplified with the button ( on the right side ), set it on , then press key: lit ( if not, you lose the amplification ) -
Page 14: Using The Phone
USING THE PHONE 1 - MAKING A CALL From the keypad : - Dial the phone number you want to call, you can press the key to cancel an incorrect entry. - Press the , the number is automatically dialled. - On completion of the call simply press the again to release the line or put the handset on the base. -
Page 15: Use The Call Back Features
USING THE PHONE 3 - USE THE CALL BACK FEATURES You can display the last 5 numbers you dialed - Press the key and scroll through the list by pressing the keys until you select the number you want. - Press the key to dial the number. -
Page 16: Phone Book
PHONE BOOK (*) You must be subscrided to the “ Caller ID” service from your local phone company to enjoy principal features of phone books. 1 - ABOUT THE PHONE BOOK Names and phone numbers can be stored in both phone books. Each phone number stored in the phone books can be called by pressing only few buttons. -
Page 17: Storing A Number With A Name
PHONE BOOK 3 - STORING A NUMBER WITH A NAME Follow instructions below to store new entries in the phone book: - Enter the phone number you wish to set in the phone book. - Select one of the two phone books by pressing the key, a beep will be heard and the phone book icon selected will flash. -
Page 18: Dialling Using The Phone Book
PHONE BOOK 4 - DIALLING USING THE PHONE BOOK 1 - Select the desired phone book by pressing the 2 - Select the desired entry in the list by using the key . 3 - Press the key then the number will be automatically dialled. Note: To leave the menu press the key. -
Page 19: Transfer Numbers And Names Into The Phone Book
4 - Store the name as described Page 17 “ Store a number with a name . 5 - Press the to confirm the storage in the phone book. For product support and help visit our website at www.geemarc.com telephone 01707 384438 or fax 01707 372529... -
Page 20: Answering Machine
ANSWERING MACHINE 1 - ANSWERING MACHINE PROGRAMMING OPTIONS To access to the menu press the key then press the key or use the keys to select . To set the answering machine use the table below: Function Programmable functions Select Default Modifies the system day List: 1 (Monday) to 7... -
Page 21: How To Use The Answering Machine
ANSWERING MACHINE 2 - HOW TO USE THE ANSWERING MACHINE The answering machine is activated by default. The phone can record up to 4 mins and 40 secs for top quality messages or 7 minutes for standard quality messages (see Programming options about explanation to change the telephone answering machine recording quality). - Page 22 ANSWERING MACHINE - Press key and then , a tone will be heard. - Record your outgoing messsage ( speak at 20/30cm from the microphone ) - Press the key to stop recording, a second tone will be heard, then your outgoing message is repeated .
-
Page 23: Answering Machine Remote Control
ANSWERING MACHINE 3 - ANSWERING MACHINE REMOTE CONTROL You can get access to your answering machine via a simple phone call. The 4 digit remote access is factory set by default to “1111”. If you wish to change this code, see programing options page 20. To remotely activate the answering machine Follow instructions below: 1 - Dial your phone number. -
Page 24: Additional Handsets
ADDITIONAL HANDSETS 1 - GENERAL SETTINGS With the DECT standard you have the possible settings below: - Register up to 4 handsets to one base unit. - Register up to 2 base units to each handset. - Make internal call handset to handset and transfer call between handsets registered to the same base unit. -
Page 25: Deregister All Additional Handsets From The Base
ADDITIONAL HANDSETS 3 - DEREGISTER ALL ADDITIONAL HANDSETS FROM THE BASE To deregister all handsets from the base unit follow the instructions below: 1 - Take one handset. 2 - Press the key. 3 - Press the and the keys to enter number 1/1 0000 will be displayed. -
Page 26: Call Transfer To Another Registered Handset
ADDITIONAL HANDSETS 5 - CALL TRANSFER TO ANOTHER REGISTERED HANDSET External calls can be transfered to another registered handset from the answering handset (both handsets must be registered to the same base unit). During an incoming call: 1 - Press the key to answer the call. -
Page 27: Additional Base Unit
ADDITIONAL BASE UNIT 1 - GENERAL SETTINGS A second base unit can be connected to the network in order to extend the range of the handsets. When an other base unit is registered to a handset, it can automatically search for the next base unit if you go outside the range of the first base unit. -
Page 28: Trouble Shooting
TROUBLE SHOOTING IF THE PHONE DOES NOT WORK Generality: Make sure that the phone line cord and adaptor are correctly plugged in and are not damaged. Make sure that the batteries are fully charged. Connect another phone on your phone socket or move your phone to another socket to check if the failure is coming from your phone or your PTT socket. - Page 29 TROUBLE SHOOTING You lost some messages : Your vocal box was full and the oldest messages have been cleaned automaticaly to allow the recording of new messages . Clean regularly your messages off. Re-Initialize the phone If you have got a problem, or lose your code for instance, you may retrieve factory parameters, follow instructions : - Remove one of the batteries - Press...
-
Page 30: Guarantee- Norms
The guarantee does not cover accidents, negligence or breakages to any parts. The product must not be tampered with or taken apart by anyone who is not an authorised Geemarc representative. The Geemarc guarantee in no way limits your legal rights. - Page 31 SOMMAIRE PAGE DESCRIPTION - Description du combiné et de la base INSTALLATION - Raccordements du téléphone et mise en place des batteries - Chargement des batteries - Rayon d’action - Entretien du téléphone REGLAGE DE LA BASE - Réglage du volume de sonnerie de la base REGLAGE DU COMBINE - Accès au menu, déplacement - Présentation des symboles...
- Page 32 - Modifier un numéro du répertoire - Effacer un numéro du répertoire et son numéro - Transfert de numéros du journal d’appels vers le répertoire REPONDEUR TELEPHONIQUE - Programmation du répondeur - Utilisation du répondeur - Activer- désactiver le répondeur à distance - Interroger votre répondeur à...
-
Page 33: Installation
INSTALLATION 1 - RACCORDEMENT DU TELEPHONE ET MISE EN PLACE DES BATTERIES - Branchez l’adaptateur entre la prise secteur et la prise sous la base (*) voir page 7. - Raccordez le cordon téléphonique entre la prise France Télécom(**) et la prise sous la base, voir page 7. -
Page 34: Rayon D'action
INSTALLATION 3 - RAYON D’ACTION La portée du téléphone peut atteindre 300 m en champ libre. Celle-ci peut être réduite à cause d’obstacles comme par exemple: arbres, mur, une structure métallique... La base doit être placée à un endroit légèrement plus élevé pour obtenir des conditions optimales d’utilisation. -
Page 35: Reglage De La Base
: Symbole Niveau Coupé Faible Normal Fort TEL. SERVICE APRES VENTE : 03 28 58 75 99 Pour tout renseignement technique ou toute commande visitez notre site web sur www.geemarc.com. Parc de l’Etoile 2, rue Galilée 59760 Grande Synthe... -
Page 36: Reglage Du Combine
REGLAGE DU COMBINE 1 - ACCES AU MENU, DEPLACEMENT Touche permettant d’accéder au menu ou de le quitter : Touche permettant de revenir en arrière dans le menu : Touche permettant d’avancer dans le menu : Validation des choix 2 - PRESENTATION DES SYMBOLES 1 Programmation répondeur 2 Choix mélodie et volume 3 Programmation du combiné... -
Page 37: Annuler L'enregistrement D'un Combine Sur La Base
REGLAGE DU COMBINE 4 - ANNULER L’ENREGISTREMENT D’UN COMBINE SUR LA BASE Pour déprogrammer un combiné de sa base procédez comme suit : - Appuyez sir la touche - Appuyez sur les touches - Entrez le code PIN de la base (1111) , validez en appuyant sur L’icône clignote, le combiné... -
Page 38: Reglage Du Volume De L'ecouteur Et De La Tonalite
REGLAGE DU COMBINE 5 - REGLAGE DU VOLUME DE L’ECOUTEUR ET DE LA TONALITE 5-1 Pour le mode Répondeur En effectuant le réglage décrit ci-dessous, vous ajusterez le volume d’écoute de vos messages ( uniquement par l’écouteur) - Appuyez sur la touche - Appuyez sur la touche ou la touche pour sélectionner l’icône... -
Page 39: Propiétés Du Réseau, Touche R (Flash), Insertion D'une Pause
REGLAGE DU COMBINE 6 - PROPRIETES DU RESEAU, TOUCHE R (FLASH), INSERTION D’UNE PAUSE 1 - Appuyez sur la touche 2 - Appuyez sur la touche ou la touche pour sélectionner l’icône 3 - Appuyez sur la touche pour confirmer . 4 - Dans ce menu, 3 choix sont disponibles : Pour passer d’un réglage à... -
Page 40: Utilisation Du Telephone
UTILISATION DU TELEPHONE 1 - APPELER Depuis le clavier : - Composez le numéro de téléphone souhaité. En cas d’erreur, appuyez sur la touche pour corriger le chiffre précédent. - Appuyez sur la touche , le numéro se compose automatiquement. - Pour terminer la communication, appuyez une nouvelle fois sur la touche ou reposez le combiné... -
Page 41: Répondre À Un Appel
UTILISATION DU TELEPHONE 2 - REPONDRE A UN APPEL Lorsque votre téléphone sonne, pour répondre : - Appuyez sur la touche pour prendre la ligne et parler. - En fin de communication, appuyez une nouvelle fois sur la touche ou reposez le combiné sur la base. Affichage du nom et du numéro Si vous êtes abonné... -
Page 42: Effacer Un Ou Plusieurs Numeros Du Journal D'appels
UTILISATION DU TELEPHONE 4- EFFACER UN OU PLUSIEURS NUMEROS DU JOURNAL D’APPELS A condition d’être abonné chez votre opérateur au service “Présentation du numéro”, sinon le journal sera vide. - Appuyez sur la touche - Sélectionnez le numéro souhaité en appuyant sur la touche Deux bips retentissent quand vous arrivez en fin ou début de liste. -
Page 43: Utilisation Du Repertoire
UTILISATION DU REPERTOIRE Vous devez être abonné au service “Présentation du numéro” chez votre opérateur, pour bénéficier des principales fonctions du répertoire : affichage du nom, du numéro, mélodie différente 1 - DESCRIPTION Vous pouvez enregistrer dans les 2 répertoires disponibles des noms et des numéros de téléphone. -
Page 44: Enregistrement D'un Numéro Et D'un Nom
UTILISATION DU REPERTOIRE 3 - ENREGISTREMENT D’UN NUMERO ET D’UN NOM Votre téléphone dispose de 2 répertoires qui vous permettront de différencier des groupes de personnes lors de leurs appels ( mélodie différente ). Pour enregistrer un numéro et un nom dans un des deux répertoires : - Entrez le numéro de téléphone souhaité. -
Page 45: Appeler En Utilisant Le Répertoire
UTILISATION DU REPERTOIRE 4 - APPELER EN UTILISANT LE REPERTOIRE Permet d’appeler votre correspondant à partir d’un nom et d’un numéro que vous avez enregistré dans un des répertoires. - Sélectionnez le répertoire en appuyant sur la touche - A l’aide des touches sélectionnez le nom dans la liste. -
Page 46: Transfert De Numéros Du Journal D'appels Vers Le Répertoire
NOTE : Même si vous êtes abonné au service “Présentation du nom”, vous devrez entrer à nouveau le nom manuellement. TEL. SERVICE APRES VENTE : 03 28 58 75 99 Pour tout renseignement technique ou toute commande visitez notre site web sur www.geemarc.com. Parc de l’Etoile 2, rue Galilée 59760 Grande Synthe... -
Page 47: Repondeur Telephonique
REPONDEUR TELEPHONIQUE 1 - PROGRAMMATION DU REPONDEUR Accédez au menu en appuyant sur la touche puis sur la touche l’icône est affichée en haut à gauche Pour mettre à jour les paramètres du répondeur, utilisez le tableau suivant, appuyez sur la touche OK pour passer d’une fonction à... -
Page 48: Utilisation Du Répondeur
REPONDEUR TELEPHONIQUE 2 - UTILISATION DU REPONDEUR Le téléphone peut enregistrer jusqu’à 4 mins et 40 secs de messages en qualité élevée ou 7 minutes en qualité standard (voir la programmation du répondeur pour changer la qualité d’enregistrement). Lorsque vous avez un nouveau message ( non lu ), l’indicateur lumineux rouge clignote, ainsi que l’icône message. - Page 49 REPONDEUR TELEPHONIQUE Enregistrer un message d’accueil : Un message d’accueil standard est pré-enregistré en usine. Vous pouvez l’écouter en appuyant sur la touche puis sur la touche . Si vous désirez changer ( personnaliser ) ce message, procédez comme suit : - Appuyez sur la touche ( mode répondeur ) - Appuyez sur la touche...
-
Page 50: Activer- Désactiver Le Répondeur À Distance
REPONDEUR TELEPHONIQUE Effacer un message: Pour effacer un message, appuyez sur la touche pendant sa lecture, un bip sera émis pour confirmer l’effacement . Effacer tous les messages: Pour effacer tous les messages, appuyez et maintenez la touche pendant que le répondeur annonce le nombre de messages reçus, 00 sera affiché... -
Page 51: Interroger Votre Répondeur À Distance
REPONDEUR TELEPHONIQUE 4 - INTERROGER VOTRE REPONDEUR A DISTANCE Pour interroger à distance votre répondeur et écouter vos messages à partir d’un autre téléphone procédez comme ci-après : - Composez votre numéro de téléphone. - Pendant la lecture du message d’accueil, appuyez sur la touche - Entrez le code RC (1111 ou votre nouveau code) . -
Page 52: Combines Additionnels
COMBINES ADDITIONNELS 1 - GENERALITES Avec le DECT 300 vous pouvez : - Enregistrer jusqu’à 4 combinés sur une base. - Enregistrer un combiné sur 2 bases au maximum. - Réaliser des communications internes et transférer des communications externes entre combinés enregistrés sur la même base. - Augmenter le rayon d’action en utilisant 2 bases (transfert automatique vers la prochaine station de base). -
Page 53: Annuler L'enregistrement Des Combines Additionnels De La Base
COMBINES ADDITIONNELS Remarque : Si vous utilisez plusieurs combinés sur une base, il est préférable que celle-ci soit placée au milieu de sorte que la zone de couverture soit à peu près la même pour tous les combinés. 3 - ANNULER L’ENREGISTREMENT DES COMBINES ADDITIONNELS DE LA BASE L’opération décrite ci-dessous entrainera la désactivation de tous les combinés supplémentaires affectés à... -
Page 54: Transfert D'appel
COMBINES ADDITIONNELS 5 - TRANSFERT D’APPEL Vous pouvez transférer des appels externes d’un combiné à un autre (les deux combinés doivent être enregistrés sur la même base). Lors d’un appel entrant : - Appuyez sur la touche pour recevoir l’appel. - Utilisez la touche pour transférer l’appel. -
Page 55: Base Additionnelle
BASE ADDITIONNELLE 1 - GENERALITES Il est possible d’étendre le rayon d’action du téléphone en raccordant une base suppléméntaire au système. Lorsqu’un combiné enregistré sur plusieurs bases se trouve hors du rayon d’action de l’une d’entre elles, une recherche automatique se fera pour trouver la base la plus proche et conserver le contact téléphonique. -
Page 56: En Cas De Probleme
EN CAS DE PROBLEME PROBLEMES DE FONCTIONNEMENT Le téléphone ne fonctionne pas ( rien à l’écran ) Vérifiez que les batteries sont bien positionnées dans leur logement et dans le bon sens, placer le combiné sur la base ( branchée ) , le symbole doit clignoter indiquant la charge . - Page 57 EN CAS DE PROBLEME REINITIALISER VOTRE DECT300 AUX PARAMETRES USINE Cela ne ré-initialise que les paramètres du combiné Dans le cas de dysfonctionnement, ou si vous avez oubliez un code que vous avez modifié, il est possible de ré-initialiser votre téléphone. Pour se faire : - Retirer une batterie - Appuyer sur la touche - Remettre la batterie ( sans relacher la touche )
-
Page 58: Garantie - Normes
GARANTIE - NORMES GARANTIE Cet appareil est garanti 1 an pièces et main-d'oeuvre. La date d'achat figurant sur le ticket de caisse fera foi. Cette garantie s'exerce sous réserve d'une utilisation normale de l'appareil. Les dommages occasionnés par les surten- sions électriques, la foudre ou par un choc sur l'appareil ne peuvent en aucun cas être couverts par la garantie.