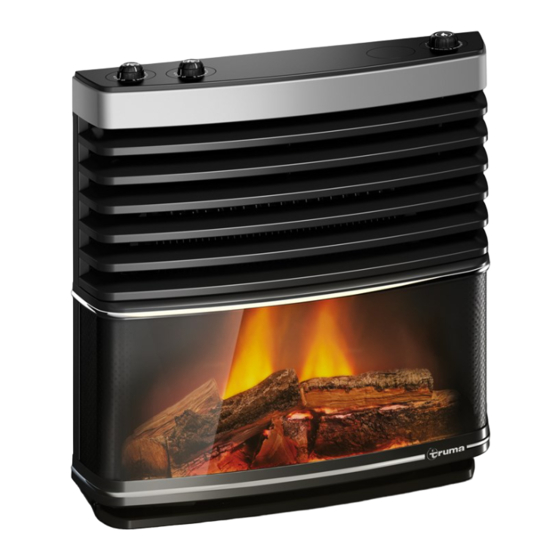
Truma S 5004 Instructions De Montage
Masquer les pouces
Voir aussi pour S 5004:
- Mode d'emploi (32 pages) ,
- Instructions de montage (76 pages) ,
- Mode d'emploi (24 pages)
Table des Matières
Publicité
Les langues disponibles
Les langues disponibles
Liens rapides
Verkleidung Kaminfeuer
DE
Einbauanweisung
EN
Installation instructions
FR
Instructions de montage
IT
Istruzioni di montaggio
All manuals and user guides at all-guides.com
Seite
02
Page
04
Page
06
Pagina
08
NL
Inbouwhandleiding
DA
Monteringsanvisning
SV
Monteringsanvisning
CS, ES, FI, NO, PL, SL
Pagina
10
Side
12
Sida
14
Page
16
Publicité
Table des Matières

Sommaire des Matières pour Truma S 5004
- Page 1 All manuals and user guides at all-guides.com Verkleidung Kaminfeuer Einbauanweisung Seite Inbouwhandleiding Pagina Installation instructions Page Monteringsanvisning Side Instructions de montage Page Monteringsanvisning Sida Istruzioni di montaggio CS, ES, FI, NO, PL, SL Pagina Page...
-
Page 2: Verwendete Symbole
Gerät am abgesicherten Bordnetz (Zentralelektrik max. Montage der Verkleidung Kaminfeuer 3,15 AT) anschließen. Auf Polarität achten. Bei einer Heizung Truma S 5004 / S 5004 E (NL) kann die Das Anschlusskabel nach vorne verlegen. Verkleidung gegen eine Verkleidung mit Kaminfeuer ersetzt werden. -
Page 3: Verkleidung Kaminfeuer Anbringen
All manuals and user guides at all-guides.com Bild 2 Verkleidung Kaminfeuer anbringen Verkleidung in die unteren Lager einhängen (1), einschwen- ken (2) bis die Verriegelung hörbar einrastet. Durch Ziehen an der Verkleidung den festen Sitz kontrollieren. Bild 3 Technische Daten Spannungsversorgung SELV (Safety Extra Low Voltage) 12 V Schutzklasse... -
Page 4: Installation Instructions
Connect the appliance to the fused vehicle electrical system (central electrical system max. 3.15 AT). Pay attention to In the case of a Truma S 5004 / S 5004 E (NL) heater, the cov- polarity. er can be replaced by a flame effect cover. -
Page 5: Technical Data
All manuals and user guides at all-guides.com Figure 2 Attach the flame effect cover Hook cover into the lower bearings (1) and swivel in (2) until catch audibly engages. Pull cover to make sure that it is se- curely attached. Figure 3 Technical data SELV power supply (Safety Extra Low Voltage) -
Page 6: Façade Feu De Cheminée
Connecter l’appareil au réseau électrique de bord protégé par fusibles (système électrique central 3,15 AT). Veiller à la polarité. En cas de chauffage Truma S 5004 / S 5004 E (NL), la façade Poser le câble connecteur vers l’avant. peut être remplacée par une façade avec feu de cheminée. -
Page 7: Caractéristiques Techniques
All manuals and user guides at all-guides.com Figure 2 Poser une façade feu de cheminée Accrocher la façade dans les attaches inférieures (1), la faire pivoter vers l’intérieur (2) jusqu’au clic de verrouillage. Tirer sur la façade pour s’assurer qu’elle est bien fixée. Figure 3 Caractéristiques techniques Alimentation en tension SELV (Safety Extra Low Voltage) -
Page 8: Simboli Utilizzati
Cavo di collegamento senza fusibile Collegare l’apparecchio alla rete di bordo protetta mediante Sulla stufa Truma S 5004 / S 5004 E (NL) è possibile sostituire fusibili (impianto elettrico centrale max. 3,15 AT). Prestare at- il pannello con uno a effetto camino. -
Page 9: Specifiche Tecniche
All manuals and user guides at all-guides.com Fig. 2 Posizionare il pannello a effetto camino Agganciare il pannello nei supporti inferiori (1), ruotarlo verso l’interno (2) finché si blocca in posizione con uno scatto. Con- trollare che il pannello sia fissato correttamente provando a tirarlo. - Page 10 (centrale elektronica max. 3,15 AT). Let op de aan- sluiting van de plus- en minpool. Bij een kachel Truma S 5004 / S 5004 E (NL) kan de standaard ommanteling worden vervangen door een ommanteling met Leg de aansluitkabel naar voren.
-
Page 11: Technische Gegevens
All manuals and user guides at all-guides.com Afbeelding 2 De ommanteling haardvuur aanbrengen De ommanteling in de onderste steunen (1) haken en dicht- drukken (2) tot de vergrendeling hoorbaar vastklikt. Door aan de ommanteling te trekken controleren of deze goed vastzit. Afbeelding 3 Technische gegevens Voedingsspanning SELV (Safety Extra Low Voltage) -
Page 12: Afmontering Af Beklædningen
Tilslutningskabel uden sikring Tilslut anlægget til det sikrede ledningsnet (det centrale elek- Ved et varmeanlæg Truma S 5004 / S 5004 E (NL) kan be- triske anlæg maks. 3,15 AT). Vær opmærksom på polariteten. klædningen udskiftes med en beklædning med kaminild. -
Page 13: Tekniske Data
All manuals and user guides at all-guides.com Fig. 2 Montering af beklædningen kaminild Ihæng beklædningen i de nederste lejer (1), sving ind (2), indtil låsen går tydeligt i hak. Kontroller, at beklædningen sidder korrekt ved at trække i den. Fig. 3 Tekniske data Spændingsforsyning SELV (Safety Extra Low Voltage) 12 V... -
Page 14: Använda Symboler
Montering av braspanelen Anslut enheten till fordonets säkrade elnät (centralelektrik max. 3,15 A). Var noga med polariteten. Med värmaren Truma S 5004 / S 5004 E (NL) kan panelen by- tas ut mot en braspanel. Dra anslutningskabeln framåt. – Ta bort panelen –... -
Page 15: Tekniska Data
All manuals and user guides at all-guides.com Bild 2 Montera braspanelen Sätt panelen i de nedre fästena (1) och tryck in den (2) tills spärren hakar i med ett klickljud. Genom att sedan dra i pane- len kan du kontrollera att den sitter stadigt. Bild 3 Tekniska data Spänningsförsörjning SELV (Safety Extra Low Voltage) - Page 16 Państwa wersji językowej można otrzymać Veuillez vous adresser au centre de SAV w firmie Truma lub serwisie firmy Truma Truma ou à un de nos partenaires de SAV znajdującym się w Państwa kraju. agréés en cas de dysfonctionnements Navodila za uporabo in vgradnjo v vašem (voir www.truma.com).


