Table des Matières
Publicité
Les langues disponibles
Les langues disponibles
Liens rapides
Owner's Manual
Manual del usuario
Notice d'utilisation
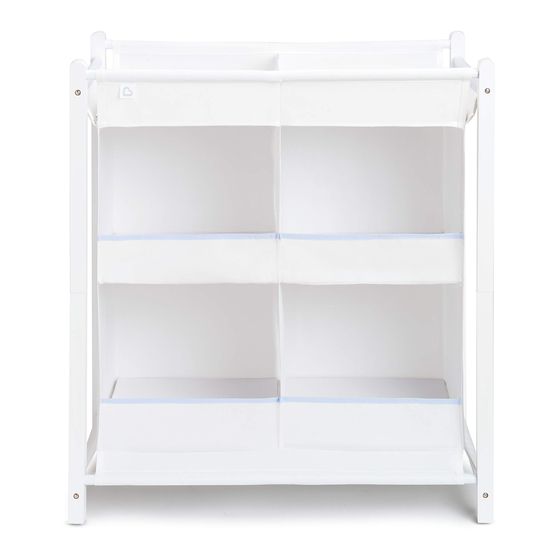
Nursery Essentials Organizer
Organizador de artículos esenciales para el cuarto del bebé
Organiseur de nécessaire à langer
KEEP FOR FUTURE REFERENCE
Please read the instructions carefully before using this product. Adult assembly required.
GUARDE PARA FUTURA REFERENCIA
Lea las instrucciones detenidamente antes de usar este producto. Requiere ser ensamblado por un adulto.
À CONSERVER POUR CONSULTATION FUTURE
Veuillez lire attentivement ces instructions avant en utilisant ce produit. Montage devant
être confié à un adulte.
™
™
MKCA0301 REV 2
™
CCD-0106-000 Rev 2
Publicité
Table des Matières

Sommaire des Matières pour Munchkin MKCA0301 REV 2
- Page 1 Organizador de artículos esenciales para el cuarto del bebé ™ Organiseur de nécessaire à langer ™ MKCA0301 REV 2 KEEP FOR FUTURE REFERENCE Please read the instructions carefully before using this product. Adult assembly required. GUARDE PARA FUTURA REFERENCIA Lea las instrucciones detenidamente antes de usar este producto. Requiere ser ensamblado por un adulto.
-
Page 2: Table Des Matières
Contents | Contenido | Contenu Contents | Contenido | Contenu IMPORTANT INFORMATION RENSEIGNEMENTS IMPORTANTS Warnings ..............................4 Mise en garde ............................. 18 GETTING STARTED DÉMARRAGE Included Parts ............................4 Pièces comprises ..........................18 HOW TO INSTALL INSTALLATION Step 1: Assemble Metal Tubes (4) ....................5 Étape 1 : Montage des 4 tubes en métal .................. -
Page 3: Important Information
Important Information | Getting Started Getting Started | How To Install WARNING: • For safety, total contents placed in organizer should Self-Tapping Flat-Bottom Wood not exceed 25 lbs (11.3 kg). Flat-Bottom Wood Self-Tapping Self-Tapping Flat-Bottom Flat-Bottom Wood Wood Screw (X4) Screw (X8) Screw (X8) Screw (x8) -
Page 4: Step 3: Attach Top Legs To Corners
How To Install How To Install 2. Insert assembled metal tubes into the top and bottom long sleeves (located on the front TIP: and back of the unit). Some force may be necessary to tighten the screws. Turn the unit onto its side while tightening the screws for greater rotational force. -
Page 5: Step 4: Attach Bottom Legs To Corners
Repeat to attach bottom legs "B", "C" contact our Customer Satisfaction Team at 1-800-344-2229 (M-F from 8:00am-5:00pm and "D” to the remaining corners. PST) or visit our website at www.munchkin.com. 2. Then insert the metal tube and wooden dowel into their matching holes. -
Page 6: Información Importante
Información Importante Información importante | Inicio ADVERTENCIA: • Por razones de seguridad, el peso total del contenido del organizador no debe ser superior a 11 kg (25 lb). • Este producto no es un juguete. • El Organizador de Artículos Esenciales para el Cuarto del Bebé debe usarse como dispositivo de almacenamiento únicamente. -
Page 7: Instalación
Inicio | Instalación Instalación 2. Inserte los tubos metálicos ya ensamblados en las mangas largas superiores e inferiores (ubicadas Self-Tapping Flat-Bottom Wood en la parte delantera y trasera de la unidad). Tornillos de base Tornillos de Screw (X4) Screw (X8) Screw (X8) Self-Tapping Self-Tapping... -
Page 8: Paso 4: Sujete Las Patas Inferiores A Las Esquinas
Instalación Instalación PASO 4: SUJETE LAS PATAS INFERIORES A LAS ESQUINAS 1. Conecte la pata inferior "A" a la pata superior SUGERENCIA: "A” alineando las letras. Repita este paso para Es posible que necesite ejercer un poco de fuerza sujetar las patas inferiores "B", "C" y "D” a las para ajustar los tornillos. -
Page 9: Servicio Al Cliente
Servicio al cliente CONTÁCTENOS Si tiene preguntas o desea enviar comentarios sobre este producto, comuniquese con nuestro Equipo de Satisfaccion del Cliente llamando al 1-800-344-2229 (Lu a Vi 8:00am- 5:00pm PST) o visite nuestro sitio web en www.munchkin.com. FRENCH FRANCÉS FRANÇAIS... -
Page 10: Mise En Garde
Renseignements importants | Démarrage Démarrage | Installation MISE EN GARDE : • Par mesure de sécurité, la charge totale dans la desserte ne Self-Tapping Flat-Bottom Wood Vis à pointe Vis à doit pas dépasser 11 kg (25 lb). Self-Tapping Self-Tapping Flat-Bottom Flat-Bottom Wood... -
Page 11: Étape 3 : Fixation Des Pattes Supérieures Aux Coins
Installation Installation 2. Introduire les tubes en métal assemblés dans les longues gaines supérieures et inférieures CONSEIL : (situées à l'avant et au dos de la desserte). Il peut être nécessaire de forcer un peu pour serrer les vis. Pour maximiser la force rotationnelle, il est conseillé de placer la desserte sur le côté. -
Page 12: Étape 4 : Fixation Des Pattes Inférieures Aux Coins
Répéter l’opération pour (du lundi au vendredi de 8h a 5h, heure du Pacifique) ou visitez note site Web : accrocher les pattes inférieures B, C www.munchkin.com. et D aux autres coins. 2. Introduire ensuite le tube en métal et le goujon en bois dans les orifices correspondants. - Page 13 PRODUCT AND DESIGN ARE TM & ©2017 MUNCHKIN, INC. MUNCHKIN, THE HEART LOGO AND IT'S THE LITTLE THINGS ARE TRADEMARKS OR REGISTERED TRADEMARKS OF MUNCHKIN, INC. 7835 GLORIA AVE., VAN NUYS, CA 91406. MUNCHKIN BABY CANADA LTD., 50 PRECIDIO CT., UNIT A, BRAMPTON, ON L6S 6E3. MADE IN CHINA/ HECHO EN CHINA/FABRIQUÉ EN CHINE. 43449-IS-2...


