Télécharger Imprimer la page

Publicité

Les langues disponibles
  • FR

Les langues disponibles

  • FRANÇAIS, page 1

Liens rapides

ECO-DE®
ECO-802 2021

Publicité

loading

Sommaire des Matières pour Eco-De ECO-802 2021

  • Page 1 ECO-DE® ECO-802 2021...
  • Page 2 MANUEL D’UTILISATION FRANÇAIS...
  • Page 3 AVERTISSEMENTS DE SÉCURITÉ COMPORTEMENT ADMIS COMPORTEMENTS NON ADMIS • Avant l’installation et l’utilisation, lire at- • NE PAS utiliser le vélo dans les centres tentivement ce mode d’emploi et toutes de conditionnement physique, des clubs les autres feuilles de pièces jointes d’ins- privés, des hôtels ou des zones pour truction.
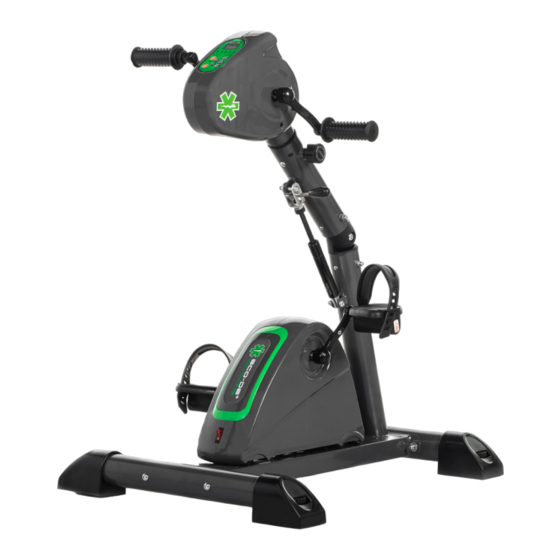
  • Page 4 UTILISATION Le produit décrit dans ce manuel est une pédale facile à utiliser et sûr, adapté à toute la famille pour la gymnastique passive, effectuée d’une manière douce et progressive. Peut facilement être utilisé alors que vous étent assis sur le canapé ou chaise de bu- reau, ou couché...
  • Page 5 UTILISATION S’il vous plaît suivez les instructions dans le manuel pour la sécurité personnelle maxi- male et la durée de vie du produit. DANGER Toute information portant ce symbole indique DANGER, utilisez avec un soin extrême pour éviter les blessures. ATTENTION Toute information portant ce symbole indique ATTENTION, utilisez un soin extrême pour éviter d’endommager le produit.
  • Page 6 CARACTERISTIQUES TECHNIQUES • Réglage de la vitesse: réglage en 12 niveaux. • MIN-MAX SPEED: 28-76 tours / minute. • INFORMATION: Analysez votre panneau, le niveau de vitesse sélectionnée, la du- rée, le nombre de début de séance d’entraînement à vélo, les calories consom- mées, programme.
  • Page 7 INSTALLATION LOCALE DU PRODUIT EXIGENCES POUR INSTALLATION LOCALE: • La superficie de la pièce dans laquelle vous placez le produit doit avoir une prise électrique située dans le voisinage immédiat et ne doit pas être exposée au soleil, s’il y a une grande surface vitrée doit être assurée par l’interposition d’une tente de pro- tection opaque.
  • Page 8 MONTAGE DU PRODUIT Le produit est livré dans un état avancé d’assemblement; après ouverture de l’emba- llage les seules opérations d’assemblage consistent à fixer les pieds de support et les pédales. • Positionner le corps principal K au sol et procéder à l’assemblage à l’aide du multi-usages et de la clé...
  • Page 9 MONTAGE DU PRODUIT • Fixez les pédales aux manivelles D serrage inférieure chacun avec G (M8x12 mm); Fixez les poignées C en serrant chaque manivelle avec un boulon M8x12 mm G.
  • Page 10 CONNEXION ÉLECTRIQUE DANGER Le produit fonctionne en agissant sur les pédales comme un simulateur de vélo, lors- que vous branchez la prise secteur et appuyez sur le bouton d’alimentation, le moteur électrique est activé et peut être utilisé en mode de pédalage assisté. Dans le cas d’incompatibilité...
  • Page 11 CONSEILS D’UTILISATION Le produit peut être utilisé dans deux modes distincts: un pédalage classique ou à pédale assisté. En pédalant traditionnelle, le produit est utilisé comme un vélo normal, sans qu’il soit nécessaire de connecter le câble de réseau à l’utilisateur normalement monter, ajuster votre rythme et la direction de pédaler vers l’avant ou vers l’arrière en fonction du type d’exercice.
  • Page 12 FONCTIONS DU PANNEAU DE COMMANDE Indicateurs LED et affichage SCAN - La succession automatique des informations sur l’écran (Vitesse, Temps, Distance, Ca- lories). Les indicateurs LED sous l’écran indiquent la fonction affichée, la fonction SCAN est activé en appuyant sur la touche PROG. jusqu’à allumer la lumière rouge “Scan”. SPEED - Le niveau de vitesse sélectionné...
  • Page 13 FONCTIONS DE L’ORDINATEUR 1) START / STOP pédale pour bras: Appuyez sur pour démarrer et arrêter le moteur d’entraînement des poignées supérieures pour déplacer les bras. 2) START / STOP pédale jambe: appuyez pour démarrer et arrêter le moteur d’entraîne- ment des pédales inférieures de bouger les jambes.
  • Page 14 ENTRETIEN DANGER • Avant d’effectuer tout entretien, débranchez le cordon d’alimentation de la prise murale. • NE PAS utiliser de substances inflammables ou nuisibles pour le nettoyage. Ne pas utiliser de solvants pour nettoyer les pièces en plastique, mais uniquement des pro- duits à...
  • Page 15 Garantie CONDITIONS: 1. La garantie du présent article sera reconnue de la part de ECOGEST TRADE S.L., C/ En Proyecto 14, 46190 Ribarroja de Turia, Valencia (Spain) chaque fois que la fiche jointe sera dûment remplie et signée et envoyée à ECO- GEST TRADE S.L..
  • Page 16 ADVERTENCIAS DE SEGURIDAD USO NO PERMITIDO USO PERMITIDO • Se ruega de leer con la mayor atención • NO usar este producto dentro de gim- este manual de instrucciones antes de la nasios, clubes privados, hoteles o zonas instalación y el uso de este aparato. para el uso colectivo del equipo de entre- •...
  • Page 17 APLICACIONES Y CONTRAINDICACIONES El producto descrito en este manual es una pedalina tanto para piernas que para bra- zos, fácil de usar y segura, convente para toda la familia. Es utilizada para los ejercicios de gimnasia pasiva llevados a cabo de una manera suave y progresiva. No tiene asiento y se puede utilizar de pié...
  • Page 18 APLICACIONES Y CONTRAINDICACIONES Por favor, siga las instrucciones del manual para la máxima seguridad personal y una vida más larga del producto. Las instrucciones de seguridad y las partes pertinentes del texto se resaltan en negrita y están precedidos por un símbolo, como se ilustra y se define a continuación. PELIGRO Cualquier información marcada con este símbolo indican PELIGRO, vaya con mucho cuidado para evitar daños personales.
  • Page 19 CARACTERÍSTICAS TÉCNICAS • AJUSTE DE LA VELOCIDAD: ajusteelectrónico de 12 niveles. • VELOCIDAD MÍN.-MÁX.: 28-76 revoluciones / minuto. • INFORMACIÓN: Analiza su equipo, nivel de velocidad seleccionado, duración, nú- mero de entrenamiento en bicicleta temprano, calorías consumidas, nr. programa. • PEDALEADA: bidireccional, de ida y vuelta.
  • Page 20 INSTALACIÓN DEL PRODUCTO REQUISITOS DE INSTALACIÓN: • El área de la sala en la que se coloque el aparato debe tener una toma de corriente situada en las inmediaciones y no debe exponerse al sol. En caso de ventanas de gran- des dimensiones, se debe garantizar sobra mediante la interposición de algún tipo de lámina protectora opaca.
  • Page 21 MONTAJE DEL PRODUCTO El producto viene en un avanzado estado de montaje; después de abrir el envase las únicas operaciones de montaje consisten en la fijación de los pies de apoyo y los pe- dales. • Coloque el cuerpo principal K en el suelo y proceder al montaje utilizando la llave múltiple E y la llave hexagonal F .
  • Page 22 MONTAJE DEL PRODUCTO • Colocar y fijar los pedales inferiores D como mostrado en el dibujo aquí abajo, apre- tando cada uno con un tornillo G (M8x12 mm) con la llave múltiple E. Colocar y fijar cada manivela (pedales superiores) C apretando con un perno G (M8x12 mm) con la llave múltiple E.
  • Page 23 CONEXIÓN ELÉCTRICA PELIGRO Antes de conectar el aparato se debe comprobar que los datos de la placa de carac- terísticas situada debajo del cuerpo principal, corresponden a la red disponible y que el interruptor de encendido de color rojo se encuentra en la posición O (OFF). El producto funciona actuando sobre los pedales como un simulador de bicicleta, cuando se conecta a la fuente de alimentación y pulse el botón de encendido B, el motor eléctrico se activa y puede ser operado en el modo de pedaleo asistido.
  • Page 24 CONSEJOS Y RECOMENDACIONES PARA EL USO El producto se puede utilizar en dos modos distintos: un pedaleo tradicional o pedal asistido. En el pedaleo tradicional, el producto se utiliza como una bicicleta normal, sin la nece- sidad de conectar el cable de red al usuario normalmente paseo, ajustando su ritmo y la dirección de pedalear hacia delante o hacia atrás, dependiendo del tipo de ejercicio.
  • Page 25 FUNCIONES DEL PANEL DE CONTROL Indicadores LED y pantalla: SCAN - La sucesión automática de la información en la pantalla (Scan, velocidad, tiempo, distancia, calorías). Los indicadores LED debajo de la pantalla indican la función que aparece, la función de exploración se activa pulsando el botón PROG. hasta encender la luz roja “Scan”.
  • Page 26 FUNCIONES DEL PANEL DE CONTROL 1) START/STOP pedales para brazos: Pulse para iniciar y detener el motor de acciona- miento de las manijas superior para mover los brazos. 2) START/STOP pedales para piernas: Pulse para iniciar y detener el motor de acciona- miento de los pedales para mover las piernas.
  • Page 27 MANTENIMIENTO PELIGRO • Antes de realizar cualquier operación de mantenimiento, desconecte el enchufe de la toma de corriente. • NO utilice sustancias inflamables o nocivas para la limpieza. No utilice disolventes para limpiar las piezas de plástico, pero sólo los productos a base de agua, paño suave. •...
  • Page 28 Garantía (Cumpliendo con la Ley 26/84 “general para la defensa de los consumidores y usarios” y la Ley 7/96 “Ordenación de Comercio Minorista”) CONDICIONES: 1. La garantía del presente articulo será reconocida por parte de ECOGEST TRADE S.L., C/ En Proyecto 14, 46190 Ribarroja de Turia, Valencia (Spain) siempre que la ficha que se adjunta esté...
  • Page 29 USER MANUAL ENGLISH...
  • Page 30 SAFETY WARNINGS BEHAVIORS ALLOWED BEHAVIORS NOT ALLOWED • DO NOT use the tool within fitness cen- • Before installation and use, read very ters, private clubs, hotels or areas for the carefully this instruction manual and any collective use of training equipment; This other attachments instruction sheets.
  • Page 31 INTENDED USE AND CONTRAINDICATED The product described in this manual is a pedal easy to use and safe, suitable for the whole family for effective passive gymnastics exercises, carried out in a gentle and progressive manner. It does not have a saddle and handlebar and can easily be used while sitting on the couch or office chair, or lying on a mat and allows you to be able to keep in shape through constant training at low intensity for an effective improvement of motor and cardiovascular capacity.
  • Page 32 INTENDED USE AND CONTRAINDICATED Please follow the instructions in the manual for maximum personal safety and longer life of the product. The safety instructions and the relevant parts of the text are highlighted in bold and are preceded by a symbol, as illustrated and defined below. DANGER Any information marked with this symbol indicate DANGER, use extreme care to avoid personal injury.
  • Page 33 TECHNICAL FEATURES • ADJUSTING THE SPEED: electronic adjustment of 12 levels. • MIN-MAX SPEED: 28-76 rounds / minute. • INFORMATION: Scan your computer, level of selected speed, duration, number of early cycling workout, calories consumed, nr. program. • RIDING: two-way, back and forth. •...
  • Page 34 LOCAL INSTALLATION OF THE PRODUCT REQUIREMENTS OF LOCAL INSTALLATION: • The area of the room in which you place the product should have an electrical outlet located in the immediate vicinity and should not be exposed to the sun, if there is a large windowed area should be ensured by interposing an opaque protective tent.
  • Page 35 ASSEMBLY PRODUCT The product comes in an advanced state of assembly; after opening the packaging the only assembly operations consist in the fixing of the supporting feet and the pedals. • Position the main body K to the ground and proceed to the assembly using the mul- ti-purpose key and hex wrench inside the packaging.
  • Page 36 ASSEMBLY PRODUCT Attach the pedals to the cranks D lower tightening each with a G Bolt (M8x12 mm); use multiple key. Attach the handles C in high school by tightening each crank with a G bolt M8x12 mm ); use multiple key. -36-...
  • Page 37 ELECTRICAL CONNECTION DANGER Before connecting the appliance check that the data on the rating plate located under the main body, correspond to the available network and that the red power switch is in position O (OFF). The product works by acting on the pedals like a bicycle simulator, when you plug the mains plug in and press the power button B, the electric motor is activated and can be operated in assisted pedaling mode.
  • Page 38 TIPS AND ADVICE FOR USE The product can be used in two distinct modes: a traditional pedaling or assisted pe- daling. In traditional pedaling the product is used as a normal bike, without the need to con- nect the network cable to the user normally ride, adjusting your pace and direction of pedaling forward or backward depending on the type of exercise.
  • Page 39 CONTROL PANEL FUNCTIONS LED indicators and display SCAN - The automatic succession of the information on the display (Scan, Speed, Time, Dis- tance, Calories). The LED indicators below the display indicate the function displayed, the SCAN function is activated by pressing the PROG. up to turn on the red light “Scan”. SPEED - The selected speed level for the current session between L1 and L12.
  • Page 40 CONTROL PANEL FUNCTIONS 1) START / STOP pedal to arms: Press to start and stop the drive motor of the upper handles to move the arms. 2) START / STOP pedal to gambePremere to start and stop the drive motor of the lower pedals to move the legs.
  • Page 41 MAINTENANCE DANGER • Before performing any maintenance, disconnect the power plug from the wall outlet. • DO NOT use flammable or harmful substances for cleaning. Do not use solvents to clean the plastic parts but only products based on water, soft cloth. •...
  • Page 42 Warranty CONDITIONS: 1. This product guarantee will be accepted by ECOGEST TRADE S.L., provided that it is correctly completed and the attached card has been stamped and send to ECOGEST TRADE S.L. 2. The responsibility of ECOGEST TRADE S.L. C/ En Proyecto 14, 46190 Riba- rroja de Turia, Valencia (Spain) it is limited to the repair of the articles that has some deficiency of technical character or of manufacture.
  • Page 43 MANUALE D’USO ITALIANO...
  • Page 44 AVVERTENZE DI SICUREZZA COMPORTAMENTI AMMESSI COMPORTAMENTI NON AMMESSI • Prima del montaggio e dell’impiego, le- • NON impiegare l’attrezzo all’interno di ggere con la massima attenzione questo centri fitness, club privati, hotel o aree manuale d’istruzioni e gli eventuali altri attrezzate per l’uso collettivo di attrezzi fogli di istruzione allegati.
  • Page 45 USO PREVISTO E CONTROINDICATO - CONVENZIONI Il prodotto descritto in questo manuale è un pedalatore di facile utilizzo e sicuro, adatto a tutta la famiglia per efficaci esercizi di ginnastica passiva, svolti in maniera dolce e progressiva. Esso non dispone di sella e manubrio e può essere utilizzato comodamen- te seduti sul divano o sulla sedia da ufficio, oppure sdraiati su un materassino e consen- te di potersi mantenere in forma attraverso un allenamento costante a bassa intensità...
  • Page 46 USO PREVISTO E CONTROINDICATO - CONVENZIONI Osservare le indicazioni contenute nel manuale garantisce la massima sicurezza perso- nale ed una maggiore durata del prodotto stesso. Le avvertenze di sicurezza e le parti di testo rilevanti sono state evidenziate in neretto e sono precedute da simboli qui di seguito illustrati e definiti.
  • Page 47 CARATTERISTICHE TECNICHE • REGOLAZIONE DELLA VELOCITÁ: regolazione elettronica su 12 livelli. • VELOCITÁ MIN-MAX: 28 - 76 giri/minuto. • INFORMAZIONI: computer funzione Scan, livello di velocità selezionato, durata, numero pedalate da inizio allenamento, calorie consumate, nr. programma. • PEDALATA: bidirezionale, avanti e indietro. •...
  • Page 48 LOCALE DI INSTALLAZIONE DEL PRODOTTO REQUISITI DEL LOCALE D’ INSTALLAZIONE: • La zona della stanza nella quale si posiziona il prodotto deve disporre di una presa di corrente elettrica posta nell’immediata vicinanza e non deve essere esposta al sole, se presente una grossa superficie finestrata occorre provvedere interponendo una tenda coprente di protezione.
  • Page 49 ASSEMBLAGGIO DEL PRODOTTO Il prodotto si presenta in avanzato stato di montaggio; dopo l’apertura dell’imballo le uniche operazioni di montaggio consistono nel fissaggio dei piedi di appoggio e dei pedali. • Posizionare il corpo principale K a terra e procedere con le operazioni di montaggio servendosi della chiave multiuso e della chiave esagonale presenti all’interno dell’im- ballo.
  • Page 50 ASSEMBLAGGIO DEL PRODOTTO • Fissare i pedali D alle pedivelle inferiori serrando ciascuno con un bullone G (M8x12 mm); utilizzare la chiave multipla. Fissare le impugnature C alle pedivelle superiori se- rrando ciascuno con un bullone G M8x12 mm); utilizzare la chiave multipla. -50-...
  • Page 51 COLLEGAMENTO ELETTRICO PERICOLO Prima di collegare l’apparecchio verificare che i dati della targhetta di identificazione, posta sotto al corpo principale, siano corrispondenti alla rete elettrica disponibile e che l’interruttore rosso di alimentazione sia in posizione O (OFF). Il prodotto funziona agendo sui pedali come un simulatore di bicicletta, quando viene collegata la spina di rete A e premuto il pulsante di accensione B si attiva il motore ele- ttrico ed è...
  • Page 52 CONSIGLI PRATICI E SUGGERIMENTI D’USO Il prodotto può essere utilizzato in due distinte modalità: a pedalata tradizionale oppu- re a pedalata assistita. Nella pedalata tradizionale il prodotto viene utilizzato come una normale bicicletta, senza la necessità di collegare il cavo di rete l’utilizzatore pedala normalmente, rego- lando la propria andatura e la direzione della pedalata avanti o indietro a seconda del tipo di esercizio.
  • Page 53 FUNZIONI DEL COMPUTER Spie a LED e display SCAN - La successione automatica delle informazioni riportate sul display (Scan, Speed, Time, Distance, Calories). Le spie a LED sotto al display indicano la funzione visualizzata, la funzione SCAN viene attivata premendo il pulsante PROG. fino ad accendere la spia rossa “Scan”.
  • Page 54 FUNZIONI DEL COMPUTER 1) START/STOP pedalatore per braccia: Premere per avviare e arrestare il motore di azionamento delle impugnature superiori per movimentare le braccia. 2) START/STOP pedalatore per gambePremere per avviare e arrestare il motore di azio- namento dei pedali inferiori per movimentare le gambe. 3) Avanti/Indietro: Premere per modificare il senso di rotazione dei pedalatori da ora- rio ad antiorario o viceversa.
  • Page 55 MANUTENZIONE PERICOLO • Prima di effettuare qualsiasi operazione di manutenzione staccare la spina di alimen- tazione dalla presa di rete. • NON utilizzare sostanze infiammabili o nocive per la pulizia. Non usare solventi per pulire le parti di plastica ma soltanto prodotti a base di acqua e panni morbidi. •...
  • Page 56 Garanzia CONDIZIONI: 1. La garanzia del presente articolo sarà riconosciuta dalla ECOGEST TRADE S.L., C/ En Proyecto 14, 46190 Ribarroja de Turia, Valencia (Spain) a con- dizione che la scheda allegata sia stata inviata alla ECOGEST TRADE S.L. debitamente compilata e firmata. 2.
  • Page 57 BENUTZERHANDBUCH DEUTSCH...
  • Page 58 SICHERHEITSHINWEISE VERHALTEN ZUGELASSEN VERHALTEN NICHT ERLAUBT • Verwenden Sie das Gerät NICHT in Fit- • Lesen Sie sich diese Bedienungsanlei- nesscentern, privaten Clubs, Hotels oder tung und alle anderen Anleitungen sorg- Bereichen für den kollektiven Einsatz von fältig durch, bevor Sie sie installieren und Trainingsgeräten;...
  • Page 59 VERWENDUNG UND KONTRAINDIKATION Das in dieser Bedienungsanleitung beschriebene Produkt ist ein leicht zu bedienendes und sicheres Pedal, das für die ganze Familie geeignet ist für effektive passive Gymnas- tikübungen, die sanft und progressiv durchgeführt werden. Es hat keinen Sattel und Lenker und kann leicht verwendet werden, während auf der Couch oder Bürostuhl sitzend, oder liegend auf einer Matte und ermöglicht es Ihnen, in Form zu halten durch konstante Ausbildung mit geringer Intensität für eine effektive Verbesserung der Mo-...
  • Page 60 VERWENDUNG UND KONTRAINDIKATION Bitte befolgen Sie die Anweisungen im Handbuch für maximale persönliche Sicherheit und längere Lebensdauer des Produkts. Die Sicherheitshinweise und die relevanten Teile des Textes sind fett hervorgehoben und einem Symbol vorangestellt, wie nachstehend erläutert und definiert. ACHTUNG Alle mit diesem Symbol gekennzeichneten Informationen weisen darauf hin, dass GE- FAHR äußerst vorsichtig ist, um Verletzungen zu vermeiden..
  • Page 61 TECHNISCHE EIGENSCHAFTEN • EINSTELLUNG DER GESCHWINDIGKEIT: elektronische Einstellung von 12 Stufen. • MIN-MAX GESCHWINDIGKEIT: 28-76 Runden / Minute. • INFORMATION: Scannen Sie Ihren Computer, das Niveau der ausgewählten Ges- chwindigkeit, Dauer, Anzahl der frühen Zyklus Workout, Kalorien verbraucht, nr. Programm. •...
  • Page 62 LOKALE INSTALLATION DES PRODUKTS VORSCHRIFTEN DER LOKALEN INSTALLATION: • Der Raum, in dem Sie das Produkt platzieren, sollte eine Steckdose haben, die sich in unmittelbarer Nähe befindet und nicht der Sonne ausgesetzt werden sollte, wenn eine große Fensterfläche durch Zwischenlage eines lichtundurchlässigen Schutzzeltes gewährleistet werden sollte.
  • Page 63 MONTAGEPRODUKT Das Produkt kommt in einem fortgeschrittenen Zustand der Montage; Nach dem Öff- nen der Verpackung besteht die einzige Montageoperation in der Befestigung der Stüt- zfüße und der Pedale. • Setzen Sie den Grundkörper K auf den Boden und fahren Sie mit dem Mehrzwecks- chlüssel und dem Sechskantschlüssel in die Verpackung.
  • Page 64 MONTAGEPRODUKT • Montieren Sie die vordere Stützleiste an der Vorderseite des Werkzeugs und befes- tigen Sie sie dann mit zwei Schrauben I (M8x75 mm) mit H-Unterlegscheiben (M8) und auf der anderen Seite mit zwei selbstsichernden Muttern J (M8) Begleitet von H-Unterlegscheiben (M8), die mit dem Inbusschlüssel F und dem Mehrfachschlüssel E -64-...
  • Page 65 ELEKTRISCHE VERBINDUNG ACHTUNG Überprüfen Sie vor dem Anschließen des Gerätes, dass die Daten auf dem Typenschild unter dem Hauptkörper dem vorhandenen Netz entsprechen und dass Befindet sich der rote Netzschalter in Stellung O (AUS). Das Produkt funktioniert, indem man auf die Pedale wie einen Fahrradsimulator einwirkt, wenn man den Netzstecker einsteckt und den Netzschalter B drückt, wird der Elektromotor aktiviert und kann im Pedaltrieb betrieben werden.
  • Page 66 TIPPS UND BERATUNG Das Produkt kann in zwei verschiedenen Modi verwendet werden: einem traditione- llen Tret- oder Pedaltritt. Beim herkömmlichen Tretfahren wird das Produkt als normales Fahrrad verwendet, ohne dass das Netzwerkkabel an den Benutzer angeschlossen werden muss, das nor- malerweise fährt, indem Sie Ihr Tempo und die Richtung des Tretens vorwärts oder rückwärts in Abhängigkeit von der Art der Übung einstellen.
  • Page 67 BEDIENELEMENTE FUNKTIONEN LED-Anzeigen und Anzeige SCAN - Die automatische Abfolge der Informationen auf dem Display (Scan, Geschwindigkeit, Zeit, Entfernung, Kalorien). Die LED-Anzeigen unterhalb der Anzeige zeigen die an- gezeigte Funktion an, die SCAN-Funktion wird durch Drücken der Taste PROG aktiviert. Um das rote Licht “Scan”...
  • Page 68 BEDIENELEMENTE FUNKTIONEN 1) START / STOPP Pedal an den Armen: Zum Starten und Stoppen des Antriebsmotors der oberen Griffe, um die Arme zu bewegen. 2) START / STOPP Pedal zu gambePremere zum Starten und Stoppen des Antriebsmo- tors der unteren Pedale, um die Beine zu bewegen. 3) Auf / Ab: Drücken Sie diese Taste, um die Drehrichtung der Radfahrer von CW nach CCW oder umgekehrt zu ändern.
  • Page 69 INSTANDHALTUNG DANGER • Bevor Sie Wartungsarbeiten durchführen, ziehen Sie den Netzstecker aus der Stec- kdose. • Verwenden Sie zur Reinigung keine brennbaren oder schädlichen Substanzen. Verwenden Sie keine Lösungsmittel zur Reinigung der Kunststoffteile, sondern nur Pro- dukte auf Wasserbasis, weichen Tuch. •...
  • Page 70 Garantie BEDINGUNGEN: Diese Produktgarantie wird von ECOGEST TRADE S.L. akzeptiert, sofern diese ordnungsgemäß ausgefüllt und die beigefügte Karte gestempelt und an ECO- GEST TRADE S.L. Die Verantwortung von ECOGEST TRADE S.L. C / En Proyecto 14, 46190 Ri- barroja de Turia, Valencia (Spanien) ist es beschränkt auf die Reparatur der Artikel, die einen gewissen Mangel an technischem Charakter oder Fertigung hat.