Publicité
Les langues disponibles
Les langues disponibles
Liens rapides
• Jump start:
• Charge:
• Light:
Thank you for choosing the Power Box by BS CHARGER™ Jump Starter ! Always follow basic safety precautions
when using electrical boosters. Read all instructions carefully, please keep this instruction manual for easy
reference.
Motorcycles, ATV/UTV, Snowmobiles, Watercrafts, Lawnmowers, Cars, Boats...
Mobile devices : smartphones, tablets, hd action cameras, music players, wireless speakers and more !
MAIN FUNCTIONS:
Motorcycles, Cars (up to 5L - 5000cc gas engine and 2.5L - 2500cc diesel engine), and Boats...
Mobile devices (smartphones, tablets, hd action cameras, music players, wireless speakers...)
3 Modes (normal, strobe, SOS)
BATTERY BOOSTER FOR :
SUITABLE FOR THE FOLLOWING 12V LEAD ACID BATTERIES :
BATTERY CHARGER FOR :
USER MANUAL
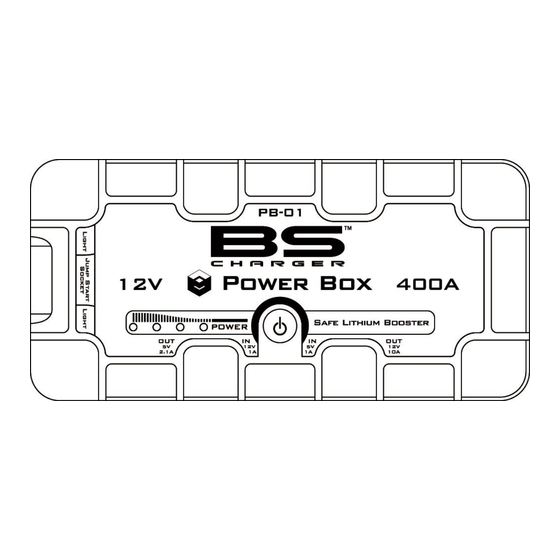
Model : PB-01
Publicité

Manuels Connexes pour BS Charger POWER BOX PB-01


Sommaire des Matières pour BS Charger POWER BOX PB-01
- Page 1 • Light: 3 Modes (normal, strobe, SOS) Thank you for choosing the Power Box by BS CHARGER™ Jump Starter ! Always follow basic safety precautions when using electrical boosters. Read all instructions carefully, please keep this instruction manual for easy reference.
- Page 2 PRODUCT LAYOUT LED Indicators On/Off Switch LED Flash Light Output port : 12 V - 10 A Input port : 5 V - 1 A Jump Start socket Input port : 12 V - 1 A Output port : USB 5 V - 2.1 A A/ Jump Start socket B/ Output port : USB 5 V - 2.1 A C/ Input port : 12 V - 1 A...
- Page 3 INITIAL CHARGE The Power Box comes partially charged out of the box and needs to be fully charged prior to first use. LED INDICATORS Press the switch to check the storage level of Power Box : STORAGE LEVEL Indicator 1 solid 2 solid 3 solid 4 solid...
- Page 4 JUMP START 12V VEHICLE INSTRUCTION • Jump start : Motorcycles, Cars (up to 5L - 5000cc gas engine and 2.5L - 2500cc diesel engine), and Boats… 1. Make sure that the number of indicators is not less than 3. 2. Connect the RED clamp to the vehicle’s battery positive (+) terminal and connect the BLACK clamp to the vehicle’s battery negative (-) terminal.
- Page 5 1. Connect the smart cable to Power Box. If the « start » and « error » indicatores will alternately flash with « green » and « red » lights, it proves the circuit normal. If only red light is on, it proves the voltage of Power Box too low to start vehicle.
- Page 6 LED FLASH LIGHT Press the switch 3 seconds to start the LED Flash Light. There are 3 modes of LED light appear in order (normal, strobe, SOS) if you press slightly. Normal mode SOS mode Strobe mode ress 3 seconds Short press Short press Short press...
- Page 7 TOXIC AND HARMFUL SUBSTANCES Composition and amount of toxic and harmful substance in Power Box PBDE Cr(Vi) 0 : indicate all homogeneous materials’s hazardous substances content are below the MCV limit specified in the standard 2002/95/EC (RoHs). WARNING Do not jump start with less than 3 LED indicators lit on the capacity indicator. Make sure the blue plug for the Smart Booster cables is plugged fully into Power Box.
- Page 8 WARRANTY INFORMATION We offer a limited warranty for this product against any defects in material and workmanship for a period of 6 months from the date of purchase by the end user/consumer. The conditions of the warranty are as follow: 1.
- Page 9 • Lampe : Avec 3 modes (normal, stroboscope, SOS) Nous vous remercions pour l’achat du booster BS CHARGER™ Power Box ! Veuillez toujours tenir compte des précautions de base lors de l’utilisation d’appareils électriques. Veuillez lire le présent mode d’emploi et assurez- vous de l’avoir compris.
- Page 10 CARACTERISTIQUES Bouton de mise en marche Témoins lumineux Lampe DEL Port sortie : 12 V - 10 A Port entrée : 5 V - 1 A Borne « booster » pour câble de démarrage Port entrée : 12 V - 1 A Port sortie : USB 5 V - 2.1 A A/ Borne «...
- Page 11 CHARGE INITIALE Le Power Box est livré partiellement déchargé. Il est indispensable de le charger avant la première utilisation. TEMOINS LUMINEUX Appuyez sur le bouton de mise en marche pour contrôler la capacité du Power Box : NIVEAU DE CHARGE Témoins lumineux 1 DEL allumée 2 DEL allumées...
- Page 12 DEMARRAGE D’UN VEHICULE 12 V • Booster : Motos, voitures (moteurs essence jusqu’à 5L - 5000cc et diesel jusqu’à 2.5L - 2500cc), bateaux… 1. Assurez-vous que le témoin lumineux affiche au moins 3 DEL allumées. 2. Branchez la pince rouge du câble de démarrage à la borne positive (+) de la batterie du véhicule puis la pince noire à...
- Page 13 FONCTIONNEMENT DU CABLE INTELLIGENT DE DEMARRAGE 1. Branchez le câble intelligent de démarrage au Power Box. Si les DEL « start » et « error » clignotent alternativement en « vert » et « rouge », cela signifie que le circuit électrique est normal. Si le « rouge » reste allumé...
- Page 14 CHARGE DE PRODUITS AUTOMOBILES 12V • Charge : produits automobiles 12V tels que compresseur d’air, réfrigérateur, ... Port sortie « out » : 12 V - 10 A / Câble non fourni. LAMPE Pressez 3 secondes le bouton « power » pour activer la fonction lampe constituée de 2 puissantes DEL. Il y a 3 modes de fonctionnement distincts : normal, stroboscope, SOS plus le statut éteint.
- Page 15 Avant d’utiliser la fonction Booster : Vérifiez bien vos branchements et assurez-vous que le témoin lumineux précisant le niveau de charge affiche bien 3 DEL allumées au minium. Pendant combien de temps le Power Box reste-t-il chargé ? En moyenne, le Power Box peut tenir sa charge pendant 6 mois. Cela dépendra néanmoins des conditions de stockage.
- Page 16 Tenez l’appareil à l’écart des sources de chaleur. Ne stockez pas l’appareil dans des locaux dont la température peut excéder 70 °C. Chargez l’appareil uniquement à des températures ambiantes comprises entre -20 °C et 60 °C. Chargez l’appareil uniquement avec le chargeur fourni. Dans des conditions extrêmes, du liquide peut s’écouler de la batterie.
- Page 17 • Licht : 3 Modi (normallicht, Stroboskoplicht, ”SOS”-Morselicht) Vielen Dank für den Kauf dieses Batterie-Startgerätes Power Box hergestellt von BS CHARGER™ ! Bitte beachten Sie immer dis grundsätzlichen Vorsichtmaßnahmen bei Bedienung von elektrischen Geräten. Lesen und verstehen Sie die Gebrauchsanleitung. Bewahren Sie diese Anleitung auf, damit Sie später darauf zurückgreifen können.
- Page 18 SPEZIFIKATION Indikatoren Einschaltknop LED-Licht 12 V - 10 A-Anschluss Input port : 5 V - 1 A Starthilfe-Anschluss Input port : 12 V - 1 A USB 5 V - 2.1 A-Anschluss A/ Starthilfe-Anschluss B/ USB 5 V - 2.1 A-Anschluss C/ In Stecker : 12 V - 1 A Verwenden Sie mit Smart Starterkabels Verwenden Sie mit Handy Ladekabel...
- Page 19 ANFANGSGEBÜHR Das Power Box ist bei der Lieferung nur teilweise geladen und muss vor der ersten Inbetriebnahme vollständing aufgeladen werden. INDIKATOREN Drücken Sie den Einschaltknopf, um die Kapazität des Power Box zu überprüfen : Batteriekapazität Indikatoren 1 Blinklicht 2 Dauerlicht 3 Dauerlicht 4 Dauerlicht Batteriekapazität...
- Page 20 4. Der Startversuch sollte nicht länger als 4 Sekunden dauern. 5. Wenn das Fahrzeug anspringt, entfermen Sie das Starterkabel vom Power Box. Entfernen Sie die rote und schwarze Klemme innerhalb 30 Sekunden. 6. Lassen Sie den Motor des Fahrzeugs laufen. Power Box kann ein Fahrzeug zu starten 20-mal (abhängig von der Größe des Motors und des Status der Fahrzeugbatterie).
- Page 21 gleichen Zeit sein. Wenn zum Fahrzeug wieder starten wollen, sollten sie die Smart-Startkabel herausziehen aus der Power Box, und stecken Sie es wieder in Power Box.) 4. Wenn nur rotes Licht auf, beweist es, die Spannung der Autobatterie höher als Power-Box und kann das Fahrzeug nicht starten.
- Page 22 Nach kurzem weiteren Drüken des Schalters leuchtet Stroboskoplicht, nach weiterem Drücken « SOS »-Morselicht, wenn Sie noch einmal drücken ist das Licht wieder ausgeschaltet. Normal mode SOS mode Strobe mode ress 3 seconds Short press Short press Short press Haltbarkeit: 24 Stunden im Strobe-Modus - 40 Stunden in den « SOS »-Morselicht. LIEFERUMFANG Teilen Name Quantität...
- Page 23 WARNHINWEISE Do not jump start with less than 3 LED indicators lit on the capacity indicator. Stecken Sie den blauen Stecker fest in den Anschluss, wenn das Fahrzeug gestartet wird. Wenn er nicht fest steckt, kann das Fahrzeug nicht gestartet werden, der Anschluss kann sogar schmelzen. Vergewisserm Sie sich, dass die Klemmen fest auf den Terminals sitzen une diese nicht verrostet oder schmutzig sind.
- Page 24 1. Die Garantie is nur gültig gegen Vorlage der Rechnung, zusammen mit dem Power Box, der repariert oder ersetzt werden soll. 2. Die Garantie verfällt, wenn die Seriennummer, das Kaufdatum oder das Label entfernt wurde. 3. Die Garantie ist nicht anwendbar auf normalen Gebrauch, Abnutzung, nicht bestimmungsgemäßen Gebrauch, falsche Anwendung, Modifikation oder Reparatur durch nicht autorisierte Personen.