Table des Matières
Publicité
Les langues disponibles
Les langues disponibles
Liens rapides
Instruction booklet
TUMBLE DRYER
GB
PT
English,1
Português,19
AQUALTIS
AQC9 2F7
www.hotpoint.co.uk
This symbol reminds you to read this
instruction manual.
!
Keep this instruction booklet on hand in order to refer to it when
necessary. Take it with you when you move, and, should you sell this
appliance or pass it on to another party, make sure that this booklet
is supplied along with the dryer so that the new owner may be infor-
med about warnings and suggestions on how the dryer works.
!
Read these instructions carefully; the following pages contain impor-
tant information on installation and suggestions on how the appliance
works
Contents
Installation, 2
NL
FR
Français,37
Before you start using your dryer
Warnings, 4
The Display, 9
Start and Programmes, 10-15
Laundry, 16
Troubleshooting, 17
Service, 18
Essential Contact Information
1
Publicité
Chapitres
Table des Matières
Dépannage

Manuels Connexes pour Hotpoint Ariston AQUALTIS AQC9 2F7


Sommaire des Matières pour Hotpoint Ariston AQUALTIS AQC9 2F7
-
Page 1: Table Des Matières
Instruction booklet TUMBLE DRYER Contents Installation, 2 Where to put your dryer Ventilation English,1 Français,37 Electrical connection Português,19 Levelling the tumble dryer Before you start using your dryer Warnings, 4 General safety Save energy and respect the environment Care and maintenance, 6 Disconnecting the power supply Cleaning the filter after each cycle Checking the drum after each cycle... -
Page 2: Installation
Installation order to reach the drain. To install the new tube just substitute the Where to put your dryer existing one as indicated in figure B inserting it in the same place. • Place your dryer at ! The drain tube has to be below 1 m from the bottom of the Dryer. a distance from gas ! Once the Dryer has been installed please assure that the drain ranges, stoves, heaters,... -
Page 3: Preliminary Information
location check that it is level first side-to-side, Maximum load: 9 kg then front to back. If the dryer is not level, adjust the two legs up or down until your dryer is level. Preliminary information Once the tumble dryer is installed, clean the inside of the drum before operating it and remove any dirt accumulated during transportation. -
Page 4: Warnings
Warnings ! This appliance has been designed and built • Do not turn off the dryer when there are still according to international safety standards. warm items inside. These warnings are given for safety reasons • Clean the filter after each use (see and must be followed carefully. -
Page 5: Save Energy And Respect The Environment
waxes and wax removers. Ensure these items have been washed in hot water with an extra amount of detergent before being dried in the tumble dryer. • Do not tumble dry items containing foam rubber (also known as latex foam), or similarly textured rubber like materials. -
Page 6: Care And Maintenance
Care and maintenance Disconnecting the power supply Emptying the water container after each cycle ! Disconnect the dryer when not in use or Remove the water container and during cleaning and maintenance operations. empty it into a sink or other Cleaning the filter after each cycle suitable drain outlet, then replace it correctly. -
Page 7: Cleaning The Tumble Dryer
4.Whenever you clean the Heat pump filter • Clean the front air intake grille regularly (every 6 months) unit always clean any build up of fluff from with a vacuum cleaner to remove any lint, fluff or dust deposits. Furthermore, remove any lint deposits from the the surface of the metal plates. -
Page 8: Dryer Description
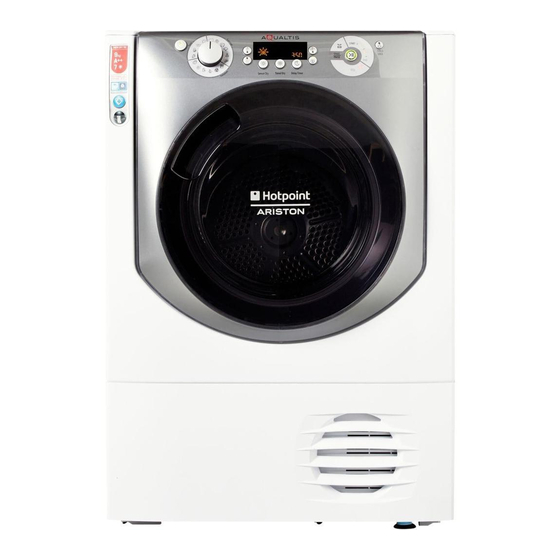
Dryer Description The Features To open door Rating Plate Model & Serial Pull on handle Numbers Water container Filter Heat Pump Filter Unit Air Intake (cover open) Grille Heat Pump Filter Unit cover handle (Pull here to open) Ajustable feet (to level dryer) Control Panel Start/Pause... -
Page 9: The Display
The Display The Display has three sections each with its corresponding button. Sensor Dry After selecting a programme that has a Sensor Dry Option, press and release the button until the required dryness sensing level is displayed. If the sensing option is not available the display will flash and the buzzer beeps three times. -
Page 10: Start And Programmes
Start and Programmes Choosing a Programme START in order to resume drying. If you open the door to check your laundry you will extend the 1. Plug the dryer into the electrical socket. drying time as the heat pump compressor will not start until 5 2. - Page 11 Special Programmes Shirts High Heat option • This is a programme for Shirts made from Cotton. • It can be used for load sizes up to 3 kg (approximately 10 shirts). • Loads dried using this programme are usually ready to wear; the edges or seams may be slightly damp. If this is found try turning the shirts inside out and running the programme again for a short period.
- Page 12 Anti Allergy The programme has the ‘Seal of Approval’ endorsement from ‘Allergy UK’, which reflects the effective reduction and elimination of allergens from the clothes. With this programme, thanks to the achievement of constant temperature for an extended period of time, the effects of the most common allergens (including House Dust Mite) are neutralized.
-
Page 13: Programmes Table
Programmes Table If the On/Off light is not lit; Press the On/Off Button and then select programme. Programme What it does How to set it Notes / Options available Brief programme (approxima- 1. Position the PROGRAMME knob on ! This is not a drying programme (see previous page). tely 10 minutes) that softens 2. - Page 14 Programme What it does How to set it Notes / Options available Dries your cuddly toy. Sound . Delay Start 1. Position the PROGRAMME knob on 2. Select any Options if required. 3. Press the Start Button Cuddly Toys Dries colored clothes.
-
Page 15: The Controls
The Controls • Empty Water Clean Filter Light “h2o” (If you have plumbed your dryer to a drain the light can be • Programme knob ignored for the water bottle, as there is no need to empty the Warning, if after pressing the start button the programme water container). -
Page 16: Laundry
Laundry Sorting laundry Drying times • Check the symbols on the care labels of the various gar- Drying times are approximate and may vary depending on ments to verify whether the garments can be safely tumble the following: dried. • Sort laundry according to the type of fabric. •... -
Page 17: Troubleshooting
Troubleshooting One day your dryer seems not to be working. Before you call your Service Centre (see Service), go through the following troublesho- oting suggestions. Problem: Possible causes / Solutions: The dryer won’t start. • The plug is not plugged into the socket, or not making contact. •... -
Page 18: Service
Service Heat Pump System Before calling the Service Centre: This dryer is fitted with a sealed heat pump system to dry • Use the troubleshooting guide to see if you can solve your clothes. To operate, the heat pump contains fluorinated problem yourself (see Troubleshooting). -
Page 19: Instruções Para A Utilização
Instruções para a utilização MÁQUINA DE SECAR ROUPA Índice Instalação, 20 Onde instalar a máquina de secar roupa? Ventilação Ligação eléctrica Português Nivelamento da máquina de secar roupa Informações preliminares Advertências, 22 Segurança geral Economia energética e respeito pelo meio ambiente Cuidados e manutenção, 24 Interrupção da alimentação eléctrica Limpeza do filtro no fim de cada ciclo... -
Page 20: Instalação
Instalação Onde instalar a máquina de mesma conduta de descarga. Basta desligar o tubo indicado na figura A e ligá-lo à secar roupa? conduta de descarga. • As chamas podem Se a conduta de descarga estiver a uma distância superior ao comprimento do tubo, para efectuar a ligação, é... -
Page 21: Nivelamento Da Máquina De Secar Roupa
Dimensões máximas de carga: 9 kg ! O cabo eléctrico não deve ser dobrado nem esmagado. ! Se a ficha a substituir é do tipo incorporado, é necessário eliminá-la de forma segura. NÃO Ficha De Produto - Regulamentação 392/2012. a deixe onde possa ser inserida numa tomada, podendo provocar choques eléctricos. -
Page 22: Advertências
Advertências ! Este electrodoméstico foi concebido e • A parte posterior da máquina de secar fabricado em conformidade com as normas roupa pode ficar muito quente: não internacionais em matéria de segurança. toque nunca nela quando a máquina Estas advertências são fornecidas por razões estiver a funcionar. -
Page 23: Economia Energética E Respeito Pelo Meio Ambiente
ou azeite, uma vez que isto representa um No caso de os reforços de metal se perigo de incêndio. As peças de roupa soltarem durante a secagem, podem contaminadas com óleo podem inflamar ocorrer danos na máquina de secar. espontaneamente, sobretudo quando são •... -
Page 24: Cuidados E Manutenção
Cuidados e manutenção Interrupção da alimentação desempenho da máquina de secar roupa. eléctrica Esvaziamento do ! Desligue a máquina de secar roupa quando recipiente de recolha não estiver a funcionar, bem como durante as operações de limpeza e de manutenção. da água no fim de cada ciclo Limpeza do filtro no fim de cada... -
Page 25: Limpeza Da Máquina De Secar Roupa
superfície interna da rede do filtro. horizontal e certificar-se de que estejam bem firmes. ! ATENÇÃO: a parte dianteira da bomba de calor é realizada com finas chapas metálicas. Limpeza da máquina de secar roupa Quando for limpá-lo, remova ou reposicione •... -
Page 26: Descrição Da Máquina De Secar Roupa
Descrição da máquina de secar roupa Abertura da porta Características Modelo e Número de Placa de série Puxe a pega características Recipiente de recolha da água Filtro Grelha da admissão Bomba de Calor de ar (tampa aberta) Pés Pega tampa da reguláveis Bomba de Calor (puxe para abrir) -
Page 27: Visor
Visor O visor possui três secções, cada uma com o respectivo botão. Secagem automática Depois de ter seleccionado um programa com a opção Secagem automática, prima várias vezes o botão até visualizar o nível de secagem automática pretendido. Se a opção de secagem automática não estiver disponível, o visor fica intermitente e são emitidos três sinais acústicos. -
Page 28: Início E Programas
Início e programas Selecção do programa e retirar as peças que já estão secas, deixando as outras no interior da máquina. Depois de ter voltado a fechar a porta, 1. Introduza a ficha da máquina de secar roupa na tomada de prima START para recolocar a máquina em funcionamento. - Page 29 Programa especial Programas para Camisas Camisas - Secagem intensiva • Este programa destina-se às camisas de algodão. • Pode ser utilizado para cargas de até 3 kg (cerca de 10 camisas). • A duração deste programa depende da carga, configuração de secagem seleccionada e velocidade de rotação utilizada na sua máquina de lavar.
- Page 30 Anti Alérgico • Este programa possui o “Selo de Aprovação” da Allergy UK que reflecte a redução e eliminação eficaz de alergénios da roupa com o ciclo especial Antialérgico. Com este programa e graças a uma temperatura constante alcançada durante um período de tempo prolongado, os efeitos da maioria dos alergénios (incluindo os ácaros domésticos) são neutralizados.
-
Page 31: Tabela Dos Programas
Tabela dos programas Se o indicador luminoso On/Off não estiver aceso, prima o respectivo botão e, em seguida, seleccione o programa. Programa Funções Definição Notas / Opções disponíveis Programa breve (cerca de 1. Posicione o botão PROGRAMAS em Não se trata de um programa de secagem (consulte a 10 minutos) que amacia 2. - Page 32 Programa Funções Definição Notas / Opções disponíveis Seca artigos em Peluche. Alarme . Início retardado 1. Posicione o botão PROGRAMAS em 2. Seleccione as eventuais opções necessárias. 3.Prima o botão de início/pausa Peluche Seca peças de vestuário Alarme . Início retardado 1.
-
Page 33: Comandos
Comandos • Temperatura Alta Quando é seleccionado um tempo de secagem, premindo • Selector dos programas Atenção: se, depois de ter premido o botão de início, este botão selecciona-se a secagem intensiva e a luz vigia alterar a posição do selector dos programas, a nova posição acima do botão acende-se. -
Page 34: Roupa
Roupa Triagem da roupa Tempos de secagem • Verifique os símbolos que constam das etiquetas das di- Os tempos são aproximativos e podem variar consoante: versas peças para se certificar de que podem ser submeti- das a secagem em tambor. •... -
Page 35: Problemas E Soluções
Problemas e soluções Se lhe parecer que a máquina de secar roupa não está a funcionar correctamente, antes de contactar o Centro de Assistência (consulte Assistência), consulte atentamente as seguintes sugestões para a resolução dos problemas. Problema: Possíveis causas / Soluções: A máquina de secar roupa não •... -
Page 36: Assistência
Assistência Sistema com bomba de calor Dados para comunicar ao Centro de Assistência: Esta máquina de secar roupas é equipada com um sistema • Nome, endereço e código postal; com bomba de calor para secar a sua indumentária. Para • número de telefone; permitir o seu funcionamento, a bomba de calor utiliza •... - Page 37 Mode d’emploi SÈCHE-LINGE Table des matières Installation, 38 Où installer le sèche-linge Ventilation Raccordement électrique Français Mise à niveau du sèche-linge Informations préliminaires Précautions, 40 Sécurité générale Économie d’énergie et protection de l’environnement Soin et entretien, 42 Interruption de l’alimentation éelectrique Nettoyage du filtre après chaque cycle Contrôle du tambour après chaque cycle Vidange du réservoir d’eau après chaque cycle...
-
Page 38: Installation
Installation Où installer le sèche-linge diamètre et la longueur nécessaire. Pour installer le nouveau il suffit de remplacer le tuyau exi- • Placez votre stant comme illustré par la figure B dans la même position. sèche-linge à une certaine distance des La hauteur de la vidange doit être inférieure à... -
Page 39: Le Câble Électrique Doit Être Contrôlé
Charge maximale: 9 kg aux consignes de sécurité. Ne la laissez jamais dans un endroit où elle peut être branchée à une prise et provoquer ainsi un choc électrique. ! Le câble électrique doit être contrôlé périodiquement. Si le câble est endommagé, il faut le faire remplacer par le fabricant, par Données techniques - Réglementation 392/2012. -
Page 40: Précautions
Précautions Cet électroménager a été conçu et réalisé • Ne chargez pas d’articles qui dégouttent conformément aux normes internationales de d’eau. sécurité. Ces consignes sont fournies pour • Vérifiez avec soin toutes les instructions sur des raisons de sécurité, il faut les respecter les étiquettes des vêtements (voir Linge). -
Page 41: Économie D'énergie Et Protection De L'environnement
contenant de l’huile végétale ou de l’huile recouvertes de caoutchouc dans le sèche- de cuisson ou ayant été en contact avec linge. des produits coiffants dans le sèche-linge, • Enlever tous les objets des poches, il convient de les laver au préalable à l’aide notamment les briquets et les allumettes. -
Page 42: Soin Et Entretien
Soin et entretien Interruption de l’alimentation Vidange du réservoir d’eau après chaque électrique cycle ! Débranchez votre sèche-linge lorsque vous Sortez le réservoir du sèche-linge et videz-le dans un évier ou autre ne l’utilisez pas, lorsque vous le nettoyez et évacuation appropriée. -
Page 43: Nettoyage Du Sèche-Linge
Quand vous le nettoyez ou que vous enlevez Nettoyage du sèche-linge et replacez le bloc filtrant pour le nettoyage, • Pour nettoyer l’extérieur en métal et en plastique et les faites attention à ne pas l’endommager et à ne parties en caoutchouc, utiliser un chiffon humide. pas vous couper. -
Page 44: Description Du Sèche-Linge
Description du sèche- linge Fonctions Ouvrir la porte Modèle et Plaque Tirez sur la numéro de signalétique poignée série Collecteur d’eau Filtre Arrivée d’air Pompe à chaleur (capot ouvert) Pieds Poignée du couvercle réglables de la pompe à chaleur (Tirer pour ouvrir) Tableau de commande Témoin de progression... -
Page 45: Affichage
Affichage L’écran se compose de trois parties avec un bouton pour chacune. Programmes Automatiques Lorsque vous sélectionnez un programme avec l’option Séchage par sonde, appuyez et relâchez le bouton jusqu’à ce que la sensibilité de la sonde de séchage s’affiche. Si l’option n’est pas disponible, l’affichage clignote et vous entendrez trois bips. -
Page 46: Démarrage Et Programmes
Démarrage et programmes Sélection d’un programme pour redémarrer le séchage. Si vous ouvrez la porte pour vérifier l’état de séchage du linge vous provoquerez un prolongement 1. Raccordez le sèche-linge à la prise électrique. des cycles de séchage, car le compresseur du condensateur 2. -
Page 47: Programmes Spéciaux Chemises - Haute Température
Programmes spéciaux Chemises - Haute température • Ce programme est conçu pour les chemises en coton. • Le programme peut être utilisé pour une lessive de 3 kg (environ 10 chemises). • La durée de ce programme dépendra du poids de la charge de linge, du degré de séchage sélectionné et de la vitesse d’essorage utilisée lors du lavage. - Page 48 Rafraîchissement Grâce à un courant d’air frais, l’oxygène pénètre dans les fibres et élimine les odeurs désagréables telles que les odeurs de tabac, de friture et de pollution. Grâce à ce programme court, vous pouvez facilement rafraîchir vos vêtements en tout juste 20 minutes. ! Ce programme sert à...
-
Page 49: Tableau Des Programmes
Tableau de programmes Si le témoin Marche/Arrêt n’est pas allumé, appuyez sur le bouton Marche/arrêt et sélectionnez le programme. Programme Fonction Réglage Remarques / Options disponibles Programme court (environ Il ne s’agit pas d’un programme de séchage (voir page pré- 1. - Page 50 Programme Fonction Réglage Remarques / Options disponibles Sèche vos jouets en peluche. Alarme . Départ Différé 1. Placez le bouton PROGRAMME sur 2. Sélectionnez les options nécessaires. 3. Appuyez sur la touche Marche/Pause Peluches Sèche vos tissus colorés. Alarme .. Départ Différé 1.
- Page 51 Commandes option n’est pas disponible. • High Heat • Bouton Programme Lorsqu’une durée de séchage a été sélectionnée, cette tou- Attention ! Si après avoir appuyé sur le bouton Démarrer, che permet de sélectionner le séchage à haute température la position du bouton de programme a changé, la nouvelle et le témoin situé...
-
Page 52: Linge
Linge Tri du linge Temps de séchage • Vérifiez les symboles sur les étiquettes des vêtements Ces temps sont approximatifs et peuvent varier en fonction pour vous assurer que les articles peuvent être passés au des paramètres suivants : sèche-linge. •... -
Page 53: Dépannage
Dépannage Votre appareil semble ne pas fonctionner correctement ? Avant de contacter votre réparateur agréé (voir Réparation), parcourez les quelques pages suivantes. Problème : Causes possibles/Solutions : Le sèche-linge ne démarre pas. • L’appareil n’est pas branché dans la prise de courant ou il n’est pas suffisamment branché... -
Page 54: Réparation
Réparation Système à pompe à chaleur Quels sont les éléments dont le réparateur a besoin : Ce sèche-linge est équipé d’un système à pompe à chaleur • Nom, adresse et code postal ; pour sécher votre linge. Pour son fonctionnement, la pompe •... - Page 56 11/2016 Xerox Fabriano...