
Manuels Connexes pour ROSIERES RH 64 DCT/1


Sommaire des Matières pour ROSIERES RH 64 DCT/1
- Page 1 TABLE DE CUISSON NOTICE D’EMPLOI ET D’INSTALLATION HOBS USER INSTRUCTIONS USINES DE ROSIÈRES - 30, rue Y. LACELLE - Rosières - 18400 - Lunery - France...
-
Page 2: Table Des Matières
SOMMAIRE ........03 CONSIGNES DE SÉCURITÉ ..........04 1. Avertissements généraux ........04 2. Protection de l'environnement ..............04 3.Installation ........05 4. Raccordement électrique 5. Conseils concernant les ustensiles de ........07 cuisine pour la table de cuisson ..............07 6. Utilisation ........08 7. Nettoyage et entretien 8. -
Page 3: Consignes De Sécurité
CONSIGNES DE SÉCURITÉ Nous vous recommandons de conserver les électricien professionnel de remplacer la prise instructions d'installation et d'utilisation pour d'alimentation par un dispositif compatible. La pouvoir les consulter ultérieurement. Avant fiche du câble d'alimentation et la prise d'installer la table de cuisson, notez son numéro d'alimentation doivent être conformes aux de série, au cas où... -
Page 4: Avertissements Généraux
Plaque d'identification (située sous le caisson de la table de cuisson) CODICE PRODUIT T Profondeur de la rainure 5 mm 1. AVERTISSEMENTS GÉNÉRAUX Largeur du périmètre En plaçant la marque sur cet appareil, nous confirmons sa de l'installation par conformité à toutes les normes européennes de protection de encastrement l'environnement, de la santé... -
Page 5: Raccordement Électrique
Un joint d'étanchéité à l'eau 4. RACCORDEMENT ÉLECTRIQUE est fourni avec la table de cuisson. Posez le joint d ' é t a n c h é i t é b i e n Parte inferiore soigneusement tout autour de la partie inférieure de la table de cuisson, comme illustré, afin d'empêcher toute fuite dans le meuble... - Page 6 « L'installation doit être conforme aux normes et directives. » Le fabricant décline toute responsabilité en cas de dommage dû à Remarque : vérifiez que les vis du bornier sont bien serrées. une utilisation non conforme ou non raisonnable. Opérations nécessaires pour réaliser un nouveau branchement : AVERTISSEMENT : Le fabricant décline toute responsabilité...
-
Page 7: Conseils Concernant Les Ustensiles De Cuisine Pour La Table De Cuisson
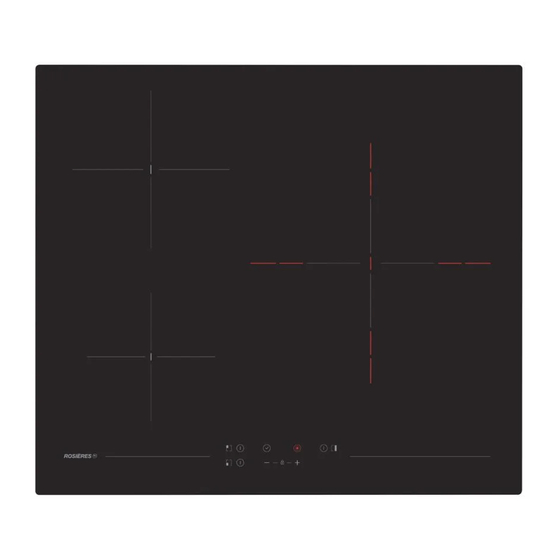
1) Si le niveau de cuisson est sur « 0 », cet affichage s'interrompt 5. CONSEILS CONCERNANT LES USTENSILES automatiquement au bout de 10 secondes et le signal de coupure de DE CUISINE POUR LA TABLE DE CUISSON la zone de commande retentit. 2) S'il y a chaleur résiduelle, mais que la zone de commande est Il est important d'utiliser des ustensiles de cuisson de bonne qualité... -
Page 8: Nettoyage Et Entretien
Doubler/Tripler la zone de cuisson Indicateur de chaleur résiduelle (pour les foyers à rayonnement -> calculé) Pour activer l'élargissement double de la zone de cuisson, la zone De même, on peut utiliser les mêmes indicateurs pour montrer la « principale associée doit déjà être allumée à un niveau de chauffe chaleur résiduelle ». -
Page 9: Résolution De Problèmes
N.B.: Traces de métal Ne faites pas glisser les casseroles en aluminium sur la surface vitrocéramique. Reportez-vous aux recommandations de nettoyage. Vous utilisez le bon matériel, mais les taches persistent. Utilisez une lame de rasoir et suivez les consignes du chapitre « NETTOYAGE ». Taches foncées 3 0°... -
Page 10: Safety Instructions
SAFETY INSTRUCTIONS We recommend you keep the instructions for suitably qualified professional. In case of installation and use for later reference, and before incompatibility between the socket and the installing the hob, note its serial number in case appliance plug, ask a qualified electrician to you need to get help from the after sales service. -
Page 11: General Warnings
Identification Plate (located under the hob's bottom casing) PRODUCT CODE T Slot depth: 5 mm 1. GENERAL WARNINGS Flush installation By placing the mark on this appliance we are assuring perimeter compliance to all European Safety, Health and Environment requirements which are applicable for this product category. Note: Inner perimeter dimensions are same with standard installation 2. -
Page 12: Electrical Connection
A watertight seal gasket is 4. ELECTRICAL CONNECTION supplied with the hob. Fit the seal gasket around the bottom hob as described Bottom and make sure that it is properly fitted to avoid any leakage into the supporting furniture. Normal Fixing: - Get the fixing clips from accessory bag and screw them into the position shown on bottom box. - Page 13 "Installation must conform to the standards & directives." Note: make sure the terminal board screws are tight. Manufacturer declines all responsibility for any damage that might be caused by unsuitable or unreasonable use. Operations to be carried out to make a new connection: - Choose the power supply cable in accordance with the WARNING: Manufacturer cannot be held responsible for any incident recommendations in the table;...
-
Page 14: Hob Cookware Advice
1) If any cooking stage is in position 0, this display will switch OFF 5. HOB COOKWARE ADVICE automatically after 10 seconds and the zone OFF sequence will Using good quality cookware is critical for setting sound. the best performance from your hob. 2) If there is residual heat indication in the display which is OFF, "H"... -
Page 15: Cleaning And Maintenance
Double / Triple zones Residual Heat Indicator (In radiant heaters-> calculated) The same indicators can be used for “residual heat” indication as well. To switch ON double extension ring, associated main zone must be A time table must be defined on this purpose: Rest Heat time=f (power already ON and Indicating power level must be higher than 0. -
Page 16: Problem Solving
Dark stains 30° Maxi Use a razor blade and follow the "CLEANING" section. Light surfaces on the hob Marks from an aluminium or copper pan, but also mineral, water or food deposits; they can be removed using the cream cleaner. Do not use a sponge which is too wet. - Page 17 Le fabricant ne pourra être tenu pour responsable de toute inexactitude résultant d'erreurs d'impression ou de transcription contenues dans cette brochure. Nous nous réservons le droit d'apporter, le cas échéant, des modifications aux produits, y compris dans l'intérêt de la consommation et sans préjudice des caractéristiques relatives à...