Table des Matières
Publicité
Les langues disponibles
Les langues disponibles
Liens rapides
User Manual........................................................................................... 2
Manuel de l'utilisateur............................................................................. 39
Benutzerhandbuch.................................................................................. 76
Manuale d'uso......................................................................................... 113
ユーザーガイド....................................................................................... 150
Gebruikershandleiding............................................................................ 187
Manual del usuario.................................................................................. 224
www.istorage-uk.com
Publicité
Chapitres
Table des Matières

Manuels Connexes pour iStorage DISKASHUR M2


Sommaire des Matières pour iStorage DISKASHUR M2
- Page 1 User Manual................... 2 Manuel de l’utilisateur................39 Benutzerhandbuch.................. 76 Manuale d’uso..................113 ユーザーガイド..................150 Gebruikershandleiding................187 Manual del usuario.................. 224 www.istorage-uk.com...
- Page 2 Please make sure you remember your PIN (password), without it, there is no way to access the data on the drive. If you are having difficulty using your diskAshur M please contact our support team by email - support@istorage-uk.com or by phone on +44 (0) 20 8991 6260. www.istorage-uk.com...
- Page 3 Copyright © iStorage Limited 2020. All rights reserved. Windows is a registered trademark of Microsoft Corporation. All other trademarks and copyrights referred to are the property of their respective owners. Distribution of modified versions of this document is prohibited without the explicit permission of the copyright holder.
-
Page 4: Table Des Matières
42. Hibernating, Suspending or Logging off from the Operating System .................... 35 43. How to check Firmware in Admin Mode ............................35 44. How to check Firmware in User Mode ............................36 45. Technical Support ..................................37 46. Warranty and RMA information ..............................37 www.istorage-uk.com... -
Page 5: Introduction
Introduction Thank you for purchasing the new iStorage diskAshur M , an ultra-secure and easy to use, hardware encrypted, PIN authenticated portable Solid State Drive (SSD) with capacities of 120GB to 2TB and rising. Designed to be FIPS 140-3 Level 3, the diskAshur M encrypts data in transit and at rest using AES-XTS 256-bit full disk hardware encryption. -
Page 6: Led Indicators And Their Actions
GREEN Initial Shipment State Waiting for configuration of an Admin PIN (First Time Use) Solid Solid Waiting for Admin or User PIN entry Standby Reset Solid Waiting for configuration of an Admin PIN www.istorage-uk.com... -
Page 7: First Time Use
• For “Password” press the following buttons: 7 (pqrs) 2 (abc) 7 (pqrs) 7 (pqrs) 9 (wxyz) 6 (mno) 7 (pqrs) 3 (def) • For “iStorage” press the following buttons: 4 (ghi) 7 (pqrs) 8 (tuv) 6 (mno) 7 (pqrs) 2 (abc) 4 (ghi) 3 (def) Using this method, long and easy to remember PINs can be configured. -
Page 8: Unlocking Diskashur M With The Admin Pin
Admin mode To Exit Admin Mode To immediately exit Admin Mode (solid BLUE LED), press and hold down the SHIFT ( ) button for a second - the solid BLUE switches to a solid LED. www.istorage-uk.com... -
Page 9: Changing The Admin Pin
• For “Password” press the following buttons: 7 (pqrs) 2 (abc) 7 (pqrs) 7 (pqrs) 9 (wxyz) 6 (mno) 7 (pqrs) 3 (def) • For “iStorage” press the following buttons: 4 (ghi) 7 (pqrs) 8 (tuv) 6 (mno) 7 (pqrs) 2 (abc) 4 (ghi) 3 (def) Using this method, long and easy to remember PINs can be configured. -
Page 10: Setting A User Pin Policy
User PIN Policy has been successfully set. Note: To immediately exit Admin Mode (solid BLUE LED), press and hold down the SHIFT ( ) button for a second - the solid BLUE LED switches to a solid LED. www.istorage-uk.com... -
Page 11: How To Delete The User Pin Policy
2 Blinks 1 Blink 12 digit PIN with NO Special Character used 1 Blink 2 Blinks 9 digit PIN with use of a Special Character 9 Blinks 1 Blink 9 digit PIN with NO Special Character used 9 Blinks www.istorage-uk.com... -
Page 12: Adding A New User Pin In Admin Mode
LED indicating a New User PIN has been button again successfully configured Note: To immediately exit Admin Mode (solid BLUE LED), press and hold down the SHIFT ( ) button for a second - the solid BLUE LED switches to a solid LED. www.istorage-uk.com... -
Page 13: Changing The User Pin In Admin Mode
SHIFT ( ) + 3 buttons again PIN has been successfully deleted Note: To immediately exit Admin Mode (solid BLUE LED), press and hold down the SHIFT ( ) button for a second - the solid BLUE LED switches to a solid LED. www.istorage-uk.com... -
Page 14: How To Unlock Diskashur M
Changing the User PIN in User mode (GREEN LED) must comply with the ‘User PIN Policy’ if one has been configured as described in section 7, which imposes a minimum PIN length and whether a ‘Special Character’ has been used. www.istorage-uk.com... -
Page 15: Creating A One-Time User Recovery Pin
Time User Recovery PIN has been successfully deleted Note: To immediately exit Admin Mode (solid BLUE LED), press and hold down the SHIFT ( ) button for a second - the solid BLUE LED switches to a solid LED. www.istorage-uk.com... -
Page 16: Activating Recovery Mode And Creating New User Pin
BLUE LEDs GREEN BLUE LEDs will change to a solid GREEN LED and then to a solid BLUE 2. Press the KEY ( ) button once indicating the drive has been configured and restricts User access to Read-Only www.istorage-uk.com... -
Page 17: Enable User Read/Write In Admin Mode
Global access to Read-Only Note: To immediately exit Admin Mode (solid BLUE LED), press and hold down the SHIFT ( ) button for a second - the solid BLUE LED switches to a solid LED. www.istorage-uk.com... -
Page 18: Enable Global Read/Write In Admin Mode
Self-Destruct PIN has been the KEY ( ) button successfully configured Note: To immediately exit Admin Mode (solid BLUE LED), press and hold down the SHIFT ( ) button for a second - the solid BLUE LED switches to a solid LED. www.istorage-uk.com... -
Page 19: How To Delete The Self-Destruct Pin
LEDs will change GREEN BLUE LEDs alternating on and off for 2. Enter the Self-Destruct PIN and press the a few seconds and finally shifts to a solid GREEN KEY ( ) button LED indicating the diskAshur M has successfully self-destructed www.istorage-uk.com... -
Page 20: How To Configure An Admin Pin After A Brute Force Attack Or Reset
In its default state, the diskAshur M Unattended Auto Lock time-out feature is turned off. The Unattended Auto Lock can be set to activate between 5 - 99 minutes. www.istorage-uk.com... -
Page 21: Turn Off The Unattended Auto-Lock
LED indicating the Auto Lock time-out has been successfully disabled Note: LED), press and hold down the SHIFT ( ) button for a second - the To immediately exit Admin Mode (solid BLUE solid BLUE LED switches to a solid LED. www.istorage-uk.com... -
Page 22: How To Check The Unattended Auto-Lock
Note: 1. If a User set the drive as Read-Only, Admin can override this by setting the drive as Read/Write in Admin mode. 2. If Admin set the drive as Read-Only, the User cannot set the drive as Read/Write. www.istorage-uk.com... -
Page 23: Enable Read/Write In User Mode
Successful authorisation of a certain PIN will zero the brute force counter for that particular PIN, but not affect the other PINs brute force counter. Failed authorisation of a certain PIN will increase the brute force counter for that particular PIN, but not affect the other PINs brute force counter. www.istorage-uk.com... -
Page 24: Admin Pin Brute Force Hack Defence Mechanism
• 10 for 10 attempts Blinking GREEN BLUE LEDs will switch to a solid GREEN LED for a second and then to a solid 3. Press the SHIFT ( ) button once BLUE LED indicating the brute force limitation was successfully configured www.istorage-uk.com... -
Page 25: How To Check The User Pin Brute Force Limitation
5 attempts 5 Blinks 10 attempts 1 Blink Note: To immediately exit Admin Mode (solid BLUE LED), press and hold down the SHIFT ( ) button for a second - the solid BLUE LED switches to a solid LED. www.istorage-uk.com... -
Page 26: How To Perform A Complete Reset
GREEN and needs to be unplugged for next time use. The default setting of the diskAshur M2 is configured as non-bootable. The diskAshur M is equipped with a bootable feature to accommodate power cycling during a host boot process. When booting from... -
Page 27: How To Disable The Diskashur M
& BLUE) become solid for 1 second. d. LEDs return to solid BLUE Note: LED), press and hold down the SHIFT ( ) button for a second - the To immediately exit Admin Mode (solid BLUE solid BLUE LED switches to a solid LED. www.istorage-uk.com... -
Page 28: Initialising And Formatting Diskashur M
MBR and GPT partition style. GPT stores multiple duplicates of this data over the disk, as a result it’s much more robust. On an MBR disk, the partitioning and boot information is stored inside single place. Select the partition style and click OK. www.istorage-uk.com... - Page 29 Assign a drive letter or path and click Next. Create a volume label, select Perform a quick format, and then click Next. Click Finish. Wait until the format process is complete. The diskAshur M will be recognised and it is available for use. www.istorage-uk.com...
-
Page 30: Initialising And Formatting Diskashur M
To initialize and format the diskAshur M 1. Select diskAshur M from the list of drives and volumes. Each drive in the list will display its capacity, manufacturer, and product name, such as ‘iStorage diskAshur M Media’. 2. Click the ‘Erase’ button under Disk Utility. - Page 31 We recommend using ‘GUID Partition Map’ on drives larger than 2TB. 5. Click the ‘Erase’ button. Disk Utility will unmount the volume from the desktop, erase it, and then remount it on the desktop. www.istorage-uk.com...
-
Page 32: Initialising And Formatting Diskashur M
2. Click to select the drive (500 GB Hard Disk) under ‘Devices’. Next click on the gears icon under ‘Volumes’ and then click on ‘Format Partitons’. 3. Select ‘Compatible with all systems and devices (FAT)’ for the ‘Type’ option. And enter a name for the drive, e.g: diskAshur M . Then, click the ‘Format’ button. www.istorage-uk.com... - Page 33 4. After the format process is finished, click Play button to mount the drive to Ubuntu. www.istorage-uk.com...
- Page 34 5. Now the drive should be mounted to Ubuntu and ready to use. 6. The disk will be shown as seen in the image below. You can click the disk icon to open your drive. www.istorage-uk.com...
-
Page 35: Hibernating, Suspending Or Logging Off From The Operating System
LED will blink twice (2) and the GREEN LED will blink three (3) times. Once the sequence has ended the RED, GREEN & BLUE LED’s will blink together once and then return to Admin mode, a solid BLUE LED. www.istorage-uk.com... -
Page 36: How To Check Firmware In User Mode
LED will blink twice (2) and the GREEN LED will blink three (3) times. Once the sequence has ended the RED, GREEN & BLUE LED’s will blink together once and then return to the User mode, a solid GREEN LED. www.istorage-uk.com... -
Page 37: Technical Support
Citizens’ Advice Bureau or Trading Standards office. The warranties set out in this clause apply only to the original purchaser of a Product from iStorage or an iStorage authorized reseller or distributor. These warranties are non-transferable. EXCEPT FOR THE LIMITED WARRANTY PROVIDED HEREIN, AND TO THE EXTENT PERMITTED BY LAW, ISTORAGE DISCLAIMS ALL WARRANTIES, EXPRESS OR IMPLIED, INCLUD- ING ALL WARRANTIES OF MERCHANTABILITY;... - Page 38 Copyright © iStorage Limited 2020. All rights reserved. iStorage Limited, iStorage House, 13 Alperton Lane Perivale, Middlesex. UB6 8DH, England Tel: +44 (0) 20 8991 6260 | Fax: +44 (0) 20 8991 6277 e-mail: info@istorage-uk.com | web: www.istorage-uk.com www.istorage-uk.com...
- Page 39 Si vous avez des difficultés à utiliser votre diskAshur M , veuillez contacter notre équipe clientèle par courriel - support@istorage-uk.com ou par téléphone au +44 (0) 20 8991 6260. www.istorage-uk.com...
- Page 40 Copyright © iStorage Limited 2020. Tous droits réservés. Windows est une marque déposée de Microsoft Corporation. Toutes les autres marques et droits d’auteur cités sont la propriété de leurs propriétaires respectifs. La distribution de versions modifiées de ce document est interdite sans l’autorisation explicite du détenteur des droits d’auteur.
- Page 41 42. Hibernation suspension ou déconnexion du système d’exploitation ....................72 43. Comment vérifier le microprogramme en mode administrateur ...................... 72 44. Comment vérifier le microprogramme en mode utilisateur ......................73 45. Support technique ..................................74 46. Informations sur la garantie et le RMA ............................74 www.istorage-uk.com...
-
Page 42: Introduction
Introduction Nous vous remercions d’avoir acheté le nouveau diskAshur M d’iStorage, un disque dur portable ultra-sécurisé et facile à utiliser, crypté au niveau matériel et authentifié par un code PIN, d’une capacité de 120 Go à 2 To et plus. -
Page 43: Voyants Led Et Leurs Actions
2. Statut de la LED Remarque : Le fonctionnement normal du diskAshur M2 peut être perturbé par de fortes interférences électromagnétiques. Si tel est le cas, redémarrez simplement le produit (éteindre/mettre hors tension puis sous tension) pour reprendre son fonctionnement normal. Si le fonctionnement normal du disque ne reprend pas, veuillez utiliser le produit dans un autre endroit. -
Page 44: Première Utilisation
» appuez sur les boutons suivants : 7 (pqrs) 2 (abc) 7 (pqrs) 7 (pqrs) 9 (wxyz) 6 (mno) 7 (pqrs) 3 (def) iStorage » appuez sur les boutons suivants : • Pour le « 4 (ghi) 7 (pqrs) 8 (tuv) 6 (mno) 7 (pqrs) 2 (abc) 4 (ghi) 3 (def) En utilisant cette méthode, les PIN longs et faciles à... -
Page 45: Déverrouillage Du Diskashur M Avec Le Code Pin De L'administrateur
éventuelle corruption des données. 4. Déverrouillage du diskAshur M2 avec le code PIN de l’administrateur Pour déverrouiller le diskAshur M avec le code PIN de l’administrateur, veuillez suivre les étapes simples du tableau ci-dessous. -
Page 46: Changer Le Pin Administrateur
7 (pqrs) 2 (abc) 7 (pqrs) 7 (pqrs) 9 (wxyz) 6 (mno) 7 (pqrs) 3 (def) • Pour le « iStorage » appuez sur les boutons suivants : 4 (ghi) 7 (pqrs) 8 (tuv) 6 (mno) 7 (pqrs) 2 (abc) 4 (ghi) 3 (def) cette méthode, les PIN longs et faciles à... -
Page 47: Définition D'une Politique De Pin Utilisateur
PIN utilisateur a été désactivée avec succès. Remarque : fixe), appuyez sur le bouton MAJ et maintenez-le Pour quitter immédiatement le mode administrateur (LED BLEU enfoncé ( ) pendant une seconde - la LED BLEUE fixe passe à une LED ROUGE fixe www.istorage-uk.com... -
Page 48: Comment Supprimer La Politique Sur Le Pin De L'utilisateur
1 Clignotant 2 Clignotants 1 Clignotant Code PIN à 12 chiffres sans caractère spécial utilisé 1 Clignotant 2 Clignotants Code PIN à 9 chiffres avec utilisation d'un caractère spécial 9 Clignotants 1 Clignotant Code PIN à 9 chiffres sans caractère spécial utilisé 9 Clignote www.istorage-uk.com... -
Page 49: Ajout D'un Code Pin De Nouvel Utilisateur En Mode Administrateur
KEY ( ) de nouveau désactivée avec succès Remarque : Pour quitter immédiatement le mode administrateur (LED BLEU fixe), appuyez sur le bouton MAJ et maintenez-le enfoncé ( ) pendant une seconde - la LED BLEUE fixe passe à une LED ROUGE fixe www.istorage-uk.com... -
Page 50: Modification Du Pin De L'utilisateur En Mode Administrateur
PIN de l’utilisateur a été supprimé avec succès Remarque : Pour quitter immédiatement le mode administrateur (LED BLEU fixe), appuyez sur le bouton MAJ et maintenez-le enfoncé ( ) pendant une seconde - la LED BLEUE fixe passe à une LED ROUGE fixe www.istorage-uk.com... -
Page 51: Comment Déverrouiller Le Diskashur M
Le changement du PIN de l’utilisateur (LED VERTE) doit être conforme à la « Politique relative au PIN de l’utilisateur » si celui-ci a été configuré comme décrit à la section 7, qui impose une longueur minimale du PIN et si un « caractère spécial » a été utilisé. www.istorage-uk.com... -
Page 52: Création D'un Code Pin De Récupération Unique Utilisateur
été supprimé avec succès Remarque : fixe), appuyez sur le bouton MAJ et maintenez-le Pour quitter immédiatement le mode administrateur (LED BLEU enfoncé ( ) pendant une seconde - la LED BLEUE fixe passe à une LED ROUGE fixe www.istorage-uk.com... -
Page 53: Activation Du Mode De Récupération Et Création D'un Nouveau Code Pin Utilisateur
VERTES BLEUE passeront à une LED VERTE fixe puis à une LED BLEU fixe indiquant 2. Appuyez une fois sur la CLÉ ( ) que le disque a été configuré et qu’il limite l’accès de l’utilisateur à la lecture seule www.istorage-uk.com... -
Page 54: Activer La Lecture/Écriture Par L'utilisateur En Mode Administrateur
à la fonction lecture uniquement Remarque : Pour quitter immédiatement le mode administrateur (LED BLEU fixe), appuyez sur le bouton MAJ et maintenez-le enfoncé ( ) pendant une seconde - la LED BLEUE fixe passe à une LED ROUGE fixe www.istorage-uk.com... -
Page 55: Activer La Lecture/Écriture De Manière Générale En Mode Administrateur
été configuré avec succès Remarque : Pour quitter immédiatement le mode administrateur (LED BLEU fixe), appuyez sur le bouton MAJ et maintenez-le enfoncé ( ) pendant une seconde - la LED BLEUE fixe passe à une LED ROUGE fixe www.istorage-uk.com... -
Page 56: Instructions Pour Supprimer Un Pin D'autodestruction
VERTE & BLEUE 2. Saisissez le code PIN d’autodestruction et appuyez sur la s’allument et s’éteignent alternativement pendant quelques secondes, puis passent finalement à une CLÉ ( ) VERTE fixe indiquant que le disqueAshur M s’est autodétruit avec succès www.istorage-uk.com... -
Page 57: Comment Configurer Un Pin D'administrateur Après Une Attaque Par Force Brute Ou Une Réinitialisation
Pour se protéger contre un accès non autorisé si le disque est déverrouillé et sans surveillance, le disque Asir M peut être configuré pour se verrouiller Dans son état par défaut, le verrouillage automatique du diskAshur M est désactivé. Celui-ci peut être réglé pour s’activer entre 5 - 99 minutes. www.istorage-uk.com... -
Page 58: Éteindre Le Verrouillage Automatique
été désactivée avec succès Remarque : Pour quitter immédiatement le mode administrateur (LED BLEU fixe), appuyez sur le bouton MAJ et maintenez-le enfoncé ( ) pendant une seconde - la LED BLEUE fixe passe à une LED ROUGE fixe www.istorage-uk.com... -
Page 59: Comment Vérifier Le Verrouillage Automatique
« 7 + 6 ». (7=Read (lecture) + 6= Seulement ) BLEUE clignotante Les LED VERTES BLEUE se transforment en une LED VERTE fixe indiquant que le disque est 2. Appuyez sur la TOUCHE ( ) configuré en lecture seule www.istorage-uk.com... -
Page 60: Activer La Lecture/Écriture En Mode Utilisateur
• Le PIN de récupération est supprimé. PIN de récupération • Le PIN d’administrateur et toutes les données demeurent intacts et accessibles. • Le diskAshur M sera réinitialisé Tous les PIN et les données sont PIN administrateur supprimés et perdus définitivement. www.istorage-uk.com... -
Page 61: Mécanisme De Défense Contre Le Piratage Du Code Pin Administrateur
VERTE clignotent chacune leur tour, le BLEUE s’allument et restent al- diskAshur M2 est alors prêt à accepter 3 nouveaux essais de code PIN lumées. Administrateur. Saisissez le code PIN suivant «47867243 » puis appuyez sur Toutes les LED, ROUGE, VERTE &... -
Page 62: Comment Vérifier La Limitation De La Force Brute Pour Le Code Pin De L'utilisateur
10 tentatives 1 clignotement Remarque : Pour quitter immédiatement le mode administrateur (LED BLEU fixe), appuyez sur le bouton MAJ et maintenez-le enfoncé ( ) pendant une seconde - la LED BLEUE fixe passe à une LED ROUGE fixe www.istorage-uk.com... -
Page 63: Comment Effectuer Une Réinitialisation Complète
été configuré avec succès comme amorçable Remarque : fixe), appuyez sur le bouton MAJ et maintenez-le Pour quitter immédiatement le mode administrateur (LED BLEU enfoncé ( ) pendant une seconde - la LED BLEUE fixe passe à une LED ROUGE fixe www.istorage-uk.com... -
Page 64: Comment Désactiver La Fonction D'amorçage De Diskashur M
Les LED redeviennent BLEU fixe Remarque : Pour quitter immédiatement le mode administrateur (LED BLEU fixe), appuyez sur le bouton MAJ et maintenez-le enfoncé ( ) pendant une seconde - la LED BLEUE fixe passe à une LED ROUGE fixe www.istorage-uk.com... -
Page 65: Initialisation Et Formatage Du Diskashur M
Sur un disque MBR, les informations de partitionnement et de démarrage sont stockées en un seul endroit. Sélectionnez le style de partition et cliquez sur OK. www.istorage-uk.com... - Page 66 Attribuez une lettre de disque ou un chemin d’accès et cliquez sur Suivant. Créez un label de volume, sélectionnez Effectuer un formatage rapide, puis cliquez sur Suivant. Cliquez sur Terminer. Attendez que le processus de formatage soit terminé. Le diskAshur M sera reconnu et pourra être utilisé. www.istorage-uk.com...
-
Page 67: Initialisation Et Formatage Du Diskashur M
1. Sélectionnez diskAshur M dans la liste des disques et des volumes. Chaque disque de la liste affichera sa capacité, son fabricant et le nom du produit, par exemple « iStorage diskAshur M Media ». 2. Cliquez sur le bouton « Effacer » sous Utilitaire de disque. - Page 68 Le menu déroulant « Scheme format » énumère les schémas disponibles à utiliser. Nous recommandons l’utilisation de « GUID Partition Map » pour les disques de plus de 2 To. 5. Cliquez sur le bouton « Effacer ». Disk Utility démontera le volume du bureau, l’effacera, puis le remontera sur le bureau. www.istorage-uk.com...
-
Page 69: Initialisation Et Formatage Du Diskashur M D'exploitation Linux
« Volumes », puis cliquez sur « Format Partitons ». 3. Sélectionnez « Compatible avec tous les systèmes et périphériques (FAT) » pour l’option « Type ». Et saisissez un nom pour le disque, par exemple : diskAshur M . Ensuite, cliquez sur le bouton « Format ». www.istorage-uk.com... - Page 70 4. Lorsque le processus de formatage est terminé, cliquez sur le bouton Lecture pour monter le disque sur Ubuntu. www.istorage-uk.com...
- Page 71 5. Le disque doit maintenant être monté sur Ubuntu et prêt à l’emploi. 6. Le disque sera montré comme dans l’image ci-dessous. Vous pouvez cliquer sur l’icône du disque pour ouvrir votre disque. www.istorage-uk.com...
-
Page 72: Hibernation Suspension Ou Déconnexion Du Système D'exploitation
Par exemple, si le numéro de révision du microprogramme est « 2.3 », la LED ROUGE clignotera deux (2) fois et la LED VERTE trois (3) fois. Une fois la séquence terminée, les ROUGE, VERTE & BLEUE clignotent ensemble une fois, puis reviennent en mode administrateur, une LED BLEUE fixe apparaît alors. www.istorage-uk.com... -
Page 73: Comment Vérifier Le Microprogramme En Mode Utilisateur
Par exemple, si le numéro de révision du microprogramme est « 2.3 », la LED ROUGE clignotera deux (2) fois et la LED VERTE trois (3) fois. Une fois la séquence terminée, les ROUGE, VERTE & BLEUE clignotent ensemble une fois, puis reviennent en mode administrateur, une LED BLEUE fixe apparaît alors. www.istorage-uk.com... -
Page 74: Support Technique
ISTORAGE CLAUSE DE NON-RESPONSABILITÉ ET GARANTIE DU PRODUIT iStorage garantit qu’à la livraison et pendant une période de 36 mois à compter de la livraison, ses produits sont exempts de défauts matériels. Toutefois, cette garantie ne s’applique pas dans les circonstances décrites ci-dessous. iStorage garantit que les produits sont conformes aux normes énumérées dans la fiche technique correspondante sur notre site web au moment où... - Page 75 Copyright © iStorage Limited 2020. Tous droits réservés. iStorage Limited, iStorage House, 13 Alperton Lane Perivale, Middlesex. UB6 8DH, Angleterre Tél. : +44 (0) 20 8991 6260 | Fax: +44 (0) 20 8991 6277 e-mail: info@istorage-uk.com | web: www.istorage-uk.com www.istorage-uk.com...
- Page 76 PIN gibt es keine Möglichkeit, auf die Daten auf dem Laufwerk zuzugreifen. Wenn Sie Probleme bei der Verwendung Ihres diskAshur M haben, kontaktieren Sie bitte unser Support-Team per E-Mail – support@istorage-uk.com oder telefonisch unter +44 (0) 20 8991 6260. www.istorage-uk.com...
- Page 77 Copyright © iStorage Limited 2020. Alle Rechte vorbehalten. Windows ist ein eingetragenes Warenzeichen der Microsoft Corporation. Alle anderen genannten Marken und Urheberrechte sind Eigentum ihrer jeweiligen Inhaber. Die Verbreitung von modifizierten Versionen dieses Dokuments ist ohne ausdrückliche Genehmigung des Copyright-Inhabers verboten.
- Page 78 42. In den Ruhezustand versetzen, anhalten oder vom Betriebssystem abmelden ................109 43. Überprüfen der Firmware im Admin-Modus ........................... 109 44. Überprüfen der Firmware im Benutzermodus ..........................110 45. Technische Unterstützung ................................111 46. Garantie- und RMA-Informationen ..............................111 www.istorage-uk.com...
-
Page 79: Einführung
Einführung Vielen Dank, dass Sie sich für den neuen iStorage diskAshur M entschieden haben, ein hochsicherer und einfach zu bedienender, hard- wareverschlüsselter tragbarer Solid State Drive (SSD) mit PIN-Authentifizierung und Kapazitäten von 120 GB bis zu 2 TB und mehr. -
Page 80: Leds Und Ihre Zustände
Starke elektromagnetische Strahlung kann die normale Funktion des diskAshur M2 beeinträchtigen. In diesem Fall schalten Sie das Produkt bitte aus und danach wieder ein. Sollte das Problem dadurch nicht beseitigt worden sein, setzen Sie die diskAshur M2 bitte an einem anderen Ort ein Aus dem Ruhezustand aufwachen Der Ruhezustand liegt vor, wenn der diskAshur M nicht verwendet wird und alle LEDs deaktiviert sind. -
Page 81: Erste Verwendung
7 (pqrs) 2 (abc) 7 (pqrs) 7 (pqrs) 9 (wxyz) 6 (mno) 7 (pqrs) 8 (tuv) • Drücken Sie für „iStorage“ die folgenden Tasten: 4 (ghi) 7 (pqrs) 8 (tuv) 6 (mno) 7 (pqrs) 2 (abc) 4 (ghi) 3 (def) Mit dieser Methode können Sie lange PINs konfigurieren, die man sich dennoch leicht merken kann. -
Page 82: Freischalten Des Diskashur M
Laufwerk im Admin-Modus ist Beenden des Admin-Modus Um den Admin-Modus sofort zu beenden (durchgehend leuchtende BLAUE LED), drücken Sie die UMSCHALT-Taste ( ) und halten Sie sie eine Sekunde lang gedrückt – die durchgehend BLAUE LED schaltet zur durchgehend ROTEN LED um. www.istorage-uk.com... -
Page 83: Ändern Der Admin-Pin
7 (pqrs) 2 (abc) 7 (pqrs) 7 (pqrs) 9 (wxyz) 6 (mno) 7 (pqrs) 8 (tuv) • Drücken Sie für „iStorage“ die folgenden Tasten: 4 (ghi) 7 (pqrs) 8 (tuv) 6 (mno) 7 (pqrs) 2 (abc) 4 (ghi) 3 (def) Mit dieser Methode können Sie lange PINs konfigurieren, die man sich dennoch leicht merken kann. -
Page 84: Festlegen Einer Benutzer-Pin-Richtlinie
Benutzer-PIN-Richtlinie erfolgreich eingestellt wurde. Anmerkung: Um den Admin-Modus (durchgehend leuchtende BLAUE LED) sofort zu beenden, drücken Sie die UMSCHALT-Taste ( ) und halten Sie sie eine Sekunde lang gedrückt – die durchgehend BLAUE LED schaltet zur durchgehend ROTEN LED um. www.istorage-uk.com... -
Page 85: Löschen Der Benutzer-Pin-Richtlinie
LED blinkt einmal (1), um anzuzeigen, dass ein Sonderzeichen verwendet werden muss. PIN-Beschreibung 3-Ziffern-Wert GRÜN BLAU 12-stellige PIN mit einem Sonderzeichen 1-faches Blinken 2-faches Blinken 1-faches Blinken 12-stellige PIN OHNE Sonderzeichen 1-faches Blinken 2-faches Blinken 9-stellige PIN mit einem Sonderzeichen 9-faches Blinken 1-faches Blinken 9-stellige PIN OHNE Sonderzeichen 9-faches Blinken www.istorage-uk.com... -
Page 86: Hinzufügen Einer Neuen Benutzer-Pin Im Admin-Modus
Benutzer-PIN eingestellt wurde Anmerkung: Um den Admin-Modus (durchgehend leuchtende BLAUE LED) sofort zu beenden, drücken Sie die UMSCHALT-Taste ( ) und halten Sie sie eine Sekunde lang gedrückt – die durchgehend BLAUE LED schaltet zur durchgehend ROTEN LED um. www.istorage-uk.com... -
Page 87: Ändern Der Benutzer-Pin Im Admin-Modus
Benutzer-PIN erfolgreich gelöscht wurde Anmerkung: Um den Admin-Modus (durchgehend leuchtende BLAUE LED) sofort zu beenden, drücken Sie die UMSCHALT-Taste ( ) und halten Sie sie eine Sekunde lang gedrückt – die durchgehend BLAUE LED schaltet zur durchgehend ROTEN LED um. www.istorage-uk.com... -
Page 88: Freischalten Des Diskashur M
LED, die anzeigt, dass die Benutzer-PIN erfolgreich geändert wurde Achtung: Das Ändern der Benutzer-PIN im Benutzermodus (GRÜNE LED) muss mit der „Benutzer-PIN-Richtlinie“ übereinstimmen, wenn diese wie in Abschnitt 7 beschrieben konfiguriert wurde. Darin wird die Mindestlänge der PIN und die Verwendung von „Sonderzeichen“ festgelegt. www.istorage-uk.com... -
Page 89: Erstellen Einer Einmaligen Benutzer-Wiederherstellungs-Pin
Anmerkung: LED) sofort zu beenden, drücken Sie die UMSCHALT-Taste Um den Admin-Modus (durchgehend leuchtende BLAUE ( ) und halten Sie sie eine Sekunde lang gedrückt – die durchgehend BLAUE LED schaltet zur durchgehend ROTEN LED um. www.istorage-uk.com... -
Page 90: Aktivieren Des Wiederherstellungsmodus Und Erstellen Einer Neuen Benutzer-Pin
BLAUEN LEDs GRÜNE BLAUE LED schalten auf eine durchgehend GRÜNE LED und dann zu einer durchgehend BLAUEN LED, die anzeigt, dass das 2. Drücken Sie die SCHLÜSSEL-Taste ( ) einmal Laufwerk konfiguriert wurde und den Benutzerzugriff auf Lesezugriff einschränkt www.istorage-uk.com... -
Page 91: Benutzer Auf Lese-/Schreibzugriff Im Admin-Modus Einstellen
Lesezugriff eingeschränkt ist Anmerkung: Um den Admin-Modus (durchgehend leuchtende BLAUE LED) sofort zu beenden, drücken Sie die UMSCHALT-Taste ( ) und halten Sie sie eine Sekunde lang gedrückt – die durchgehend BLAUE LED schaltet zur durchgehend ROTEN LED um. www.istorage-uk.com... -
Page 92: Globalen Lese-/Schreibzugriff Im Admin-Modus Einstellen
Selbstzerstörungs-PIN erfolgreich konfiguriert wurde Anmerkung: Um den Admin-Modus (durchgehend leuchtende BLAUE LED) sofort zu beenden, drücken Sie die UMSCHALT-Taste ( ) und halten Sie sie eine Sekunde lang gedrückt – die durchgehend BLAUE LED schaltet zur durchgehend ROTEN LED um. www.istorage-uk.com... -
Page 93: Löschen Der Selbstzerstörungs-Pin
2. Geben Sie die Wiederherstellungs-PIN ein und drück- einige Sekunden abwechselnd an und aus gehen. Schließlich leuchtet die GRÜNE LED durchgehend en Sie die Schlüssel-Taste ( ) und zeigt an, dass der Selbstzerstörungsvorgang des diskAshur M erfolgreich abgeschlossen wurde www.istorage-uk.com... -
Page 94: Erstellen Einer Admin-Pin Nach Einem Brute-Force-Angriff Oder Nach Dem Zurücksetzen
Zeitspanne automatisch gesperrt wird, wenn er freigeschaltet und unbeaufsichtigt ist. In der Standardeinstellung ist die automatische Sperre des diskAshur M deaktiviert. Die automatische Sperre bei Abwesenheit kann so eingestellt werden, dass sie zwischen 5 und 99 Minuten aktiviert wird. www.istorage-uk.com... -
Page 95: Deaktivieren Der Automatischen Sperre Bei Abwesenheit
Zeitspanne für die automatische Sperre erfolgreich deaktiviert wurde Anmerkung: Um den Admin-Modus (durchgehend leuchtende BLAUE LED) sofort zu beenden, drücken Sie die UMSCHALT-Taste ( ) und halten Sie sie eine Sekunde lang gedrückt – die durchgehend BLAUE LED schaltet zur durchgehend ROTEN LED um. www.istorage-uk.com... -
Page 96: Überprüfen Der Automatischen Sperre Bei Abwesenheit
LED schaltet zu blinkend GRÜN, und „7 + 6“ gedrückt. (7=Read + 6=Only) BLAUE LEDs ebenfalls GRÜNE BLAUE LED wechseln zu einer durchgehenden GRÜNEN LED, die anzeigt, dass das 2. Drücken Sie die Schlüssel-Taste ( ) Laufwerk als schreibgeschützt konfiguriert ist www.istorage-uk.com... -
Page 97: Lese-/Schreibzugriff Im Benutzermodus Einstellen
• Die Wiederherstellungs-PIN, die Admin-PIN und alle Daten bleiben intakt und zugänglich. Wiederherstel- • Die Wiederherstellungs-PIN wird gelöscht. lungs-PIN • Die Admin-PIN und alle Daten bleiben intakt und zugänglich. • Der diskAshur M wird zurückgesetzt. Alle PINs und Daten werden gelöscht Admin-PIN und gehen für immer verloren. www.istorage-uk.com... -
Page 98: Admin-Pin-Mechanismus Zur Abwehr Von Brute-Force-Hacker-Angriffen
10 aufeinanderfolgende falsche PIN-Eingaben eingestellt, wenn das Laufwerk vollständig zurückgesetzt wurde, einem Brute-Force-Angriff unterlag oder die Selbstzerstörungs-PIN aktiviert wurde. Die Brute-Force-Begrenzung für die Benutzer-PIN des diskAshur M kann vom Administrator umprogrammiert und eingestellt werden. Diese Funktion kann so eingestellt werden, dass von 1 bis 10 aufeinanderfolgende falsche PIN-Eingaben möglich sind. www.istorage-uk.com... -
Page 99: Überprüfen Der Brute-Force-Begrenzung Für Die Benutzer-Pin
Die folgende Tabelle beschreibt die Signale der LEDs bei der Überprüfung der Einstellung der Brute-Force-Begrenzung. Wenn Sie z. B. das Laufwerk so eingestellt haben, dass es nach 5 aufeinanderfolgenden falschen PIN-Eingaben den Brute-Force-Abwehrmechanismus aktiviert, blinkt die GRÜNE LED fünf (5) Mal. Einstellung der Brute-Force-Begrenzung GRÜN 2 Versuche 2-faches Blinken 5 Versuche 5-faches Blinken 10 Versuche 1-faches Blinken www.istorage-uk.com... -
Page 100: Vollständiges Zurücksetzen Des Geräts
Laufwerk erfolgreich als bootfähig eingestellt wurde Anmerkung: Um den Admin-Modus (durchgehend leuchtende BLAUE LED) sofort zu beenden, drücken Sie die UMSCHALT-Taste ( ) und halten Sie sie eine Sekunde lang gedrückt – die durchgehend BLAUE LED schaltet zur durchgehend ROTEN LED um. #100 www.istorage-uk.com... -
Page 101: Bootfunktion Des Diskashur M Deaktivieren
BLAU zurück Anmerkung: Um den Admin-Modus (durchgehend leuchtende BLAUE LED) sofort zu beenden, drücken Sie die UMSCHALT-Taste ( ) und halten Sie sie eine Sekunde lang gedrückt – die durchgehend BLAUE LED schaltet zur durchgehend ROTEN LED um. #101 www.istorage-uk.com... -
Page 102: Initialisieren Und Formatieren Des Diskashur M
Es erscheint ein Meldungsfenster, in dem Sie zwischen MBR- und GPT-Partitionsstil wählen können. Mit GPT werden mehrere Duplikate dieser Daten über das Laufwerk verteilt gespeichert, wodurch die Datenspeicherung deutlich robuster ist. Auf einem MBR-Laufwerk werden die Partitionierungs- und Boot-Informationen an einem einzigen Ort gespeichert. Wählen Sie den Partitionsstil und klicken Sie auf OK. #102 www.istorage-uk.com... - Page 103 Weisen Sie einen Laufwerksbuchstaben oder Pfad zu und klicken Sie auf Weiter. Erstellen Sie eine Datenträger-Bezeichnung, wählen Sie „Schnellformatierung durchführen“ und klicken Sie dann auf Weiter. Klicken Sie auf Fertigstellen. Warten Sie, bis der Formatierungsprozess abgeschlossen ist. Der diskAshur M wird erkannt und kann nun benutzt werden. #103 www.istorage-uk.com...
-
Page 104: Initialisieren Und Formatieren Des Diskashur M
1. Wählen Sie den diskAshur M aus der Liste der Laufwerke und Datenträger aus. Für jedes Laufwerk in der Liste wird die Kapazität, der Hersteller und der Produktname angezeigt, z. B. „iStorage diskAshur M Media“. 2. Klicken Sie im Festplattendienstprogramm auf die Schaltfläche „Löschen“. - Page 105 Wir empfehlen die Verwendung von „GUID Partition Map“ auf Laufwerken mit mehr als 2 TB Kapazität. 5. Klicken Sie auf die Schaltfläche „Löschen“. Das Festplattendienstprogramm wirft den Datenträger vom Desktop aus, löscht ihn zeigt ihn dann wieder auf dem Desktop an. #105 www.istorage-uk.com...
-
Page 106: Initialisieren Und Formatieren Des Diskashur M
„Datenträger“ und dann auf „Partitionen formatieren“. 3. Wählen Sie „Kompatibel mit allen Systemen und Geräten (FAT)“ für die Option „Typ“. Und geben Sie einen Namen für das Laufwerk ein, z. B.: „diskAshur M “. Klicken Sie dann auf die Schaltfläche „Formatieren“. #106 www.istorage-uk.com... - Page 107 4. Nachdem der Formatierungsprozess abgeschlossen ist, klicken Sie auf die Schaltfläche „Wiedergeben“, um das Laufwerk in Ubuntu einzubinden. #107 www.istorage-uk.com...
- Page 108 5. Nun sollte das Laufwerk in Ubuntu eingebunden und einsatzbereit sein. 6. Das Laufwerk wird wie in der Abbildung unten gezeigt. Sie können auf das Laufwerkssymbol klicken, um Ihr Laufwerk zu öffnen. #108 www.istorage-uk.com...
-
Page 109: In Den Ruhezustand Versetzen, Anhalten Oder Vom Betriebssystem Abmelden
Wenn zum Beispiel die Firmware-Revisionsnummer „2.3“ ist, blinkt die ROTE LED zwei Mal (2) und die GRÜNE LED drei Mal (3). Sobald die Sequenz beendet ist, blinken die ROTE, GRÜNE BLAUE LED einmal zusammen und kehren dann in den Admin-Modus zurück, also zur durchgehend BLAUEN LED. #109 www.istorage-uk.com... -
Page 110: Überprüfen Der Firmware Im Benutzermodus
Wenn zum Beispiel die Firmware-Revisionsnummer „2.3“ ist, blinkt die ROTE LED zwei Mal (2) und die GRÜNE LED drei Mal (3). Sobald die Sequenz beendet ist, blinken die ROTE, GRÜNE BLAUE LED einmal zusammen und kehren dann in den Benutzermodus zurück, also zur durchgehend GRÜNEN LED. #110 www.istorage-uk.com... -
Page 111: Technische Unterstützung
ISTORAGE-PRODUKTHAFTUNG UND -GARANTIE iStorage garantiert, dass seine Produkte bei Lieferung und für einen Zeitraum von 36 Monaten ab Lieferung frei von Materialfehlern sind. Diese Garantie gilt jedoch nicht unter den nachfolgend beschriebenen Umständen. iStorage garantiert, dass die Produkte den Standards entsprechen, die im entsprechenden Datenblatt auf unserer Website zum Zeitpunkt Ihrer Bestellung aufgeführt sind. - Page 112 Copyright © iStorage Limited 2020. Alle Rechte vorbehalten. iStorage Limited, iStorage House, 13 Alperton Lane Perivale, Middlesex. UB6 8DH, England Tel: +44 (0) 20 8991 6260 | Fax: +44 (0) 20 8991 6277 E-Mail: info@istorage-uk.com | Web: www.istorage-uk.com www.istorage-uk.com #112...
- Page 113 Tenere a mente il proprio PIN (password): senza di esso non è possibile accedere ai dati sul disco. Se si riscontrano difficoltà nell’uso di diskAshur M si prega di contattare il nostro servizio assistenza via e-mail - support@istorage-uk.com o telefono al numero +44 (0) 20 8991 6260. #113 www.istorage-uk.com...
- Page 114 Copyright © iStorage Limited 2020. Tutti i diritti riservati. Windows è un marchio registrato di Microsoft Corporation. Tutti gli altri marchi commerciali e i copyright a cui si fa riferimento sono proprietà dei rispettivi titolari. La distribuzione di versioni modificate del presente documento è proibita senza il consenso esplicito del titolare di copyright.
- Page 115 42. Ibernazione, Sospensione o Uscita dal Sistema Operativo ......................146 43. Come verificare il Firmware in Modalità amministratore ........................ 146 44. Come verificare il Firmware in Modalità Utente ..........................147 45. Assistenza Tecnica ..................................148 46. Garanzia e Informazioni RMA ................................. 148 #115 www.istorage-uk.com...
-
Page 116: Introduzione
Introduzione Grazie per aver acquistato il nuovo iStorage diskAshur M , un’unità a stato solido portatile (SSD) ultra sicura e facile da usare, con hardware crittografato e autenticato con PIN, con capacità da 120GB fino a 2TB e oltre. Progettato in base alle certificazioni FIPS 140-3 Livello 3, diskAshur M cripta i dati in transito e a riposo, tramite la crittografia hardware AES-XTS 256-bit full disk. -
Page 117: Indicatori Led E Azioni Corrispondenti
2. Stati LED Nota: La normale funzione di diskAshur M2 può essere disturbata da forti interferenze elettromagnetiche. In questo caso, spegnere e poi accendere l’unità per riprendere il normale funzionamento. Se il normale funzionamento non riprende, utilizzare il dispositivo in una posizione diversa... -
Page 118: Primo Utilizzo
• Per “Password” premere i seguenti tasti: 7 (pqrs) 2 (abc) 7 (pqrs) 7 (pqrs) 9 (wxyz) 6 (mno) 7 (pqrs) 3 (def) • Per “iStorage” premere i seguenti tasti: 4 (ghi) 7 (pqrs) 8 (tuv) 6 (mno) 7 (pqrs) 2 (abc) 4 (ghi) 3 (def) Con questo metodo si possono configurare PIN lunghi e facili da ricordare. -
Page 119: Sblocco Diskashur M Con Il Pin Amministratore
è in Modalità amministratore Per uscire dalla Modalità amministratore Per uscire immediatamente dalla Modalità amministratore (LED fisso), premere e tenere premuto il tasto SHIFT ( ) per un secondo - il LED fisso diventa ROSSO fisso. #119 www.istorage-uk.com... -
Page 120: Modifica Del Pin Amministratore
• Per “Password” premere i seguenti tasti: 7 (pqrs) 2 (abc) 7 (pqrs) 7 (pqrs) 9 (wxyz) 6 (mno) 7 (pqrs) 3 (def) • Per “iStorage” premere i seguenti tasti: 4 (ghi) 7 (pqrs) 8 (tuv) 6 (mno) 7 (pqrs) 2 (abc) 4 (ghi) 3 (def) Con questo metodo si possono configurare PIN lunghi e facili da ricordare. -
Page 121: Impostare Una Politica Codice Pin Utente
3. Premere una volta il tasto SHIFT ( ) Codice PIN Utente è stata impostata con successo. Nota: Per uscire immediatamente dalla Modalità amministratore (LED fisso), premere e tenere premuto il tasto SHIFT ( ) per un secondo - il LED fisso diventa ROSSO fisso. #121 www.istorage-uk.com... -
Page 122: Come Cancellare La Politica Codice Pin Utente
2 Lampeggi 1 Lampeggio PIN a 12 cifre SENZA Caratteri speciali 1 Lampeggio 2 Lampeggi PIN a 9 cifre con l’utilizzo di un Carattere speciale 9 Lampeggi 1 Lampeggio PIN a 9 cifre SENZA Caratteri speciali 9 Lampeggi #122 www.istorage-uk.com... -
Page 123: Aggiunta Di Un Nuovo Pin Utente In Modalità Amministratore
Nuovo PIN Utente è stato KEY ( ) nuovamente configurato con successo Nota: Per uscire immediatamente dalla Modalità amministratore (LED fisso), premere e tenere premuto il tasto SHIFT ( ) per un secondo - il LED fisso diventa ROSSO fisso. #123 www.istorage-uk.com... -
Page 124: Modifica Del Pin Utente In Modalità Amministratore
PIN Utente di nuovo è stato eliminato con successo Nota: Per uscire immediatamente dalla Modalità amministratore (LED fisso), premere e tenere premuto il tasto SHIFT ( ) per un secondo - il LED fisso diventa ROSSO fisso. #124 www.istorage-uk.com... -
Page 125: Come Sbloccare Diskashur M
La modifica del PIN Utente in Modalità Utente (LED VERDE) deve essere conforme alla “Politica Codice PIN Utente”, se configurata come descritto nella sezione 7, che impone una lunghezza minima del PIN e l’eventuale richiesta di un “Carattere speciale”. #125 www.istorage-uk.com... -
Page 126: Creare Un Pin Utente Di Recupero Una Tantum
SHIFT ( ) + 4 di nuovo recupero è cancellato con successo Nota: Per uscire immediatamente dalla Modalità amministratore (LED fisso), premere e tenere premuto il tasto SHIFT ( ) per un secondo - il LED fisso diventa ROSSO fisso. #126 www.istorage-uk.com... -
Page 127: Attivare La Modalità Di Recupero E Creare Un Nuovo Pin Utente
“7 + 6”. e BLU lampeggianti I LED VERDE saranno sostituiti da LED VERDE fisso e poi fisso, a indicare 2. Premere una volta il tasto KEY ( ) che l’unità è stata configurata e limita l’accesso dell’Utente alla Sola Lettura Utente. #127 www.istorage-uk.com... -
Page 128: Abilitare Lettura/Scrittura Utente In Modalità Amministratore
2. il tasto KEY ( ) limita l’accesso globale alla Sola Lettura Nota: Per uscire immediatamente dalla Modalità amministratore (LED fisso), premere e tenere premuto il tasto SHIFT ( ) per un secondo - il LED fisso diventa ROSSO fisso. #128 www.istorage-uk.com... -
Page 129: Come Configurare Un Pin Auto-Cancellabile
PIN Auto-Cancellabile è stato configurato con e premere il tasto KEY ( ) successo Nota: Per uscire immediatamente dalla Modalità amministratore (LED fisso), premere e tenere premuto il tasto SHIFT ( ) per un secondo - il LED fisso diventa ROSSO fisso. #129 www.istorage-uk.com... -
Page 130: Come Cancellare Il Pin Auto-Cancellabile
I LED ROSSO, VERDE lampeggianti 2. Inserire il Pin Auto-Cancellabile e premere il tasto diventano VERDE alternandosi per alcuni secondi e diventano infine VERDE fisso, a indicare KEY ( ) button che diskAshur M si è autodistrutto con successo. #130 www.istorage-uk.com... -
Page 131: Impostare Il Blocco Automatico Incustodito
Nel suo stato predefinito, la funzione di time-out del Blocco Automatico Incustodito di diskAshur M è disattivata. È possibile impostare il Blocco Automatico Incustodito perché si attivi dopo un lasso di tempo compreso tra i 5 e i 99 minuti. #131 www.istorage-uk.com... -
Page 132: Disattivare Il Blocco Automatico Incustodito
Blocco Automatico è stato disattivato con successo. Nota: Per uscire immediatamente dalla Modalità amministratore (LED fisso), premere e tenere premuto il tasto SHIFT ( ) per un secondo - il LED fisso diventa ROSSO fisso. #132 www.istorage-uk.com... -
Page 133: Come Verificare Il Blocco Automatico Incustodito
LED VERDE i tasti “7 + 6” (7=Read + 6=Only) (sola lettura) e BLU lampeggianti I LED VERDE diventeranno VERDE fisso, a indicare che l’unità è configurata come Sola 2. Premere il tasto KEY ( ) Lettura #133 www.istorage-uk.com... -
Page 134: Attivare Lettura/Scrittura In Modalità Utente
• Il PIN di recupero viene cancellato. Recupero PIN • Il PIN Amministratore e tutti i dati rimangono intatti e accessibili. • diskAshur M si resetta. Tutti i PIN e i dati vengono cancellati e persi per PIN Amministratore sempre. #134 www.istorage-uk.com... -
Page 135: Meccanismo Di Difesa Contro L'hacking Con Forza Bruta Del Pin
PIN quando l’unità viene sottoposta a reset completo, forzato con forza bruta o viene attivato il PIN Auto-Cancellabile. La limitazione della forza bruta per il PIN Utente diskAshur M può essere riprogrammata e impostata dall’amministratore. Questa funzione può essere impostata per consentire 1 a 10 tentativi errati di immissione del PIN consecutivi. #135 www.istorage-uk.com... -
Page 136: Come Verificare La Limitazione Forza Bruta Del Pin Utente
è impostata l’unità in modo da attivare la forzatura con forza bruta dopo 5 immissioni errate consecutive del PIN, il LED VERDE lampeggerà cinque (5) volte. Impostazione della limitazione della forza bruta ROSSO VERDE 2 tentativi 2 Lampeggi 5 tentativi 5 Lampeggi 10 tentativi 1 Lampeggio #136 www.istorage-uk.com... -
Page 137: Come Eseguire Un Reset Completo
è stata configurata come avviabile con successo. Nota: Per uscire immediatamente dalla Modalità amministratore (LED fisso), premere e tenere premuto il tasto SHIFT ( ) per un secondo - il LED fisso diventa ROSSO fisso. #137 www.istorage-uk.com... -
Page 138: Come Verificare L'impostazione Avviabile
& BLU) diventano fissi per 1 secondo. d. I LED ritornano al fisso Nota: Per uscire immediatamente dalla Modalità amministratore (LED fisso), premere e tenere premuto il tasto SHIFT ( ) per un secondo - il LED fisso diventa ROSSO fisso. #138 www.istorage-uk.com... -
Page 139: Inizializzazione E Formattazione Di Diskashur M
Dovrebbe apparire una finestra di dialogo che invita a scegliere lo stile di partizione MBR o GPT. GPT memorizza più duplicati di questi dati sul disco, di conseguenza è molto più robusto. Invece su un disco MBR, le informazioni di partizione e di avvio sono memorizzate in un’unica sede. Selezionare lo stile di partizione e fare clic su OK. #139 www.istorage-uk.com... - Page 140 Assegnare una lettera di unità o un percorso e fare clic su Avanti. Creare un’etichetta di volume, selezionare Esegui un formato rapido, quindi fare clic su Avanti. Fare clic su Fine. Attendere il completamento del processo di formattazione. diskAshur M sarà riconosciuto ed è disponibile per l’uso. #140 www.istorage-uk.com...
- Page 141 1. Selezionare diskAshur M dall’elenco delle unità e dei volumi. In corrispondenza di ogni unità della lista verranno mostrati dati quali la capacità, il produttore e il nome del prodotto, come “iStorage diskAshur M Media”. 2. Fare clic sul pulsante “Cancella” alla voce utilità Disco.
- Page 142 Il menu a discesa del formato dello schema contiene una lista degli schemi disponibili da utilizzare. Si consiglia di utilizzare la “Mappa partizione GUID” su unità di dimensioni superiori a 2 TB. 5. Fare clic sul pulsante “Cancella”. Utilità disco smonterà il volume dal desktop, lo cancellerà e poi lo rimonterà sul desktop. #142 www.istorage-uk.com...
-
Page 143: Inizializzazione E Formattazione Di Diskashur M
2. Fare clic per selezionare l’unità (Hard Disk da 500 GB) alla voce “Dispositivi”. Fare clic poi sull’icona degli ingranaggi sotto “Volumi” e poi cliccare su “Formato Partizioni”. 3. Selezionare “Compatibile con tutti i sistemi e dispositivi (FAT)” per l’opzione “Tipo”. E inserire un nome per l’unità, ad esempio: diskAshur M . Quindi, fare clic sul pulsante “Formato”. #143 www.istorage-uk.com... - Page 144 4. Al termine del processo di formattazione, fare clic sul pulsante Play per montare l’unità su Ubuntu. #144 www.istorage-uk.com...
- Page 145 5. Ora l’unità dovrebbe essere stata montata su Ubuntu e pronta all’uso. 6. Il disco verrà visualizzato come nell’immagine qui sotto. È possibile fare clic sull’icona del disco per aprire l’unità. #145 www.istorage-uk.com...
-
Page 146: Ibernazione, Sospensione O Uscita Dal Sistema Operativo
Ad esempio, se il numero di revisione del firmware è ‘2.3’, il LED ROSSO lampeggerà due volte (2) e il LED VERDE tre (3) volte. Una volta terminata la sequenza, i LED ROSSO, VERDE lampeggeranno insieme una volta e poi torneranno in Modalità amministratore, un LED fisso. #146 www.istorage-uk.com... -
Page 147: Come Verificare Il Firmware In Modalità Utente
Ad esempio, se il numero di revisione del firmware è “2.3”, il LED ROSSO lampeggerà due volte (2) e il LED VERDE tre (3) volte. Una volta terminata la sequenza, i LED ROSSO, VERDE lampeggeranno insieme una volta e poi torneranno in Modalità Utente, un LED VERDE fisso. #147 www.istorage-uk.com... -
Page 148: Assistenza Tecnica
Consulenza per i cittadini o l’Ufficio per gli Standard Commerciali. Le garanzie di cui alla presente clausola si applicano solo agli acquirenti originali dei Prodotti iStorage o a rivenditori o distributori autorizzati iStorage. Queste garanzie non sono trasferibili. - Page 149 Copyright © iStorage Limited 2020. Tutti i diritti riservati. iStorage Limited, iStorage House, 13 Alperton Lane Perivale, Middlesex. UB6 8DH, Inghilterra Tel: +44 (0) 20 8991 6260 | Fax: +44 (0) 20 89916277 e-mail: info@istorage-uk.com | web: www.istorage-uk.com #149 www.istorage-uk.com...
- Page 150 ユーザーガイ ド それなしであなたのピン (パスワード) をメモしてく ださいlドライブ上のデータにア クセスする方法はありません。 diskAshurMの使用に問題がある場合。 メール (support@istorage-uk.com) また は電話 (+44 ( 0) 20 8991 6260) でサポートチームに連絡してください。 #150 www.istorage-uk.com...
- Page 151 著作権©iStorageで、 2020年株式会社.無断複写 ・ 転載を禁じます。 ウィンドウズは、 マイクロソフトの登録商標です。 記載されているその他すべての商標および著作権は、 それぞれの所有者に帰属します。 このドキュメントの変更されたバージョンの配布は、 著作権所有者の明示的な許可なしに禁止されています。 著作権者の事 前の許可なしに、 作品または派生物を標準的な本 (紙) 形式で商業目的で配布することは禁止されています。 ドキュメントは現状のまま提供され、 すべての明示的または黙示的な条件、 表現、 および 商品性、 特定への適合性の黙示の保証を含む保証 これらの免責事項が法的に無効である場合を除き、 目的または非侵害は否認されるものとします。 。 すべての商標およびブランド名は、 それぞれの所有者に帰属します すべての商標およびブランド名は、 それぞれの所有者に帰属します 貿易協定法 (TAA) に準拠 #151 www.istorage-uk.com...
- Page 152 Windowsの初期化とフォーマッ ト ....................... 176 40. MacOSでのdiskAshurM の初期化とフォーマッ ト ........................178 41. LinuxでのdiskAshurM の初期化とフォーマッ ト ........................180 42. オペレーティングシステムを休止、 一時停止、 またはログオフします ................183 43. 管理モードでファームウェアを確認する方法 ..........................183 44. ユーザーモードでファームウェアを確認する方法 ........................184 45. テクニカルサポート ....................................185 46. 保証およびRMA情報 ....................................185 #152 www.istorage-uk.com...
-
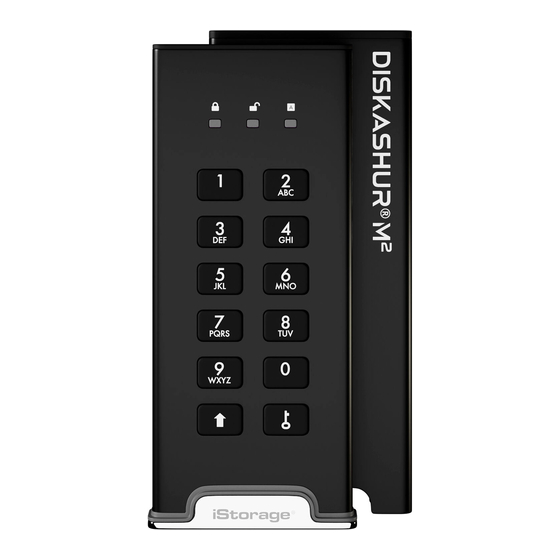
Page 153: Diskashur M レイアウト
前書き 新しいiStoragediskAshur M をお買い上げいただき、 ありがとうございます。 これは、 120GBから2TB以上の容量 を備えた、 安全性が高く使いやすい、 ハードウェア暗号化、 ピン認証済みのポータブルソリッ ドステートドライブ (SSD) です。 diskAshur M2は、 FIPS 140-3レベル3になるように設計されており、 AES-XTS 256ビッ トフルディスクハードウェア 暗号化を使用して、 転送中および保存中のデータを暗号化します。 diskAshur M には、 Common Criteria EAL 5+ (ハードウェア認定) に準拠した安全なマイクロプロセッサが含ま れています。 です。 。 外部操作、 バイパス攻撃、 およびフォールトインジェクションに対する防御のメカニズム。 他のソリューションとは対照的に、 diskAshurM。 2 自動化された攻撃に応答して、 デッ ドロック凍結状態に入り、 そ... -
Page 154: Ledの状態
されました のを待ちます 緑と青 認証が進 グリーン データ転送が実行されて 行中です フラッシュ 交互に点滅 います 2. LEDの状態 注意: ‘強い電磁波障害によりdiskAshur M2の通常の機能に不具合が生じる場合があります。 その ような場合、 商品の電源操作 (電源をオフにしてからオンすること) を行うと通常に稼働するように なります。 それでも通常に稼働しない場合、 本商品を違う場所で使ってみてください。 ’ 睡眠から目覚める ハイバネーションは、 diskAshur M が使用されておらず、 すべてのLEDがオフの場合と定義されます。 次の手順に従って、 diskAshurM をスリープから復帰させます。 赤、 緑、 青LEDが連続して1回点滅し、 次に緑LEDが2回点 diskAshurM をコンピューターのUSBポ 滅し、 最後に赤色のLEDに変わり、 ドライブがスタンバイ... - Page 155 • 「パスワード」 の場合は、 次のキーを押します。 7 (pqrs) 2 (abc) 7 (pqrs) 7 (pqrs) 9 (wxyz) 6 (mno) 7 (pqrs) 3 (def) • 「iStorage」 の場合は、 次のキーを押します。 4 (ghi) 7 (pqrs) 8 (tuv) 6 (mno) 7 (pqrs) 2 (abc) 4 (ghi) 3 (def) この方法は、...
-
Page 156: 管理者ピンを使用してDiskashurm
を接続します の電源付きUSBポー LEDが1回点滅します次に、 緑色のLEDが2回 トに コンピューター 点滅し、 最後に赤色のLEDが点灯して、 ドライ ブがスタンバイ状態にあることを示します。 2. スタンバイモード (赤色の連続LED) で、 両方の 緑と青のLEDが一緒に点滅します キー +1ボタンを押し続けます 数回押してから、 緑色のLEDに切り替え、 最 後 3. 管理者ピンを入力し、 キーボタンを1回押しま に青色のLEDに切り替えて、 ドライブが管理モ す ードになっていることを示します。 管理モードを終了する方法 (管理者モードをすぐに終了するには (青色のLEDが点灯) 、 シフトキー () を1秒間押し続けます。 青色のLEDが 赤色の点灯に変わります。 #156 www.istorage-uk.com... - Page 157 • パスワード」 の場合は、 次のキーを押します。 7 (pqrs) 2 (abc) 7 (pqrs) 7 (pqrs) 9 (wxyz) 6 (mno) 7 (pqrs) 3 (def) • iStorage」 の場合は、 次のキーを押します。 4 (ghi) 7 (pqrs) 8 (tuv) 6 (mno) 7 (pqrs) 2 (abc) 4 (ghi) 3 (def) この方法は、...
- Page 158 ユーザーピンポリシーを設定するには、 最初にセクション5の説明に従って 「管理者モード」 に移動します。 ドライ ブが管理者モード (青色のLEDが点灯) の場合は、 次の手順に進みます。 1. 管理者モードで、 両方を押し続けますキー+7 点灯している青色LEDは緑色に点滅し、 青 キー 色LED 2. 3桁を入力し、 最初の2桁を覚えておいてくださ 点滅している緑と青のLEDが点滅し続けま いピンの最小長と最後の桁 (0または1) を示しま す す特殊文字が使用されたかどうか LEDの緑と青の点滅がに変わります緑色の LEDが点灯し、 最後に青色のLEDが点灯し 3. シフトキーを1回押します ますユーザーピンポリシーが成功したこと の表示合わせる。 注意: 管理モードをすぐに終了するには (青色のLEDが点灯) 、 シフトキーを1秒間押し続けます。 点灯して いる青色LEDが点灯している赤色 #158 www.istorage-uk.com...
-
Page 159: ユーザーピンポリシーを削除する方法
すべてのLED (赤、 緑、 青) が1秒間点灯します。 f) LEDが再び青色に点灯します 次の表に、 ユーザーピンポリシーを確認するときのLEDの動作を示します。 たとえば、 特殊文字 (121) を使用して 12桁のユーザーピンを設定した場合、 赤のLEDが1回点滅し (1) 、 緑のLEDが2回点滅し (2) 、 その後に青みがかっ たLEDが1回点滅します。 特殊文字を使用する必要があることを示します。 ピンの説明 3桁のセッ トアップ 赤 緑 青い 特殊文字を使用した12桁のピン 1回点滅 2回点滅 1回点滅 特殊文字なしの12桁のピン 1回点滅 2回点滅 特殊文字を使用した9桁のピン 9回点滅 1回点滅 特殊文字なしの9桁のピン 9回点滅 #159 www.istorage-uk.com... - Page 160 新しいユーザーピンを追加するには、 セクション5の説明に従って、 最初に 「管理者モード」 を呼び出します。 ドラ イブが管理者モード (青色のLEDが点灯) の場合は、 次の手順に進みます。 1. 管理者モードで、 両方を押し続けますキー+3 点灯している青色LEDが点滅している緑色 キー と点灯している青色LEDに変わります 緑と青のLEDの点滅は、 緑のLEDの1回の点 2. 新規ユーザーのピンを入力し、 キーを押します 滅と交互になり、 その後、 緑と青のLEDの点 滅に戻ります。 緑の点滅と青のLEDの点灯が緑のLEDが急 3. 新しいユーザーピンをもう一度入力し、 ボタン 速に点滅し、 最後に点灯します青色のLED をもう一度押します は、 新しいユーザーピンが利用可能である ことを示します正常に構成されました 注意: 管理モードをすぐに終了するには (青色のLEDが点灯) 、 シフトキーを1秒間押し続けます。 点灯して いる青色LEDが点灯している赤色 #160 www.istorage-uk.com...
- Page 161 管理モードをすぐに終了するには (青色のLEDが点灯) 、 シフトキーを1秒間押し続けます。 点灯して いる青色LEDが点灯している赤色 12. 管理者モードでユーザーピンを削除します 既存のユーザーピンを削除するには、 最初にセクション5で説明されている 「管理者モード」 を呼び出します。 ドラ イブが管理者モード (青色のLEDが点灯) の場合は、 以下の手順に従います。 1. 管理者モードで両方のシフト + 3キーを押し続 点灯している青色LEDが点滅している赤色 LEDに変わります けます 点滅している赤色のLEDが赤色のLEDに変 2. 両方のシフト + 3キーをもう一度押し続けます わります次に、 ユーザーを示す青色のLED が点灯しますピンは正常に削除されました 注意: 管理モードをすぐに終了するには (青色のLEDが点灯) 、 シフトキーを1秒間押し続けます。 点灯して いる青色LEDが点灯している赤色 #161 www.istorage-uk.com...
-
Page 162: ユーザーピンを使用してDiskashurm
ります。 青色LED 緑と青のLEDの点滅は、 緑のLEDの1回の 3. 新しいユーザーピンを入力し、 ボタンを押しま 点滅と交互になり、 その後、 緑と青のLED す1回押す の点滅に戻ります。 緑の点滅と青のLEDの点灯が切り替わり ます急速に点滅する緑色のLEDに、 次に緑 4. 新しいユーザーピンをもう一度入力し、 ボタン 色のLEDが点灯している場合は、 ユーザー を押します 1回押す ピンが正常に変更されたことを示してい ます。 重要: ユーザーモード (緑色のLED) でのユーザーPINの変更は、 セクション7で説明されているよう に構成されており、 最小のPIN長が必要であり、 「 特殊文字」 が使用されている場合は、 「 ユーザー PINポリシー」 に準拠する必要があります。 #162 www.istorage-uk.com... - Page 163 管理モードをすぐに終了するには (青色のLEDが点灯) 、 シフトキーを1秒間押し続けます。 点灯してい る青色LEDが点灯している赤色 16. ワンタイムユーザーリカバリピンを削除します 1回限りのユーザー回復のためにピンを削除するには、 最初にセクション5で説明されている 「管理者モード」 を 呼び出します。 ドライブが管理者モード (青色のLEDが点灯) になったらすぐに次の手順を実行します。 1. 管理者モードで両方のシフト + 4キーを押し続 点灯している青色LEDが点滅している赤色 けます LEDに変わります 点滅する赤いLEDが赤く点灯してから赤く 点灯します点灯している青色LEDに切り替 2. 両方のシフト + 4キーをもう一度押し続けます えて、 One-ユーザー回復ピンが正常に削除 された時間 注意: 管理モードをすぐに終了するには (青色のLEDが点灯) 、 シフトキーを1秒間押し続けます。 点灯して いる青色LEDが点灯している赤色 #163 www.istorage-uk.com...
-
Page 164: リカバリモードをアクティブにして、 新しいユーザーピンを作成します
を構成し、 ユーザーアクセスを読み取り専用に制限した場合、 セクション19で説明されて いるように、 管理者のみがドライブへの書き込みまたは設定を読み取り専用に戻すことができます。 ユーザーは 読み取り専用アクセスに制限され、 ドライブに書き込んだり、 ユーザーモードでこの設定を変更したりすることは できません。 diskAshur M をセッ トアップし、 ユーザーアクセスを書き込み禁止に制限するには、 最初にセクション5で説明さ れている 「管理モード」 を呼び出します。 ドライブが管理モード (青色のLEDが点灯) になったらすぐに次の手順を 実行します。 1. 管理者モードで両方のボタン 「7 + 6」 を押し続 点灯している青色LEDが点滅する緑色と青 けます。 色LEDに変わります 緑と青のLEDが連続して点灯します緑の LED、 次に青のLEDに点灯ドライブが構成 2. キーボタンを1回押します されていることを示し、 ユーザーアクセス を読み取り専用に制限します #164 www.istorage-uk.com... - Page 165 M をセッ トアップし、 グローバルアクセスを書き込み禁止に制限するには、 最初にセクション5で説明 されている 「管理モード」 に移動します。 ドライブが管理モード (青色のLEDが点灯) になったら、 次の手順に従い ます。 1. 管理者モードで両方のボタン 「5 + 6」 を押し続 点灯している青色LEDは緑色に点滅し、 青 けます。 色LED 緑と青のLEDが連続して点灯します緑の LED、 次に青のLEDに点灯ドライブが構成 2. ボタンを押します されていることを示し、 グローバルアクセ スを読み取り専用に制限します 注意: 管理モードをすぐに終了するには (青色のLEDが点灯) 、 シフトキーを1秒間押し続けます。 点灯して いる青色LEDが点灯している赤色 #165 www.istorage-uk.com...
- Page 166 自己破壊ピンを設定するには、 最初にセクション5の説明に従って 「管理者モード」 に移動します。 ドライブが管理 者モード (継続的に青信号) になったら、 次の手順に進みます。 1. 管理者モードで、 両方を押し続けますキー+6 点灯している青色LEDは緑色に点滅し、 青 キー 色のLEDが点灯 緑の点滅と青のLEDの点灯がに変わりま 2. 7〜15桁の自己破壊ピンを設定して入力し、 キー す1つの緑色のLEDが点滅してから、 再び ( ) ボタンを押します。 点滅します緑と青のLED 緑のLEDが数回すばやく点滅します数秒 3. 自己破壊ピンをもう一度入力して、 を押します。 後、 青色のLEDに変わります自己破壊ピン キーボタン が正常に構成されました 注意: 管理モードをすぐに終了するには (青色のLEDが点灯) 、 シフトキーを1秒間押し続けます。 点灯してい る青色LEDが点灯している赤色 #166 www.istorage-uk.com...
-
Page 167: 自己破壊ピンを削除する方法
ます。 この機能を有効にすると、 自己破壊ピンが新しいユーザーピンになり、 新しいデータをドライブに追加する 前にdiskAshurM をフォーマッ トする必要があります。 自己破壊メカニズムをアクティブにするには、 ドライブをスタンバイ状態 (赤色のLEDが点灯) にしてから、 次の 手順に進む必要があります。 1. スタンバイモードで、 長押しします (赤色のLED 赤LEDは、 赤、 緑、 およびすべてのLEDに切 が点灯) シフトキーとキーの両方を押します り替わります。 BLUEが点滅します 点滅するLEDの赤、 緑、 青が変化します交 互にオンとオフを切り替える緑色と青色 2. 自己破壊ピンを入力し、 ボタンを押しますキー のLED数秒後、 最終的に緑色に変わります ボタン LEDは、 diskAshurM が成功したことを示し ます 自己破壊 #167 www.istorage-uk.com... -
Page 168: ブルートフォース攻撃またはリセッ ト後に管理者ピンを設定する方法
緑の点滅と青のLEDの点灯がに変わります 2. 新しい管理者ピンを入力し、 ボタンを押します 1つの緑色のLEDが点滅してから、 再び点滅 します緑と青のLED 交互に点滅する緑色のLEDと青色のLEDが 3. 新しい管理者ピンをもう一度入力して、 を押し 点灯青のLEDが数秒間すばやく点滅し、 次 ますキーボタン に、 管理者ピンを示す青色のLEDが点灯し ます正常に構成されました。 注意: 管理モードをすぐに終了するには (青色のLEDが点灯) 、 シフトキーを1秒間押し続けます。 点灯して いる青色LEDが点灯している赤色 26. 無人自動ロックを設定します ドライブのロックが解除されていないときに不正アクセスから保護するために、 diskAshur M は、 事前設定され た時間後に自動的にロックするように設定できます。 デフォルトの状態では、 diskAshurM の無人自動ロックのタ イムアウト機能は無効になっています。 無人自動ロックは、 5〜99分でアクティブになるように設定できます。 #168 www.istorage-uk.com... - Page 169 管理モードをすぐに終了するには (青色のLEDが点灯) 、 シフトキーを1秒間押し続けます。 点灯してい る青色LEDが点灯している赤色 27. 無人自動ロックをオフにします 無人自動ロックのタイムアウト機能を無効にするには、 最初にセクション5で説明されている 「管理モード」 に移 動します。 ドライブが管理モード (青色のLEDが点灯) になったらすぐに次の手順を実行します。 1. 管理者モードで、 両方を押し続けますキー+5 点灯している青色LEDが緑色に点滅しま キー すおよび青色LED LEDの緑と青の点滅がに変わりますソリッ ドグリーンを1秒間、 最後にソリッ ドにオー 2. 00と入力し、 シフトキーを押します トロックの制限時間を示す青色LED正常 に非アクティブ化されました 注意: 管理モードをすぐに終了するには (青色のLEDが点灯) 、 シフトキーを1秒間押し続けます。 点灯して いる青色LEDが点灯している赤色 #169 www.istorage-uk.com...
- Page 170 管理モードをすぐに終了するには (青色のLEDが点灯) 、 シフトキーを1秒間押し続けます。 点灯してい る青色LEDが点灯している赤色 29. ユーザーモードを読み取り専用に設定します diskAshur M を書き込み禁止に設定するには、 最初にセクション13で説明されている 「ユーザーモード」 を呼び 出します。 ドライブがユーザーモード (緑色のLEDが点灯) になったら、 次の手順を実行します。 1. ユーザーモードで、 「 7 +6」 の両方を押し続けま 緑色のLEDが緑色に点滅しますおよび青 す。 キー。 ( 7 =読み取り+6 =のみ) 色LED 緑と青のLEDが連続して点灯します緑の 2. ボタンを押します LEDは、 ドライブが次のように構成されて いることを示します読み取り専用 #170 www.istorage-uk.com...
-
Page 171: ユーザーモードで読み取り/書き込みを有効にする
• 間違った管理ピンが10回続けて入力された場合、 ドライブはリセッ トされます。 すべてのピンとデータは削 除され、 永久に失われます。 次の表は、 3つのピンがすべて設定されていることを前提としており、 各ピンのブルートフォース防御メカニズム をトリガーした場合の影響を示しています。 以前のピンドラ 連続して間違っている イブのロックを 何が起こ っているかの説明 ピンエントリ 解除する • ユーザーピンが削除されます。 ユーザーピン • リカバリピン、 管理者ピン、 およびすべてのデータはそのまま残 り、 アクセス可能です。 • リカバリピンは削除されます。 回復ピン • 管理者ピンとすべてのデータは保持され、 アクセス可能です。 • diskAshur M リセッ トされます。 すべてのピンとデータは削除 管理者ピン され、 永久に失われます。 #171 www.istorage-uk.com... -
Page 172: 管理者Pinブルートフォースアタック (総当たり攻撃) の防御機構
を入力できる状態になります。 赤のLEDが点灯し、 固定され 管理者PINが不正に10回連続入力されると、 暗号鍵、 すべての ます。 PIN、 データが完全に削除され、 復元することはできません。 33. これは、 ユーザーピンのブルートフォース制限を設定する方法です。 注意: ドライブが完全にリセッ トされているか、 残酷に強制されているか、 または自己破壊PINが有 32. How to set the User PIN Brute Force Limitation 効になっている場合、 ユーザーPINのブルートフォース制限設定はデフォルトで10回の連続した不正 なPINエントリに設定されます。 diskAshur M のユーザーピンの強引な制限は、 管理者が再プログラムして定義できます。 この機能は、 1〜10回 の連続した誤ったピン入力の試行が可能になるように設定できます。 #172 www.istorage-uk.com... - Page 173 各赤色LEDの点滅は、 ブルートフォース制限数の10単位に対応します。 c. 各緑色のLEDの点滅は、 ブルートフォース制限数の1つの単一ユニッ トに対応します。 d. すべてのLED (赤、 緑、 青) が1秒間点灯します。 e. LEDが再び青色に点灯します 次の表に、 ブルートフォース制限設定を確認するときのLEDの動作を示します。 たとえば、 5つの誤ったピンエント リが連続して発生した後、 ドライブをブルートフォースに設定すると、 緑色のLEDが5回点滅します。 ブルートフォース制限設定 赤 緑 2回の試行 2回点滅 5回の試行 5回点滅 10回の試行 1回点滅 注意: 管理モードをすぐに終了するには (青色のLEDが点灯) 、 シフトキーを1秒間押し続けます。 点灯してい る青色LEDが点灯している赤色LEDに変わります。 #173 www.istorage-uk.com...
-
Page 174: Diskashur M を起動可能として構成する方法
ドライブを起動可能にするには、 最初にセクション5の説明に従って 「管理者モード」 に移動します。 ドライブが管 理者モード (青色のLEDが点灯) の場合は、 次の手順に進みます。 点灯している青色LEDは緑色に点滅し、 青 1. 管理者モードで、 両方を押し続けますキー+8 キー 色LED 2. 「0」 を押してから 「1」 ( 01) を押します。 緑と青のLEDが点滅し続ける LEDの緑と青の点滅がに変わります緑色 のLEDが点灯し、 最後に青色のLEDが点灯 3. シフトキーを1回押します しますドライブが成功したことを示します 起動可能として構成 注意: 管理モードをすぐに終了するには (青色のLEDが点灯) 、 シフトキーを1秒間押し続けます。 点灯して いる青色LEDが点灯している赤色 #174 www.istorage-uk.com... -
Page 175: 起動可能な機能Diskashurm
緑のLEDが1回点滅します。 c. すべてのLED (赤、 緑、 青) が1秒間点灯します。 d. LEDが再び青色に点灯します • datAshur PRO が起動可能と して構成されていない場合、 以下が発生します。 a. すべてのLED (赤、 緑、 青) が1秒間点灯します。 b. すべてのLEDがオフになっています c. すべてのLED (赤、 緑、 青) が1秒間点灯します。 d. LEDが再び青色に点灯します 注意: 管理モードをすぐに終了するには (青色のLEDが点灯) 、 シフトキーを1秒間押し続けます。 点灯してい る青色LEDが点灯している赤色 #175 www.istorage-uk.com... -
Page 176: Diskashur M
4. ウ ィ ンドウズ 7: [コンピューター]を右クリックし、 [管理]をクリックして、 [ディスクの管理]を選択します ウ ィ ンドウズ 8: デスク トップの左隅を右クリックして、 [ディスクの管理]を選択します ウ ィ ンドウズ 10: [スタート]ボタンを右クリックして、 [ディスクの管理]を選択します 5. [ディスクの管理]ウィンドウで、 diskAshur M は、 初期化されておらず、 割り当てられていない不明なデバイ スとして認識されます。 メッセージボックスが表示され、 MBRとGPTのパーティションスタイルを選択できま す。 GPTは、 このデータの複数の複製をディスクに保存するため、 はるかに堅牢になります。 MBRハードドライ ブは、 パーティションとブート情報を1か所に保存します。 パーティションスタイルを選択し、 [OK]をクリックします。 #176 www.istorage-uk.com... - Page 177 6. [未割り当て]セクションの上の空白の領域を右クリックして、 [新しいシンプルボリューム]を選択します。 7. [新しいシンプルボリュームウィザードへようこそ]ウィンドウが開きます。 [次へ]をクリックします。 必要なパーティションが1つだけの場合は、 デフォルトのパーティションサイズを受け入れて、 [次へ]をク リックします。 ドライブ文字またはパスを割り当て、 [次へ]をクリックします。 ボリュームラベルを作成し、 [クイックフォーマッ トを実行する]を選択して、 [次へ]をクリックします。 [完了]をクリックします。 フォーマッ トプロセスが完了するのを待ちます。 diskAshur M が認識され、 使用可能になります。 #177 www.istorage-uk.com...
-
Page 178: MacosでのDiskashurm の初期化とフォーマッ ト
はすべてのピン、 データ、 および暗号化キー を削除します。 diskAshur M を使用する前に、 初期化してフォーマッ トする必要があります。 diskAshurM を初期化およびフォーマッ トする方法 1. ドライブとボリュームのリストからdiskAshurM を選択します。 リスト内の各ドライブには、 容量、 製造元、 製品 名が表示されます (例 : B。 「 iStoragediskAshur M Media」 ) 。 2. [ディスクユーティ リティ]で、 [消去]ボタンをクリックします。 3. ドライブの名前を入力します。 デフォルトの名前は無題です。 ドライブの名前は、 最終的にデスク トップに表示 されます。 #178 www.istorage-uk.com... - Page 179 4. スキームとボリュームフォーマッ トを選択します。 [ボリュームフォーマッ ト]ドロップダウンメニューには、 Mac がサポートする利用可能なドライブフォーマッ トが一覧表示されます。 推奨されるフォーマッ トタイプは MacOS 拡張 (ジャーナリング) です。 クロスプラッ トフォームアプリケーションにはexFATを使用します。 [スキ ーマ形式]ドロップダウンメニューには、 使用可能なスキーマが一覧表示されます。 2TBを超えるドライブでは 「GUIDパーティションマップ」 を使用することをお勧めします。 5. [削除]ボタンをクリックします。 ディスクユーティ リティは、 ボリュームをデスク トップからアンマウントし、 削除 してから、 デスク トップに再度マウントします。 #179 www.istorage-uk.com...
-
Page 180: LinuxでのDiskashurm の初期化とフォーマッ ト
41. LinuxでのdiskAshurM の初期化とフォーマッ ト 1. 「アプリケーションの表示」 を開き、 検索フィールドに 「ディスク」 と入力します。 表示されたら、 ハードディスク ユーティ リティをクリックします。 2. [デバイス]の下のドライブ (500 GBハードドライブ) をクリックして選択します。 次に、 [ボリューム]の下の歯車 アイコンをクリックし、 [パーティションのフォーマッ ト]をクリックします。 3. [タイプ]オプションで[すべてのシステムとデバイスと互換性がある (FAT) ]を選択します。 ドライブの名前を入 力します (例 : B。 diskAshurM ) 。 次に、 [フォーマッ ト]ボタンをクリックします。 #180 www.istorage-uk.com... - Page 181 4. フォーマッ トプロセスが完了したら、 [再生]ボタンをクリックしてドライブをUbuntuにマウントします。 #181 www.istorage-uk.com...
- Page 182 5. これで、 ドライブがUbuntuにマウントされ、 使用できるようになります。 6. 次の図に示すように、 ハードドライブが表示されます。 ハードドライブのアイコンをクリックして、 ドライブを 開く ことができます。 #182 www.istorage-uk.com...
-
Page 183: オペレーティングシステムを休止、 一時停止、 またはログオフします
すべてのLED (赤、 緑、 青) が1秒間点灯します。 b) 赤いLEDが点滅し、 ファームウェアのバージョン番号の不可欠な部分を示します。 c) 緑のLEDが点滅し、 端数を示します。 d) 青LEDが点滅し、 ファームウェアバージョン番号の最後の桁を示します e) すべてのLED (赤、 緑、 青) が1秒間点灯します。 f) 赤、 緑、 青のLEDが青一色のLEDに変わります たとえば、 ファームウェアのバージョン番号が 「2.3」 の場合、 赤色のLEDが2回点滅し (2) 、 緑色のLEDが3回点滅し ます (3) 。 シーケンスが終了するとすぐに、 赤、 緑、 青のLEDが1回点滅し、 その後、 連続した青のLEDである管理モ ードに戻ります。 #183 www.istorage-uk.com... -
Page 184: ユーザーモードでファームウェアを確認する方法
すべてのLED (赤、 緑、 青) が1秒間点灯します。 b) 赤いLEDが点滅し、 ファームウェアのバージョン番号の不可欠な部分を示します。 c) 緑のLEDが点滅し、 端数を示します。 d) 青LEDが点滅し、 ファームウェアバージョン番号の最後の桁を示します e) すべてのLED (赤、 緑、 青) が1秒間点灯します。 f) 赤、 緑、 青のLEDが青一色のLEDに変わります たとえば、 ファームウェアのバージョン番号が 「2.3」 の場合、 赤色のLEDが2回点滅し (2) 、 緑色のLEDが3回点滅し ます (3) 。 シーケンスが終了すると、 赤、 緑、 青のLEDが1回点滅し、 ユーザーモードに戻ります。 緑のLEDが点灯し ます。 #184 www.istorage-uk.com... -
Page 185: テクニカルサポート
あなたが消費者である場合、 この保証は、 欠陥があるか、 説明されていない製品に関するあなたの法定権利に追加されます。 法的権利については、 最寄 りの市民相談局または貿易基準局にお問い合わせください。 この条項に記載されている保証は、 iStorage製品の最初の購入者またはiStorage認定再販業者またはディーラーにのみ適用されます。 これらの保証は 譲渡できません。 ここに記載されている限定保証を除き、 ISTORAGEは、 商品性のすべての保証を含む、 明示または黙示を問わず、 すべての保証を否認します。 侵害ではな く、 特定の目的への適合性。 ISTORAGEは、 製品がエラーなしで動作することを保証しません。 法的規定により暗黙の保証が単純に存在できない限り、 そ のような保証はこの保証の期間に限定されます。 ここに記載されているように、 この製品を修理または交換することが唯一の救済策です。 いかなる場合も、 損失または将来の利益、 または偶発的、 罰則、 例、 特別、 信頼性、 または結果的損害に対する保管責任を負わないものとします。 これに は、 収入、 損失、 または損失、 損失、 損失、 第三者の損失が含まれますが、 これらに限定されません。 保証、 契約、 法定規制を含む、 回復理論に起因する請... - Page 186 Copyright © iStorage Limited 2020。 無断複写 ・ 転載を禁じます。 iStorageでリミテッ ド、 iStorageでハウス、 13 Alpertonレーン ペリベール、 ミドルセックス。 UB6 8DH、 イギリス 電話 : +44 ( 0) 20 8991 6260 | ファックス : +44 ( 0) 20 8991 6277 Eメール : info@istorage-uk.com | ウェブ : www.istorage-uk.com www.istorage-uk.com...
- Page 187 Als u problemen ondervindt bij het gebruik van uw diskAshur M neem dan contact op met ons ondersteuningsteam via e-mail - support@istorage-uk.com of per telefoon +44 (0) 20 8991 6260. #187 www.istorage-uk.com...
- Page 188 Copyright © iStorage Limited 2020. Alle rechten voorbehouden. Windows is een geregistreerd handelsmerk van Microsoft Corporation. Alle andere handelsmerken en auteursrechten waarnaar wordt verwezen, zijn eigendom van hun respectievelijke eigenaren. Verspreiding van gewijzigde versies van dit document is verboden zonder de uitdrukkelijke toestemming van de copyrighthouder.
- Page 189 42. In slaapstand gaan, opschorten of afmelden bij het besturingssysteem ..................220 43. Firmware controleren in de beheerdersmodus ..........................220 44. Firmware controleren in de gebruikersmodus ..........................221 45. Technische ondersteuning ................................222 46. Garantie en RMA-informatie ................................222 #189 www.istorage-uk.com...
-
Page 190: Introductie
Introductie Dank u voor de aanschaf van de nieuwe iStorage diskAshur M , een ultraveilige en gebruiksvriendelijke draagbare Solid State Drive (SSD) met een capaciteit van 120 GB tot 2 TB en hoger geverifieerd met pincode en met hardware-encryptie. Ontworpen om FIPS 140-3 Level 3, versleutelt de diskAshur M gegevens tijdens verzending en in rust met behulp van AES-XTS 256-bit hardwareversleuteling op de volledige disk. -
Page 191: Led-Indicatoren En Hun Werking
Koppel de drive los als deze op een USB-poort is aangesloten, alle LED’s gaan uit (inactieve toestand). Inschakelstatus Nadat de drive uit de inactieve status ontwaakt, gaat deze naar een van de volgende status die in de onderstaande tabel worden weergegeven. #191 www.istorage-uk.com... -
Page 192: Eerste Gebruik
7 (pqrs) 2 (abc) 7 (pqrs) 7 (pqrs) 9 (wxyz) 6 (mno) 7 (pqrs) 3 (def) • Druk voor “iStorage” op de volgende toetsen: 4 (ghi) 7 (pqrs) 8 (tuv) 6 (mno) 7 (pqrs) 2 (abc) 4 (ghi) 3 (def) Met deze methode kunnen lange en gemakkelijk te onthouden pincodes worden geconfigureerd. -
Page 193: Diskashur M 2 Ontgrendelen Met De Pincode Van De Beheerder
De beheerdersmodus verlaten Om de beheerdersmodus onmiddellijk te verlaten (ononderbroken BLAUWE LED), houdt u de SHIFT ( )-knop een seconde ingedrukt - de ononderbroken BLAUWE LED schakelt over naar een ononderbroken RODE #193 www.istorage-uk.com... - Page 194 7 (pqrs) 2 (abc) 7 (pqrs) 7 (pqrs) 9 (wxyz) 6 (mno) 7 (pqrs) 3 (def) • Druk voor “iStorage” op de volgende toetsen: 4 (ghi) 7 (pqrs) 8 (tuv) 6 (mno) 7 (pqrs) 2 (abc) 4 (ghi) 3 (def) Met deze methode kunnen lange en gemakkelijk te onthouden pincodes worden geconfigureerd.
-
Page 195: Beleid Voor Pincode Van De Gebruiker Instellen
Opmerking: Om de beheerdersmodus onmiddellijk te verlaten (ononderbroken BLAUWE LED), houdt u de SHIFT ( )-knop een seconde ingedrukt - de ononderbroken BLAUWE LED schakelt over naar een ononderbroken RODE LED. #195 www.istorage-uk.com... -
Page 196: Beleid Van De Gebruikerspincode Verwijderen
12-cijferige pincode met gebruik van een speciaal teken 1 knippering 2 knipperingen 1 knippering 12-cijferige pincode ZONDER speciaal teken 1 knippering 2 knipperingen 9-cijferige pincode met gebruik van een speciaal teken 9 knipperingen 1 knippering 9-cijferige pincode ZONDER speciaal teken 9 knipperingen #196 www.istorage-uk.com... -
Page 197: Een Nieuwe Gebruikerspincode Toevoegen In De Beheerdersmodus
LED waarmee wordt aangeduid dat de nieuwe gebruikerspincode met succes werd geconfigureerd Opmerking: Om de beheerdersmodus onmiddellijk te verlaten (ononderbroken BLAUWE LED), houdt u de SHIFT ( )-knop een seconde ingedrukt - de ononderbroken BLAUWE LED schakelt over naar een ononderbroken RODE LED. #197 www.istorage-uk.com... -
Page 198: De Gebruikerspincode Veranderen In De Beheerdersmodus
LED om aan te duiden dat het gebruikerspincode met succes werd verwijderd. Opmerking: LED), houdt u de SHIFT ( )-knop Om de beheerdersmodus onmiddellijk te verlaten (ononderbroken BLAUWE een seconde ingedrukt - de ononderbroken BLAUWE LED schakelt over naar een ononderbroken RODE LED. #198 www.istorage-uk.com... -
Page 199: De Pincode Van De Gebruiker In De Gebruikersmodus Wijzigen
Belangrijk: Het veranderen van een gebruikerspincode in de gebruikersmodus (GROENE LED) moet voldoen aan het ‘gebruikerspincodebeleid’ als er een is geconfigureerd zoals beschreven in hoofdstuk 7, die een minimale pincodelengte oplegt en of een ‘speciaal teken’ is gebruikt. #199 www.istorage-uk.com... -
Page 200: Eenmalig Herstel Van Gebruikerspincode Aanmaken
Eenmalige herstelpincode met succes is verwijderd Opmerking: LED), houdt u de SHIFT ( )-knop Om de beheerdersmodus onmiddellijk te verlaten (ononderbroken BLAUWE een seconde ingedrukt - de ononderbroken BLAUWE LED schakelt over naar een ononderbroken RODE LED. #200 www.istorage-uk.com... -
Page 201: Herstelmodus Activeren En Nieuwe Gebruikerspincode Aanmaken
GROENE LED en dan naar een ononderbroken BLAUWE LED waarmee wordt 2. Druk eenmaal op de SLEUTEL ( )-knop aangeduid dat de drive werd geconfigureerd en het beperkt de toegang voor de gebruiker tot alleen-lezen #201 www.istorage-uk.com... -
Page 202: Gebruiker Lezen/Schrijven In De Beheerdersmodus Inschakelen
Opmerking: Om de beheerdersmodus onmiddellijk te verlaten (ononderbroken BLAUWE LED), houdt u de SHIFT ( )-knop een seconde ingedrukt - de ononderbroken BLAUWE LED schakelt over naar een ononderbroken RODE LED. #202 www.istorage-uk.com... -
Page 203: Globaal Lezen/Schrijven In De Beheerdersmodus Inschakelen
SLEUTEL ( )-knop de zelfvernietigingspincode met succes werd geconfigureerd Opmerking: Om de beheerdersmodus onmiddellijk te verlaten (ononderbroken BLAUWE LED), houdt u de SHIFT ( )-knop een seconde ingedrukt - de ononderbroken BLAUWE LED schakelt over naar een ononderbroken RODE LED. #203 www.istorage-uk.com... -
Page 204: Zelfvernietigingspincode Verwijderen
2. Voer de eenmalige zelfvernietigingspincode in en uit gaan en dan uiteindelijk een ononderbroken druk op de SLEUTEL ( )-knop GROENE LED worden, waarmee wordt aangeduid dat de diskAshur M zichzelf met succes heeft vernietigd #204 www.istorage-uk.com... -
Page 205: Beheerderspincode Configureren Of Opnieuw Instellen Na Een Brute Aanval
In de standaardstatus is de time-out functie van de diskAshur M onbeheerde automatische vergrendeling uitgeschakeld. De onbeheerde automatische vergrendeling kan worden ingesteld om te activeren tussen 5 - 99 minuten. #205 www.istorage-uk.com... -
Page 206: De Onbeheerde Automatische Vergrendeling Uitschakelen
Opmerking: Om de beheerdersmodus onmiddellijk te verlaten (ononderbroken BLAUWE LED), houdt u de SHIFT ( )-knop een seconde ingedrukt - de ononderbroken BLAUWE LED schakelt over naar een ononderbroken RODE LED. #206 www.istorage-uk.com... -
Page 207: De Onbeheerde Automatische Vergrendeling Controleren
1. In gebruikersmodus houdt u beide “7 + 6”-knoppen knipperende GROENE en ononderbroken BLAUWE ingedrukt. (7=Read + 6=Only) LED’s GROENE BLAUWE LED’s veranderen naar een ononderbroken GROENE LED waarmee 2. Druk op de SLEUTEL ( )-knop wordt aangeduid dat de drive als alleen-lezen is geconfigureerd #207 www.istorage-uk.com... -
Page 208: Lezen/Schrijven In Gebruikersmodus Inschakelen
• De herstelpincode, de beheerderspincode en alle data blijven intact en toegankelijk. • De herstelpincode is verwijderd. Herstelpincode • De beheerderspincode en alle data blijven intact en toegankelijk. • De diskAshur M zal resetten. Alle pincodes en data worden verwijderd en Beheerderspincode zijn voor altijd verloren. #208 www.istorage-uk.com... -
Page 209: Admin Pin Brute Force Hack Verdedigingsmechanisme
LED-lampje & BLAUW gaan aan en blijven afwisselend aan en uit knipperend, is de diskAshur M2 klaar om nog eens 3 branden. Admin PIN-codes te accepteren. Voer de volgende PIN-code ‘47867243’ in en druk eenmaal op de TOETS Alle LED-lampjes, ROOD, GROEN &... -
Page 210: De Gebruikerspincode Tegen Beperking Van Brute Aanvallen Controleren
5 achtereenvolgende foute pogingen tot invoeren van de pincode, zal de GROENE LED vijf keer (5) knipperen. Instelling voor beperking van brute aanvallen ROOD GROEN 2 pogingen 2 knipperingen 5 pogingen 5 knipperingen 10 pogingen 1 knippering #210 www.istorage-uk.com... -
Page 211: Een Volledige Reset Uitvoeren
Opmerking: Om de beheerdersmodus onmiddellijk te verlaten (ononderbroken BLAUWE LED), houdt u de SHIFT ( )-knop een seconde ingedrukt - de ononderbroken BLAUWE LED schakelt over naar een ononderbroken RODE LED. #211 www.istorage-uk.com... -
Page 212: De Diskashur M 2 Opstartfunctie Uitschakelen
& BLAUW) branden ononderbroken gedurende 1 seconde. d. LED’s worden terug ononderbroken BLAUW Opmerking: LED), houdt u de SHIFT ( )-knop Om de beheerdersmodus onmiddellijk te verlaten (ononderbroken BLAUWE een seconde ingedrukt - de ononderbroken BLAUWE LED schakelt over naar een ononderbroken RODE LED. #212 www.istorage-uk.com... -
Page 213: Initialiseren En Formatteren Van Diskashur M
Er verschijnt een berichtvenster zodat u kunt kiezen tussen MBR- en GPT-partitiestijl. GPT slaat meerdere duplicaten van deze gegevens op over de disk, waardoor hij veel robuuster is. Op een MBR-disk worden de partitionerings- en opstartinformatie opgeslagen in een enkele locatie. Selecteer de partitiestijl en klik op OK. #213 www.istorage-uk.com... - Page 214 Wijs een disk letter of pad toe en klik op Volgende. Maak een volume label aan, selecteer snelle formattering uitvoeren en klik dan op Volgende. Klik op Finish (Klaar). Wacht totdat het formatteringsproces volledig klaar is. De diskAshur M zal worden herkend en is klaar voor gebruik. #214 www.istorage-uk.com...
-
Page 215: Initialiseren En Formatteren Van Diskashur M
1. Selecteer diskAshur M van de lijst van drives en volumes. Elke drive in de lijst geeft de capaciteit, fabrikant en productnaam weer, zoals ‘iStorage diskAshur M Media’. 2. Klik op de ‘wissen’-knop onder Disk Utility (schijfhulpprogramma). - Page 216 We raden aan om ‘GUID Partition Map’ te gebruiken voor schijven die groter zijn dan 2 TB. 5. Klik op de ‘wissen’ -knop. Het schijfhulpprogramma ontkoppelt het volume van de desktop, wist het en plaatst het vervolgens opnieuw op de desktop. #216 www.istorage-uk.com...
-
Page 217: Initialiseren En Formatteren Van Diskashur M
2. Klik om de drive (500 GB harde schijf) te selecteren bij ‘Apparaten’. Klik vervolgens op het tandwielpictogram onder ‘Volumes’ en klik dan op ‘Partities formatteren’. 3. Selecteer ‘Compatibel met alle systemen en apparaten (FAT)’ voor de ‘Type’-optie. En voer een naam in voor de drive, bijv. diskAshur M . Klik dan op de ‘Format’-knop. #217 www.istorage-uk.com... - Page 218 4. Nadat het formatteerproces is voltooid, klikt u op de afspeelknop om de drive aan Ubuntu te koppelen. #218 www.istorage-uk.com...
- Page 219 5. De drive moet aan Ubuntu worden gekoppeld en is klaar voor gebruik. 6. De disk wordt weergegeven zoals te zien in de onderstaande afbeelding. U kunt op het disk-pictogram klikken om uw drive te openen. #219 www.istorage-uk.com...
-
Page 220: In Slaapstand Gaan, Opschorten Of Afmelden Bij Het Besturingssysteem
Als het firmwarerevisienummer bijvoorbeeld ‘2.3’ is, dan zal de RODE LED tweemaal (2) knipperen en de GROENE LED knippert drie (3) keer. Zodra de reeks is beëindigd, knipperen de RODE, GROENE & BLAUWE LED’s eenmaal tegelijkertijd en keren dan terug naar de beheerdersmodus, een ononderbroken GROENE LED. #220 www.istorage-uk.com... -
Page 221: Firmware Controleren In De Gebruikersmodus
Als het firmwarerevisienummer bijvoorbeeld ‘2.3’ is, dan zal de RODE LED tweemaal (2) knipperen en de GROENE LED knippert drie (3) keer. Zodra de reeks is beëindigd, knipperen de RODE, GROENE & BLAUWE LED’s eenmaal tegelijkertijd en keren dan terug naar de beheerdersmodus, een ononderbroken GROENE LED. #221 www.istorage-uk.com... -
Page 222: Technische Ondersteuning
(Citizens ‘Advice Bureau of Trading Standards Office). De garanties die in deze clausule worden uiteengezet, zijn alleen van toepassing op de oorspronkelijke koper van een product van iStorage of een door iStorage geautoriseerde wederverkoper of distributeur. Deze garanties zijn niet overdraagbaar. - Page 223 Copyright © iStorage Limited 2020. Alle rechten voorbehouden. iStorage Limited, iStorage House, 13 Alperton Lane Perivale, Middlesex. UB6 8DH, Engeland Tel: +44 (0) 20 8991 6260 | Fax: +44 (0) 20 8991 6277 e-mail: info@istorage-uk.com | website: www.istorage-uk.com #223 www.istorage-uk.com...
- Page 224 Si tiene dificultades para utilizar su diskAshur M , póngase en contacto con nuestro equipo de soporte en el correo electrónico support@istorage-uk.com o por teléfono al +44 (0) 20 8991 6260. #224 www.istorage-uk.com...
- Page 225 Copyright © iStorage Limited 2020. Todos los derechos reservados. Windows es una marca registrada de Microsoft Corporation. Todas las demás marcas comerciales y derechos de autor mencionados son propiedad de sus correspondientes dueños. Está prohibida la distribución de versiones modificadas de este documento sin el permiso expreso del titular de los derechos de autor.
- Page 226 43. Cómo verificar el firmware en modo administrador ........................257 44. Cómo verificar el firmware en modo usuario ..........................258 45. Asistencia técnica ................................... 259 46. Información de garantía y autorización de devolución de material (RMA) ..................259 #226 www.istorage-uk.com...
-
Page 227: Contenido De La Caja
AES-XTS de 256 bits. El diskAshur M2 incorpora un microprocesador seguro Common Criteria EAL 5+ (Certificado Hardware), que incorpora mecanismos de protección física diseñados para defenderse de manipulaciones externas, ataques bypass e inyecciones de fallos. - Page 228 2. Estados LED Nota: La función normal del diskAshur M2 puede ser perturbada por una fuerte interferencia electromagnética. Si esto ocurre, apague y luego encienda la unidad para reanudar el funcionamiento normal. Si el funcionamiento normal no se reanuda, utilice el dispositivo en un lugar diferente...
-
Page 229: Uso Por Primera Vez
• Para “Contraseña” presione los siguientes botones: 7 (pqrs) 2 (abc) 7 (pqrs) 7 (pqrs) 9 (wxyz) 6 (mno) 7 (pqrs) 3 (def) • Para “iStorage” presione los siguientes botones: 4 (ghi) 7 (pqrs) 8 (tuv) 6 (mno) 7 (pqrs) 2 (abc) 4 (ghi) 3 (def) Usando este método, largo y fácil de recordar, se pueden configurar los PIN. - Page 230 Para salir del modo administrador Para salir inmediatamente del modo administrador (LED AZUL fijo), mantenga presionado el botón SHIFT ( ) durante un segundo; el LED AZUL fijo cambia a un LED ROJO fijo. #230 www.istorage-uk.com...
- Page 231 • Para “Contraseña” presione los siguientes botones: 7 (pqrs) 2 (abc) 7 (pqrs) 7 (pqrs) 9 (wxyz) 6 (mno) 7 (pqrs) 3 (def) • Para “iStorage” presione los siguientes botones: 4 (ghi) 7 (pqrs) 8 (tuv) 6 (mno) 7 (pqrs) 2 (abc) 4 (ghi) 3 (def) Usando este método, largo y fácil de recordar, se pueden configurar los PIN.
- Page 232 PIN de usuario se ha establecido correctamente. Nota: fijo), mantenga presionado el botón SHIFT ( ) durante Para salir inmediatamente del modo administrador (LED AZUL un segundo; el LED AZUL fijo cambia a un LED ROJO fijo. #232 www.istorage-uk.com...
- Page 233 2 parpadeos 1 parpadeo PIN de 12 dígitos SIN usar carácter especial 1 parpadeo 2 parpadeos PIN de 9 dígitos usando un carácter especial 9 parpadeos 1 parpadeo PIN de 9 dígitos SIN usar caracteres especiales 9 parpadeos #233 www.istorage-uk.com...
- Page 234 LLAVE ( ) configurado correctamente un PIN de usuario nuevo Nota: Para salir inmediatamente del modo administrador (LED AZUL fijo), mantenga presionado el botón SHIFT ( ) durante un segundo; el LED AZUL fijo cambia a un LED ROJO fijo. #234 www.istorage-uk.com...
- Page 235 SHIFT ( ) + 3 PIN de usuario se ha eliminado correctamente Nota: Para salir inmediatamente del modo administrador (LED AZUL fijo), mantenga presionado el botón SHIFT ( ) durante un segundo; el LED AZUL fijo cambia a un LED ROJO fijo. #235 www.istorage-uk.com...
- Page 236 El cambio del PIN de usuario en modo usuario (LED VERDE) debe cumplir con la ‘política de PIN de usuario’ si se ha configurado una como se describe en la sección 7, que impone una longitud mínima de PIN y el uso de un ‘carácter especial’. #236 www.istorage-uk.com...
- Page 237 PIN único de recuperación de usuario se ha eliminado correctamente Nota: fijo), mantenga presionado el botón SHIFT ( ) durante Para salir inmediatamente del modo administrador (LED AZUL un segundo; el LED AZUL fijo cambia a un LED ROJO fijo. #237 www.istorage-uk.com...
- Page 238 AZUL cambiarán a un LED VERDE fijo y luego a un LED AZUL fijo que indica 2. Presione el botón LLAVE ( ) que la unidad se ha configurado y limita el acceso del usuario a solo lectura. #238 www.istorage-uk.com...
- Page 239 Nota: Para salir inmediatamente del modo administrador (LED AZUL fijo), mantenga presionado el botón SHIFT ( ) durante un segundo; el LED AZUL fijo cambia a un LED ROJO fijo. #239 www.istorage-uk.com...
- Page 240 LLAVE ( ) configurado correctamente Nota: Para salir inmediatamente del modo administrador (LED AZUL fijo), mantenga presionado el botón SHIFT ( ) durante un segundo; el LED AZUL fijo cambia a un LED ROJO fijo. #240 www.istorage-uk.com...
- Page 241 2. Introduzca el PIN de autodestrucción y presione el encendido y apagado durante unos segundos y finalmente cambiarán a un LED VERDE fijo que botón LLAVE ( ) indica que el diskAshur M se ha autodestruido correctamente #241 www.istorage-uk.com...
- Page 242 En su estado predeterminado, la función de tiempo de espera de bloqueo automático desatendido del diskAshur M está desactivada. El bloqueo automático desatendido se puede establecer para que se active entre 5 y 99 minutos. #242 www.istorage-uk.com...
- Page 243 Nota: Para salir inmediatamente del modo administrador (LED AZUL fijo), mantenga presionado el botón SHIFT ( ) durante un segundo; el LED AZUL fijo cambia a un LED ROJO fijo. #243 www.istorage-uk.com...
- Page 244 LED VERDE AZUL “7 + 6” (7=Lectura + 6=Solo) parpadeantes Los LED VERDE AZUL cambiarán a un LED VERDE fijo que indica que la unidad está 2. Presione el botón LLAVE ( ) configurada en solo lectura #244 www.istorage-uk.com...
- Page 245 PIN de recuperación • El PIN de administrador y todos los datos permanecen intactos y accesibles. PIN de • El diskAshur M se restablecerá. Todos los PIN y los datos se eliminan y se pierden para siempre. administrador #245 www.istorage-uk.com...
- Page 246 VERDE se encenderán y apagarán de manera alterna, y la encienden de manera diskAshur M2 estará lista para aceptar 3 intentos más de continua. introducir el PIN del administrador. Introduzca el PIN ‘47867243’ y pulse la LLAVE ( ) una vez; los LED...
- Page 247 5 introducciones de PIN incorrectas seguidas, el LED VERDE parpadeará cinco (5) veces. Ajuste de limitación de fuerza bruta ROJO VERDE 2 intentos 2 parpadeos 5 intentos 5 parpadeos 10 intentos 1 parpadeo #247 www.istorage-uk.com...
- Page 248 VERDE fijo y debe desenchufarse para la próxima vez que se use. El ajuste predeterminado del diskAshur M2 está configurado en no arranque. El diskAshur M está equipado con una función de arranque para acomodar el ciclo de energía durante un proceso de arranque del host.
- Page 249 AZUL) permanecen fijos durante 1 segundo. d. Los LED vuelven a AZUL fijo Nota: fijo), mantenga presionado el botón SHIFT ( ) durante Para salir inmediatamente del modo administrador (LED AZUL un segundo; el LED AZUL fijo cambia a un LED ROJO fijo. #249 www.istorage-uk.com...
-
Page 250: Para Windows
En un disco MBR, la información de partición y arranque se almacena en un solo lugar. Seleccione el estilo de partición y haga clic en Aceptar. #250 www.istorage-uk.com... - Page 251 Cree una etiqueta de volumen, seleccione Realizar un formateo rápido y luego haga clic en Siguiente. Haga clic en Finalizar. Espere hasta que haya finalizado el proceso de formateo. El diskAshur M será reconocido y estará disponible para su uso. #251 www.istorage-uk.com...
- Page 252 1. Seleccione diskAshur M de la lista de unidades y volúmenes. Cada unidad de la lista mostrará su capacidad, fabricante y nombre de producto, como, por ejemplo, ‘iStorage diskAshur M Media’. 2. Haga clic en el botón ‘Borrar’ en la utilidad de Disco.
- Page 253 El menú desplegable de formato de disposiciones enumera las disposiciones disponibles para usar. Recomendamos utilizar ‘Mapa de partición GUID’ en unidades de más de 2 TB. 5. Haga clic en el botón ‘Borrar’. La utilidad Disco desmontará el volumen del escritorio, lo borrará y luego lo volverá a montar en el escritorio. #253 www.istorage-uk.com...
- Page 254 ‘Volúmenes’ y en ‘Formatear particiones’. 3. Seleccione ‘Compatible con todos los sistemas y dispositivos (FAT)’ para la opción ‘Tipo’. E introduzca un nombre para la unidad, por ejemplo: diskAshur M . Luego, haga clic en el botón ‘Formatear’. #254 www.istorage-uk.com...
- Page 255 4. Una vez finalizado el proceso de formateo, haga clic en el botón Reproducir para montar la unidad en Ubuntu. #255 www.istorage-uk.com...
- Page 256 5. Ahora la unidad debería estar montada en Ubuntu y lista para usarse. 6. El disco se mostrará como se ve en la imagen a continuación. Puede hacer clic en el icono del disco para abrir su unidad. #256 www.istorage-uk.com...
- Page 257 (2) veces y el LED VERDE parpadeará tres (3) veces. Una vez que la secuencia ha terminado, los LED ROJO, VERDE AZUL parpadearán juntos una vez y luego regresarán al modo administrador, un LED AZUL fijo. #257 www.istorage-uk.com...
- Page 258 (2) veces y el LED VERDE parpadeará tres (3) veces. Una vez que la secuencia haya terminado, los LED ROJO, VERDE AZUL parpadearán juntos una vez y luego regresarán al modo usuario, un LED VERDE fijo. #258 www.istorage-uk.com...
-
Page 259: Asistencia Técnica
DESCARGO DE RESPONSABILIDAD Y GARANTÍA DEL PRODUCTO DE ISTORAGE iStorage garantiza que en el momento de la entrega y durante un período de 36 meses a partir de la misma, sus productos carecerán de defectos materiales. Sin embargo, esta garantía no se aplica en las circunstancias que se describen a continuación. iStorage garantiza que los productos cumplen con los estándares enumerados en la ficha técnica correspondiente en nuestro sitio web en el momento en que realiza su pedido. - Page 260 Copyright © iStorage Limited 2020. Todos los derechos reservados. iStorage Limited, iStorage House, 13 Alperton Lane Perivale, Middlesex. UB6 8DH, Inglaterra Tel: +44 (0) 20 8991 6260 | Fax: +44 (0) 20 8991 6277 correo electrónico: info@istorage-uk.com | web: www.istorage-uk.com...