Table des Matières
Publicité
Les langues disponibles
Les langues disponibles
Liens rapides
Publicité
Table des Matières

Manuels Connexes pour Samson SYNTH SEVEN


Sommaire des Matières pour Samson SYNTH SEVEN
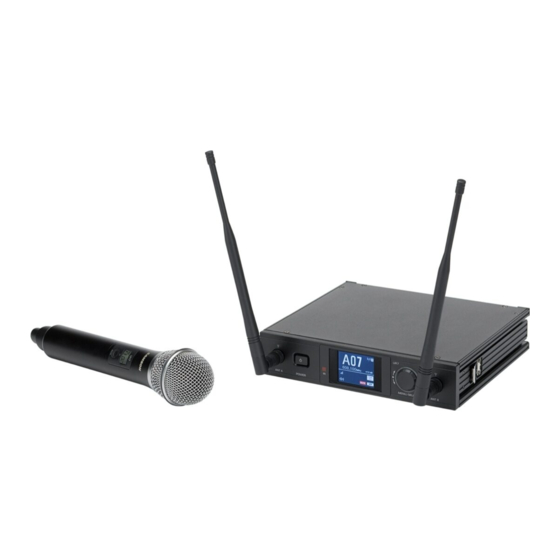
- Page 1 Professional UHF Wireless System OWNER'S MANUAL...
- Page 2 For more information, call the FCC at 1-888-CALL-FCC (TTY: 1-888-TELL-FCC) or visit the FCC’s wireless microphone website at www.fcc.gov/cgb/wirelessmicrophones. Copyright 2015, Samson Technologies Corp. Samson Technologies 45 Gilpin Avenue...
-
Page 3: Important Safety Information
Important Safety Information 1. Read these instructions. 2. Keep these instructions. 3. Heed all warnings. 4. Follow all instructions. 5. Do not use this apparatus near water. 6. Clean only with dry cloth. 7. Do not block any ventilation openings. Install in accordance with the manufacturer’s instructions. 8. - Page 4 Important Safety Information FCC and Industry Canada Rules and Regulations Samson wireless receivers are certified under FCC Rules part 15 and transmitters are certified under FCC Rules part 74. Licensing of Samson equipment is the user’s responsibility and licensability depends on the user’s classification, application and frequency selected.
- Page 5 Should your wireless system ever require servicing, a Return Authorization (RA) number must be obtained before shipping your unit to Samson. Without this number, the unit will not be accepted. Please call Samson at 1-800-3SAMSON (1-800-372-6766) for an RA number prior to shipping your unit. Please retain the original packing materials and, if possible, return the unit in its original carton.
-
Page 6: Quick Start
Quick Start In order for your wireless system to work correctly, both the receiver and transmitter must be set to the same channel. Set up the receiver: Physically place the UR7 receiver where it will be used. The general rule of thumb is to maintain “line of sight” between the receiver and transmitter so that the person using or wearing the transmitter can see the receiver. - Page 7 Quick Start Multiple System Setup Press and hold the power button to turn on the UR7 receiver. Press the Menu/Select button to enter the Main Menu. Rotate the Menu/Select encoder to highlight GROUP & CHANNEL and press the MENU/SELECT button to enter the menu. Set each receiver to the same Group.
- Page 8 UR7 Receiver Callouts 1. Antennas Jacks - The BNC antenna jacks allow full rotation for optimum placement. In normal operation, both antennas should be placed in a vertical position. 2. POWER Switch - Press and hold this to power the receiver on or off. A quick press of the button will move back through the menus.
- Page 9 UB7 Callouts 1. Input Connector - Connect the input device via the mini-XLR connector. 2. Power/Mute Switch - Press and hold to turn the unit on or off. Press and release to mute or unmute the transmitter. 3. Antenna - Permanently attached transmitter antenna. 4.
- Page 10 UH7 Callouts 1. LCD Display - Displays the current group,channel and battery level information. 2. Power/Mute Switch - Press and hold to turn the unit on or off. Press and release to mute or un-mute the transmitter. 3. UNLOCK/LOCK Switch - Locking the system controls prevents accidental muting or channel adjustment during performance.
- Page 11 UR7 Operating Menu The UR7 receiver features a user friendly operating menu, with extensive features and adjustable parameters. This enables the receiver and transmitter to be quickly and easily set up for performance. Controls POWER Button Press and hold switches the receiver on and off Short press cancels an entry and returns to the current menu Short press moves back through the menus.
-
Page 12: Menu Parameters
Menu Parameters Group & Channel Group Manually adjusts the operating Group Group & Channel Channel Manually adjusts the channel with the selected Group Group Channel Scans the current selected group channels and selects the cleanest Group Scan Group Scan signal to use for optimal performance IR Set Sends the group and channel information to the UH7 and UB7 IR Set... - Page 13 Group & Channel Menu Group & Channel Group & Channel Group & Channel Group & Channel Group Group Group Group Channel Channel Channel Channel Group Scan Group Scan Group Scan Group Scan IR Set IR Set IR Set IR Set Back Back Back...
- Page 14 Frequency Select Menu Frequency Select Frequency Select 518.000 546.850 Scan Spectrum Scan Spectrum IR Set IR Set Back Back From the main performance page, press the MENU/SELECT Button to enter the Main Menu. With FREQUENCY SETUP highlighted, press the MENU/SELECT button to enter the FREQUENCY SETUP sub- menu.
-
Page 15: Audio Setup
Audio Setup Audio Setup Audio Setup Audio Level Audio Level Back Back From the main performance page, press the MENU/SELECT Button to enter the Main Menu. With AUDIO SETUP highlighted, press the MENU/SELECT button to enter the AUDIO SETUP sub-menu. Setting the Audio Level Rotate the cursor to select the AUDIO LEVEL parameter. - Page 16 Advanced Setup Advanced Setup Advanced Setup Squelch Squelch Tone Key Tone Key Contrast Contrast Lock Lock Back Back The Tone Key is an inaudible fre- quency that is transmitted along Enabling the Tone Key with the audio signal. It assists in Rotate the cursor to select the TONE KEY parameter.
-
Page 17: Rack Mounting
Rack Mounting The UR7 receiver can be installed into a standard 19” rack for transport or permanent installation using the included rack ears. Affix the included rack ears to each side of the UR7 receiver. Secure the rack ears in place using the screws provided. - Page 18 629.475 629.550 629.675 630.200 630.250 630.450 630.475 630.550 632.700 632.900 632.925 633.000 633.125 633.650 633.700 633.900 633.925 634.000 * Not for use in the USA and Canada. For questions regarding available channels in your area contact your local Samson distributor.
- Page 19 Image Rejection >50 dB Operating Voltage: Dimensions (LxWxH) 8.5” x 1.8” x 7.4” / 215mm x 45mm x 189mm Weight: 3.1lb / 1.4kg At Samson, we are continually improving our products, therefore specifications and images are subject to change without notice.
- Page 20 Alerte de la FCC sur les micros sans fil adressée aux consommateurs La plupart des utilisateurs n'ont pas besoin d'autorisation pour faire fonctionner ce système de micros sans fil. Néanmoins, l'utilisation de ce système de micros sans fil est soumise à certaines restrictions : le système peut provoquer des interférences nocives ;...
-
Page 21: Consignes De Sécurité Importantes
Consignes de sécurité importantes 1. Lire la présente notice. 2. Conserver la présente notice. 3. Respecter toutes les mises en garde. 4. Suivre les consignes. 5. Ne pas utiliser cet appareil près de l'eau. 6. Ne nettoyer qu'avec un chiffon sec. 7. - Page 22 La FCC et les Règles et Réglementation Professionnels du Automéfac Canada Les récepteurs sans fil Samson sont certifiés aux termes des Règles de la FCC partie 15 et les émetteurs- récepteurs sont certifiés aux termes des Règles de la FCC partie 74.
-
Page 23: Fonctionnalités
Introduction Félicitations ! Vous venez de vous procurer le système sans fil Samson Synth 7. Le Synth 7 est la solution idéale pour le chanteur actif qui recherche un système de sonorisation génial et fiable destiné aux applications sans fil. -
Page 24: Prise En Mains Rapide
Prise en mains rapide Pour que votre système sans fil fonctionne correctement, le récepteur comme l'émetteur doivent être réglés à la même fréquence. Installation du récepteur : Disposer physiquement le récepteur UR7 là où on s'en servira. La règle empirique générale consiste à assurer la "visibilité... - Page 25 Prise en mains rapide Configuration d'un Système Multiple Appuyer sur le bouton Marche/Arrêt et le maintenir enfoncé pour allumer le récepteur UR7. Appuyer sur le bouton Menu/Select pour entrer dans le Menu Principal. Tourner le codeur Menu/Select pour choisir GROUP & CHANNEL (Groupe & Canal), puis appuyer sur le bouton MENU/SELECT pour entrer dans le menu. Paramétrer chaque récepteur pour le même Groupe.
-
Page 26: Appels Du Récepteur Ur7
Appels du récepteur UR7 1. Jacks d'antennes - Les jacks d'antennes BNC permettent le pivotement intégral pour un positionnement optimum. En fonctionnement normal, les deux antennes devront être positionnées à la verticale. 2. Bouton Marche/Arrêt (POWER) - Appuyer et maintenir enfoncé pour allumer ou éteindre le récepteur. En appuyant rapidement, on reviendra en arrière dans les menus. -
Page 27: Appels Sur Ub7
Appels sur UB7 1. Connecteur d'entrée - Brancher le dispositif d'entrée via le connecteur mini-XLR. 2. Bouton Marche/Arrêt / Coupure - Appuyer et maintenir enfoncé pour allumer ou éteindre l'appareil. Appuyer et relâcher pour couper ou réenclencher l'émetteur. 3. Antenne - Antenne de l'émetteur fixée en permanence. -
Page 28: Appels Sur Uh7
Appels sur UH7 1. Afficheur LCD - Affiche les informations concernant le groupe actuel, le canal et le niveau des piles. 2. Bouton Marche/Arrêt / Coupure - Appuyer et maintenir enfoncé pour allumer ou éteindre l'appareil. Appuyer et relâcher pour couper le son de l'émetteur ou le rétablir. -
Page 29: Menu D'utilisation De L'ur7
Menu d'utilisation de l'UR7 Le récepteur de l'UR7 présente un menu convivial comportant des fonctionnalités étendues et des paramètres réglables. Ceci permet de configurer rapidement le récepteur et l'émetteur pour le spectacle. Commandes Bouton POWER (Marche/Arrêt) Appuyer dessus et le maintenir enfoncé allumera et éteindra le récepteur. -
Page 30: Paramètres Des Menus
Paramètres des menus Group & Channel (Groupe & Canal) Group (Groupe) Règle manuellement le Groupe en fonctionnement Group & Channel Channel (Canal) Règle manuellement le canal ainsi que le Groupe sélectionné. Group Group Scan Channel Parcourt les canaux du groupe actuel sélectionné et sélectionne le Group Scan (Parcourir le signal le plus net à... - Page 31 Menu Groupe & Canal Group & Channel Group & Channel Group & Channel Group & Channel Group Group Group Group Channel Channel Channel Channel Group Scan Group Scan Group Scan Group Scan IR Set IR Set IR Set IR Set Back Back Back...
-
Page 32: Menu Frequency Select (Sélection De Fréquence)
Menu Frequency Select (Sélection de Fréquence) Frequency Select Frequency Select 518.000 546.850 Scan Spectrum Scan Spectrum IR Set IR Set Back Back Sur la page principale des performances, appuyer sur le bouton MENU/SELECT pour accéder au Menu Principal. Le curseur étant placé sur FREQUENCY SETUP (CONFIG. FREQUENCE), appuyer sur le bouton MENU/SELECT pour ouvrir le sous-menu FREQUENCY SETUP. - Page 33 Audio Setup (Config. Audio) Audio Setup Audio Setup Audio Level Audio Level Back Back Sur la page principale des performances, appuyer sur le bouton MENU/SELECT pour accéder au Menu Principal. Le curseur étant placé sur AUDIO SETUP (CONFIG. AUDIO), appuyer sur le bouton MENU/SELECT pour ouvrir le sous-menu AUDIO SETUP.
- Page 34 Advanced Setup (Config. Avancée) Advanced Setup Advanced Setup Squelch Squelch Tone Key Tone Key Contrast Contrast Lock Lock Back Back Le Calage du Timbre ou Tone Key est une fréquence inaudible émise en même temps que le signal audio. Il aide à Activer la Manipulation du Timbre réduire les interférences audio provenant Déplacer le curseur pour sélectionner le paramètre TONE KEY (Manipulation du...
-
Page 35: Montage Sur Rack
Montage sur rack Le récepteur UR7 peut être installé à l'intérieur d'un rack standard de 19" en vue du transport ou d'une installation permanente en se servant des pattes du rack. Disposer les pattes du rack de chaque côté du récepteur UR7. -
Page 36: Plans De Fréquences
630,200 630,250 630,450 630,475 630,550 632,700 632,900 632,925 633,000 633,125 633,650 633,700 633,900 633,925 634,000 * Non utilisable aux Etats-Unis ni au Canada. Pour toutes questions sur les canaux disponibles dans votre secteur, contactez le revendeur Samson le plus proche. -
Page 37: Caractéristiques Techniques
Tension de fonctionnement : 15 V Dimensions 8,5” x 1,8” x 7,4” - 215 x 45 x 189 mm Poids : 3,1 lb / 1,4 kg Chez Samson, nous améliorons nos produits en permanence ; certaines images et caractéristiques techniques sont donc susceptibles d'évoluer sans préavis. - Page 38 FCC Warnung von Verbrauchern hinsichtlich Funkmikrofone Die meisten Benutzer benötigen keine Lizenz, um dieses drahtlose Mikrofonsystem zu betreiben. Dennoch unterliegt der Betrieb dieses Mikrofonsystem ohne Lizenz bestimmten Einschränkungen: Das System darf keine schädlichen Störungen verursachen; es muss bei einer niedrigen Leistungsstufe betrieben werden (nicht mehr als 50 Milliwatt);...
-
Page 39: Wichtige Sicherheitsinformationen
Wichtige Sicherheitsinformationen 1. Lesen Sie diese Anweisungen. 2. Bewahren Sie diese Anweisungen auf. 3. Beachten Sie alle Warnungen. 4. Folgen Sie allen Anweisungen. 5. Benutzen Sie das Gerät nicht in der Nähe von Wasser. 6. Reinigen Sie es nur mit einem trockenen Tuch. 7. - Page 40 Wichtige Sicherheitsinformationen FCC und Industry Canada Regelungen und Verordnungen Samson Funkempfänger werden nach FCC, Teil 15 zertifiziert und die Sender sind nach FCC Teil 74 zertifiziert. Die Lizenzierung von Samson Ausrüstung liegt in der Verantwortung des Benutzers. Die Erteilung einer Lizenz hängt von der Klassifizierung des Benutzers, der Anwendung und der gewählten Frequenz ab.
- Page 41 Einführung Herzlichen Glückwunsch für den Kauf des kabellosen Samson Synth 7 Systems! Das Synth 7 ist die ideale Lö- sung für den aktiven Performer, der ein zuverlässiges, gut klingendes System für drahtlose Anwendungen benö- tigt. Das Synth 7 System verfügt über Vollmetall- Komponenten mit leicht ablesbaren Displays und erweiterte Menü- funktionen für einen nahtlosen Betrieb.
- Page 42 Kurze Betriebsanleitung Damit Ihr Wireless System einwandfrei funktioniert, müssen sowohl Sender und als auch Empfänger auf den gleichen Kanal eingestellt werden. Einstellen des Empfängers: Platzieren Sie den UR7 Empfänger dort, wo er verwendet wird. Allgemeine Daumenregel ist dabei, die “Sichtverbindung” zwischen dem Empfänger und dem / den Sender(n) zu halten, so dass die Person / Personen, die Sender nutzen, den Empfänger sehen können.
- Page 43 Kurze Betriebsanleitung Setup eines mehrfachen Systems Betätigen und halten Sie den Netzschalter, um den UR7 Receiver einzuschalten. Betätigen Sie die Menu / Select Taste, um in das Hauptmenü zu gelangen. Drehen Sie den Menu / Select Regler so, dass GROUP & CHANNEL gewählt ist, und betätigen Sie dann die MENU / SELECT Taste. Stellen Sie jeden Empfänger auf die gleiche Gruppe ein.
- Page 44 UR7 Receiver Angaben 1. Antennenstecker - Der BNC Antennenstecker ermöglicht eine volle Umdrehung für eine optimale Stellung. Bei normalem Betrieb sollen sich beide Antennen in vertikaler Position befinden. 2. POWER Schalter - Betätigen und halten Sie ihn, um den Empfänger ein- oder auszuschalten. Ein kurzes Betätigen der Taste wird Sie zurück durch die Menüs führen.
- Page 45 UB7 Angaben 1. Anschluss Eingang - Schließen Sie das Eingabegerät über den Mini-XLR Anschluss an. 2. Power/Mute Schalter - Betätigen Sie ihn, um das Gerät ein- oder auszuschalten. Drücken Sie die Mute Taste und lassen Sie sie los, um den Sender stummzuschalten oder wieder zu aktivieren.
- Page 46 UH7 Angaben 1. LCD Display - Zeigt die aktuelle Gruppe, den Kanal und den Batteriestand an. 2. Power/Mute Schalter - Betätigen und halten Sie ihn, um das Gerät ein- oder auszuschalten. Drücken Sie die Mute Taste und lassen Sie sie los, um den Sen- der stummzuschalten oder wieder zu aktivieren.
- Page 47 UR7 Bedienmenü Die UR7 Empfänger besitzt ein benutzerfreundliches Bedienmenü mit umfangreichen Funktionen und einstell- baren Parametern. Dies ermöglicht es dem Empfänger und Sender, schnell und einfach für die Performance eingestellt zu werden. Steuerungen POWER Taste Betätigen und halten Sie sie, um den Empfänger ein- und auszuschalten Kurz Betätigen löscht einen Eintrag und kehrt zum aktuellen Menü...
-
Page 48: Menüparameter
Menüparameter Group & Channel Group / Gruppe Stellt manuell die Betriebsgruppe ein Group & Channel Channel / Kanal Stellt manuell den Kanal der ausgewählten Gruppe ein Group Group Scan / Channel Scannt die Kanäle der aktuell ausgewählten Gruppe und wählt das Group Scan Gruppen- Scan sauberste Signal für eine optimale Performance... - Page 49 Group & Channel / Gruppe & Kanal Menü Group & Channel Group & Channel Group & Channel Group & Channel Group Group Group Group Channel Channel Channel Channel Group Scan Group Scan Group Scan Group Scan IR Set IR Set IR Set IR Set Back...
- Page 50 Menü Frequenzauswahl Frequency Select Frequency Select 518.000 546.850 Scan Spectrum Scan Spectrum IR Set IR Set Back Back Betätigen Sie in der Haupt-Performance- Seite die MENU / SELECT, um in das Hauptmenü zu gelangen. Wählen Sie FREQUENCY SETUP, betätigen Sie die MENU / SELECT Taste, um in das FREQUENCY SETUP Untermenü...
- Page 51 Audio Setup Audio Setup Audio Setup Audio Level Audio Level Back Back Betätigen Sie in der Haupt-Performance- Seite die MENU / SELECT, um in das Hauptmenü zu gelangen. Wählen Sie AUDIO SETUP, betätigen Sie die MENU / SELECT Taste, um in das AUDIO SETUP Untermenü zu gelangen. Einstellen des Audio Pegels Drehen Sie den Cursor auf den Parameter AUDIO LEVEL.
- Page 52 Erweitertes Setup Advanced Setup Advanced Setup Squelch Squelch Tone Key Tone Key Contrast Contrast Lock Lock Back Back Die Tontaste ist eine unhörbare Frequenz, die zusammen mit dem Audiosignal übertragen wird. Sie Aktivieren der Tontaste. hilft bei der Verringerung der Audio- Interferenz durch andere Funk- Drehen Sie den Cursor auf den Parameter TONE KEY.
-
Page 53: Rack Montage
Rack Montage Der UR7 Empfänger kann in einen Standard 19” Rack für den Transport oder die permanente Installation mon- tiert werden. Benutzen Sie dazu die enthaltenen Rack Laschen. Befestigen Sie die mitgelieferten Rackwin- kel auf jeder Seite des UR7 Empfängers. Sichern Sie mit den mitgelieferten Schrau- ben die Rackwinkel. - Page 54 630,250 630,450 630,475 630,550 632,700 632,900 632,925 633,000 633,125 633,650 633,700 633,900 633,925 634,000 * Nicht für die Verwendung in den USA und Kanada. Wenden Sie sich bei Fragen zu verfügbaren Kanälen in Ihrer Region an Ihren lokalen Samson Händler.
- Page 55 -100 dBm / 30 dB sinad Spiegelfrequenz >50 dB Betriebsspannung: Dimensionen (LxBxH) 8,5” x 1,8” x 7,4” / 215mm x 45mm x 189mm Gewicht: 3,1lb / 1,4kg Wir bei Samson verbessern ständig unsere Produkte. Daher können Spezifikationen und Bilder ohne vorherige Ankündigung geändert werden.
- Page 56 Advertencia al Usuario de la FCC para los Micrófonos Inalámbricos La mayoría de los usuarios no necesitan una licencia para utilizar este sistema de micrófono inalámbrico. No obstante, el uso de este sistema de micrófono inalámbrico sin una licencia está sujeto a determinadas restricciones: el sistema no puede producir interferencias molestas;...
-
Page 57: Información De Seguridad Importante
Información de Seguridad Importante 1. Lea cuidadosamente estas instrucciones. 2. Conserve estas instrucciones para cualquier consulta en el futuro. 3. Siga cuidadosamente todas las advertencias. 4. Observe y siga todas las instrucciones del fabricante. 5. No utilice este aparato cerca del agua. 6. - Page 58 Normas y Regulaciones de la FCC e Industry Canada Los receptores inalámbricos de Samson están certificados de acuerdo con el apartado 15 de las Normas de la FCC y los transmisores están certificados de acuerdo con el apartado 74 de las Normas de la FCC.
-
Page 59: Características
Introducción Le felicitamos por haber adquirido el sistema inalámbrico Synth 7 de Samson. El Synth 7 es la solución ideal para el intérprete activo que necesite un sistema fiable y que ofrezca un sonido extraordinario para aplicaciones inalámbricas. El sistema Synth 7 ofrece al usuario un robusto diseño de sus componentes totalmente en metal, visualizaciones de fácil lectura y funciones avanzadas para un funcionamiento impecable. - Page 60 Inicio Rápido Para que su sistema inalámbrico funcione correctamente, el receptor y el transmisor deben estar ajustados en el mismo canal. Configuración del receptor: Coloque físicamente el receptor UR7 en el lugar en el que vaya a utilizarse. La regla general es que se debe intentar mantener la “línea de visión”...
- Page 61 Inicio Rápido Configuración de Sistema Múltiple Pulse y mantenga pulsado el botón de encendido para encender el receptor UR7. Pulse el botón Menú/Seleccionar para introducir el Menú Principal. Gire el codificador de Menú/Seleccionar para resaltar GRUPO Y CANAL y pulse el botón MENÚ/SELECCIONAR para introducir el menú. Ajuste cada receptor en el mismo Grupo.
- Page 62 Elementos del Receptor UR7 1. Conectores de las Antenas - Los conectores de las antenas permiten la rotación completa de las mismas para un posicionamiento óptimo. Durante el funcionamiento normal de la unidad, las dos antenas deben colocarse en posición vertical. 2.
- Page 63 Elementos del UB7 1. Conector de Entrada - Conecte el dispositivo de entrada a través del conector mini XLR. 2. Interruptor de Alimentación/Silenciador - Pulse y mantenga pulsado este botón para encender y apagar la unidad. Púlselo brevemente para activar o desactivar el modo de silencio del transmisor.
- Page 64 Elementos del UH7 1. Pantalla LCD - Esta pantalla muestra información actual sobre el grupo, el canal y el nivel de las pilas. 2. Interruptor de Alimentación/Silenciador - Pulse y man- tenga pulsado este botón para encender y apagar la unidad.
- Page 65 Menú Operativo del UR7 El receptor UR7 tiene un menú operativo cómodo y práctico para el usuario, con amplias funciones y paráme- tros ajustables. Gracias a estas características, el receptor y el transmisor pueden configurarse rápida y fácil- mente para el uso. Controles Si se pulsa y mantiene pulsado este botón, el Botón de ALIMENTACIÓN...
-
Page 66: Menú De Parámetros
Menú de Parámetros Grupo y Canal Grupo Ajusta manualmente el Grupo operativo. Group & Channel Canal Ajusta manualmente el canal con el Grupo seleccionado. Group Channel Escanea los canales del grupo seleccionado en ese momento y Group Scan Escanear Grupo selecciona la señal más limpia a utilizar con el fin de obtener un IR Set rendimiento óptimo. - Page 67 Menú de Grupo y Canal Group & Channel Group & Channel Group & Channel Group & Channel Group Group Group Group Channel Channel Channel Channel Group Scan Group Scan Group Scan Group Scan IR Set IR Set IR Set IR Set Back Back Back...
- Page 68 Selección de Frecuencia Frequency Select Frequency Select 518.000 546.850 Scan Spectrum Scan Spectrum IR Set IR Set Back Back En la página de funcionamiento principal, pulse el botón MENÚ/SELECCIONAR para introducir el Menú Principal. Con CONFIGURACIÓN DE FRECUENCIA resaltada, pulse el botón MENÚ/SELECCIONAR para introducir el sub- menú...
-
Page 69: Configuración De Audio
Configuración de Audio Audio Setup Audio Setup Audio Level Audio Level Back Back En la página de funcionamiento principal, pulse el botón MENÚ/SELECCIONAR para introducir el Menú Principal. Con CONFIGURACIÓN DE AUDIO resaltada, pulse el botón MENÚ/SELECCIONAR para introducir el sub-menú de CONFIGURACIÓN DE AUDIO. - Page 70 Configuración Avanzada Advanced Setup Advanced Setup Squelch Squelch Tone Key Tone Key Contrast Contrast Lock Lock Back Back La Clave de Tono es una frecuencia inaudible que se Activación de la Clave de Tono transmite junto con la señal de audio. Ayuda a reducir las Gire el cursor para seleccionar el parámetro TECLA DE TONO.
-
Page 71: Montaje En Rack
Montaje en Rack El receptor UR7 puede instalarse en un rack de 19 pulgadas estándar para el transporte o la instalación permanente utilizando las orejetas de rack incluidas. Fije las orejetas de rack incluidas en cada uno de los lados del receptor UR7. Fije firmemente las orejetas en su lugar utilizando los tornillos incluidos. -
Page 72: Planes De Canales
632,925 633,000 633,125 633,650 633,700 633,900 633,925 634,000 * No para el uso en Estados Unidos y Canadá. Para cualquier pregunta en lo relativo a los canales disponibles en su área, póngase en contacto con su distribuidor de Samson local. - Page 73 215 mm x 45 mm x 189 mm (8,5" x 1,8" x 7,4") Peso: 1,4 kg / 3,1 libras En Samson mejoramos continuamente nuestros productos y debido a ello las especificaciones y las imágenes pueden ser objeto de cambios sin previo aviso.
- Page 74 Avviso Consumatori della FCC per i microfoni Wireless La maggior parte degli utenti non necessita di licenza per usare questo sistema microfonico wireless. Tuttavia, l’uso di questo sistema microfonico senza una licenza è soggetto a certe restrizioni: il sistema non può causare interferenze dannose;...
-
Page 75: Informazioni Di Sicurezza Importanti
Informazioni di sicurezza importanti 1. Leggere queste istruzioni. 2. Conservare queste istruzioni. 3. Osservare tutte le avvertenze. 4. Seguire tutte le istruzioni. 5. Non usare questo apparecchio in prossimità di acqua. 6. Pulire solo con panno asciutto. 7. Non bloccare alcuna apertura di ventilazione. Installare secondo le istruzioni del fabbricante. 8. - Page 76 Regole e normative FCC e Industry Canada I ricevitori wireless Samson sono certificati sotto le FCC Rules part 15 e i trasmettitori sotto le FCC Rules part 74. L’ottenimento di licenza dell’apparecchiatura Samson è responsabilità dell’utente e la possibilità di concessione dipende dalla classificazione dell’utente, dell’applicazione e dalla frequenza selezionata.
- Page 77 Introduzione Congratulazioni per l’acquisto del sistema wireless Samson Synth 7. Il Synth 7 è la soluzione ideale per l’esecutore attivo che necessita di un sistema affidabile, dalle ottime prestazioni audio, per applicazioni wireless. Il sistema Synth 7 è dotato di elementi completamente metallici, con display di facile lettura e funzioni menù...
-
Page 78: Avvio Rapido
Avvio rapido Perché il sistema wireless possa funzionare correttamente, sia il ricevitore che il trasmettitore devono essere sullo stesso canale. Configurazione del ricevitore: Collocare fisicamente il ricevitore UR7 dove verrà usato. La regola pratica generale è mantenere la “linea di vista” tra il ricevitore e il trasmettitore, in modo che la persona che usa o indossa il trasmettitore possa vedere il ricevitore. - Page 79 Avvio rapido Setup di sistema multiplo Premere e mantenere premuto il pulsante power per accendere il ricevitore UR7. Premere il tasto MENU/SELECT per entrare nel Menù Principale. Far ruotare l’encoder Menu/Select per evidenziare GROUP & CHANNEL e premere il tasto MENU/SELECT per entrare nel menù. Impostare ciascun ricevitore allo stesso Gruppo.
- Page 80 Legenda Ricevitore UR7 1. Jack antenne - I jack antenna BNC consentono una completa rotazione per un posizionamento ottimale. In funzionamento normale, entrambe le antenne devono essere collocate in posizione verticale. 2. Interruttore Power - Premere e mantenere premuto per accendere o spegnere il ricevitore. Una rapida pressione del pulsante farà...
- Page 81 Legenda UB7 1. Connettore di Input - Connettere il dispositivo di input tramite il connettore mini-XLR. 2. Interruttore Power/Mute - Premere e mantenere premuto per accendere o spegnere l’unità. Premere e rilasciare per silenziare o ripristinare l’audio del trasmettitore (mute/unmute) 3.
- Page 82 Legenda UH7 1. Display LCD - Visualizza attuale gruppo, canale e informazioni livello batteria. 2. Interruttore Power/Mute - Premere e mantenere premuto per accendere o spegnere l’unità. Premere e rilasciare per silenziare o ripristinare l’audio del trasmettitore (mute/unmute) 3. Interruttore UNLOCK/LOCK (sblocco/blocco) - Il blocco dei controlli di sistema impedisce un muting accidentale o una regolazione di canale durante la performance.
- Page 83 Menù di funzionamento UR7 Il ricevitore UR7 dispone di un menù di funzionamento user friendly, con molteplici funzioni e parametri regolabili. Ciò consente al ricevitore e al trasmettitore di essere rapidamente e facilmente impostato. Controlli Tasto POWER Premere e mantenere premuti gli interruttori per accendere e spegnere il ricevitore Una breve pressione cancella un’immissione e fa ritornare al menù...
- Page 84 Parametri menù Gruppo e Canale Gruppo Regola manualmente il Gruppo operativo Group & Channel Canale Regolare manualmente il canale con il Gruppo selezionato Group Scansione Channel Scansiona i canali gruppo correntemente selezionati e seleziona il Group Scan Gruppo segnale più pulito per usare la performance ottimale IR Set Invia le informazioni di gruppo e canale ai trasmettitori UH7 e UB7 IR Set...
- Page 85 Menù Gruppo e Canale Group & Channel Group & Channel Group & Channel Group & Channel Group Group Group Group Channel Channel Channel Channel Group Scan Group Scan Group Scan Group Scan IR Set IR Set IR Set IR Set Back Back Back...
- Page 86 Menù Selezione Frequenza Frequency Select Frequency Select 518.000 546.850 Scan Spectrum Scan Spectrum IR Set IR Set Back Back Dalla pagina di performance principale, premere il pulsante MENU/SELECT per entrare nel Menù Principale. Con FREQUENCY SETUP evidenziato, premere il pulsante MENU/SELECT per entrare nel sottomenù FREQUENCY SETUP.
-
Page 87: Configurazione Avanzata
Configurazione audio Audio Setup Audio Setup Audio Level Audio Level Back Back Dalla pagina di performance principale, premere il pulsante MENU/SELECT per entrare nel Menù Principale. Con AUDIO SETUP evidenziato, premere il pulsante MENU/SELECT per entrare nel sottomenù AUDIO SETUP. Impostazione di Livello Audio Ruotare il cursore per selezionare il parametro AUDIO LEVEL. - Page 88 Setup avanzato Advanced Setup Advanced Setup Squelch Squelch Tone Key Tone Key Contrast Contrast Lock Lock Back Back Il Tone Key è una frequenza non udibile che viene trasmessa insieme Abilitazione del Tone Key al segnale audio. Assiste nella Ruotare il cursore per selezionare il parametro TONE KEY. Premere il tasto riduzione dell’interferenza audio MENU/SELECT per regolare l’impostazione.
-
Page 89: Montaggio Su Rack
Montaggio su rack Il ricevitore UR7 può essere installato in un rack standard da 19” per il trasporto o l’installazione permanente usando le orecchie rack incluse. Attaccare le orecchie rack incluse a ciascun lato del ricevitore UR7. Assicurare le orecchie rack in posto usando le viti fornite. Posizionare il ricevitore UR7 in uno spazio rack disponibile, e farlo scorrere fono a che le orecchie del rack toccano le guide della... - Page 90 629.675 630.200 630.250 630.450 630.475 630.550 632.700 632.900 632.925 633.000 633.125 633.650 633.700 633.900 633.925 634.000 * Non per uso negli USA e in Canada. Per questioni riguardanti i canali disponibili nella vostra area, rivolgetevi al vostro distributore Samson locale.
- Page 91 >50 dB Tensione di funzionamento: Dimensioni (L×S×A) 8.25” ×1.8” × 7.4” 215mm × 45mm × 189mm Peso: 3.1lb / 1,4kg In Samson miglioriamo continuamente i nostri prodotti, e pertanto le specifiche e le immagini sono soggette a cambiamento senza preavviso.
- Page 92 Samson Technologies 45 Gilpin Avenue Hauppauge, New York 11788-8816 Phone: 1-800-3-SAMSON (1-800-372-6766) Fax: 631-784-2201 www.samsontech.com...