Publicité
Les langues disponibles
Les langues disponibles
Liens rapides
Fitting
Instructions
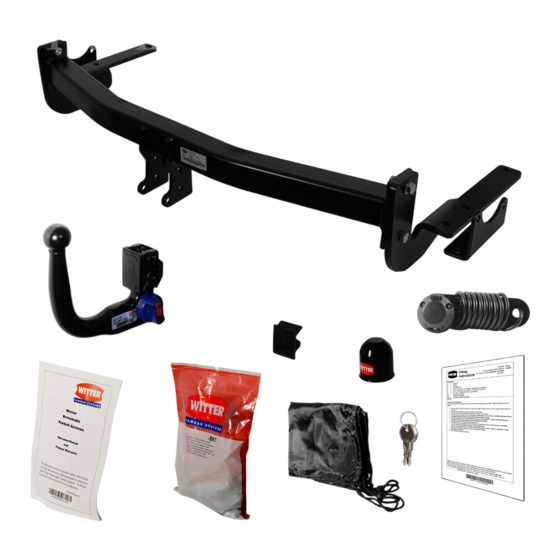
MATERIALS
A
1
Cross Bar with European facing to 94/20/EC A50-1
C
1
Side Arm (R.H.)
D
1
Side Arm (L.H.)
E
1
Bracket (R.H.)
F
1
Bracket (L.H.)
G
1
Clamp Plate
H
6
M10 x 40mm x 1.25 Bolts, Lock Washers, Flat Washers (O.D. 25mm)
J
4
M10 x 35mm x 1.25 Bolts, Lock Washers, Flat Washers (O.D. 25mm)
K
2
M12 x 45mm x 1.75 Bolts, Nuts, Lock Washers, Flat Washers (O.D. 25mm)
P
2
M12 x 45mm x 1.75 Bolts, Nuts, Lock Washers, 4 Flat Washers (O.D. 25mm)
ZEP2 1
Electrical Plate
S
2
M8 x 40mm x 1.25 Bolts, lock washers, 10 Flat Washers (O.D. 25mm)
'3019' Series Necks
ZQ
1
FITTING
1. Remove bumper, bumper crash beam, offside (if present on vehicle) and nearside under trays, and towing eyes.
Note: Bumper has securing nuts along inside of boot rear wall and thus internal boot trim needs removing to obtain
access. Also bumper has 1 tip screw each side and plastic clips along bottom edge.
Each under tray is secured with plastic clips around the bumper edge and self-tapping screws into vehicle floor.
2. Remove bolts securing the rearmost exhaust silencer bracket to the side of the chassis rail. Refit the bracket, spacing out
with fasteners (S)
3. Loosely attach Side Arms (C & D) and Brackets (E & F) to vehicle chassis using fasteners (H). (Do not fit forward-most
fastener and Clamp Plate (G) on offside of vehicle.)
4. Insert fasteners (J), though holes in Brackets (E & F), in to chassis mountings.
5. Assemble Cross Bar (A) to Side Arms by first using fasteners (P) and then fasteners (K).
6. Assemble chosen Neck (3019 series) and Electrical Plate (ZEP2) to Cross Bar (A) using fasteners and spacers supplied
in the Neck Kit
7. Fully tighten all Bolts ensuring fasteners (P) are at the forward most end of slotted hole.
8. Mark out and cut bumper (ref note below), nearside and offside under trays as shown, using images as a guide.
Note: When fitting detachable necks it may be necessary to cut deeper than 20mm. Judge as required during
fitting.
9. Refit the bumper and nearside under tray.
10. Refit the offside under tray (if present on vehicle) using Clamp Plate and remaining fasteners (H).
11. Fully Tighten Bolts (H)
Note: This towbar must be used with a Witter 3019 series Neck Kit or Class A50-1 or A50-X towball dimensionally Conforming to
A50-1 with a 'D' and 'S' value greater than or equal to that of the towbar.
Please refer to the vehicle specification for the trailer weight and nose limits, which must be observed.
Recommended torque settings: M8 - 27Nm, M10 - 53 Nm, M12 - 95 Nm, M14 - 150 Nm, M16 - 214 Nm
Models with underslung spare wheel
#NAME?
W 0 0 0 1 T Y 1 3 5 B U - F IT $ 0 2 0 8 0 1 1 0 0 0 0 0
TOWBAR
TY135BU
For Lexus RX300
For use with
April 2003 –
'3019 series
necks
only
Publicité

Sommaire des Matières pour Witter TY135BU
- Page 1 11. Fully Tighten Bolts (H) Note: This towbar must be used with a Witter 3019 series Neck Kit or Class A50-1 or A50-X towball dimensionally Conforming to A50-1 with a ‘D’ and 'S' value greater than or equal to that of the towbar.
- Page 2 Z E P 2 CUT OUT HATCHED OFFSIDE AREA NEARSIDE UNDERTRAY UNDERTRAY CUT OUT HATCHED AREA #NAME? W 0 0 0 1 T Y 1 3 5 B U - F IT $ 0 2 0 8 0 1 1 0 0 0 0 0...
- Page 3 11. Resserrer complètement les boulons (H) Remarque : Cet attelage doit être utilisé avec une boule de remorquage Witter (référence produit Z11) ou une boule de remorquage Classe A50-1 ou A50-X se conformant dimensionnellement Conforme à A50-1 avec une valeur ‘D’ et 'S' supérieure ou égale à...
- Page 4 CUT OUT HATCHED AREA Issue 2 WITTER TOWBARS Support technique Numéro Vert : 0 805 102 860 #NAME? W 0 0 0 1 T Y 1 3 5 B U - F IT $ 0 2 0 8 0 1 1 0 0 0 0 0...


