Table des Matières
Publicité
Les langues disponibles
Les langues disponibles
Liens rapides
Publicité
Chapitres
Table des Matières
Dépannage

Manuels Connexes pour HP Photosmart B8500 Série


Sommaire des Matières pour HP Photosmart B8500 Série
- Page 1 HP Photosmart B8500 series User Guide Guide de l’utilisateur...
- Page 2 Tous droits réservés. La reproduction, l'adaptation ou la traduction de ce matériel est interdite sans l'accord écrit préalable de Hewlett-Packard, sauf dans les cas permis par la législation relative aux droits d'auteur. Les seules garanties relatives aux produits et services HP sont décrites dans les déclarations de garantie expresse accompagnant lesdits produits et services.
- Page 3 HP Photosmart B8500 series User Guide...
-
Page 4: Table Des Matières
Contents HP Photosmart overview The HP Photosmart at a glance............................2 Control panel features................................2 Photosmart Express Menu..............................4 Paper basics..................................4 Choose the right paper..............................4 Load the main tray................................5 Load the photo tray................................6 Avoid paper jams................................7 Print from memory cards and other devices.........................7 Insert a memory card or storage device.........................8... -
Page 5: Hp Photosmart Overview
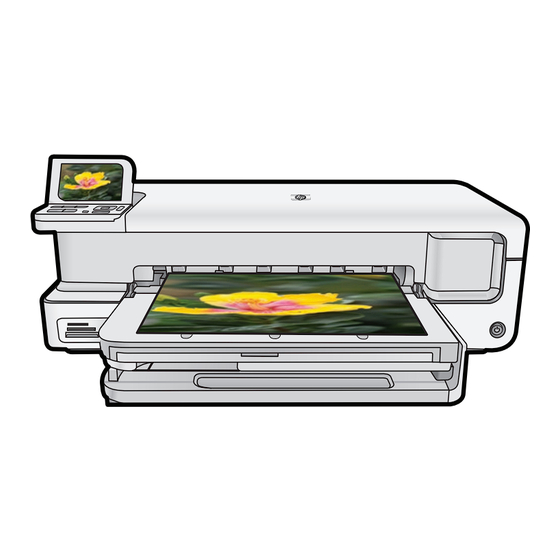
Ink cartridge door USB port Power connection Rear door Use only with the power adapter supplied by HP. Control panel features The following diagram and related table provide a quick reference to the HP Photosmart control panel features. HP Photosmart overview... - Page 6 If you are zooming in on a photo, you can also use the arrow buttons to pan around the photo and select a different area to print. On: Turns the HP Photosmart on or off. The On light is solid blue when the product is on. The On light flashes when the product is busy.
-
Page 7: Photosmart Express Menu
Paper basics The HP Photosmart printer supports paper sizes ranging from 7.6 x 12.7 cm to 33 x 111.8 cm (3 x 5 inches to 13 x 44 inches), including B+ (33 x 48.3 cm / 13 x 19 inch) paper, letter or A4 paper, legal paper, photo paper, transparencies, and envelopes. -
Page 8: Load The Main Tray
Plain paper Load the main tray You can load many types of papers up to 33 x 111.8 cm (13 x 44 inches) into the main input tray of the HP Photosmart. To load the main tray 1. Raise the output and photo trays together. -
Page 9: Load The Photo Tray
7. Lower the photo and output trays together, and then extend the output tray. Load the photo tray You can load up to 13 x 18 cm (5 x 7 inch) photo paper into the photo tray of the HP Photosmart. For the best results, use HP Advanced Photo Paper. -
Page 10: Avoid Paper Jams
Print from memory cards and other devices The HP Photosmart is equipped with memory card slots and a front USB port that enable you to print or edit photos from a memory card or storage device (such as a keychain drive, portable hard drive, or a digital camera in storage mode) without uploading your photos to a computer first. -
Page 11: Insert A Memory Card Or Storage Device
Insert a memory card or storage device The HP Photosmart supports memory cards and storage devices as described below. Each type of memory card can only be inserted in the appropriate slot for that card, and only one card or storage device may be inserted at a time. -
Page 12: Print Your Photos
The Photosmart Express menu appears, with the most recent photo shown on the display and View highlighted. View Print Save Create 3. Press OK to select View. The View Photos screen appears. 4. Press to scroll through the thumbnails of your photos. 5. -
Page 13: Print Photos From A Pictbridge Camera Or Other Pictbridge Device
Printing from a computer gives you more options for printing your images. Before printing from your computer, you must install the HP Photosmart software and connect a USB cable from the printer (using the USB port on the back) to your computer. -
Page 14: Use The Hp Solution Center
3. Select the HP Photosmart as the printer. If you set the HP Photosmart as the default printer, you can skip this step. The HP Photosmart will already be selected. 4. If you need to change settings, click the button that opens the Properties dialog box. -
Page 15: Find More Information
HP Photosmart animations: The HP Photosmart animations, located in the relevant sections of the onscreen Help, show you how to complete key tasks on the HP Photosmart. You will learn how to load paper, insert a memory card, and replace ink. -
Page 16: Maintain The Hp Photosmart
• Turn off the HP Photosmart by pressing the On button located on the product. Wait until the On light turns off before unplugging the power cord or turning off a power strip. If you improperly turn off the HP Photosmart, the print carriage might not return to the correct position causing problems with the ink cartridges and print quality issues. -
Page 17: Replace The Ink Cartridges
NOTE: If you are setting up the product for the first time, make sure you follow the instructions in the Start Here guide for installing the printhead and the ink cartridges. If you do not already have replacement ink cartridges for the HP Photosmart, to order cartridges, go to www.hp.com/ buy/supplies. - Page 18 3. Wait until the print carriage stops moving. Press the tab on the front of the ink cartridge and remove the cartridge from the slot. 4. Remove the plastic wrap from the new ink cartridge by pulling the orange pull-tab straight back. NOTE: Make sure you remove the plastic wrap from the ink cartridge before installing it in the product, or printing will fail.
-
Page 19: Print A Diagnostic Page
HP support. • History log: contains information that might be used for diagnostic purposes if you need to call HP support. Turn off the HP Photosmart To avoid damaging the product, you must properly shut it down by using the On button located on the product. Wait until the On light turns off before you unplug the power cord or turn off a power strip. -
Page 20: Troubleshooting And Support
Many issues are caused when the HP Photosmart is connected to the computer using a USB cable before the HP Photosmart software is installed on the computer. If you connected the HP Photosmart to your computer before... -
Page 21: Setup Troubleshooting
Chapter 3 When the software installation is complete, the HP Digital Imaging Monitor icon appears in the Windows system tray. To uninstall and reinstall the software (Mac) 1. Disconnect the HP Photosmart from your Mac. 2. Double-click the Applications:Hewlett-Packard folder. - Page 22 Solution: Contact HP support to request a power supply for the product. Go to: www.hp.com/support. If prompted, choose your country/region, and then click Contact HP for information on calling for technical support. Cause: The power supply was not intended for use with this product.
-
Page 23: After Setting Up The Product, It Does Not Print
Chapter 3 For more information on installing the software and connecting the USB cable, see the Start Here guide that came with the product. Cause: The USB cable was connected before the software was installed. Connecting the USB cable before you are prompted can cause errors. - Page 24 Solution 4: Load paper in the input tray Solution: Load paper in the input tray. For more information, see: • Paper basics on page 4 Cause: The product might have been out of paper. When I insert the CD-ROM into my computer’s CD-ROM drive, nothing happens Solution: If the installation does not run automatically, you can start it manually.
-
Page 25: Clear Paper Jams
Chapter 3 Clear paper jams In case of a paper jam, check the rear door. You might need to clear the paper jam from the rear door. To clear a paper jam from the rear door 1. Remove the door by pulling it away from the product. 2. - Page 26 Solution: The printer driver status might have changed to either offline or stop printing. To check the printer driver status (Windows) ▲ Open the HP Solution Center. Make sure the product is the selected printer. For information on opening the HP Solution Center, see Use the HP Solution Center on page Click the Status icon at the bottom of the HP Solution Center window.
- Page 27 Chapter 3 If this did not solve the issue, try the next solution. Solution 6: Remove all cancelled print jobs from the queue Solution: A print job might remain in the queue after it has been cancelled. The cancelled print job jams the queue and prevents the next print job from printing.
-
Page 28: Paper Is Not Picked Up From The Input Tray
Solution 9: Check the connection from the product to your computer Solution: Check the connection from the product to your computer. Verify that the USB cable is securely plugged into the USB port on the back of the product. Make sure the other end of the USB cable is plugged into a USB port on your computer. -
Page 29: The Product Prints Meaningless Characters
Cause: The rollers were dirty and needed to be cleaned. If this did not solve the issue, try the next solution. Solution 5: Service the product Solution: If you have completed all of the steps provided in the previous solutions, contact HP support for service. Go to: www.hp.com/support. -
Page 30: Text Or Graphics Are Cut Off At The Edge Of The Page
• Solution 2: Print a previously saved version of the document Solution 1: Reset the product Solution: Turn off the product and reset it by disconnecting the power cord. Wait 60 seconds, and then plug in the power cord. Turn on the product. Cause: There was no available memory in the product. -
Page 31: The Product Prints Slowly
• Solution 2: Check the ink levels • Solution 3: Contact HP support Solution 1: Use a lower print quality setting Solution: Check the print quality setting. Best and Maximum dpi provide the best quality but are slower than Normal or Draft. Draft provides the fastest print speed. -
Page 32: Support Process
1. Check the documentation that came with the product. 2. Visit the HP online support Web site at www.hp.com/support. HP online support is available to all HP customers. It is the fastest source for up-to-date device information and expert assistance and includes the following features: •... -
Page 33: Technical Information
Technical information The technical specifications and international regulatory information for the HP Photosmart are provided in this section. For additional regulatory and environmental information, including the Declaration of Conformity statement, see the onscreen Help. System requirements The table below lists the minimum requirements the computer must have to work with the printer. -
Page 34: Regulatory Notices
HP ink products that have been refilled, remanufactured, refurbished, misused, or tampered with. During the warranty period the product is covered as long as the HP ink is not depleted and the end of warranty date has not been reached. The end of warranty date, in YYYY/MM/DD format, may be found on the product as indicated: For a copy of the HP Limited Warranty Statement, see the printed documentation that came with the product. -
Page 35: Warranty
Chapter 4 Warranty Technical information... - Page 36 HP Photosmart série B8500 Guide de l'utilisateur...
- Page 37 Sommaire Présentation de l'appareil HP Photosmart L'appareil HP Photosmart en un coup d'œil........................35 Fonctions du panneau de commande..........................35 Menu Photosmart Express..............................37 Principes de base sur le papier............................37 Choix du papier approprié............................38 Chargement du bac principal............................38 Chargement du bac photo............................39 Prévention des bourrages papier..........................40 Impression à...
-
Page 38: Présentation De L'appareil Hp Photosmart
Présentation de l'appareil HP Photosmart L'appareil HP Photosmart en un coup d'œil Libellé Description Écran graphique couleur (aussi appelé écran) Panneau de commande Logements des cartes mémoire et port USB avant Bac de sortie (présenté ici en position repliée) Bac photo Guide de largeur du papier du bac photo Bac d'alimentation principal (également appelé... - Page 39 Suppression yeux rouges : active ou désactive la fonction Suppression yeux rouges. Par défaut, cette fonction est activée. Lorsque la fonction est activée, l'appareil HP Photosmart corrige automatiquement la coloration rouge des yeux apparaissant sur les photos. Le voyant Suppression yeux rouges est de couleur verte et s'allume fixement lorsque la fonction Suppression yeux rouges est activée et qu'une carte mémoire...
-
Page 40: Menu Photosmart Express
Principes de base sur le papier L'imprimante HP Photosmart prend en charge les formats de papier compris entre 7,6 x 12,7 cm et 33 x 111,8 cm, y compris les formats B+ (33 x 48,3 cm / 13 x 19 pouces), Lettre, A4, Légal, ainsi que les papiers photo, transparents et enveloppes. -
Page 41: Choix Du Papier Approprié
Attention Ne chargez pas de support d'une épaisseur supérieure à 0,4 mm au risque d'endommager le produit. Choix du papier approprié Pour obtenir la liste des papiers jet d'encre HP disponibles ou pour acheter des consommables, allez sur le site : •... -
Page 42: Chargement Du Bac Photo
Chargement du bac photo Vous pouvez charger une taille de papier photo maximale de 13 x 18 cm dans le bac d'alimentation photo de l'appareil HP Photosmart. Pour de meilleurs résultats, utilisez du papier photo HP Advanced. Pour charger le bac photo 1. -
Page 43: Prévention Des Bourrages Papier
Important ! Assurez-vous d'abaisser complètement le bac de sortie. Dans le cas contraire, le bac photo peut ne pas fonctionner correctement. Prévention des bourrages papier Pour éviter les bourrages papier, respectez les principes suivants : Présentation de l'appareil HP Photosmart... -
Page 44: Impression À Partir De Cartes Mémoire Et D'autres Périphériques
(tel qu'une unité Flash, un disque dur portable ou un appareil photo numérique en mode stockage), sans avoir à les charger au préalable sur un ordinateur. En outre, si le produit HP Photosmart est relié à un ordinateur via un câble USB, vous pouvez également transférer vers l'ordinateur les photos que vous souhaitez imprimer ou éditer. -
Page 45: Affichage Et Sélection De Photos
2. Insérez une carte mémoire dans l'emplacement approprié ou connectez un périphérique de stockage photo au port USB avant. Le menu Photosmart Express s'ouvre et indique les photos les plus récemment affichées à l'écran, ainsi que l'option Afficher en surbrillance. Présentation de l'appareil HP Photosmart... -
Page 46: Impression De Vos Photos
Afficher Imprimer Enregistrer Créer 3. Appuyez sur OK pour sélectionner Afficher. L'écran Afficher les photos s'affiche. 4. Appuyez sur pour parcourir les miniatures de vos photos. 5. Lorsque la miniature correspondant à la photo que vous souhaitez visualiser est mise en surbrillance, appuyez sur OK. -
Page 47: Impression De Photos À Partir D'un Appareil Photo Ou D'un Autre Périphérique Pictbridge
Non dans le cas contraire. 5. Pour imprimer les photos, utilisez les options et commandes de votre appareil photo. Pour plus d'informations, reportez-vous à la documentation de l'appareil photo. Le voyant PictBridge clignote lorsque les photos s'impriment. Présentation de l'appareil HP Photosmart... -
Page 48: Impression À Partir D'un Ordinateur
L'impression à partir d'un ordinateur vous permet de disposer de davantage d'options pour imprimer vos images. Avant d'imprimer à partir de votre ordinateur, vous devez installer le logiciel HP Photosmart et connecter un câble USB entre l'imprimante (sur le port USB à l'arrière de l'imprimante) et l'ordinateur. -
Page 49: Utilisation Du Logiciel Centre De Solutions Hp
Après avoir installé le logiciel HP Photosmart sur un ordinateur, ouvrez et parcourez le Centre de solutions HP : ▲ Cliquez avec le bouton droit de la souris sur l'icône HP Digital Imaging Monitor dans la barre des tâches de Windows, puis cliquez sur Lancer/Afficher le Centre de solutions HP. - Page 50 Installez le logiciel pour accéder au fichier Readme. • Site Web HP : Si vous disposez d'un accès à Internet, vous pouvez obtenir de l'aide sur le site Web HP à l'adresse www.hp.com/support. Vous y trouverez une assistance technique, des pilotes, des fournitures et des informations pour passer des commandes.
-
Page 51: Maintenance De L'appareil Hp Photosmart
Informations sur les cartouches d'encre et la tête d'impression Pour conserver les cartouches d'encre HP et vous assurer d'une qualité d'impression régulière, suivez les conseils ci-dessous. •... -
Page 52: Vérification Des Niveaux D'encre Estimés
En outre, une certaine quantité d'encre demeure dans la cartouche après utilisation. Pour plus d'informations, consultez le site www.hp.com/go/inkusage. Visitez le site www.hp.com/go/learnaboutsupplies... - Page 53 Guide de démarrage lors de l'installation de la tête d'impression et des cartouches d'encre. Si vous ne disposez pas de cartouches d'encre de rechange HP Photosmart, vous pouvez en commander sur le site Web www.hp.com/buy/supplies. Si le système vous y invite, sélectionnez votre pays/région, suivez les instructions des invites pour sélectionner votre produit, puis cliquez sur l'un des liens d'achat figurant sur la page.
-
Page 54: Impression D'une Page De Diagnostic
5. Tournez le bouchon de couleur orange afin de l'enlever. 6. Faites glisser la cartouche d'encre dans son logement, puis appuyez fermement jusqu'à ce qu'elle soit bien en place. Attention Ne soulevez pas le loquet du chariot d'impression lors de l'installation des cartouches d'encre. 7. -
Page 55: Mise Hors Tension De L'appareil Hp Photosmart
à l'alignement de l'imprimante. Pour plus d'informations sur le nettoyage manuel des têtes d'impression et l'alignement de l'imprimante, consultez l'aide en ligne. Si les blocs de couleur continuent de signaler des problèmes de qualité d'impression après le nettoyage et l'alignement, contactez l'assistance HP. •... -
Page 56: Dépannage Et Assistance
à l'aide en ligne, voir Recherche d'informations supplémentaires, page Plusieurs problèmes peuvent se produire si l'appareil HP Photosmart est connecté à l'ordinateur via un câble USB avant l'installation du logiciel HP Photosmart sur l'ordinateur. Si vous avez connecté l'appareil HP Photosmart à... -
Page 57: Dépannage Concernant L'installation
7. Suivez les instructions à l'écran et celles fournies dans le Guide de démarrage qui accompagne le produit. Une fois l'installation du logiciel terminée, l'icône HP Digital Imaging Monitor apparaît dans la barre d'état système de Windows. - Page 58 Solution: Contactez l'Assistance HP afin de commander un bloc d'alimentation électrique pour le produit. Rendez-vous sur le site : www.hp.com/support. Si vous y êtes invité, sélectionnez votre pays/région, puis cliquez sur Contacter HP pour savoir comment contacter l'assistance technique. Cause: Le bloc d'alimentation n'était pas destiné à ce produit.
-
Page 59: L'appareil Est Configuré Mais N'imprime Pas
Chapitre 3 Cause: Une assistance est peut-être nécessaire pour permettre le bon fonctionnement du produit ou du logiciel. J'ai branché le câble USB mais je rencontre des problèmes d'utilisation du produit avec mon ordinateur Solution: Vous devez installer le logiciel fourni avec le produit avant de brancher le câble USB. Durant l'installation, ne branchez pas le câble USB avant d'y être invité... - Page 60 Si le problème persiste, passez à la solution suivante. Solution 3 : Appuyez sur le bouton Marche/arrêt pour mettre le produit sous tension Solution: Regardez l'écran du produit. S'il n'affiche rien et que le bouton Marche/arrêt n'est pas allumé, le produit est hors tension.
-
Page 61: Élimination De Bourrages Papier
Chapitre 3 4. Cliquez sur Réessayer pour tenter d'établir une nouvelle connexion. 5. Continuez l'installation et redémarrez l'ordinateur lorsque vous y êtes invité. Cause: La connexion USB entre le produit et l'ordinateur a échoué. Élimination de bourrages papier Si un bourrage papier est survenu, vérifiez d'abord la porte d'accès arrière. Il peut être nécessaire d'éliminer un bourrage papier par la porte d'accès arrière. -
Page 62: L'appareil Ne Répond Pas
Pour vérifier l'état du pilote d'imprimante (Windows) ▲ Ouvrez le Centre de solutions HP. Vérifiez que le produit est sélectionné en tant qu'imprimante. Pour plus d'informations sur l'ouverture du Centre de solutions HP, reportez-vous à la rubrique Utilisation du logiciel Centre de solutions HP, page Cliquez sur l'icône État située dans la partie inférieure de la fenêtre Centre de solutions HP. - Page 63 Chapitre 3 Pour vérifier l'état du pilote d'imprimante (Mac OS X v10.4) 1. Dans Finder, cliquez sur Applications, sur Utilitaires, puis deux fois sur Configuration d'imprimante. 2. Cliquez deux fois sur le nom de l'imprimante pour afficher la file d'attente. 3.
- Page 64 Pour supprimer un travail d'impression (Mac OS X v10.4) 1. Dans Finder, cliquez sur Applications, sur Utilitaires, puis deux fois sur Configuration d'imprimante. 2. Cliquez deux fois sur le nom de l'imprimante pour afficher la file d'attente. 3. Cliquez sur une tâche d'impression pour la sélectionner. 4.
-
Page 65: Le Papier N'est Pas Chargé Depuis Le Bac D'alimentation
Chapitre 3 Si le problème persiste, passez à la solution suivante. Solution 10 : Réinitialisez le produit Solution: Mettez-le hors tension et réinitialisez-le en déconnectant son cordon d'alimentation. Patientez 60 secondes et rebranchez le cordon d'alimentation. Mettez l'appareil sous tension. Cause: Le produit a généré... -
Page 66: L'appareil Imprime Des Caractères Incohérents
HP pour obtenir une assistance. Rendez-vous sur le site : www.hp.com/support. Si vous y êtes invité, sélectionnez votre pays/région, puis cliquez sur Contacter HP pour savoir comment contacter le centre d'assistance. Cause: La maintenance de votre produit est nécessaire. -
Page 67: Le Texte Ou Les Graphiques Sont Tronqués Au Bord De La Page
Chapitre 3 Cause: Les paramètres d'impression étaient configurés pour imprimer d'abord la première page du document. Selon la manière dont le papier est inséré dans le produit, la première page s'imprime face vers le haut en bas de la pile. Le texte ou les graphiques sont tronqués au bord de la page Pour résoudre ce problème, essayez les solutions ci-après. -
Page 68: Le Produit Imprime Lentement
• Solution 2 : Vérifiez les niveaux d'encre • Solution 3 : Contactez l'assistance HP Solution 1 : Utilisez un paramètre de qualité d'impression plus faible Solution: Vérifiez le paramètre de qualité d'impression. Avec les paramètres Optimale et ppp maximum, l'impression est d'une qualité... -
Page 69: Procédure D'assistance
1. Consultez la documentation fournie avec le produit. 2. Visitez le site Web de service et d'assistance en ligne de HP à l'adresse suivante : www.hp.com/support. L'assistance en ligne HP est disponible pour tous les clients HP. L'assistance HP constitue le moyen le plus rapide d'obtenir des informations à... -
Page 70: Renseignements Techniques
Tous navigateurs Recommandé : Adobe Acrobat Reader 5 ou supérieur Caractéristiques du produit Pour obtenir les caractéristiques du produit, visitez le site Web HP à l'adresse www.hp.com/support. Spécifications relatives au papier • Capacité du bac d'alimentation principal : Feuilles de papier ordinaire : Jusqu'à 125, Feuilles de papier photo : jusqu'à... -
Page 71: Déclarations De Conformité
Substances chimiques Chez HP, notre objectif est de fournir à nos clients des informations sur les substances chimiques présentes dans nos produits afin de répondre aux obligations légales telles que REACH (Regulation EC No 1907/2006 of the European Parliament and the Council). - Page 72 Pour obtenir copie de la déclaration de garantie limitée HP, consultez la documentation imprimée livrée avec le produit. Informations relatives à la garantie des cartouches d'encre...
-
Page 73: Garantie
6. Si HP est dans l'incapacité de réparer ou de remplacer, selon le cas, un produit défectueux couvert par la garantie HP, HP devra, dans un délai raisonnable après avoir été informé du défaut, rembourser le prix d'achat du produit. - Page 74 ﺍﻷﺭﺩﻥ ﺍﻟﺠﺰﺍﺋﺮ ﺍﻟﺒﺤﺮﻳﻦ ﻋ ُ ﻤﺎﻥ ℡ ℡ ﻣﺼﺮ ﺍﻟﺴﻌﻮﺑﻴﺔ ﺗﻮﻧﺲ ﺍﻟﻌﺮﺍﻕ ﺍﻟﻜﻮﻳﺖ ﻟﺒﻨﺎﻥ ﻗﻄﺮ ﺍﻟﻴﻤﻦ ישראל...